The Art of Painting Warhammer 40K Terrain: A Comprehensive Guide
In the universe of Warhammer 40K, well-crafted terrain breathes life into the tabletop battlefield. From crumbling ruins to imposing industrial structures, every detail enriches the immersive, narrative-driven battles that unfold. This comprehensive guide aims to unlock your terrain painting potential, combining detailed instructions with advanced techniques to elevate your Warhammer landscapes.
Essential Tools and Expanding Your Arsenal
Before embarking on your painting journey, assemble the following:
- Primer: Black, white, or grey are good starting points. Choose based on your desired overall look.
- Acrylic Paints: Citadel’s line is popular, but experiment as your painting evolves. Start with the core sets and add niche colors gradually.
- Brushes: Get various sizes (large for basecoating, medium for detail work, small for fine accents) and a dedicated drybrush.
- Washes (Shades): Nuln Oil and Agrax Earthshade are your go-to starting points, but add more as your collection grows.
- Water cup: Don’t neglect this! Essential for both cleaning and thinning paints.
- Palette: Wet palettes keep acrylics usable longer, but simple alternatives work as well.
- Paper Towels: Always on hand for blotting away excess paints and washes.
Beyond the Basics (For Ambitious Painters)
- Airbrush: Streamlines basecoating and allows for smooth blended effects.
- Texture Pastes: These add realism to bases and larger features. Experiment with sand, stone, and grit effects.
- Pigments: Powders that enable layering of dust, rust, and organic weathering. Learn how to fix them for more permanent additions.
- Masking Materials: Tape or liquid solutions protect areas during intricate techniques.
Before You Paint: Preparation for Perfect Pieces
- Assembly: Build your terrain fully before priming, unless you relish painting tiny, fiddly parts.
- Mold Lines: Remove those distracting lines created during the casting process. Use a hobby knife or fine sandpaper.
Priming and Building Your Base
- Prime: A smooth, even primer coat in your chosen shade gives paint a surface to adhere to. Don’t neglect ventilation!
- Basecoat: Choose the dominant color of your terrain and thin your paints slightly for easy layering. Multiple thin coats prevent gloopy paint that obscures details.
- Advanced Basecoat Options:
- Pre-shading: Subtly airbrush or drybrush lighter tones where light would naturally strike, enhancing depth later.
- Zenithal Highlighting: Prime black, then lightly dust grey from above – accentuating this with a final zenithal burst of white spray will generate instant visual shadows.
- Color Modulation: Avoid boring, flat terrain with subtle layering of several related shades instead of one solid color.
Weathering and Realism: Going the Extra Mile
- Washes Go Beyond Grime: Greens like Athonian Camoshade or Coelia Greenshade mimic specific weathering, from verdigris to subtle glowing effects. Play with your shade collection!
- Oil Washes: Thinned with paint thinner, oil paints offer expert-level control for smooth blending and streaking. A bit messy, but the results are unparalleled.
- Stippling: Mimic complex texturing like rust by brushing random patterns with very close-toned colors. Use stippling to layer over solid basecoats for intricate chipping effects.
Atmospheric Effects and Advanced Techniques
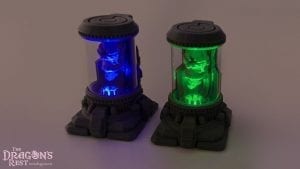
- Object Source Lighting (OSL): Imitates reflected light by subtly airbrushing colored glow from the light’s source (screens, weapons, magical auras). Dramatically elevates scenes.
- Environmental Effects: Apply thinned layers of grime to lower portions of structures, or mimic slimy algae blooms, snow effects, or leaf scatter based on your terrain’s “setting”.
- Specific Material Effects: Create realistic metal with mixed metallic and browns, use washes selectively to add depth, and drybrush streaks to show where rain would naturally wear paint. Consider similar careful layering for concrete, battle damage, or any effect your imagination wants to create!
It’s a Journey, Not a Destination
- YouTube Is Your Ally: Search for tutorials on specific effects or terrain types you envision. Visual learning goes hand-in-hand with written tutorials.
- Practice Pieces: Never paint an expensive centerpiece straight away. Use small scraps to perfect new techniques before applying them to treasured kits.
- Enjoy the Process!: Terrain painting is an extension of the Warhammer hobby and should be exciting and fulfilling. Focus on improvement over time, and the enjoyment of crafting your own grimdark landscapes!
-
%22%20transform%3D%22translate(.6%20.6)%20scale(1.17188)%22%20fill-opacity%3D%22.5%22%3E%3Cellipse%20cx%3D%22219%22%20cy%3D%2214%22%20rx%3D%2261%22%20ry%3D%2287%22%2F%3E%3Cellipse%20fill%3D%22%23a9a9a9%22%20rx%3D%221%22%20ry%3D%221%22%20transform%3D%22matrix(48.2565%20149.63579%20-49.94437%2016.10671%2089.3%2031.8)%22%2F%3E%3Cellipse%20fill%3D%22%23b0b0b0%22%20rx%3D%221%22%20ry%3D%221%22%20transform%3D%22matrix(92.92748%20-95.9842%2030.31715%2029.35167%20215.2%20181)%22%2F%3E%3Cpath%20d%3D%22M27.7%20298.8L-18%20238.1l62.3-47L90%20252z%22%2F%3E%3Cellipse%20rx%3D%221%22%20ry%3D%221%22%20transform%3D%22rotate(158.9%20108.5%2028.4)%20scale(56.10833%2073.15531)%22%2F%3E%3Cpath%20d%3D%22M213%20239h43v17h-43z%22%2F%3E%3Cellipse%20rx%3D%221%22%20ry%3D%221%22%20transform%3D%22matrix(3.13467%20-30.86025%2012.99298%201.31978%207.3%2016.5)%22%2F%3E%3Cpath%20d%3D%22M-11.2%20230.8l97.7%208.5-3.3%2037.9-97.7-8.5z%22%2F%3E%3Cellipse%20cx%3D%22223%22%20cy%3D%2232%22%20rx%3D%2254%22%20ry%3D%2254%22%2F%3E%3Cellipse%20fill%3D%22%23b0b0b0%22%20rx%3D%221%22%20ry%3D%221%22%20transform%3D%22matrix(-32.14838%20-40.46904%2027.8255%20-22.10443%20100.4%202.3)%22%2F%3E%3Cpath%20d%3D%22M215.9%20268.9l-2.6-29.9%2044.8-3.9%202.6%2029.9z%22%2F%3E%3Cellipse%20fill%3D%22%23b3b3b3%22%20rx%3D%221%22%20ry%3D%221%22%20transform%3D%22matrix(2.3698%20-34.76147%2020.17864%201.37564%20247.3%20156.9)%22%2F%3E%3Cpath%20fill%3D%22%23b3b3b3%22%20d%3D%22M211.8%20256l-12-46.9-11.7-9-25.2%2070.9z%22%2F%3E%3Cpath%20d%3D%22M-.5-1.3l13.9%202-4.9%2034.6-13.9-2z%22%2F%3E%3Cpath%20fill%3D%22%23767676%22%20d%3D%22M114%20271L74%2017l160%20145z%22%2F%3E%3Cellipse%20fill%3D%22%234f4f4f%22%20rx%3D%221%22%20ry%3D%221%22%20transform%3D%22rotate(-4.3%201146%20-2227)%20scale(20.43198%2043.31443)%22%2F%3E%3Cellipse%20fill%3D%22%23575757%22%20cx%3D%2255%22%20cy%3D%22205%22%20rx%3D%2290%22%20ry%3D%2221%22%2F%3E%3Cpath%20d%3D%22M187%200h69v86h-69z%22%2F%3E%3Cellipse%20cx%3D%2233%22%20cy%3D%22249%22%20rx%3D%2252%22%20ry%3D%2212%22%2F%3E%3Cellipse%20fill%3D%22%234e4e4e%22%20cx%3D%22239%22%20cy%3D%2296%22%20rx%3D%2265%22%20ry%3D%2212%22%2F%3E%3C%2Fg%3E%3C%2Fsvg%3E) Buildings and Tents
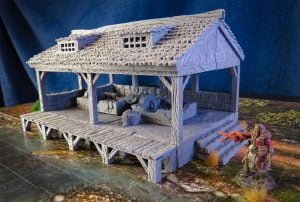
Buildings and TentsStar Wars Terrain Building: Entfessle galaktische Abenteuer!
Star Wars Terrain Building, eine fesselnde Ergänzung zu deinen Tabletop-Abenteuern. Tauchen Sie mit diesem sorgfältig gefertigten Geländestück in das ikonische Universum von Star Wars ein.
(0 reviews) -
%22%20transform%3D%22translate(.8%20.8)%20scale(1.63281)%22%20fill-opacity%3D%22.5%22%3E%3Cellipse%20fill%3D%22%23fff%22%20rx%3D%221%22%20ry%3D%221%22%20transform%3D%22rotate(79.5%20-1.3%2048.2)%20scale(47.94532%20182.99998)%22%2F%3E%3Cellipse%20fill%3D%22%234b4b47%22%20rx%3D%221%22%20ry%3D%221%22%20transform%3D%22matrix(-54.74352%20-32.7107%2044.46709%20-74.4186%20113.6%20158.8)%22%2F%3E%3Cellipse%20fill%3D%22%23fff%22%20rx%3D%221%22%20ry%3D%221%22%20transform%3D%22matrix(-28.22135%2087.22712%20-37.52729%20-12.14153%2031.7%2030)%22%2F%3E%3Cellipse%20fill%3D%22%238b8a8d%22%20rx%3D%221%22%20ry%3D%221%22%20transform%3D%22rotate(21.5%20-193.7%20323.8)%20scale(41.00793%2049.6604)%22%2F%3E%3Cellipse%20fill%3D%22%234b4a4e%22%20rx%3D%221%22%20ry%3D%221%22%20transform%3D%22matrix(-15.36749%2041.2589%20-30.76837%20-11.46014%20112.4%20184.3)%22%2F%3E%3Cellipse%20fill%3D%22%23e0e0e2%22%20rx%3D%221%22%20ry%3D%221%22%20transform%3D%22matrix(-9.15096%2047.07761%20-31.3843%20-6.1005%20160.4%2049.2)%22%2F%3E%3Cpath%20fill%3D%22%23d6d5d8%22%20d%3D%22M18.5%20323l-69.3-148.6L3.5%20149l69.3%20148.6z%22%2F%3E%3Cellipse%20fill%3D%22%23fff%22%20rx%3D%221%22%20ry%3D%221%22%20transform%3D%22matrix(23.71365%2028.2144%20-41.16643%2034.59957%2022.9%2034.2)%22%2F%3E%3Cellipse%20fill%3D%22%23b2bc79%22%20cx%3D%22178%22%20cy%3D%22225%22%20rx%3D%2226%22%20ry%3D%2271%22%2F%3E%3Cellipse%20fill%3D%22%23859820%22%20rx%3D%221%22%20ry%3D%221%22%20transform%3D%22matrix(-.73312%20-18.63462%2026.13645%20-1.02826%20183%20139.5)%22%2F%3E%3Cpath%20fill%3D%22%2389898a%22%20d%3D%22M85.4%2081.3l9-24.4%20120.2%2043.8-9%2024.4z%22%2F%3E%3Cellipse%20fill%3D%22%23afaeb0%22%20cx%3D%2228%22%20cy%3D%22131%22%20rx%3D%2235%22%20ry%3D%2235%22%2F%3E%3Cellipse%20fill%3D%22%23928ea5%22%20cx%3D%22166%22%20cy%3D%22183%22%20rx%3D%2225%22%20ry%3D%2225%22%2F%3E%3Cellipse%20fill%3D%22%238f8e91%22%20cx%3D%2245%22%20cy%3D%22176%22%20rx%3D%2227%22%20ry%3D%2249%22%2F%3E%3Cellipse%20fill%3D%22%23cdcdce%22%20rx%3D%221%22%20ry%3D%221%22%20transform%3D%22matrix(16.95263%2010.35336%20-19.76603%2032.36496%2033.7%2098.2)%22%2F%3E%3C%2Fg%3E%3C%2Fsvg%3E) Buildings and Tents
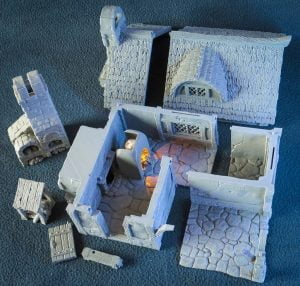
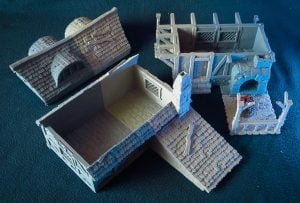
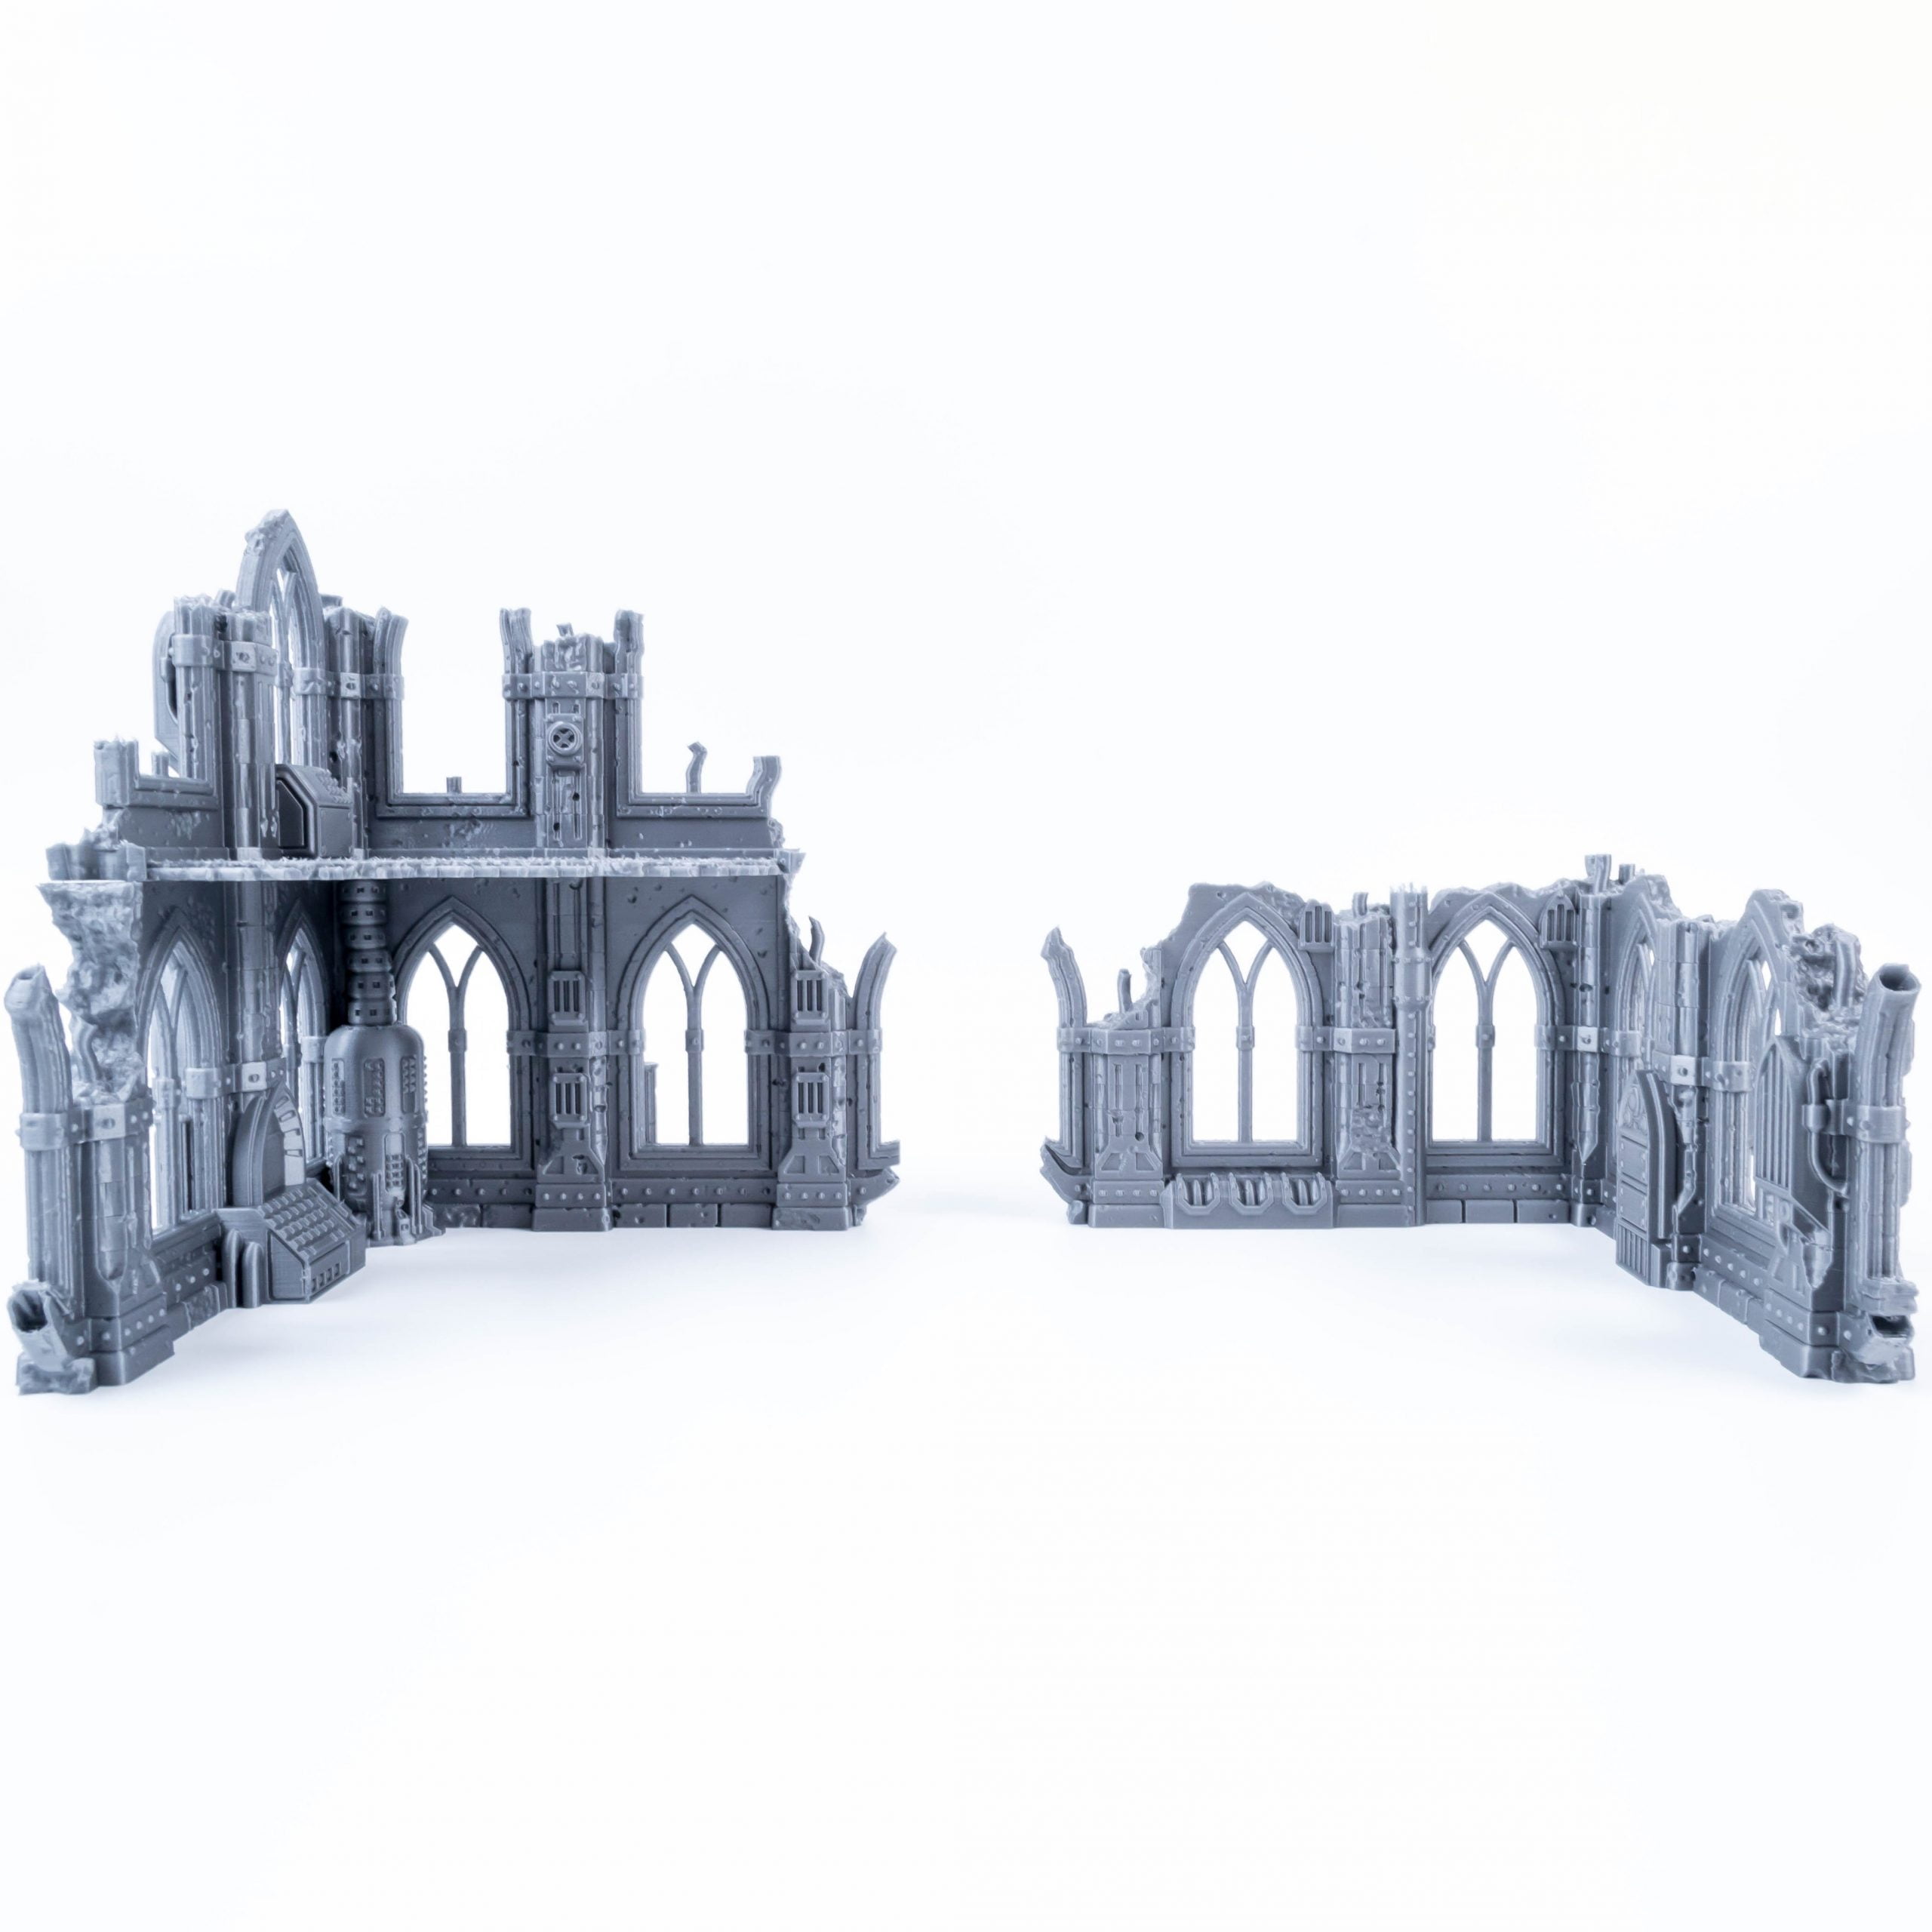
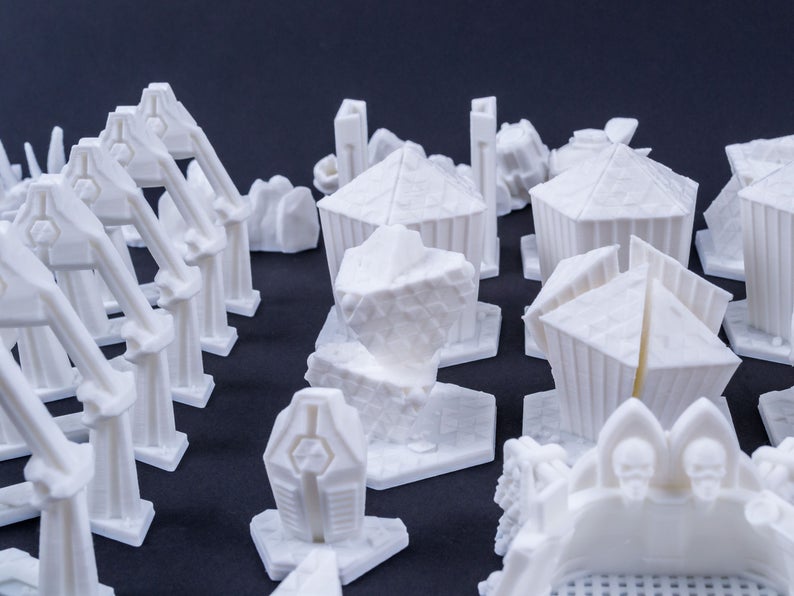
Buildings and TentsGothic Ruins Set 1: Miniatur-Gelände für Fantasy- und Sci-Fi-Spiele
Sind Sie bereit, eine Welt der Geschichte und der Verwüstung zu betreten? Eine Welt, in der die Ruinen eines einst glorreichen Gebäudes als stumme Zeugen der Kriege und der vergangenen Zeitalter stehen? Dann wirst du das Gothic Ruins Set lieben, das ultimative Set, um eine atemberaubende und immersive Szene für deine Tabletop-Spiele und RPGs zu schaffen.
(0 reviews) -
%22%20transform%3D%22translate(.6%20.6)%20scale(1.17188)%22%20fill-opacity%3D%22.5%22%3E%3Cellipse%20fill%3D%22%234e4e4e%22%20rx%3D%221%22%20ry%3D%221%22%20transform%3D%22matrix(5.00494%2052.9467%20-108.88075%2010.29226%20100.6%20134.7)%22%2F%3E%3Cellipse%20fill%3D%22%23fff%22%20rx%3D%221%22%20ry%3D%221%22%20transform%3D%22rotate(-178.4%2066.8%205.3)%20scale(255%2045.78985)%22%2F%3E%3Cpath%20fill%3D%22%23fff%22%20d%3D%22M1.8%20284.4l-2.5-72%20254.9-8.8%202.5%2072z%22%2F%3E%3Cellipse%20fill%3D%22%23fff%22%20rx%3D%221%22%20ry%3D%221%22%20transform%3D%22matrix(24.3819%20-44.68004%2061.53022%2033.57705%20230.6%2027)%22%2F%3E%3Cellipse%20fill%3D%22%23949494%22%20cx%3D%22129%22%20cy%3D%2270%22%20rx%3D%2250%22%20ry%3D%2242%22%2F%3E%3Cellipse%20fill%3D%22%23fdfdfd%22%20cx%3D%2217%22%20cy%3D%2230%22%20rx%3D%2262%22%20ry%3D%2245%22%2F%3E%3Cellipse%20fill%3D%22%23939393%22%20cx%3D%22190%22%20cy%3D%22142%22%20rx%3D%2253%22%20ry%3D%2253%22%2F%3E%3Cellipse%20fill%3D%22%23464646%22%20rx%3D%221%22%20ry%3D%221%22%20transform%3D%22matrix(33.85052%20-7.19592%205.0197%2023.61328%2061.8%20146.3)%22%2F%3E%3Cpath%20fill%3D%22%23fefefe%22%20d%3D%22M249.3%20294.6l-46.4-12.4%2023.8-88.8%2046.4%2012.4z%22%2F%3E%3Cellipse%20fill%3D%22%23959595%22%20cx%3D%22111%22%20cy%3D%22188%22%20rx%3D%22100%22%20ry%3D%2210%22%2F%3E%3Cellipse%20fill%3D%22%23fff%22%20rx%3D%221%22%20ry%3D%221%22%20transform%3D%22matrix(-77.50766%20-36.85495%2011.40845%20-23.9925%20233.5%2018.2)%22%2F%3E%3Cellipse%20fill%3D%22%23a0a0a0%22%20rx%3D%221%22%20ry%3D%221%22%20transform%3D%22matrix(12.11763%20-15.67839%2078.79711%2060.90133%20194.8%20110.8)%22%2F%3E%3Cellipse%20fill%3D%22%239f9f9f%22%20rx%3D%221%22%20ry%3D%221%22%20transform%3D%22rotate(74.4%20-33.1%2081.8)%20scale(11.35201%20116.25558)%22%2F%3E%3Cellipse%20fill%3D%22%23b8b8b8%22%20cx%3D%22163%22%20cy%3D%22207%22%20rx%3D%2248%22%20ry%3D%2211%22%2F%3E%3Cellipse%20fill%3D%22%23d1d1d1%22%20rx%3D%221%22%20ry%3D%221%22%20transform%3D%22matrix(-56.87536%20-39.5745%2014.84907%20-21.34066%20204.5%2065.7)%22%2F%3E%3Cellipse%20fill%3D%22%23f9f9f9%22%20rx%3D%221%22%20ry%3D%221%22%20transform%3D%22matrix(-18.55063%20-3.38158%206.21105%20-34.07245%205.6%20236.8)%22%2F%3E%3Cellipse%20fill%3D%22%23797979%22%20cx%3D%22136%22%20cy%3D%22134%22%20rx%3D%2244%22%20ry%3D%2239%22%2F%3E%3Cellipse%20fill%3D%22%23fff%22%20rx%3D%221%22%20ry%3D%221%22%20transform%3D%22rotate(-26.8%2027.7%20-116)%20scale(128.96123%2013.17979)%22%2F%3E%3Cellipse%20fill%3D%22%23d5d5d5%22%20rx%3D%221%22%20ry%3D%221%22%20transform%3D%22matrix(-9.48245%20-29.37013%2031.19265%20-10.07087%2069.4%2041.6)%22%2F%3E%3Cellipse%20fill%3D%22%23d1d1d1%22%20rx%3D%221%22%20ry%3D%221%22%20transform%3D%22matrix(21.95167%2013.81675%20-20.17119%2032.0474%20237.6%20200.7)%22%2F%3E%3C%2Fg%3E%3C%2Fsvg%3E) Sci-Fi
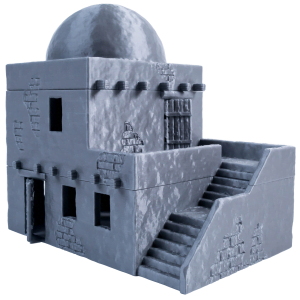
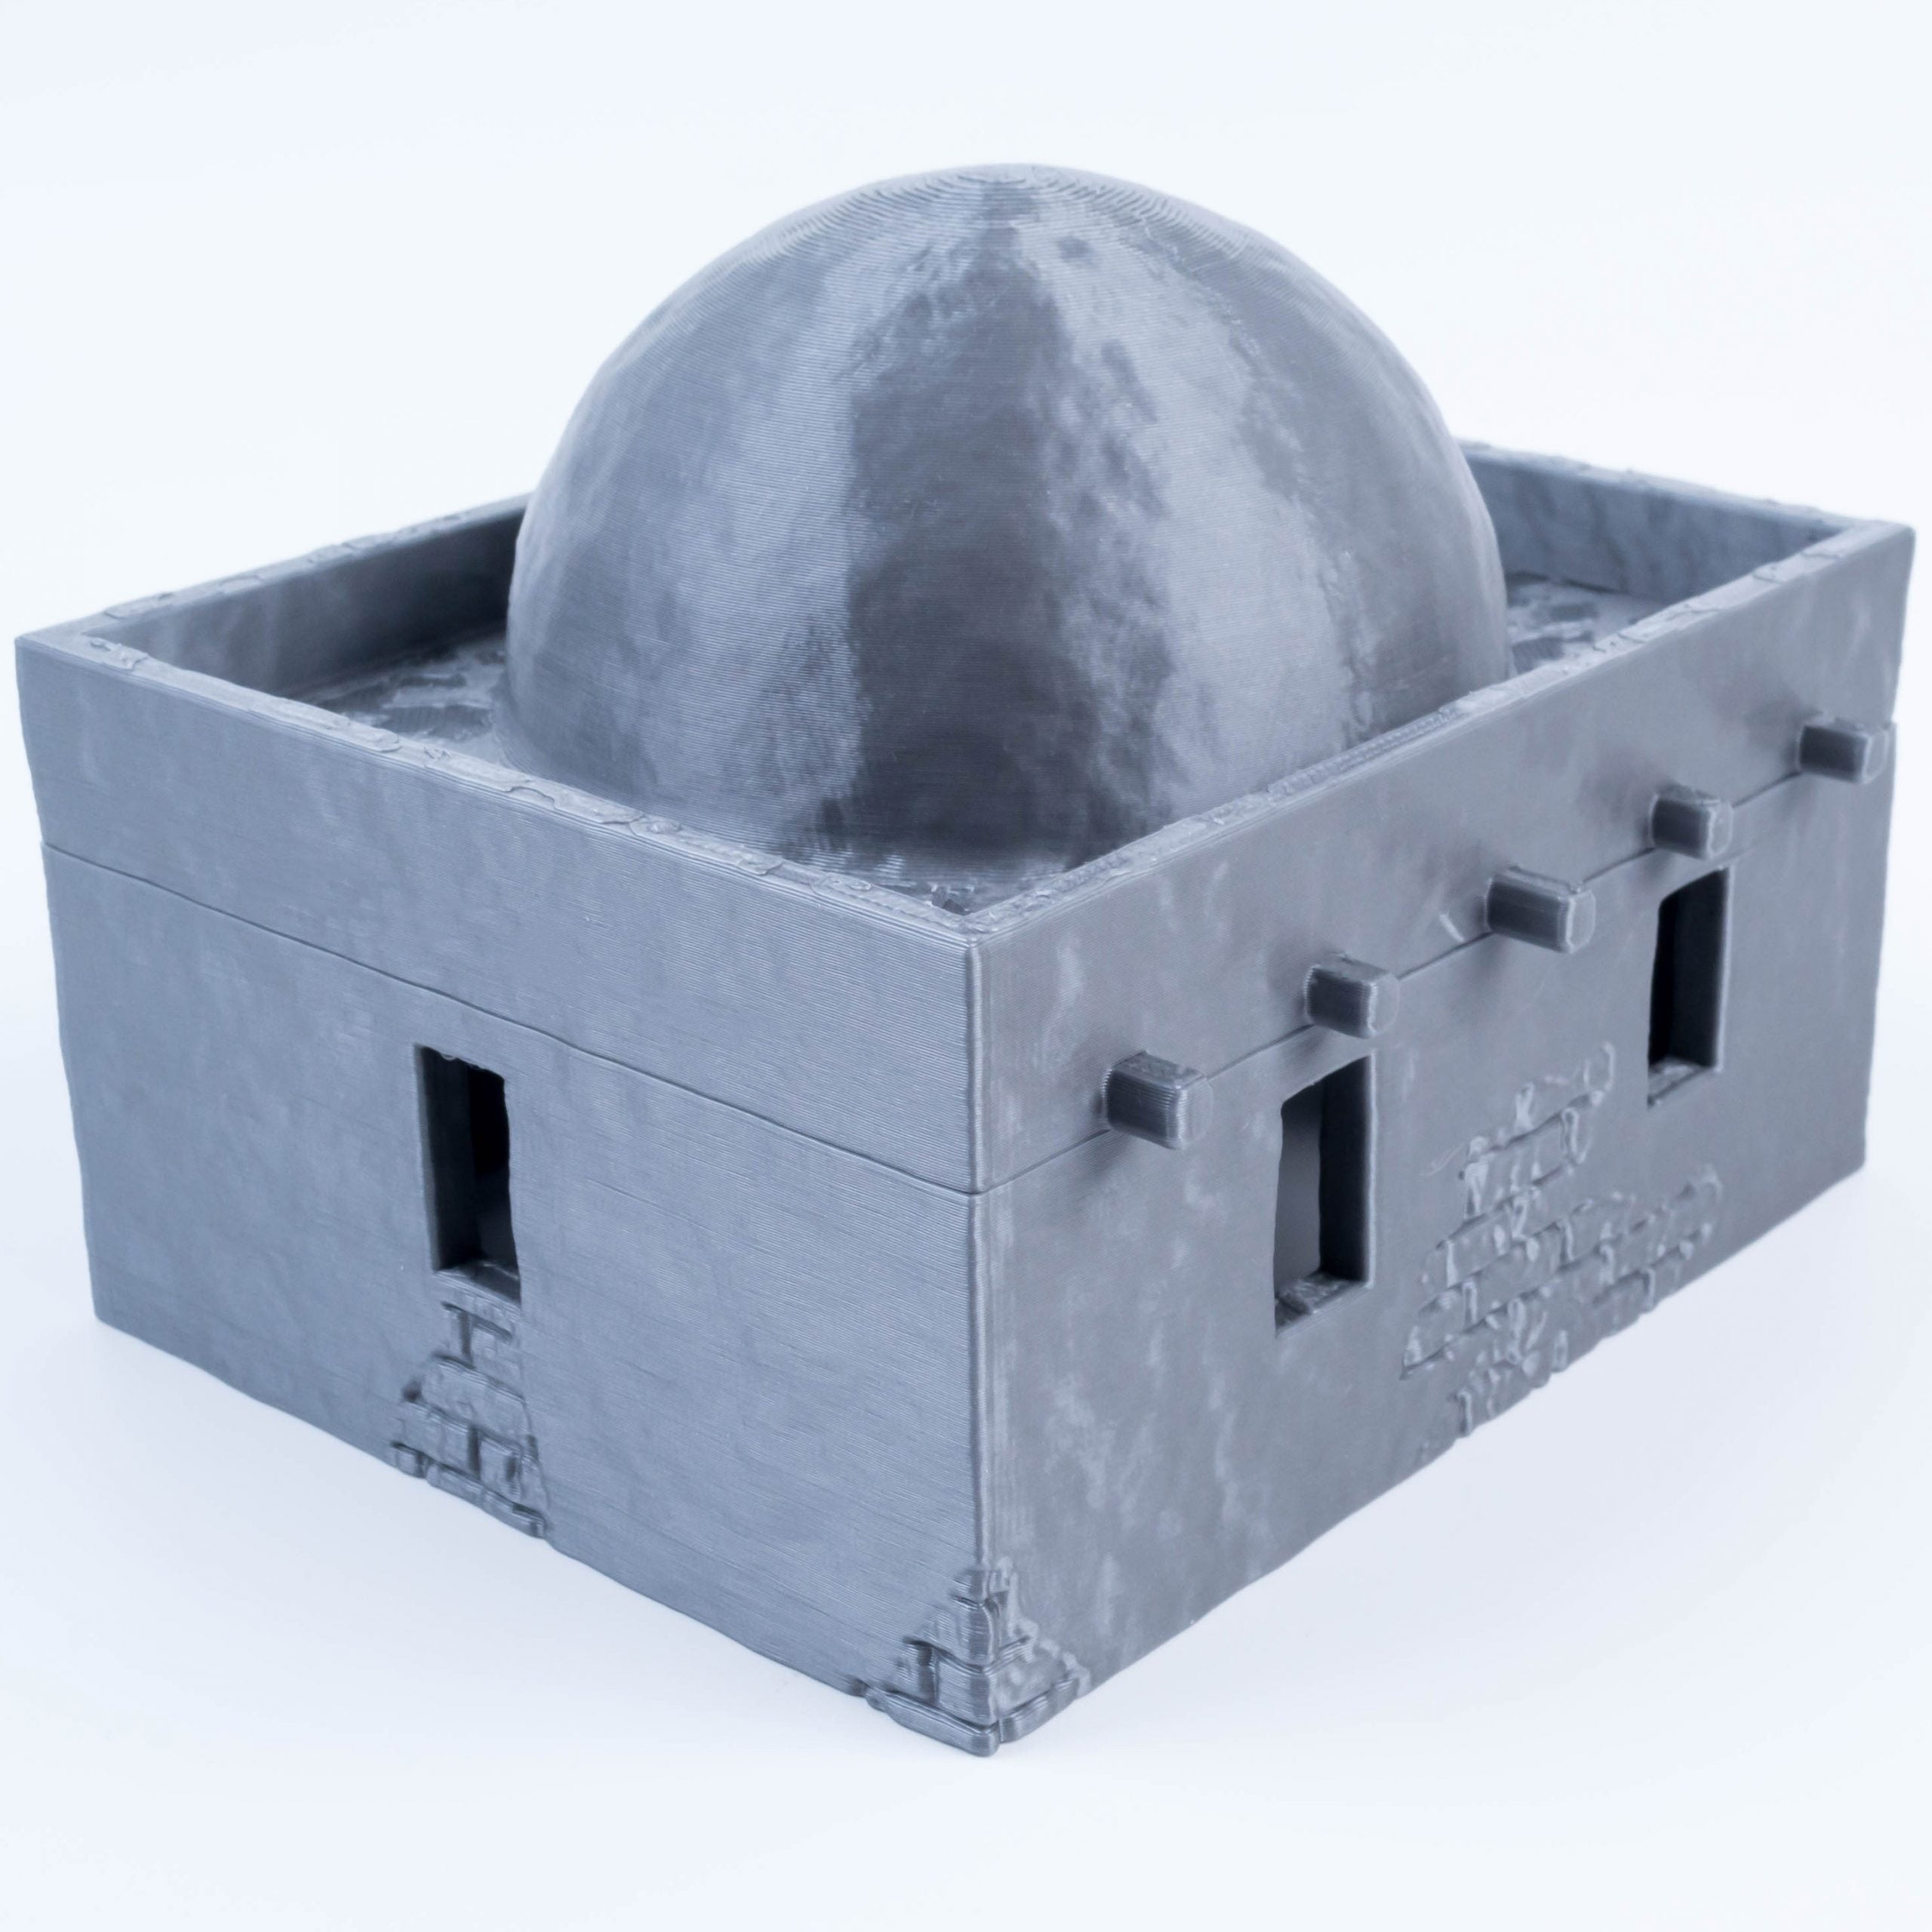
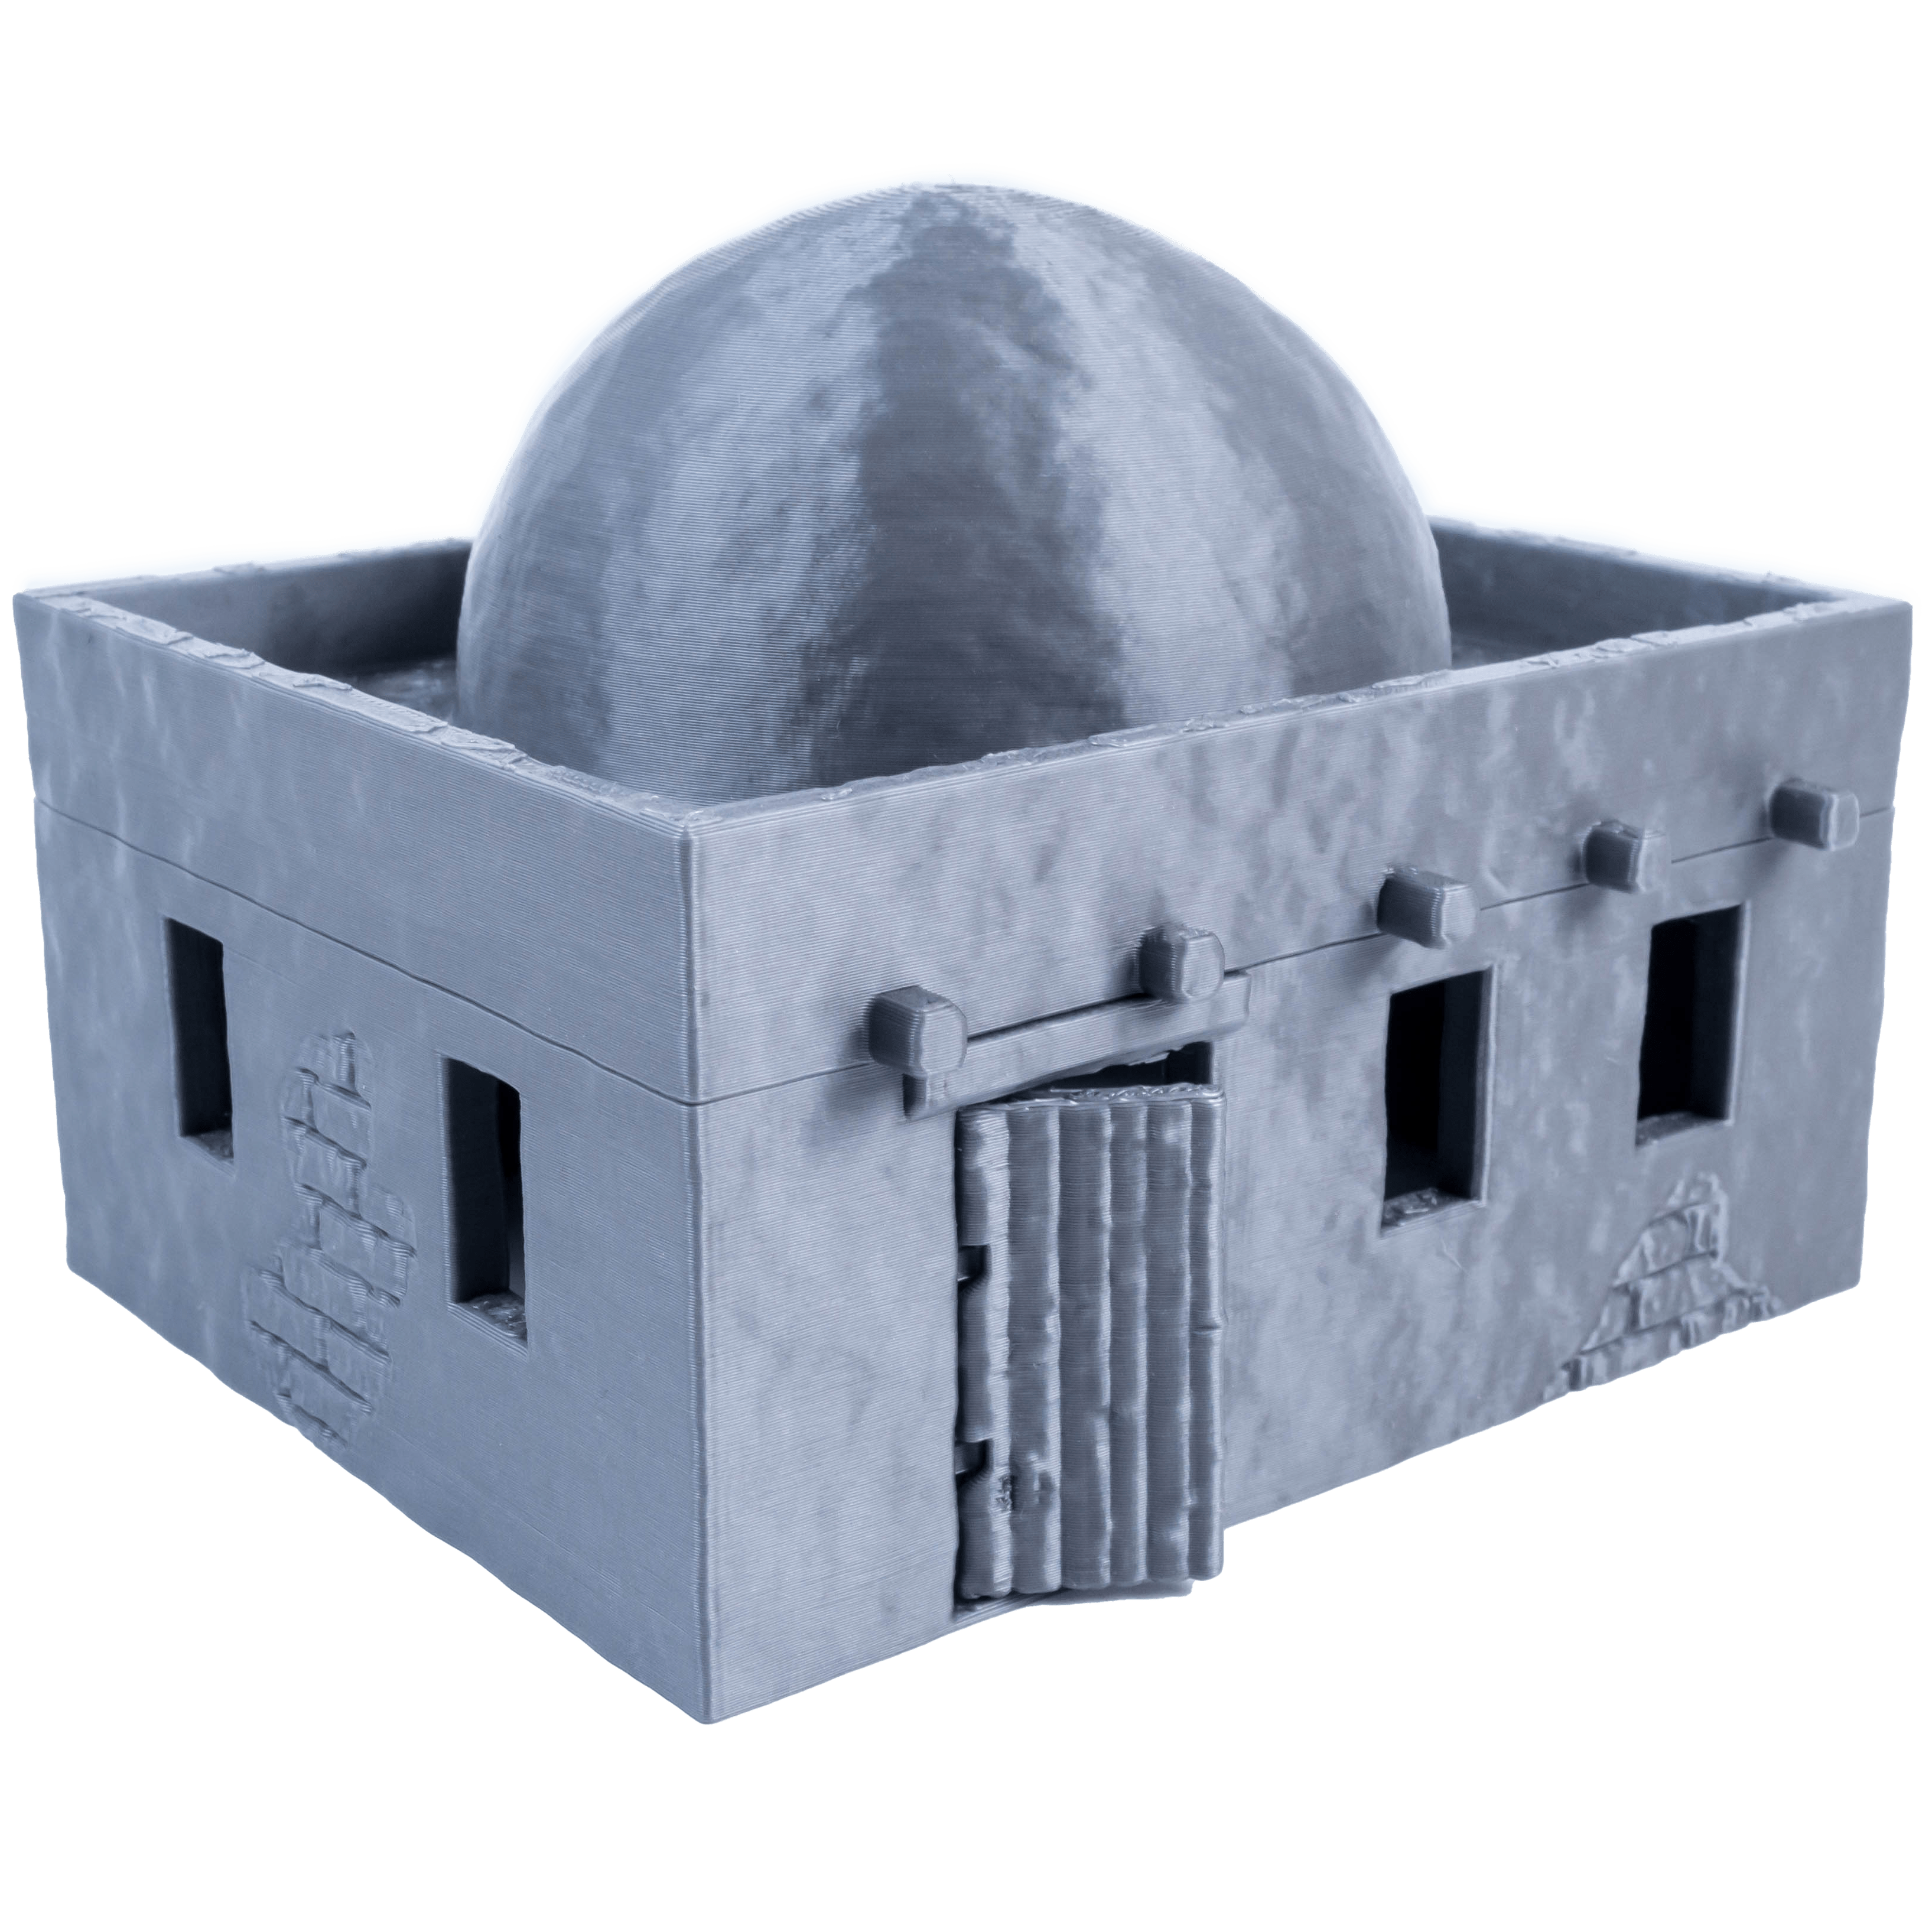
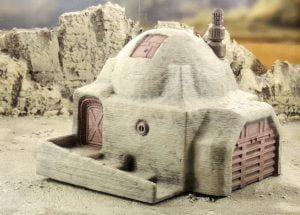
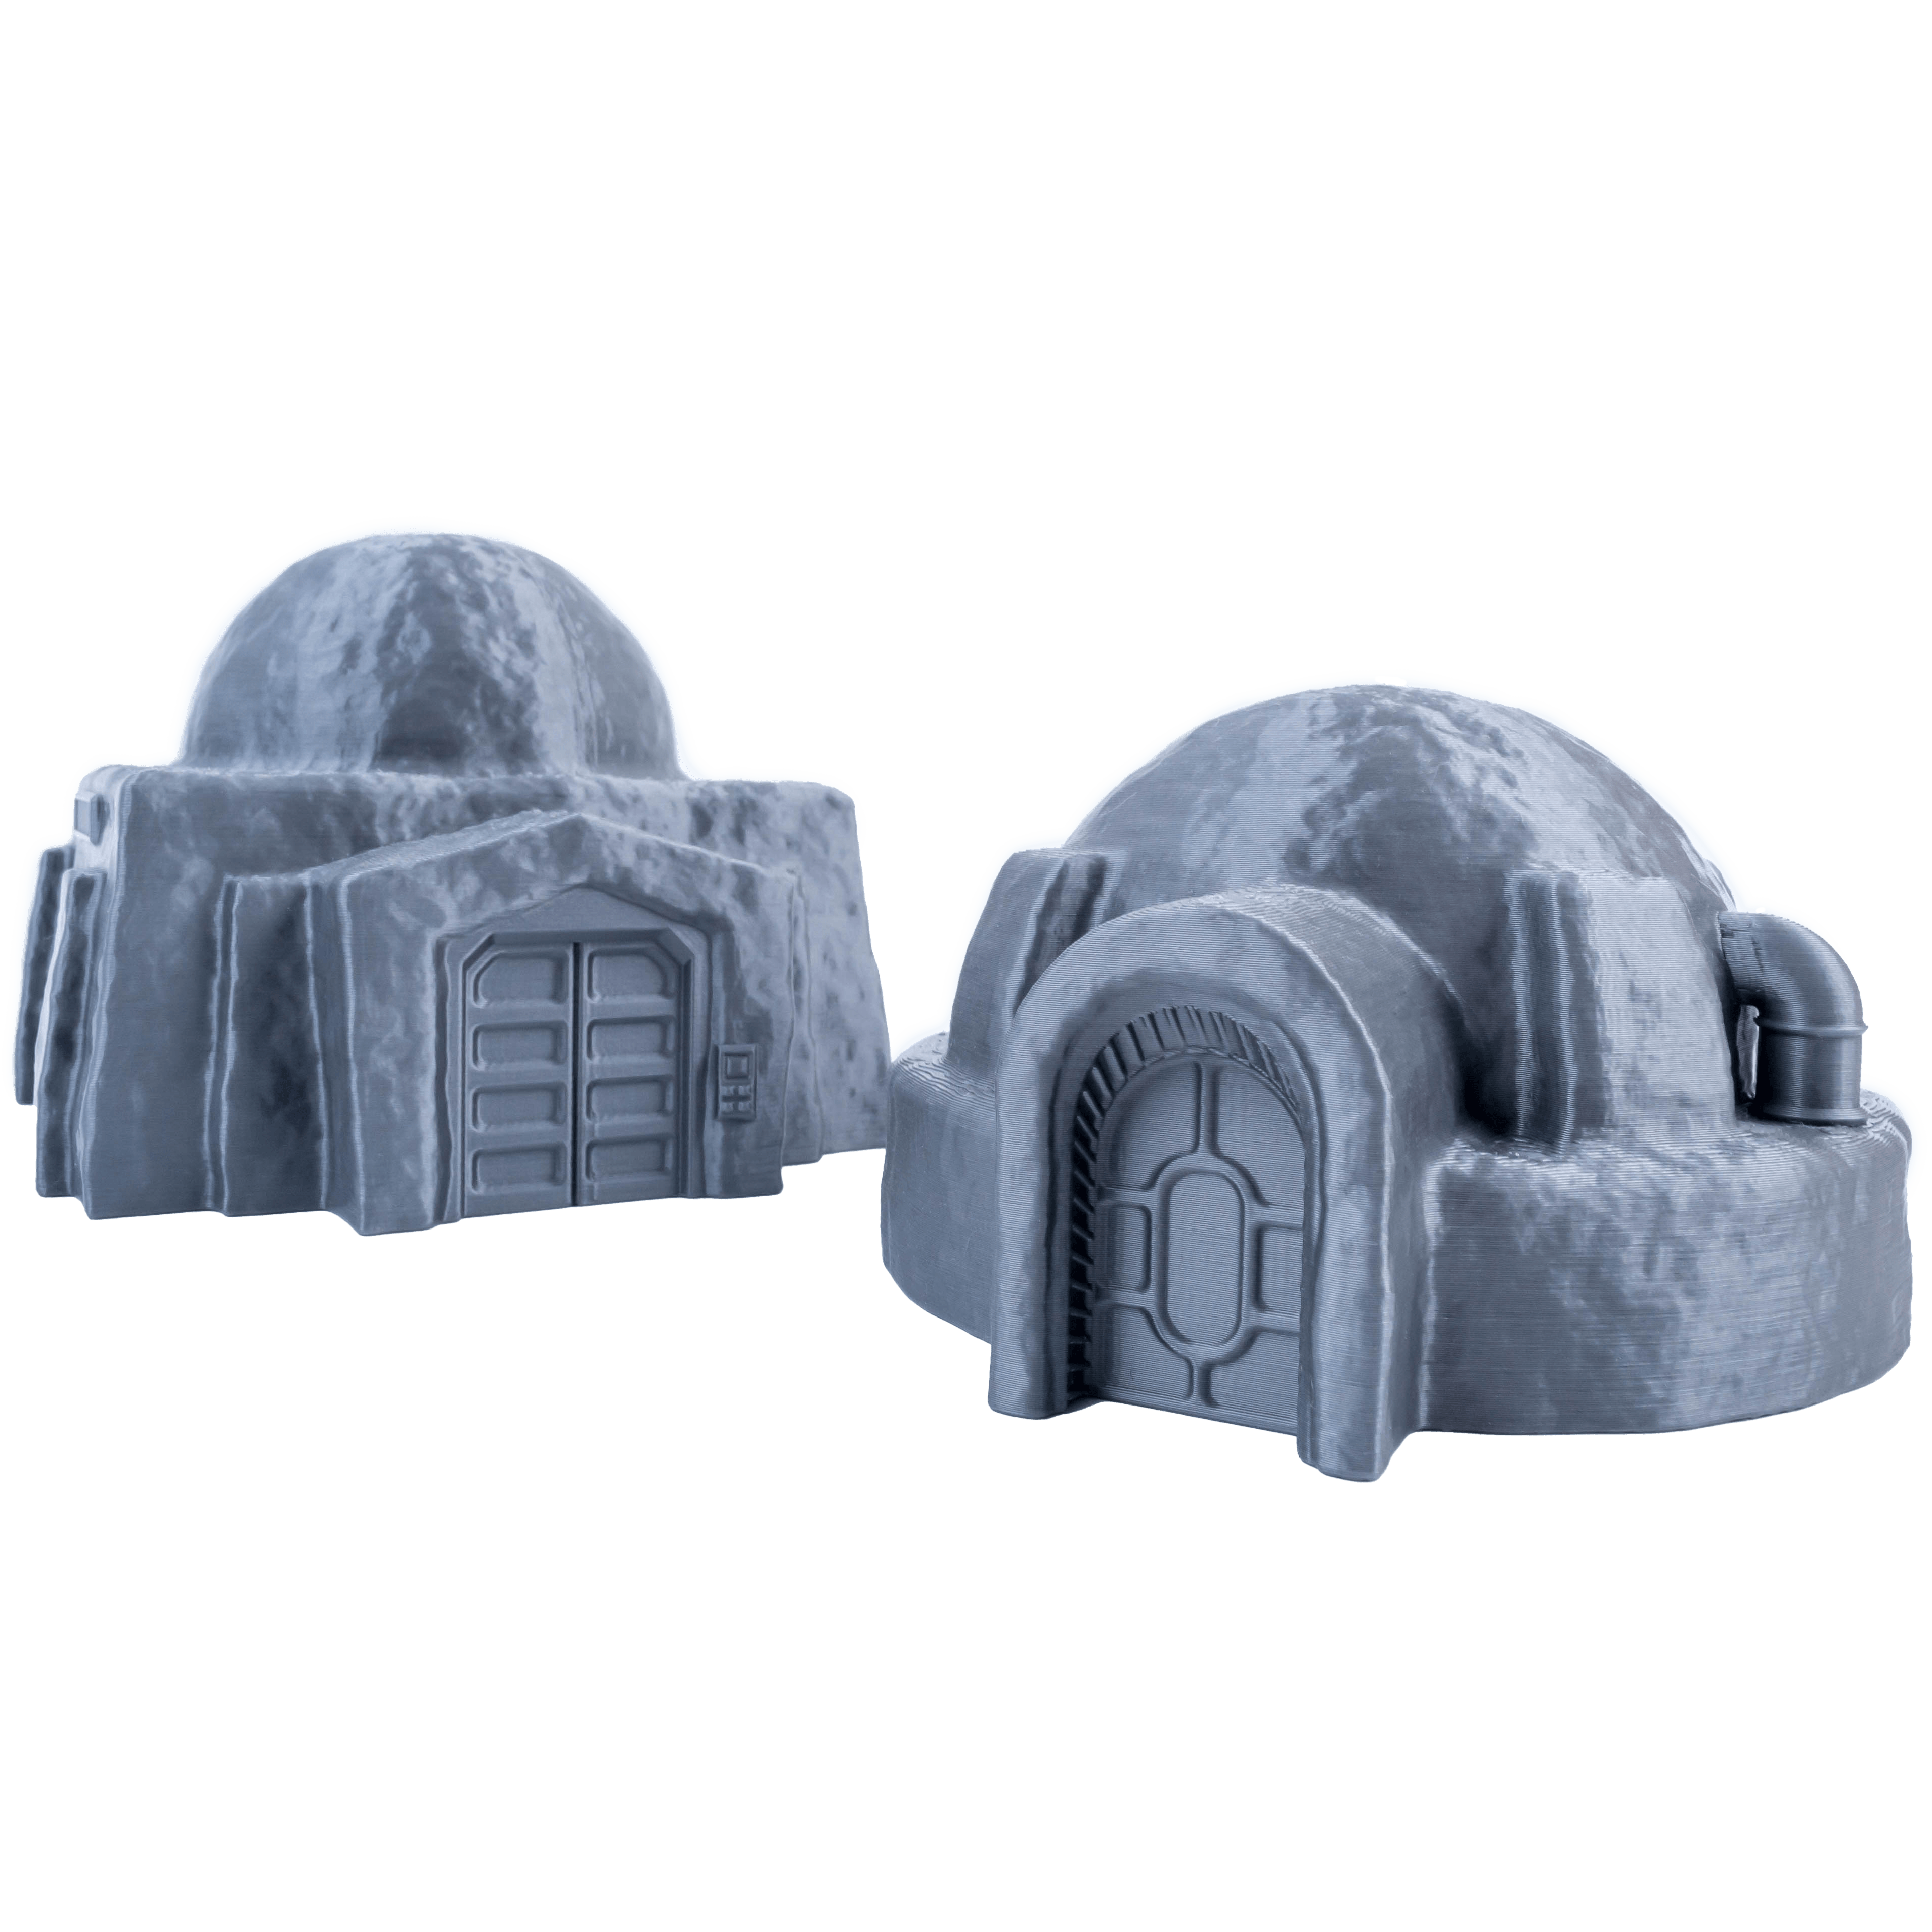
Sci-FiReise in eine Oase: Einfache Kuppelresidenz für arabische Landschaften
Star Wars Terrain Building, eine fesselnde Ergänzung zu deinen Tabletop-Abenteuern. Tauchen Sie mit diesem sorgfältig gefertigten Geländestück in das ikonische Universum von Star Wars ein.
(0 reviews) -
%22%20transform%3D%22translate(.6%20.6)%20scale(1.17188)%22%20fill-opacity%3D%22.5%22%3E%3Cellipse%20fill%3D%22%23bbb%22%20rx%3D%221%22%20ry%3D%221%22%20transform%3D%22rotate(176.5%2039.4%2064)%20scale(238.52625%2041.57687)%22%2F%3E%3Cpath%20d%3D%22M169%20130L-16%20256l287-2z%22%2F%3E%3Cellipse%20rx%3D%221%22%20ry%3D%221%22%20transform%3D%22rotate(-.6%202953.8%20-8675.5)%20scale(255%2037.29465)%22%2F%3E%3Cellipse%20rx%3D%221%22%20ry%3D%221%22%20transform%3D%22matrix(-254.99645%201.3447%20-.19691%20-37.34028%20133.1%20222)%22%2F%3E%3Cellipse%20cx%3D%2262%22%20cy%3D%2252%22%20rx%3D%2245%22%20ry%3D%2245%22%2F%3E%3Cellipse%20fill%3D%22%237a7a7a%22%20rx%3D%221%22%20ry%3D%221%22%20transform%3D%22matrix(-90.59526%20-48.53255%2018.71229%20-34.93006%20190.7%20121.2)%22%2F%3E%3Cellipse%20fill%3D%22%238b8b8b%22%20rx%3D%221%22%20ry%3D%221%22%20transform%3D%22matrix(26.4836%2035.79052%20-29.94499%2022.15812%2092%20145.5)%22%2F%3E%3Cellipse%20rx%3D%221%22%20ry%3D%221%22%20transform%3D%22matrix(.1331%2038.12985%20-226.8232%20.79177%20130.5%2024.4)%22%2F%3E%3Cellipse%20fill%3D%22%239c9c9c%22%20cx%3D%228%22%20cy%3D%22132%22%20rx%3D%22102%22%20ry%3D%2224%22%2F%3E%3Cpath%20d%3D%22M232%200h24v96h-24z%22%2F%3E%3Cellipse%20cx%3D%2289%22%20cy%3D%22223%22%20rx%3D%22255%22%20ry%3D%2237%22%2F%3E%3Cellipse%20fill%3D%22%23575757%22%20rx%3D%221%22%20ry%3D%221%22%20transform%3D%22matrix(-58.4244%20-20.87598%205.74277%20-16.07196%20212.5%2087.2)%22%2F%3E%3Cellipse%20fill%3D%22%23505050%22%20rx%3D%221%22%20ry%3D%221%22%20transform%3D%22matrix(-1.14261%2016.41145%20-99.18911%20-6.90584%2032.3%20170.7)%22%2F%3E%3Cellipse%20fill%3D%22%23676767%22%20rx%3D%221%22%20ry%3D%221%22%20transform%3D%22rotate(-66.2%2073.7%2035.4)%20scale(15.41468%2080.44725)%22%2F%3E%3Cellipse%20cx%3D%22175%22%20cy%3D%2222%22%20rx%3D%22255%22%20ry%3D%2239%22%2F%3E%3Cpath%20d%3D%22M137%20159h54v97h-54z%22%2F%3E%3Cpath%20fill%3D%22%234b4b4b%22%20d%3D%22M161%20126l-67%2039%20126-13z%22%2F%3E%3Cellipse%20fill%3D%22%238a8a8a%22%20rx%3D%221%22%20ry%3D%221%22%20transform%3D%22matrix(-41.83921%20-27.0276%2010.80722%20-16.72977%20214.2%20120)%22%2F%3E%3Cpath%20d%3D%22M34%2056h57v30H34z%22%2F%3E%3Cellipse%20fill%3D%22%238b8b8b%22%20cx%3D%22139%22%20cy%3D%22112%22%20rx%3D%2239%22%20ry%3D%2224%22%2F%3E%3C%2Fg%3E%3C%2Fsvg%3E) Terrain & Szenerie
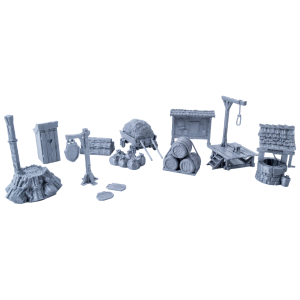
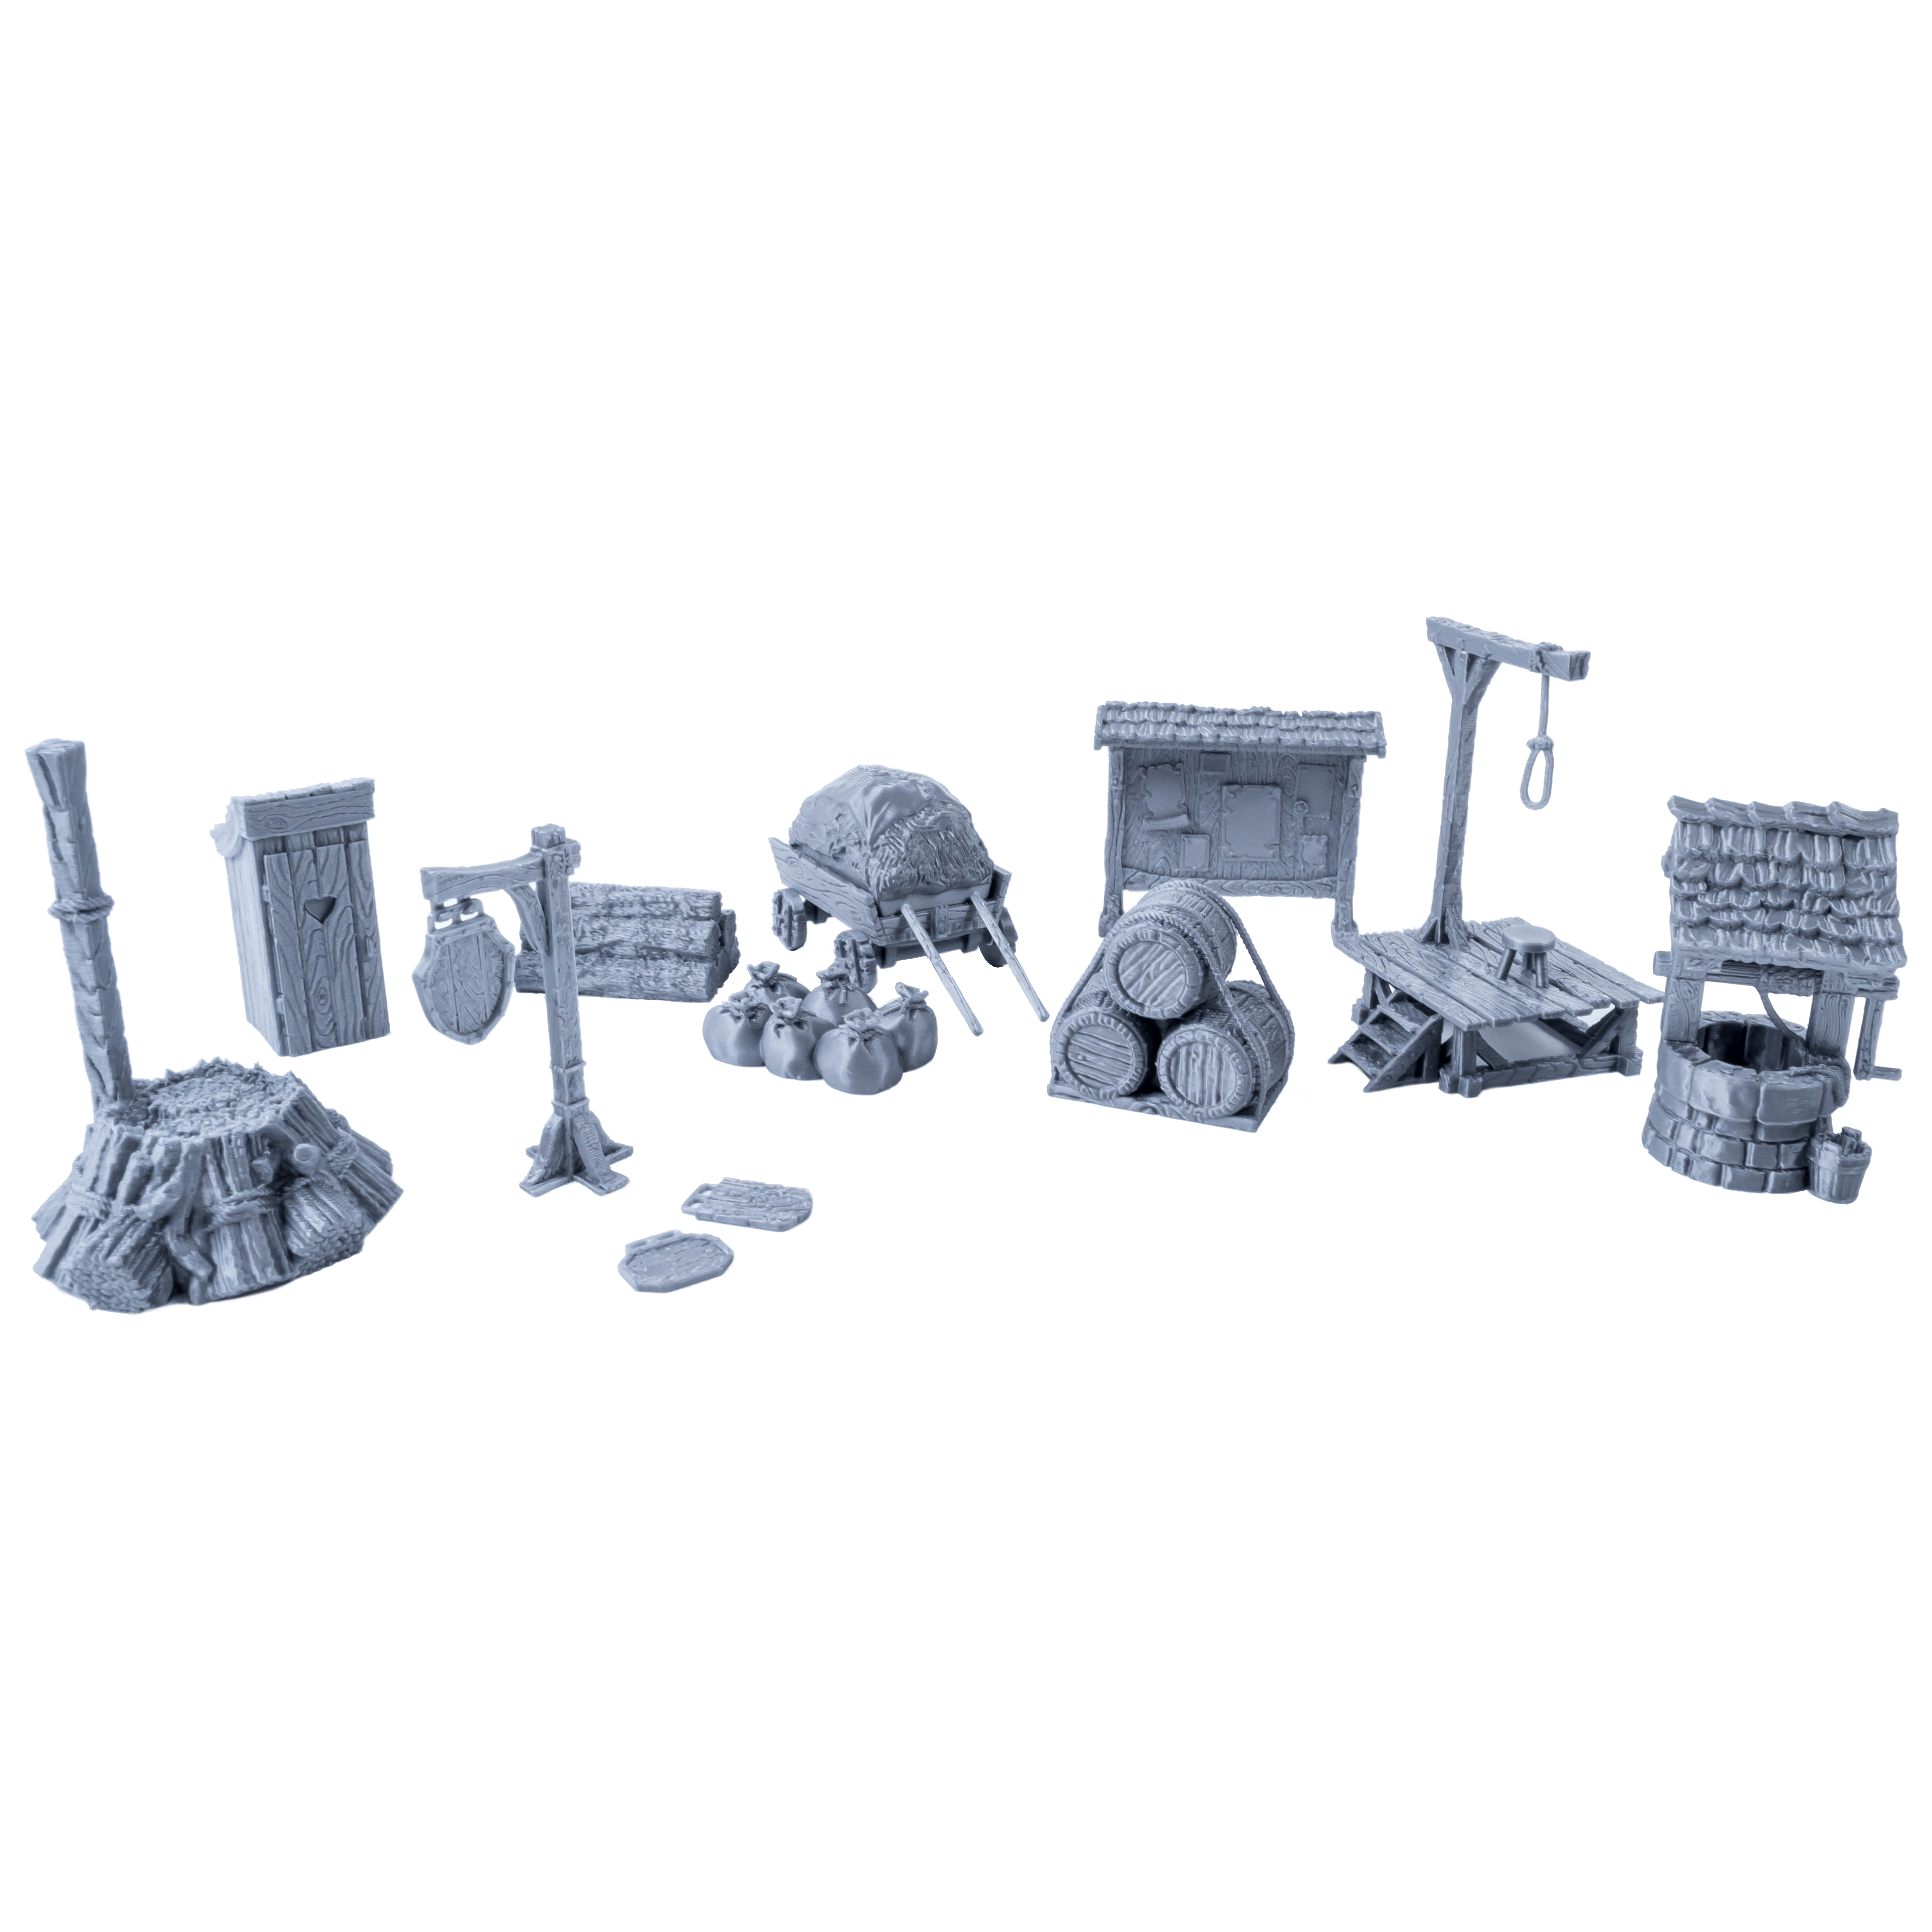
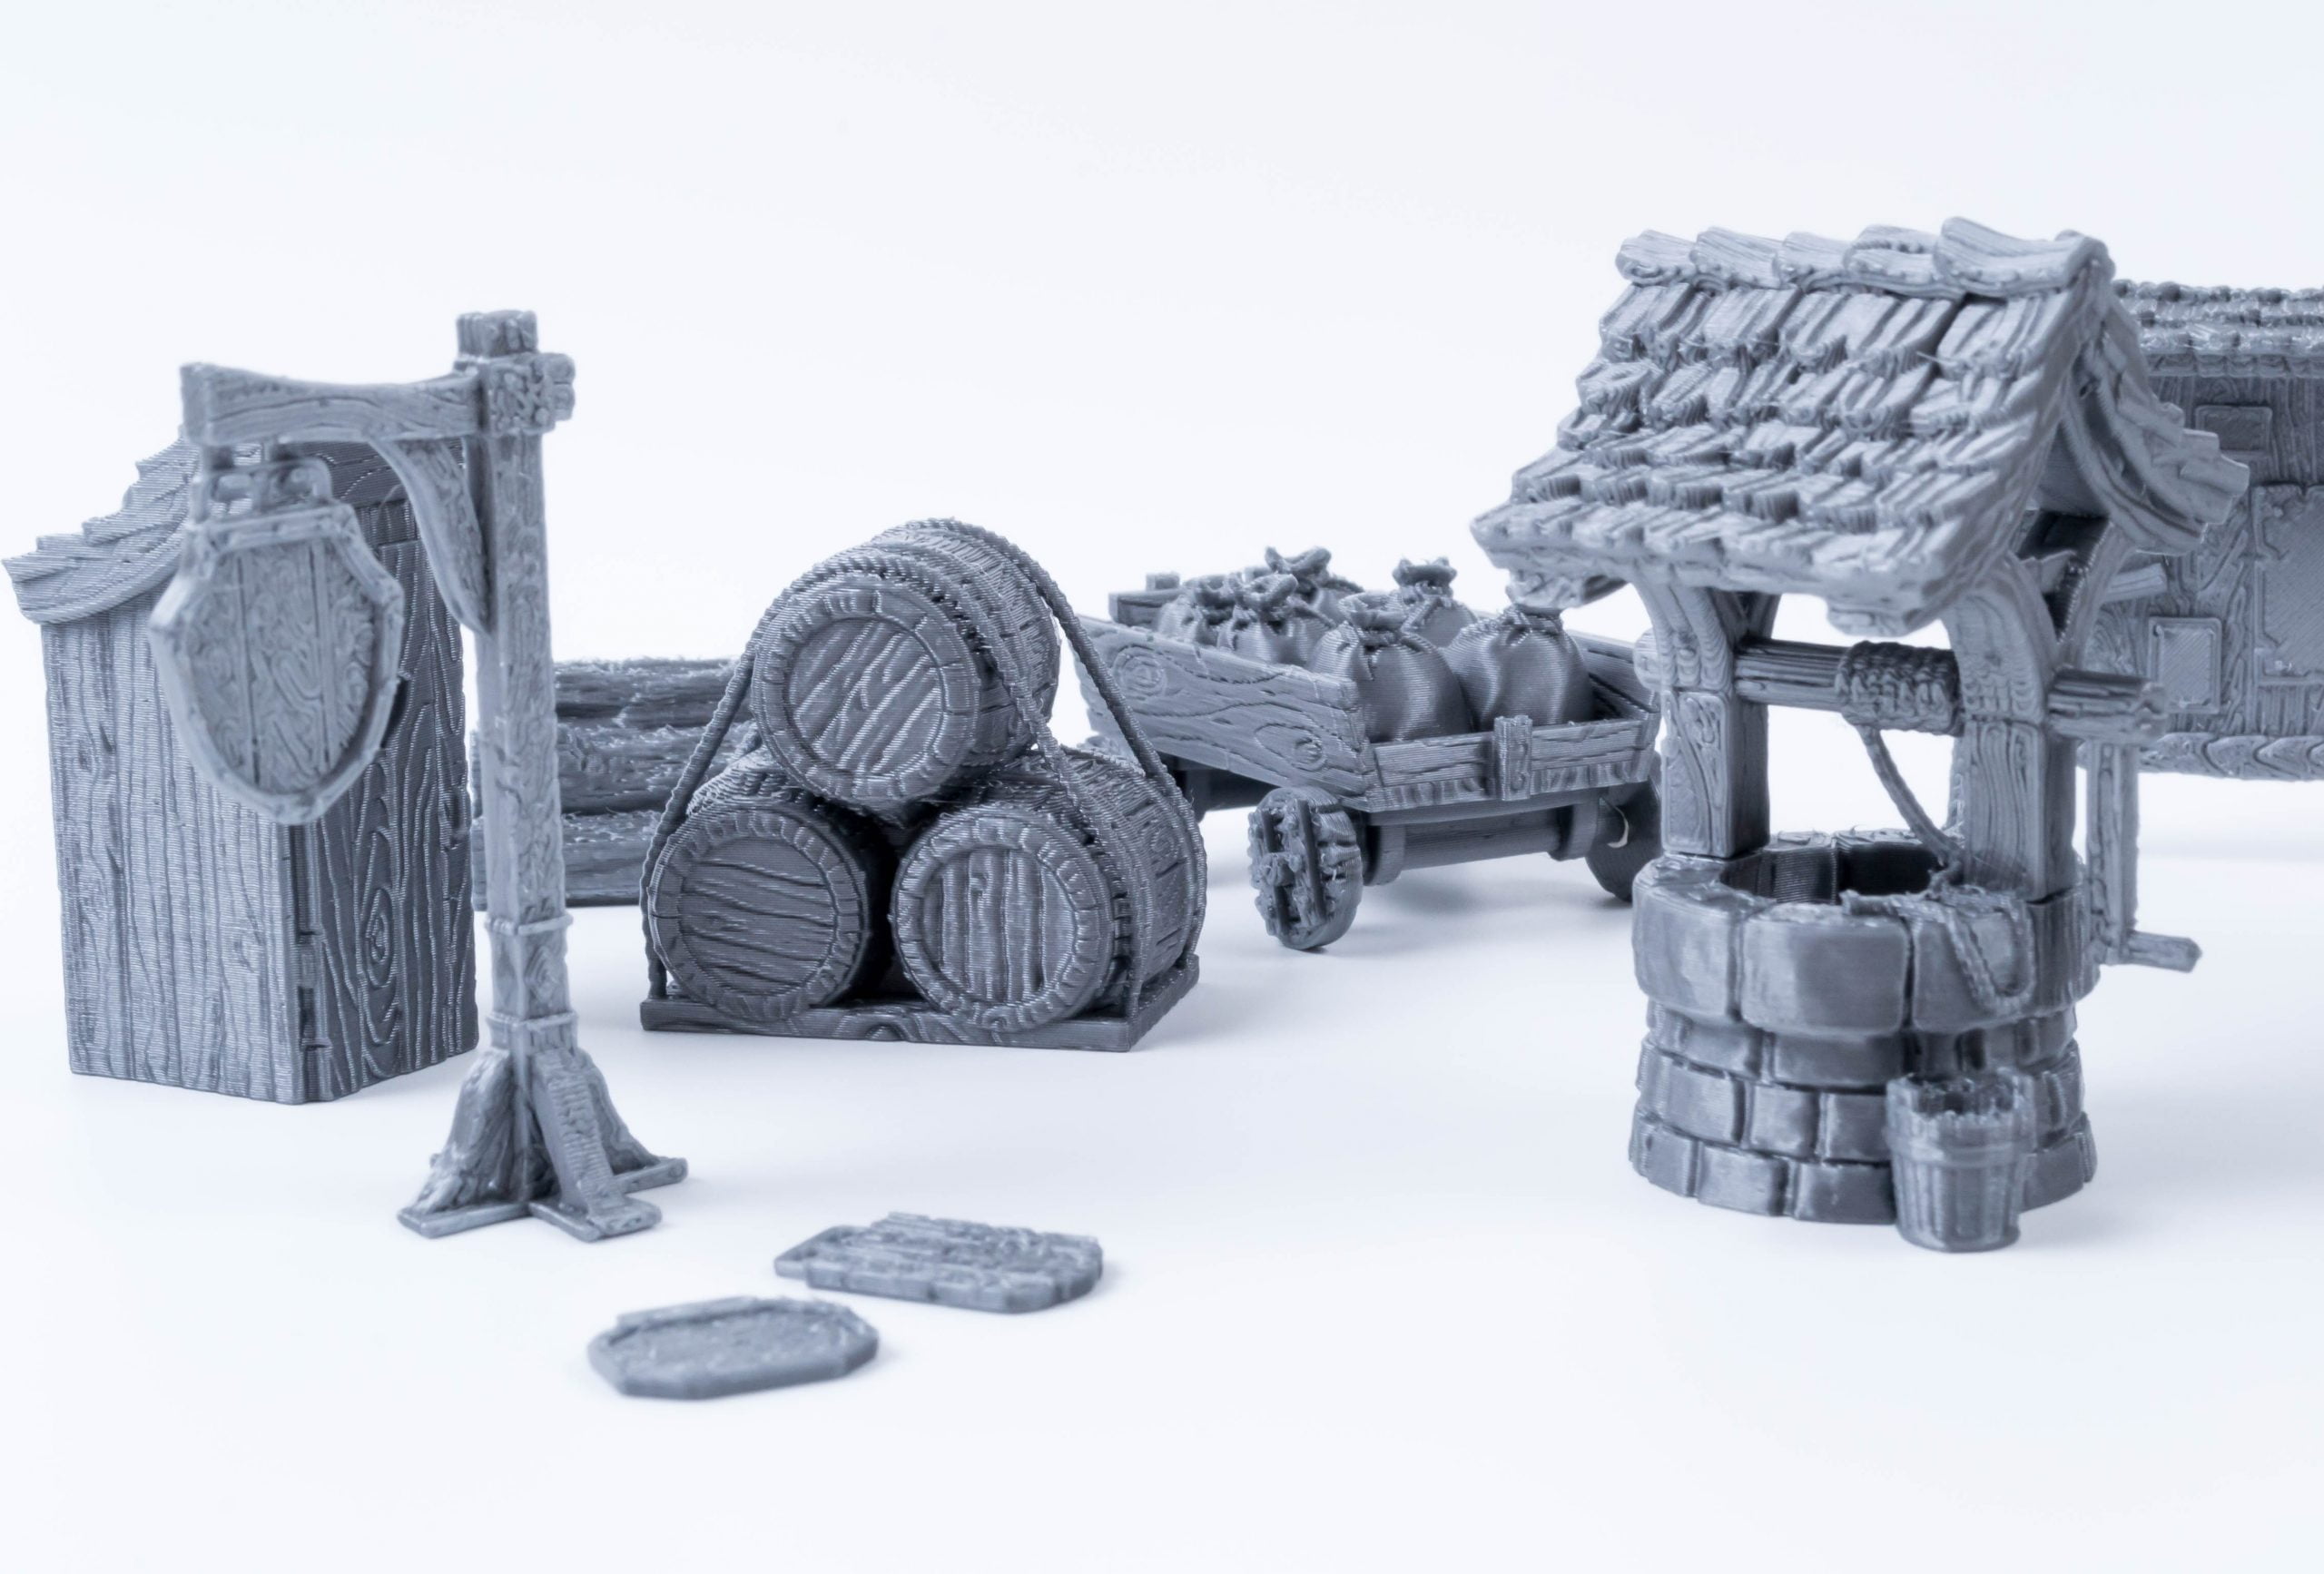
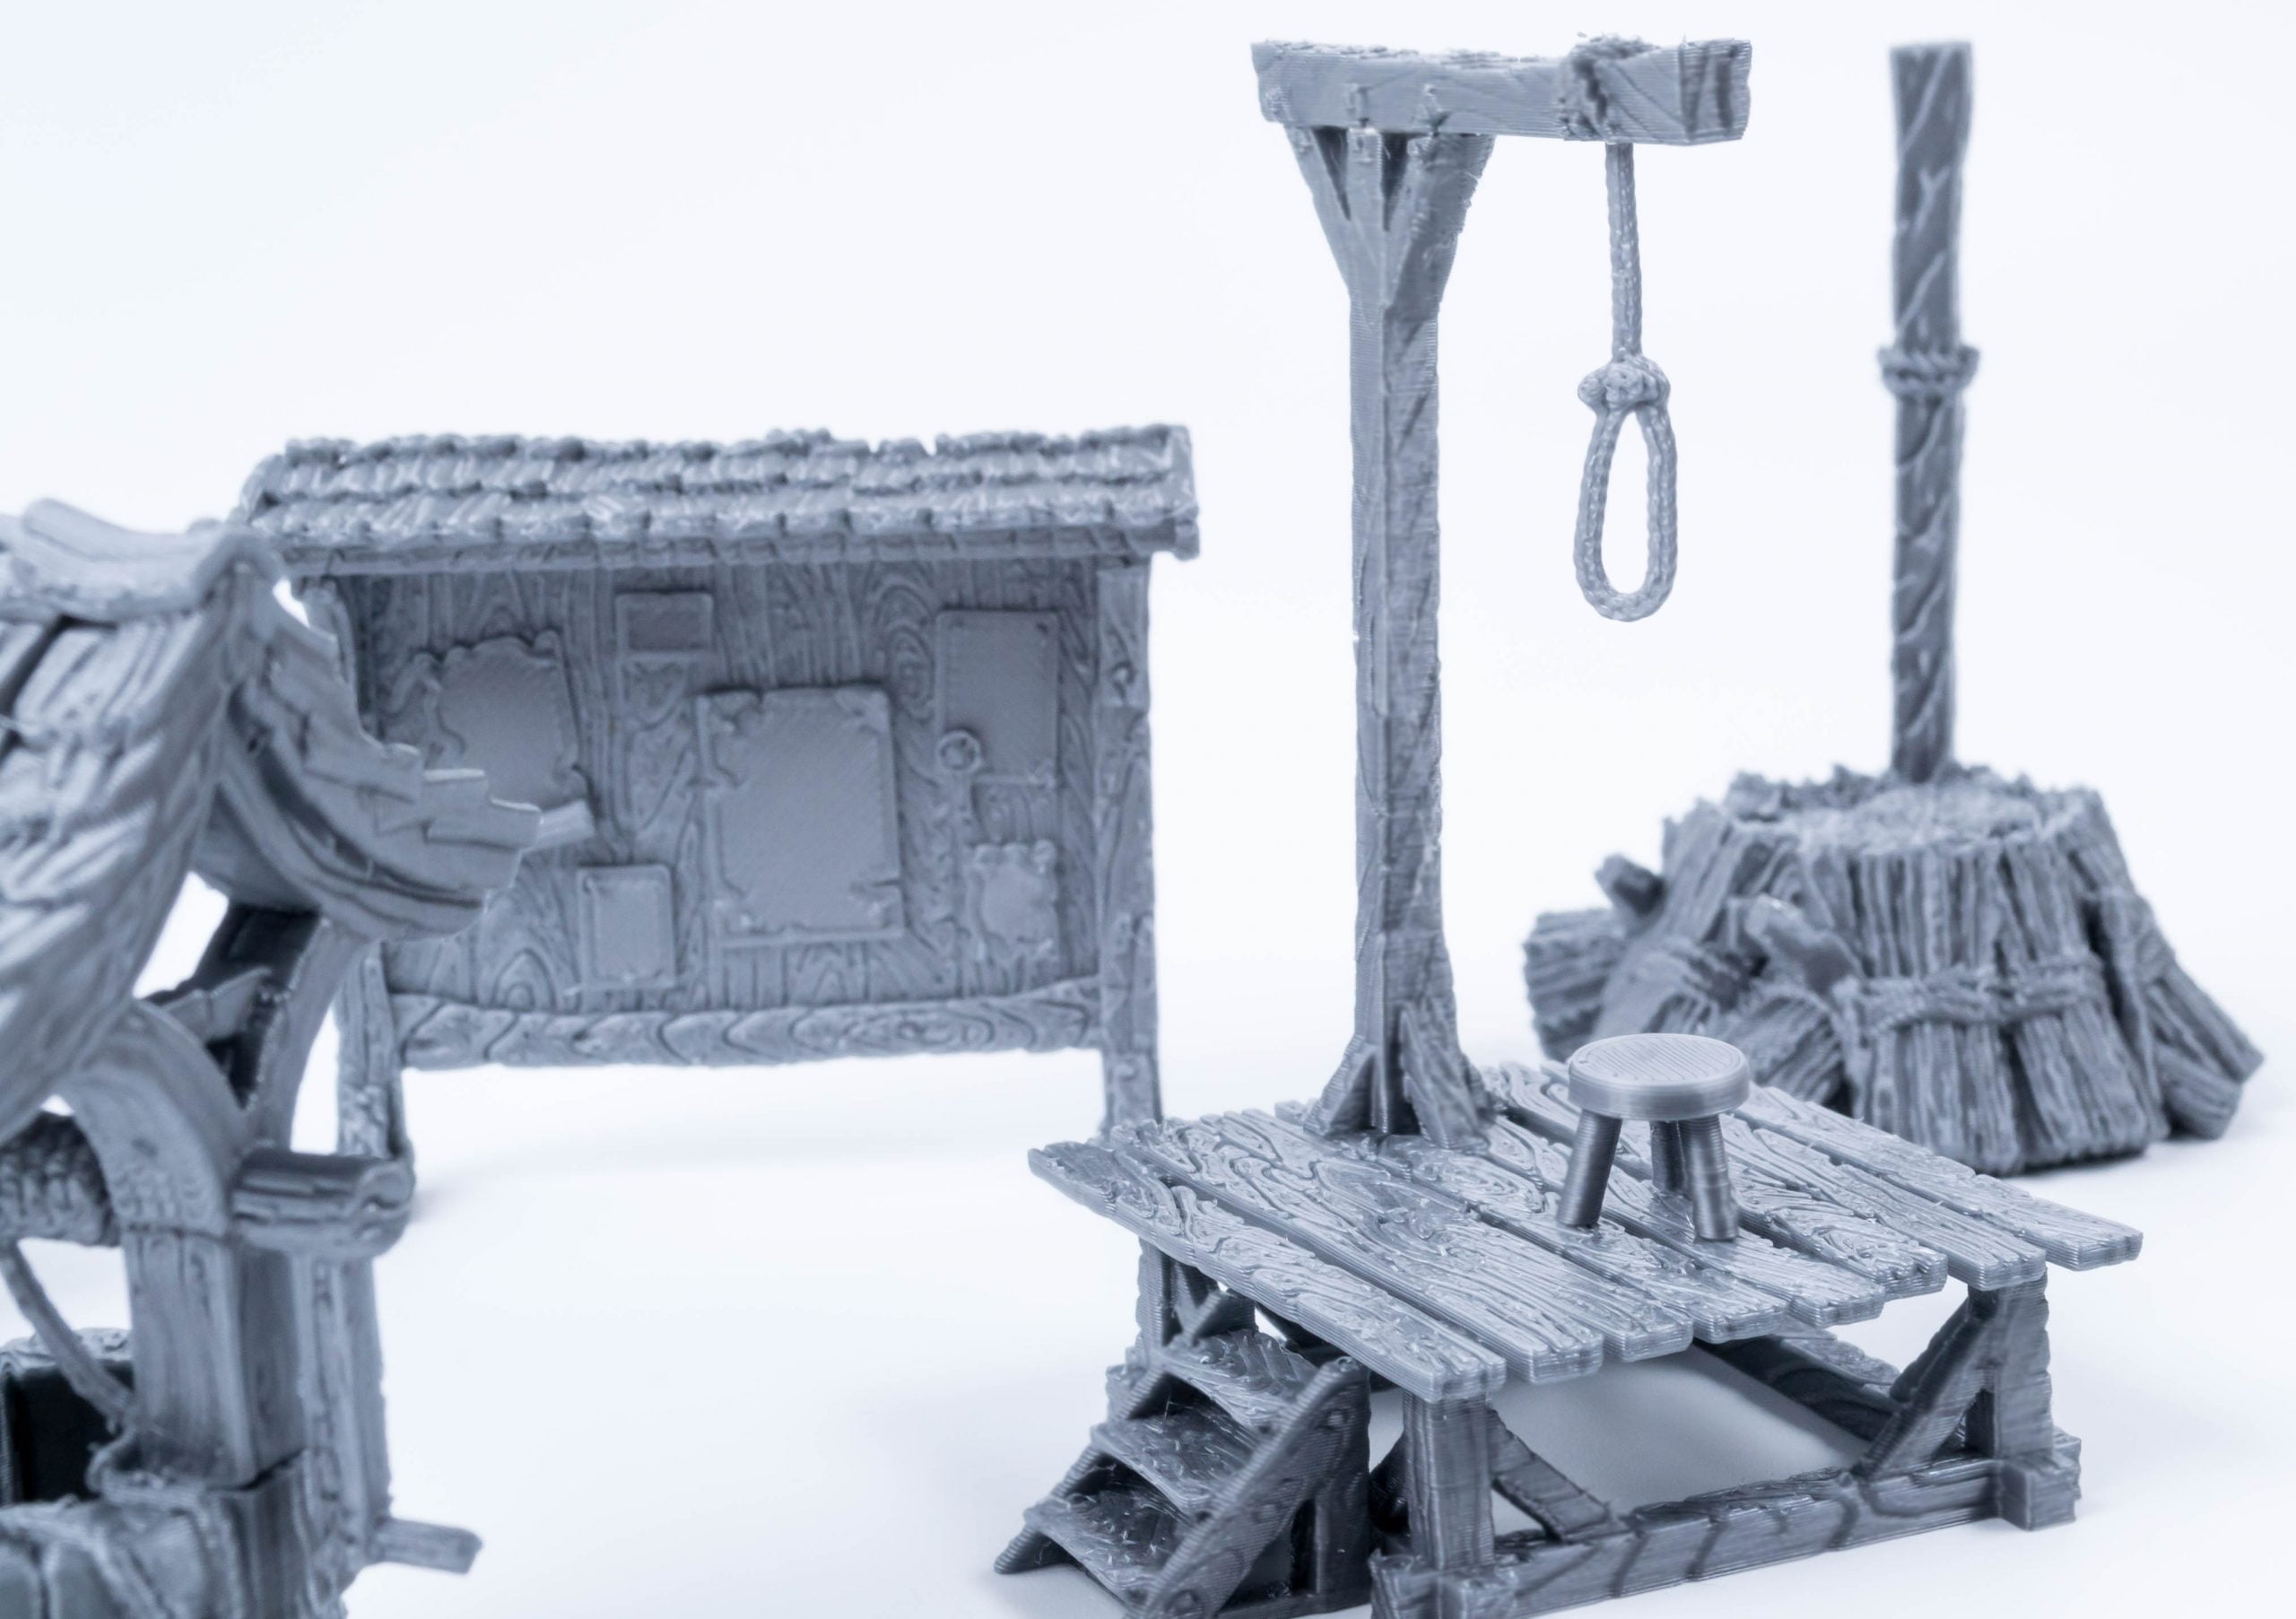
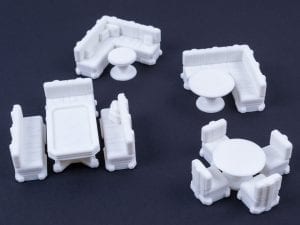
Terrain & SzenerieStadt-Gegenstände-Set: Vielseitiges Gelände für Tabletop-RPGs & Wargames (28/32mm)
Tauchen Sie ein in den fesselnden Realismus Ihrer 28/32-mm-Miniaturwelten! Dieses Set bietet eine Fülle von Möglichkeiten, die als unverzichtbares Scatter Terrain, als stimmungsvolles D&D Scatter Terrain oder als fesselnde Ergänzung zu Miniatur-Basis-Terrain dienen. Ob Fantasiedörfer, historische Städte oder düstere Unterwelten – jedes PLA-Teil bietet handgefertigte Details und liefert Stoff für endlose Spielgeschichten.
(0 reviews) -
%22%20transform%3D%22translate(.6%20.6)%20scale(1.17188)%22%20fill-opacity%3D%22.5%22%3E%3Cpath%20fill%3D%22%23b3b3b3%22%20d%3D%22M-16%20144L233%2017l38%20199z%22%2F%3E%3Cellipse%20rx%3D%221%22%20ry%3D%221%22%20transform%3D%22matrix(14.33141%2046.743%20-243.79837%2074.74861%2079.9%2025.3)%22%2F%3E%3Cellipse%20rx%3D%221%22%20ry%3D%221%22%20transform%3D%22rotate(-89.4%20196.6%2059)%20scale(43.61256%20143.62091)%22%2F%3E%3Cellipse%20cx%3D%2254%22%20cy%3D%2221%22%20rx%3D%2271%22%20ry%3D%2271%22%2F%3E%3Cellipse%20fill%3D%22%23a1a1a1%22%20rx%3D%221%22%20ry%3D%221%22%20transform%3D%22rotate(-29%20328%2031.4)%20scale(42.51789%2070.17104)%22%2F%3E%3Cpath%20d%3D%22M129%20196l142%2066-281-5z%22%2F%3E%3Cellipse%20rx%3D%221%22%20ry%3D%221%22%20transform%3D%22matrix(15.9225%20-28.41042%2019.73262%2011.05906%20242%2013)%22%2F%3E%3Cellipse%20fill%3D%22%23999%22%20rx%3D%221%22%20ry%3D%221%22%20transform%3D%22matrix(-64.95543%2037.5605%20-18.11153%20-31.32127%20162.3%2073.4)%22%2F%3E%3Cpath%20d%3D%22M3%2089L253-13-16-2z%22%2F%3E%3Cellipse%20fill%3D%22%23444%22%20rx%3D%221%22%20ry%3D%221%22%20transform%3D%22rotate(-71.4%20186%20.2)%20scale(20.74018%2049.49992)%22%2F%3E%3Cellipse%20fill%3D%22%23727272%22%20rx%3D%221%22%20ry%3D%221%22%20transform%3D%22matrix(46.62727%20-1.34143%20.8174%2028.41208%20209.1%20206.8)%22%2F%3E%3Cpath%20fill%3D%22%239c9c9c%22%20d%3D%22M242%2055h14v74h-14z%22%2F%3E%3Cpath%20fill%3D%22%23555%22%20d%3D%22M0%20205h96v27H0z%22%2F%3E%3Cellipse%20cx%3D%22190%22%20cy%3D%22255%22%20rx%3D%22255%22%20ry%3D%2224%22%2F%3E%3Cellipse%20fill%3D%22%235d5d5d%22%20rx%3D%221%22%20ry%3D%221%22%20transform%3D%22rotate(18.5%20-8.2%20655.4)%20scale(42.41977%2023.96545)%22%2F%3E%3C%2Fg%3E%3C%2Fsvg%3E) Sci-Fi
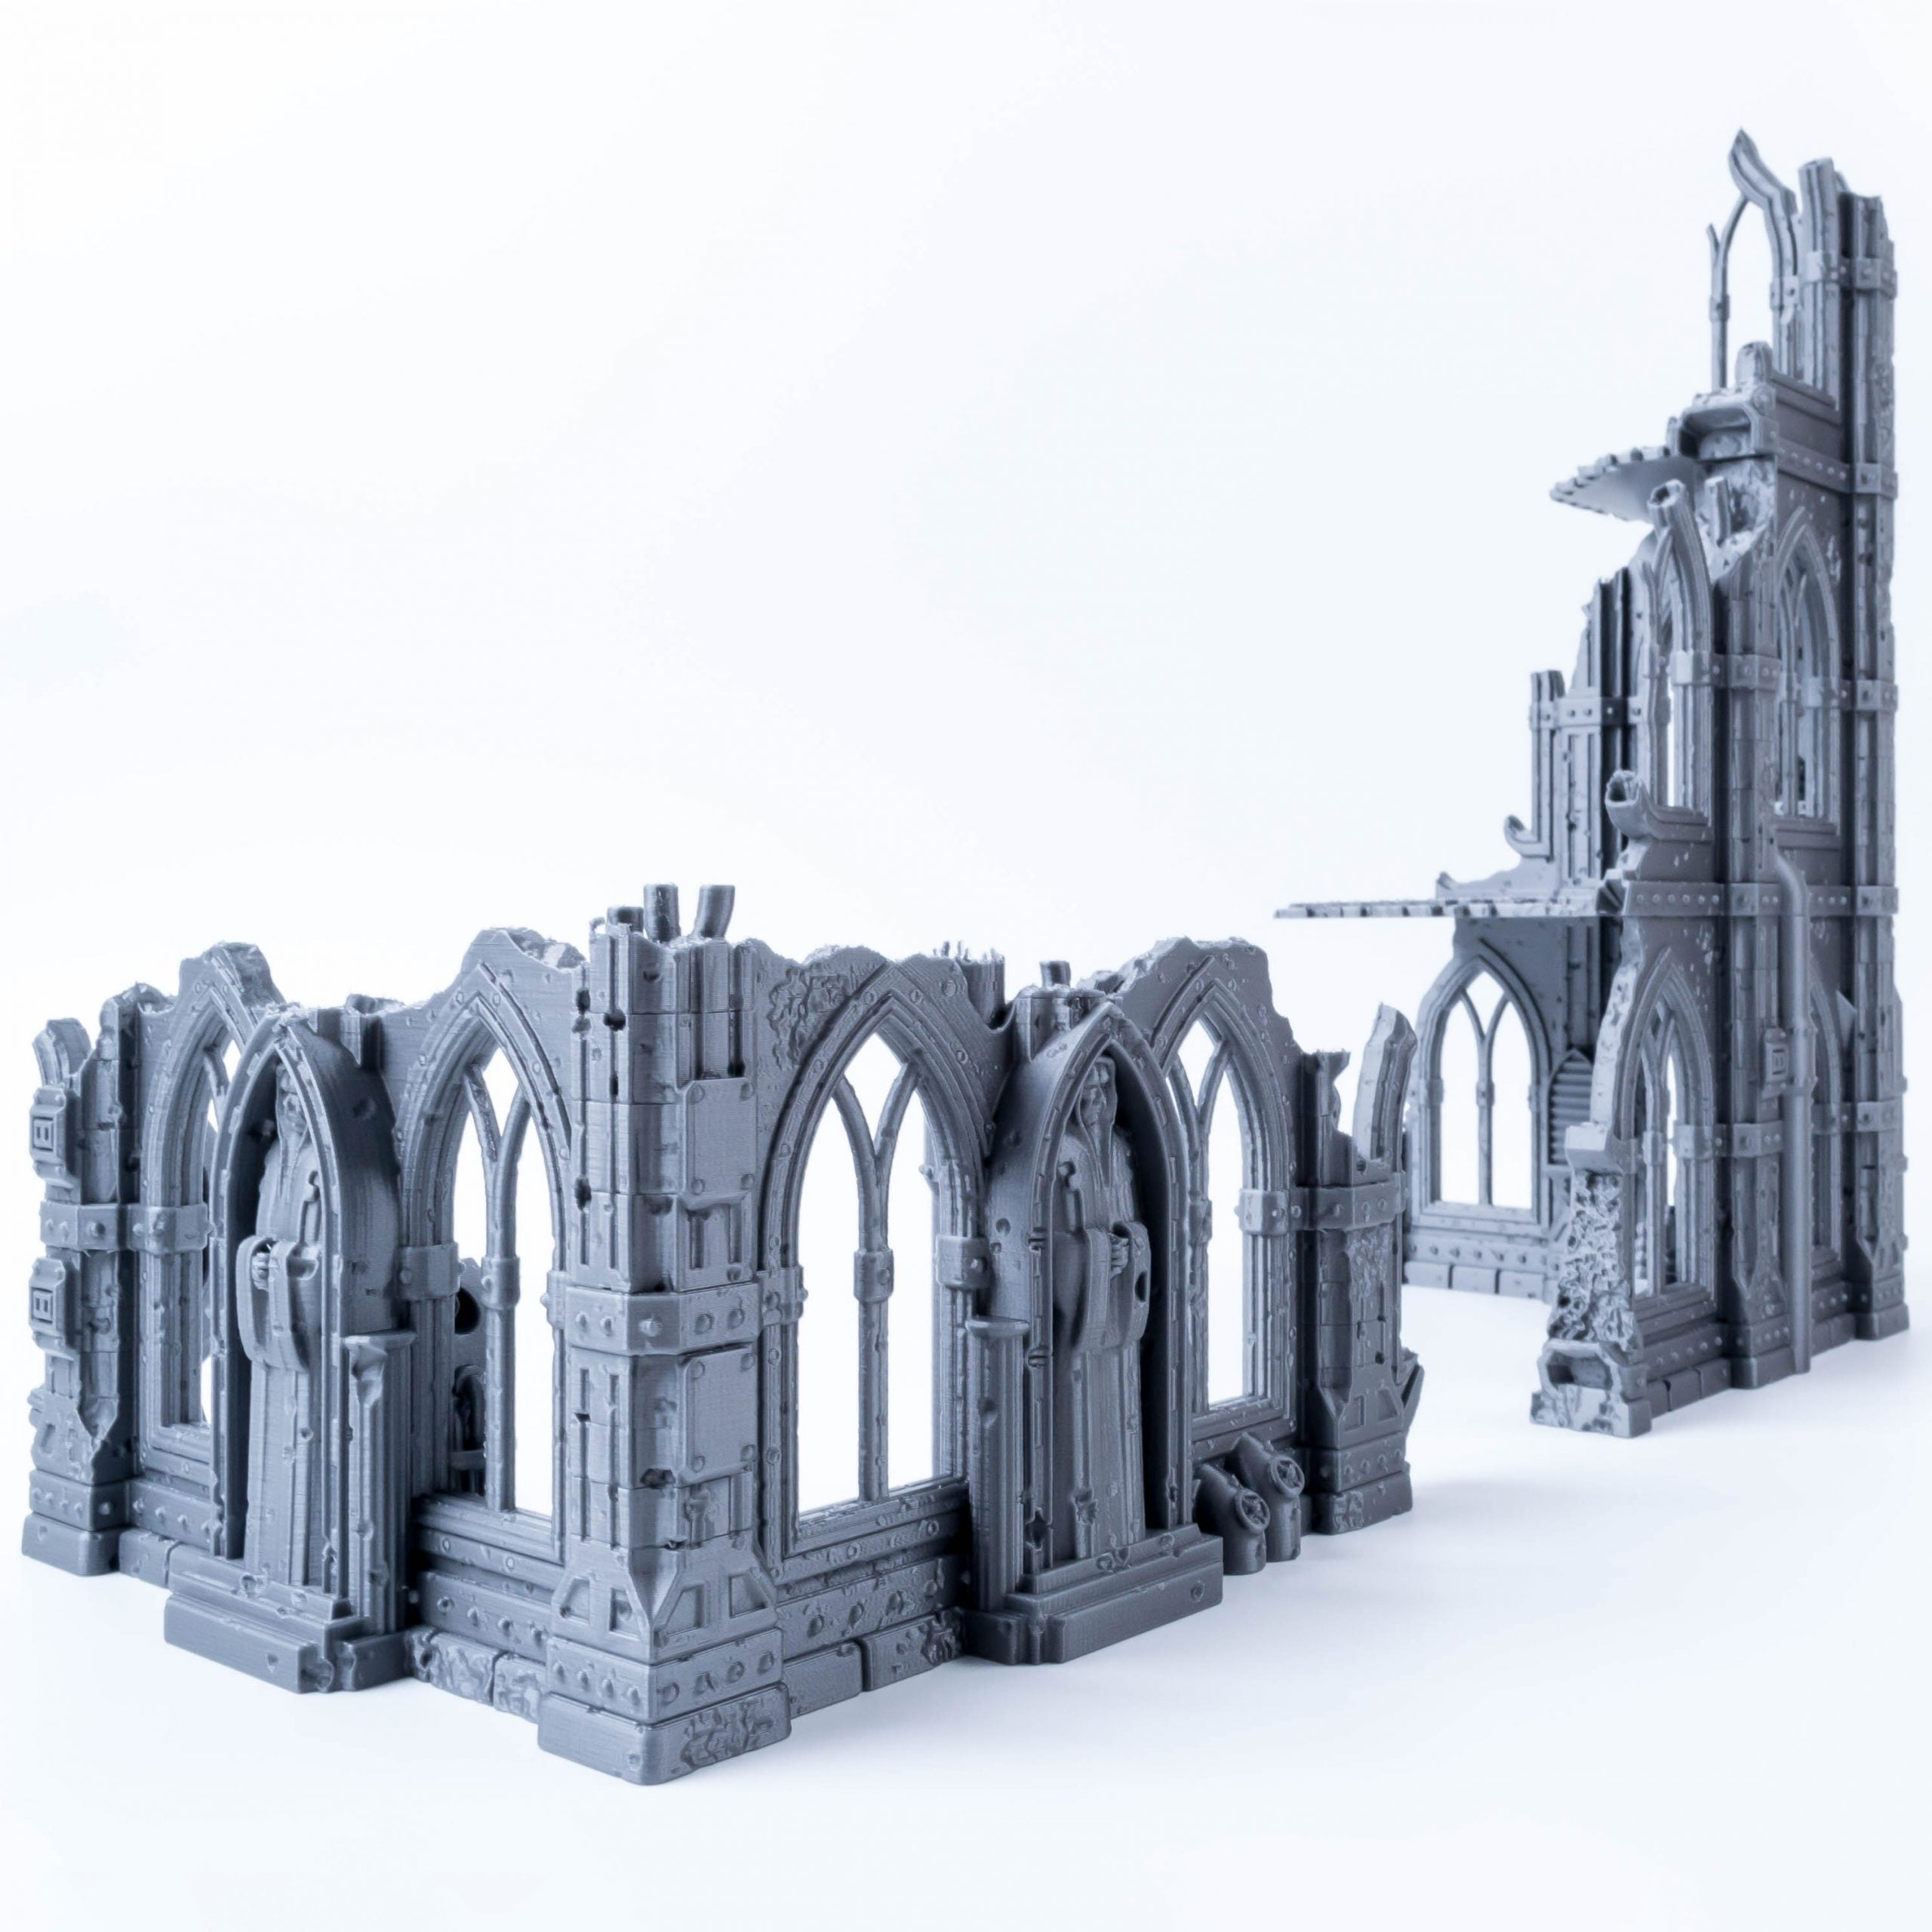
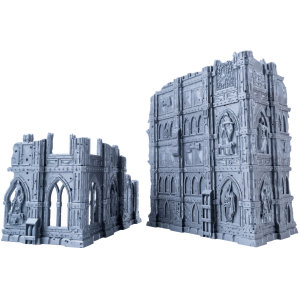
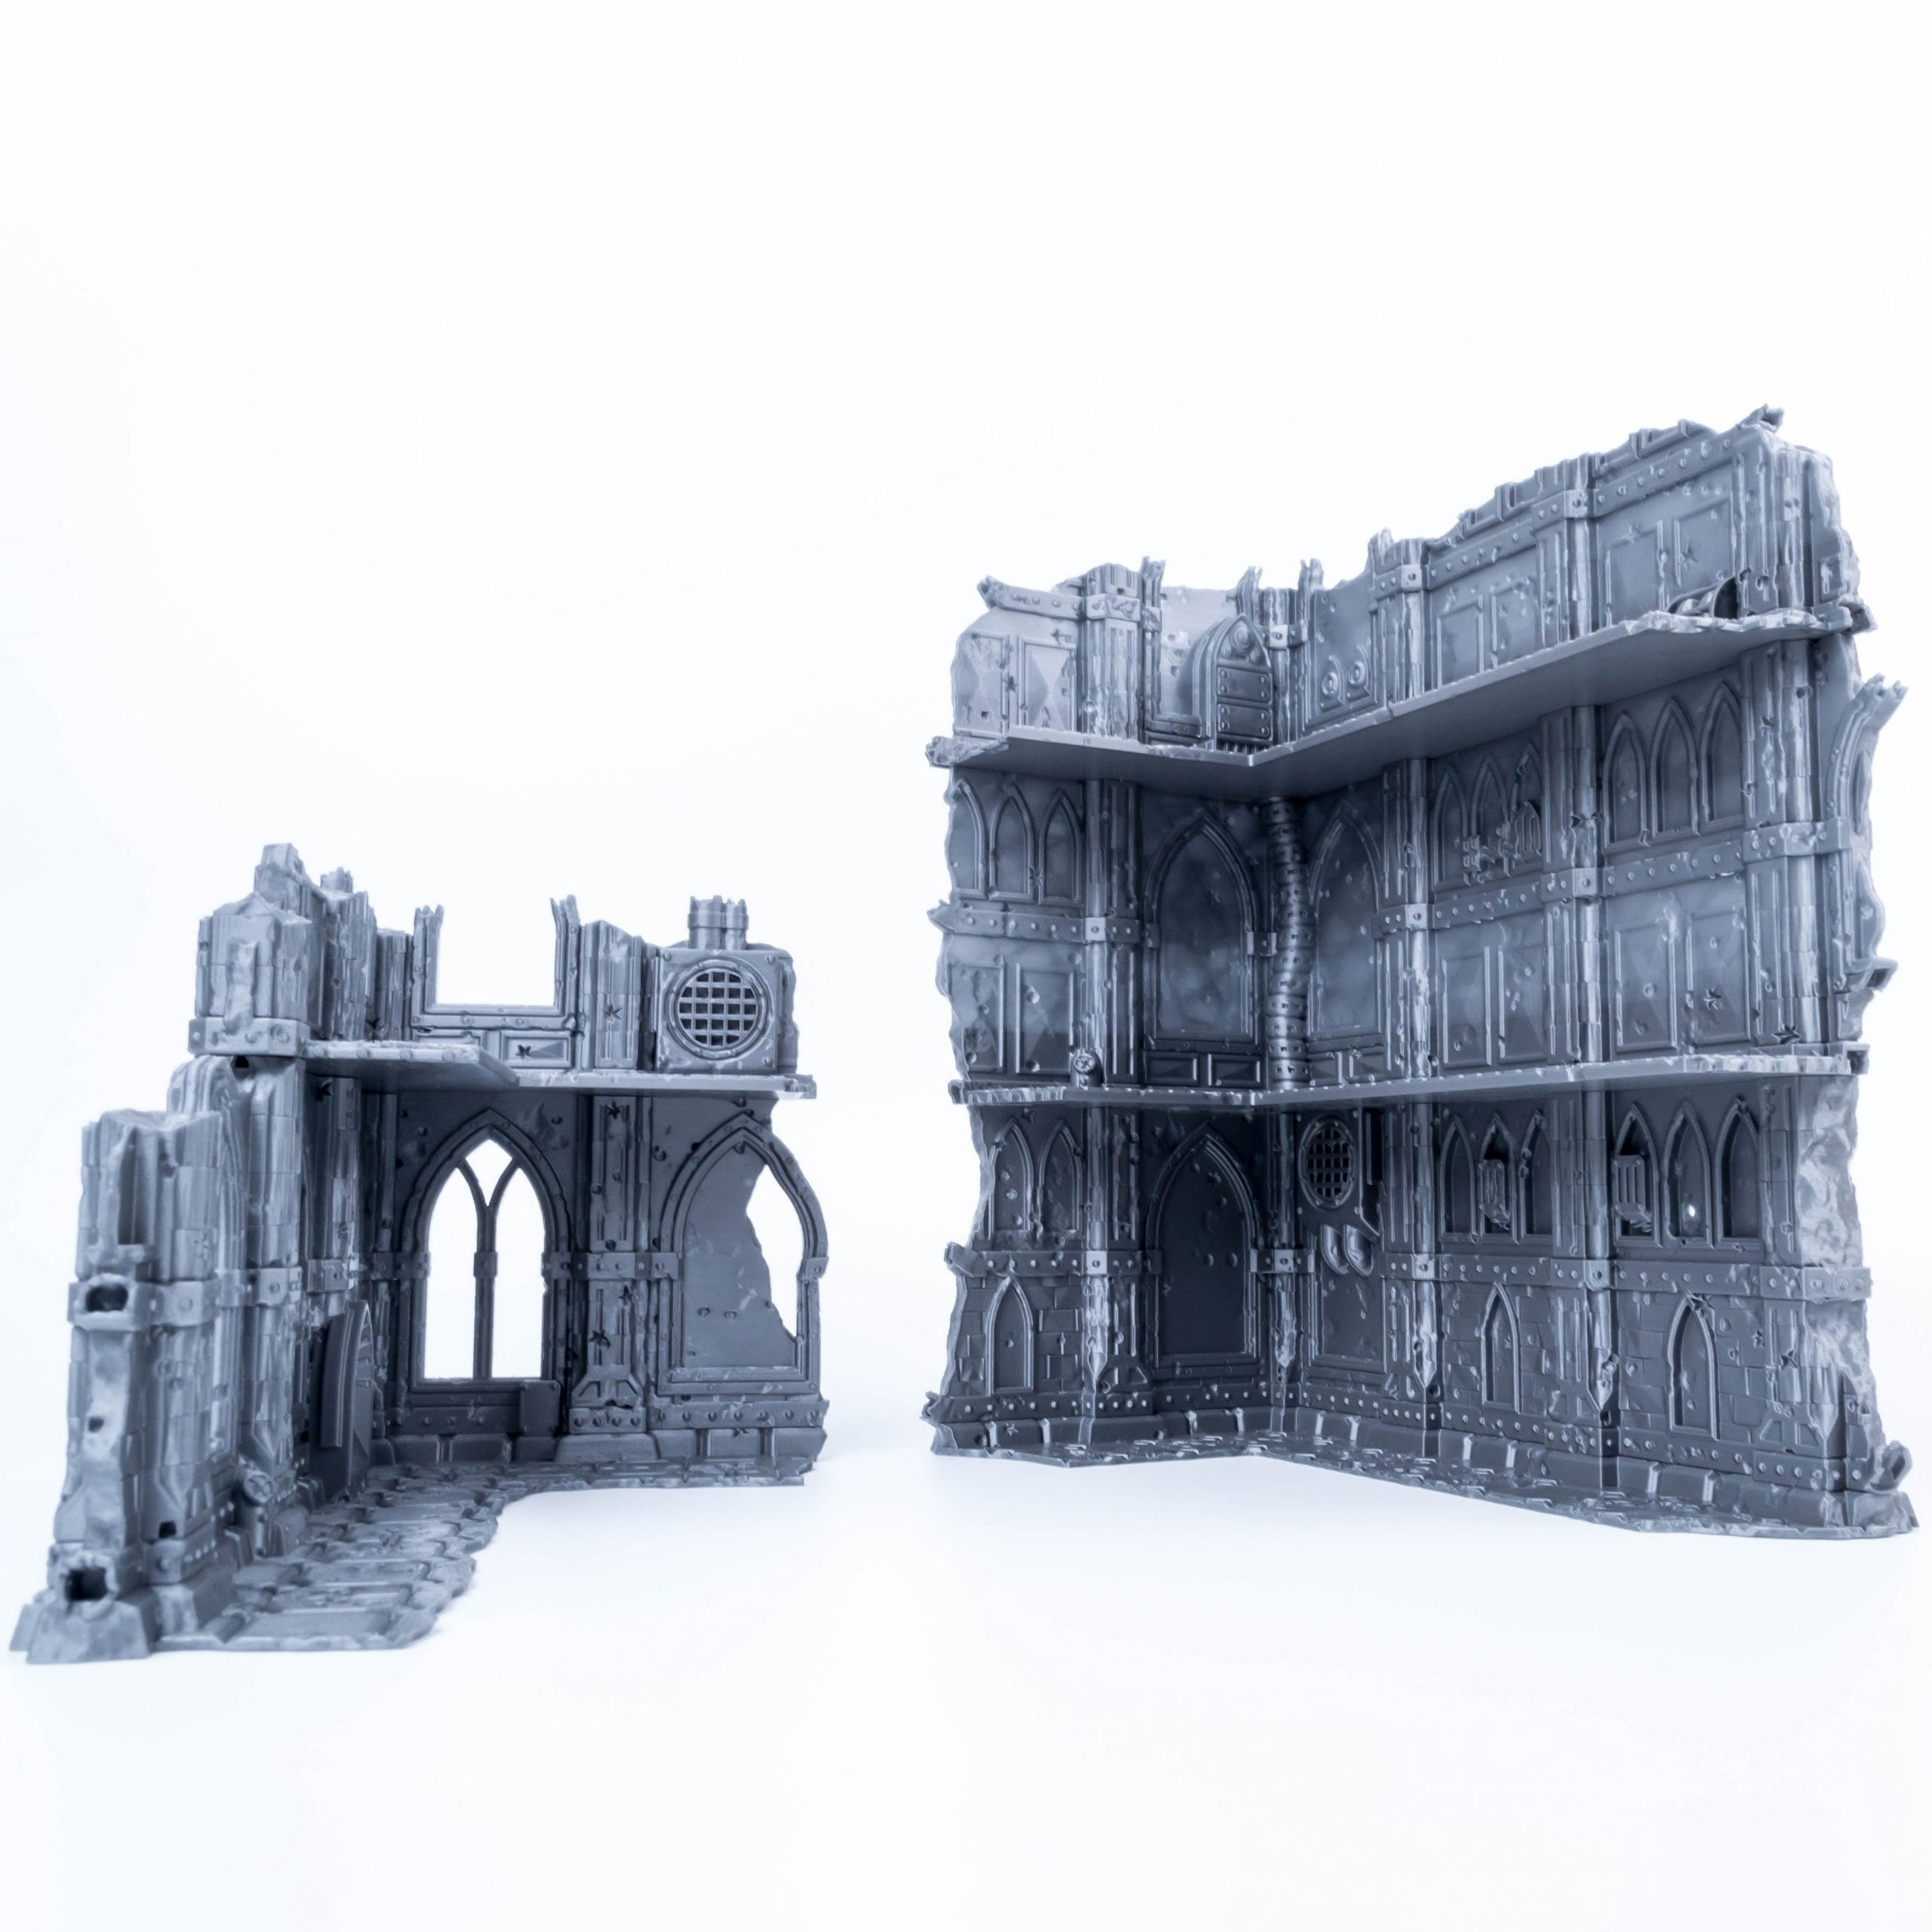
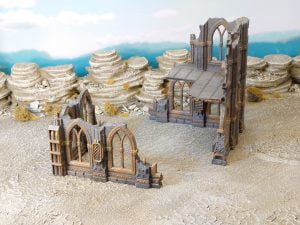
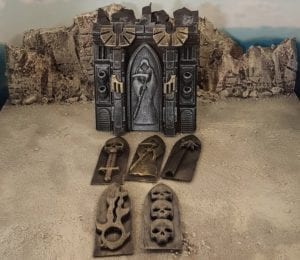
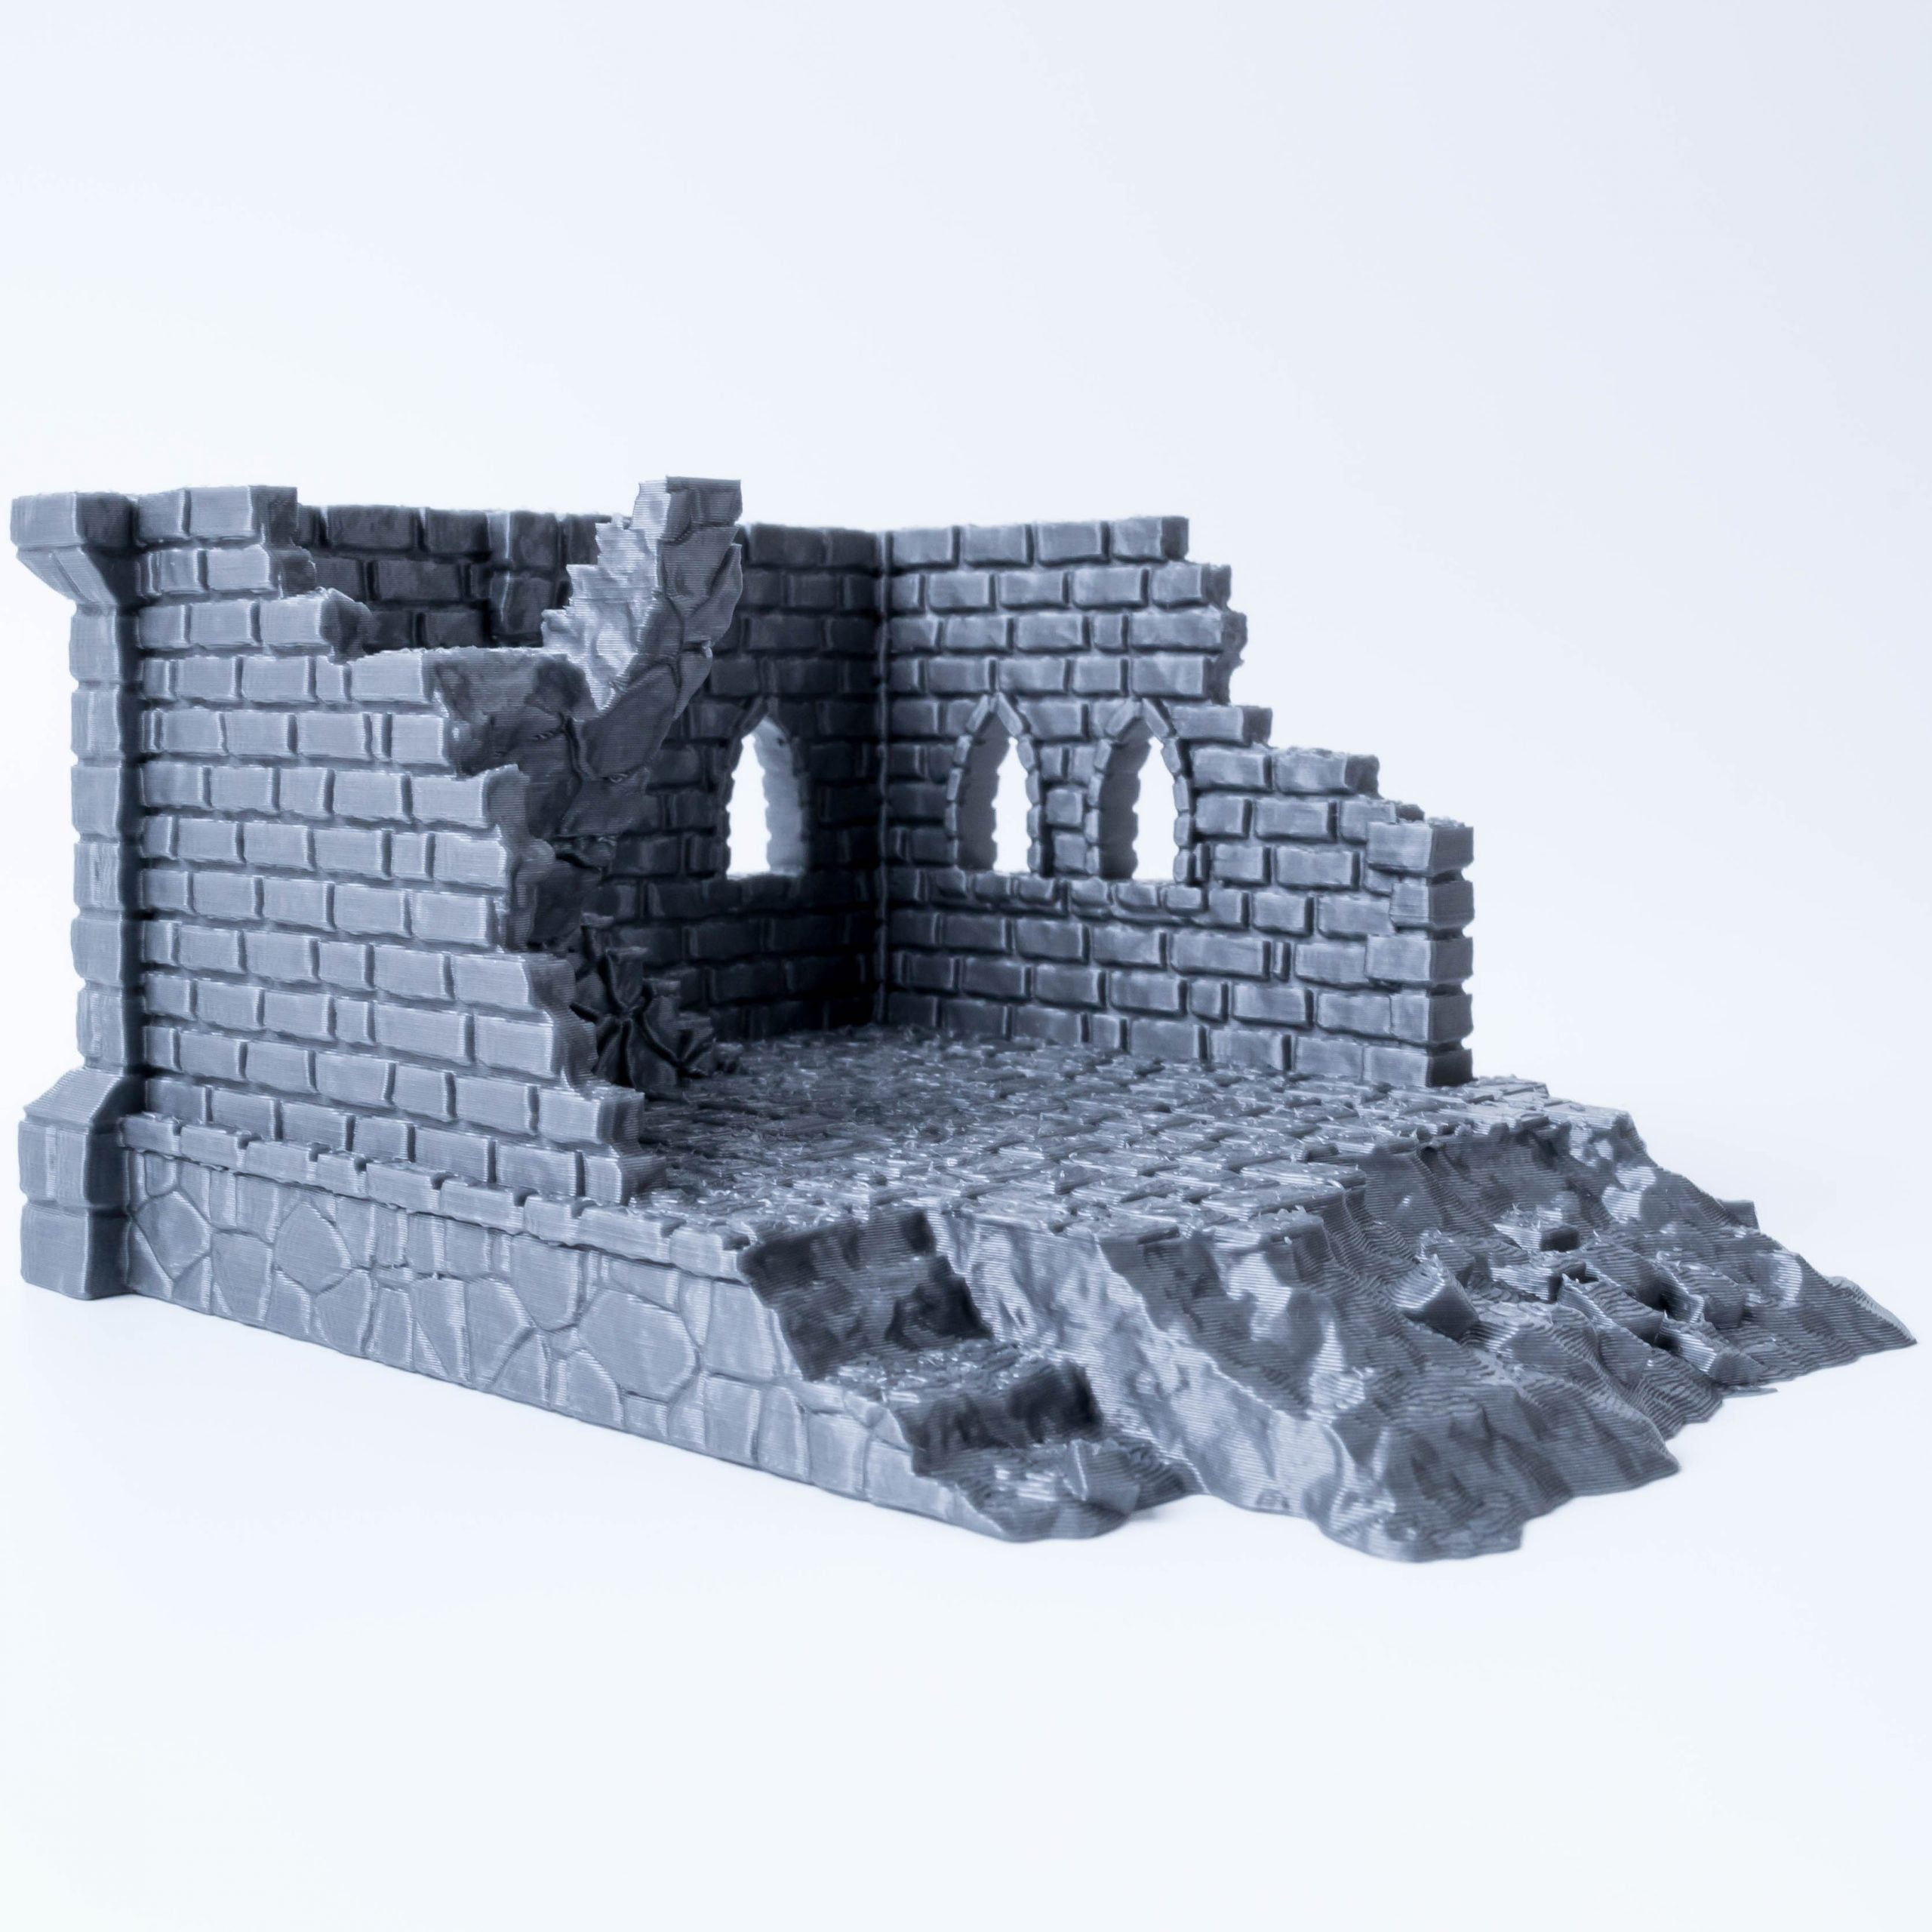
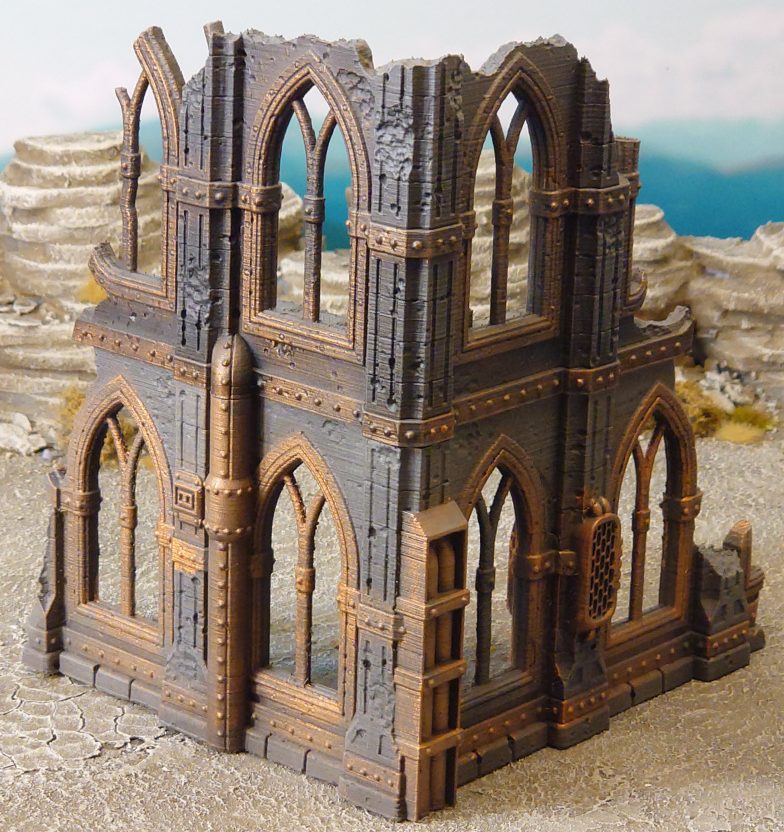
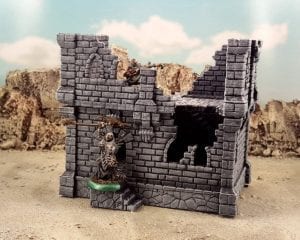
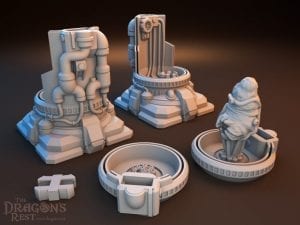
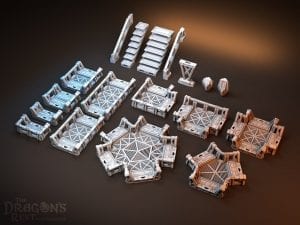
Sci-FiDomina Ferrum Ruinen Set: Gotische Ruinen Gelände
Dieses Set enthält atemberaubende gotische Ruinen-Geländestücke, die perfekt für Spiele wie Warhammer 40k geeignet sind. Mit diesen modularen Ruinen kannst du deine eigene düstere Stadtlandschaft aufbauen und epische Schlachten in einer dystopischen Zukunft austragen.
(0 reviews) -
%22%20transform%3D%22translate(.6%20.6)%20scale(1.17188)%22%20fill-opacity%3D%22.5%22%3E%3Cellipse%20fill%3D%22%233c3c3c%22%20cx%3D%22127%22%20cy%3D%22105%22%20rx%3D%2271%22%20ry%3D%2271%22%2F%3E%3Cellipse%20fill%3D%22%23f9f9f9%22%20rx%3D%221%22%20ry%3D%221%22%20transform%3D%22matrix(187.10938%20-85.6276%2014.68786%2032.09521%20192.8%20203)%22%2F%3E%3Cellipse%20fill%3D%22%23e1e1e1%22%20rx%3D%221%22%20ry%3D%221%22%20transform%3D%22matrix(-42.87806%2010.60816%20-51.21983%20-207.02998%206.5%20188.4)%22%2F%3E%3Cellipse%20fill%3D%22%23a3a3a3%22%20rx%3D%221%22%20ry%3D%221%22%20transform%3D%22matrix(6.66159%2019.68081%20-116.75572%2039.51963%20141%20177.5)%22%2F%3E%3Cellipse%20fill%3D%22%23b5b5b5%22%20rx%3D%221%22%20ry%3D%221%22%20transform%3D%22matrix(39.00497%2062.0951%20-27.67778%2017.38577%20248.9%2074.4)%22%2F%3E%3Cellipse%20fill%3D%22%235d5d5d%22%20cx%3D%22188%22%20cy%3D%22115%22%20rx%3D%2232%22%20ry%3D%2246%22%2F%3E%3Cellipse%20fill%3D%22%23b3b3b3%22%20rx%3D%221%22%20ry%3D%221%22%20transform%3D%22matrix(47.18906%20-8.69165%205.31738%2028.86936%2014.8%2043.5)%22%2F%3E%3Cellipse%20fill%3D%22%23fbfbfb%22%20rx%3D%221%22%20ry%3D%221%22%20transform%3D%22matrix(-12.33259%20-17.5475%2026.42606%20-18.57254%20239.4%20194.4)%22%2F%3E%3Cellipse%20fill%3D%22%23565656%22%20rx%3D%221%22%20ry%3D%221%22%20transform%3D%22matrix(60.774%20-27.44051%2011.62296%2025.742%2084.1%2092.2)%22%2F%3E%3Cellipse%20fill%3D%22%238f8f8f%22%20rx%3D%221%22%20ry%3D%221%22%20transform%3D%22matrix(11.15586%2048.23815%20-20.18831%204.66888%2032.4%20114.9)%22%2F%3E%3Cellipse%20fill%3D%22%237d7d7d%22%20rx%3D%221%22%20ry%3D%221%22%20transform%3D%22matrix(-5.33503%20-11.7342%2066.71767%20-30.3336%20102.5%2043.6)%22%2F%3E%3Cellipse%20fill%3D%22%23c9c9c9%22%20cx%3D%2214%22%20cy%3D%22182%22%20rx%3D%2257%22%20ry%3D%2227%22%2F%3E%3Cpath%20fill%3D%22%23aeaeae%22%20d%3D%22M87%2038l49-54L20%2043z%22%2F%3E%3Cpath%20fill%3D%22%23282828%22%20d%3D%22M83%2081l51%201-54%2026z%22%2F%3E%3Cpath%20fill%3D%22%23fefefe%22%20d%3D%22M-1.7%20222.1l-.6-38%2016-.2.6%2038z%22%2F%3E%3C%2Fg%3E%3C%2Fsvg%3E) Gebäude und Zelte
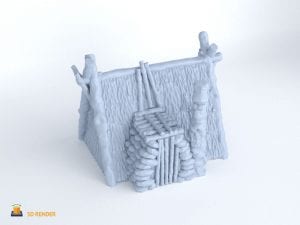
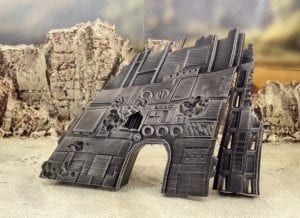
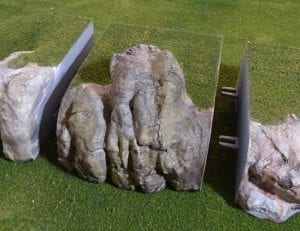
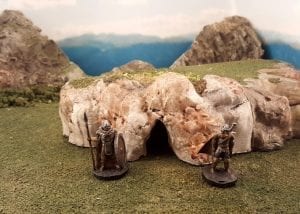
Gebäude und ZelteNackte Steinruine für WWII oder Fantasy-Kriegsspiele (Ein Stück)
Wenn du ein einfaches und vielseitiges Geländestück für deine WWII- oder Fantasy-Wargames suchst, wirst du diese nackte Steinruine lieben. Dieses Modell ist eine einteilige Struktur, die leicht auf Ihrer Tischplatte platziert werden kann.
(0 reviews) -
%22%20transform%3D%22translate(.6%20.6)%20scale(1.1914)%22%20fill-opacity%3D%22.5%22%3E%3Cpath%20fill%3D%22%237a768e%22%20d%3D%22M144%208L-6%20196l231-61z%22%2F%3E%3Cellipse%20rx%3D%221%22%20ry%3D%221%22%20transform%3D%22rotate(121.1%20-12.7%2022.5)%20scale(251%2065.64066)%22%2F%3E%3Cellipse%20fill%3D%22%230a0a09%22%20rx%3D%221%22%20ry%3D%221%22%20transform%3D%22matrix(2.52572%20-250.9873%2024.44567%20.246%20232.3%20126.8)%22%2F%3E%3Cellipse%20fill%3D%22%235645af%22%20rx%3D%221%22%20ry%3D%221%22%20transform%3D%22rotate(33.4%20-110.2%20358.6)%20scale(29.34387%2051.17048)%22%2F%3E%3Cellipse%20fill%3D%22%23171814%22%20rx%3D%221%22%20ry%3D%221%22%20transform%3D%22matrix(107.82638%20-.20663%20.06505%2033.94716%20167.9%200)%22%2F%3E%3Cellipse%20fill%3D%22%230e0f0c%22%20rx%3D%221%22%20ry%3D%221%22%20transform%3D%22matrix(43.67555%20-57.54041%2019.89924%2015.10435%20178.2%20255)%22%2F%3E%3Cpath%20fill%3D%22%231c1d17%22%20d%3D%22M-47%20156.5l65.7-21.3L67%20283.5%201.3%20304.8z%22%2F%3E%3Cellipse%20fill%3D%22%2352544c%22%20cx%3D%2270%22%20cy%3D%22178%22%20rx%3D%2259%22%20ry%3D%2259%22%2F%3E%3Cellipse%20fill%3D%22%2362645a%22%20rx%3D%221%22%20ry%3D%221%22%20transform%3D%22matrix(-49.20396%2049.05577%20-28.9233%20-29.01067%20130.6%2070)%22%2F%3E%3Cellipse%20rx%3D%221%22%20ry%3D%221%22%20transform%3D%22rotate(-136.3%208.3%202.2)%20scale(21.45067%2039.5144)%22%2F%3E%3Cellipse%20fill%3D%22%23434056%22%20cx%3D%22207%22%20cy%3D%22129%22%20rx%3D%2215%22%20ry%3D%2259%22%2F%3E%3Cellipse%20fill%3D%22%236d6e6c%22%20cx%3D%2259%22%20cy%3D%22170%22%20rx%3D%2222%22%20ry%3D%2232%22%2F%3E%3Cellipse%20fill%3D%22%233d3d3c%22%20cx%3D%22119%22%20cy%3D%22184%22%20rx%3D%2237%22%20ry%3D%2237%22%2F%3E%3Cellipse%20rx%3D%221%22%20ry%3D%221%22%20transform%3D%22matrix(-12.53844%20-18.88945%2016.58351%20-11.0078%20241.3%200)%22%2F%3E%3Cellipse%20fill%3D%22%23665aa3%22%20rx%3D%221%22%20ry%3D%221%22%20transform%3D%22matrix(13.75555%20-32.33532%2021.07508%208.96541%20172.7%20112.7)%22%2F%3E%3C%2Fg%3E%3C%2Fsvg%3E) Gebäude und Zelte
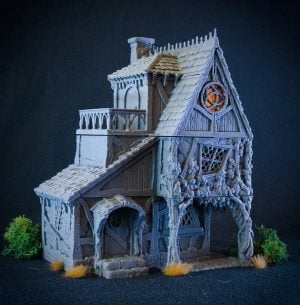
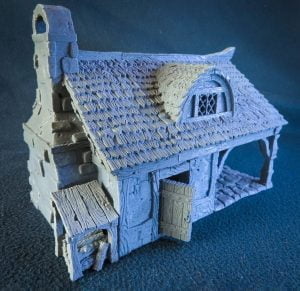
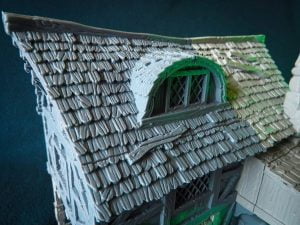
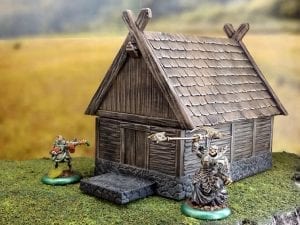
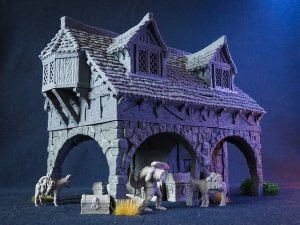
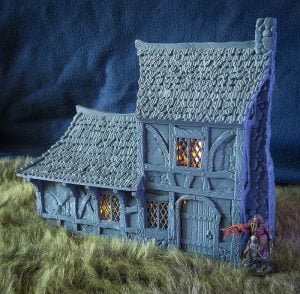
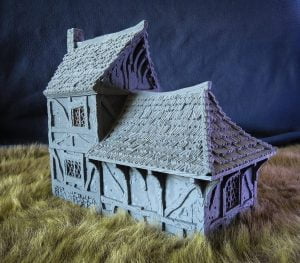
Gebäude und ZelteHaus des Heilers 28mm Maßstab Gebäude für mittelalterliche und Fantasy-Dorf. Stadt Tarok
Sie können die Türen dieses mittelalterlichen Heilerhauses öffnen und schließen, um Ihre Tischplatte lebendiger zu gestalten. Alle Risse und jedes Detail werden individuell modelliert. Bei diesem Modell gibt es einige sich wiederholende Muster.
(0 reviews) -
%22%20transform%3D%22translate(.6%20.6)%20scale(1.17188)%22%20fill-opacity%3D%22.5%22%3E%3Cellipse%20fill%3D%22%23dadada%22%20rx%3D%221%22%20ry%3D%221%22%20transform%3D%22matrix(-74.71496%20-7.69895%205.52902%20-53.65673%20119.1%2097.9)%22%2F%3E%3Cpath%20d%3D%22M253%20207L271-5%20164-2z%22%2F%3E%3Cpath%20d%3D%22M147.2-68.5l25.3%2078-181.7%2059-25.3-78z%22%2F%3E%3Cellipse%20fill%3D%22%23050505%22%20rx%3D%221%22%20ry%3D%221%22%20transform%3D%22matrix(145.49648%20114.49444%20-22.55308%2028.65986%2016.3%20167)%22%2F%3E%3Cellipse%20rx%3D%221%22%20ry%3D%221%22%20transform%3D%22rotate(-126.1%20150.5%2041)%20scale(29.5527%2048.13093)%22%2F%3E%3Cellipse%20fill%3D%22%23626262%22%20rx%3D%221%22%20ry%3D%221%22%20transform%3D%22rotate(-115.2%20130.4%20-15)%20scale(52.95248%2025.58332)%22%2F%3E%3Cellipse%20fill%3D%22%23b6b6b6%22%20rx%3D%221%22%20ry%3D%221%22%20transform%3D%22matrix(-55.0167%20-5.78249%204.06902%20-38.71412%20118.1%2093.4)%22%2F%3E%3Cellipse%20fill%3D%22%23161616%22%20rx%3D%221%22%20ry%3D%221%22%20transform%3D%22rotate(-70.5%2038.6%2027.3)%20scale(167.37484%2028.79731)%22%2F%3E%3Cellipse%20fill%3D%22%23666%22%20cx%3D%22108%22%20cy%3D%22146%22%20rx%3D%2288%22%20ry%3D%2217%22%2F%3E%3Cellipse%20fill%3D%22%23777%22%20cx%3D%22100%22%20cy%3D%2246%22%20rx%3D%2265%22%20ry%3D%2213%22%2F%3E%3Cellipse%20fill%3D%22%237b7b7b%22%20rx%3D%221%22%20ry%3D%221%22%20transform%3D%22matrix(22.92008%20-.27703%20.45073%2037.29171%2054.7%20100.8)%22%2F%3E%3Cellipse%20fill%3D%22%231c1c1c%22%20rx%3D%221%22%20ry%3D%221%22%20transform%3D%22matrix(-231.31015%20-48.97973%205.09775%20-24.07446%20207%2019.3)%22%2F%3E%3Cpath%20fill%3D%22%23d2d2d2%22%20d%3D%22M83%2075h59v20H83z%22%2F%3E%3Cellipse%20fill%3D%22%23505050%22%20rx%3D%221%22%20ry%3D%221%22%20transform%3D%22matrix(-38.39561%204.71648%20-.8264%20-6.72745%2092.1%2028.1)%22%2F%3E%3Cellipse%20fill%3D%22%23272727%22%20rx%3D%221%22%20ry%3D%221%22%20transform%3D%22matrix(-139.47294%2066.6074%20-14.35961%20-30.0684%20211.4%20172.8)%22%2F%3E%3C%2Fg%3E%3C%2Fsvg%3E) Sci-Fi
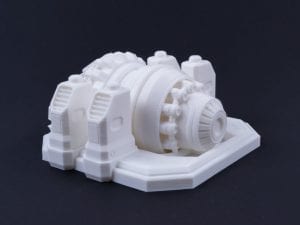
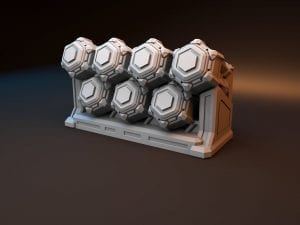
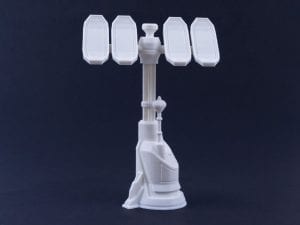
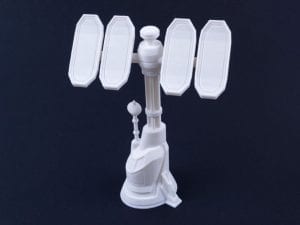
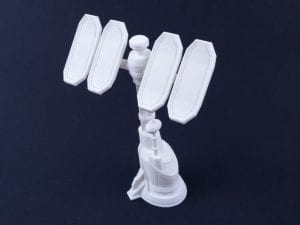
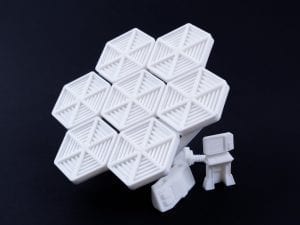
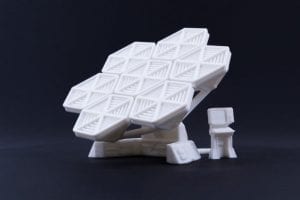
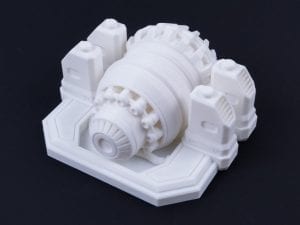
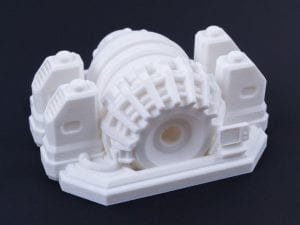
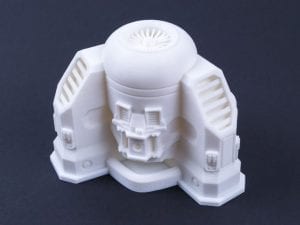
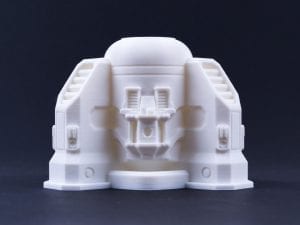
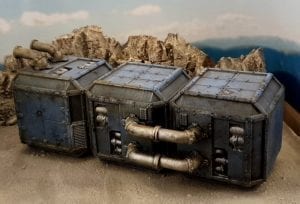
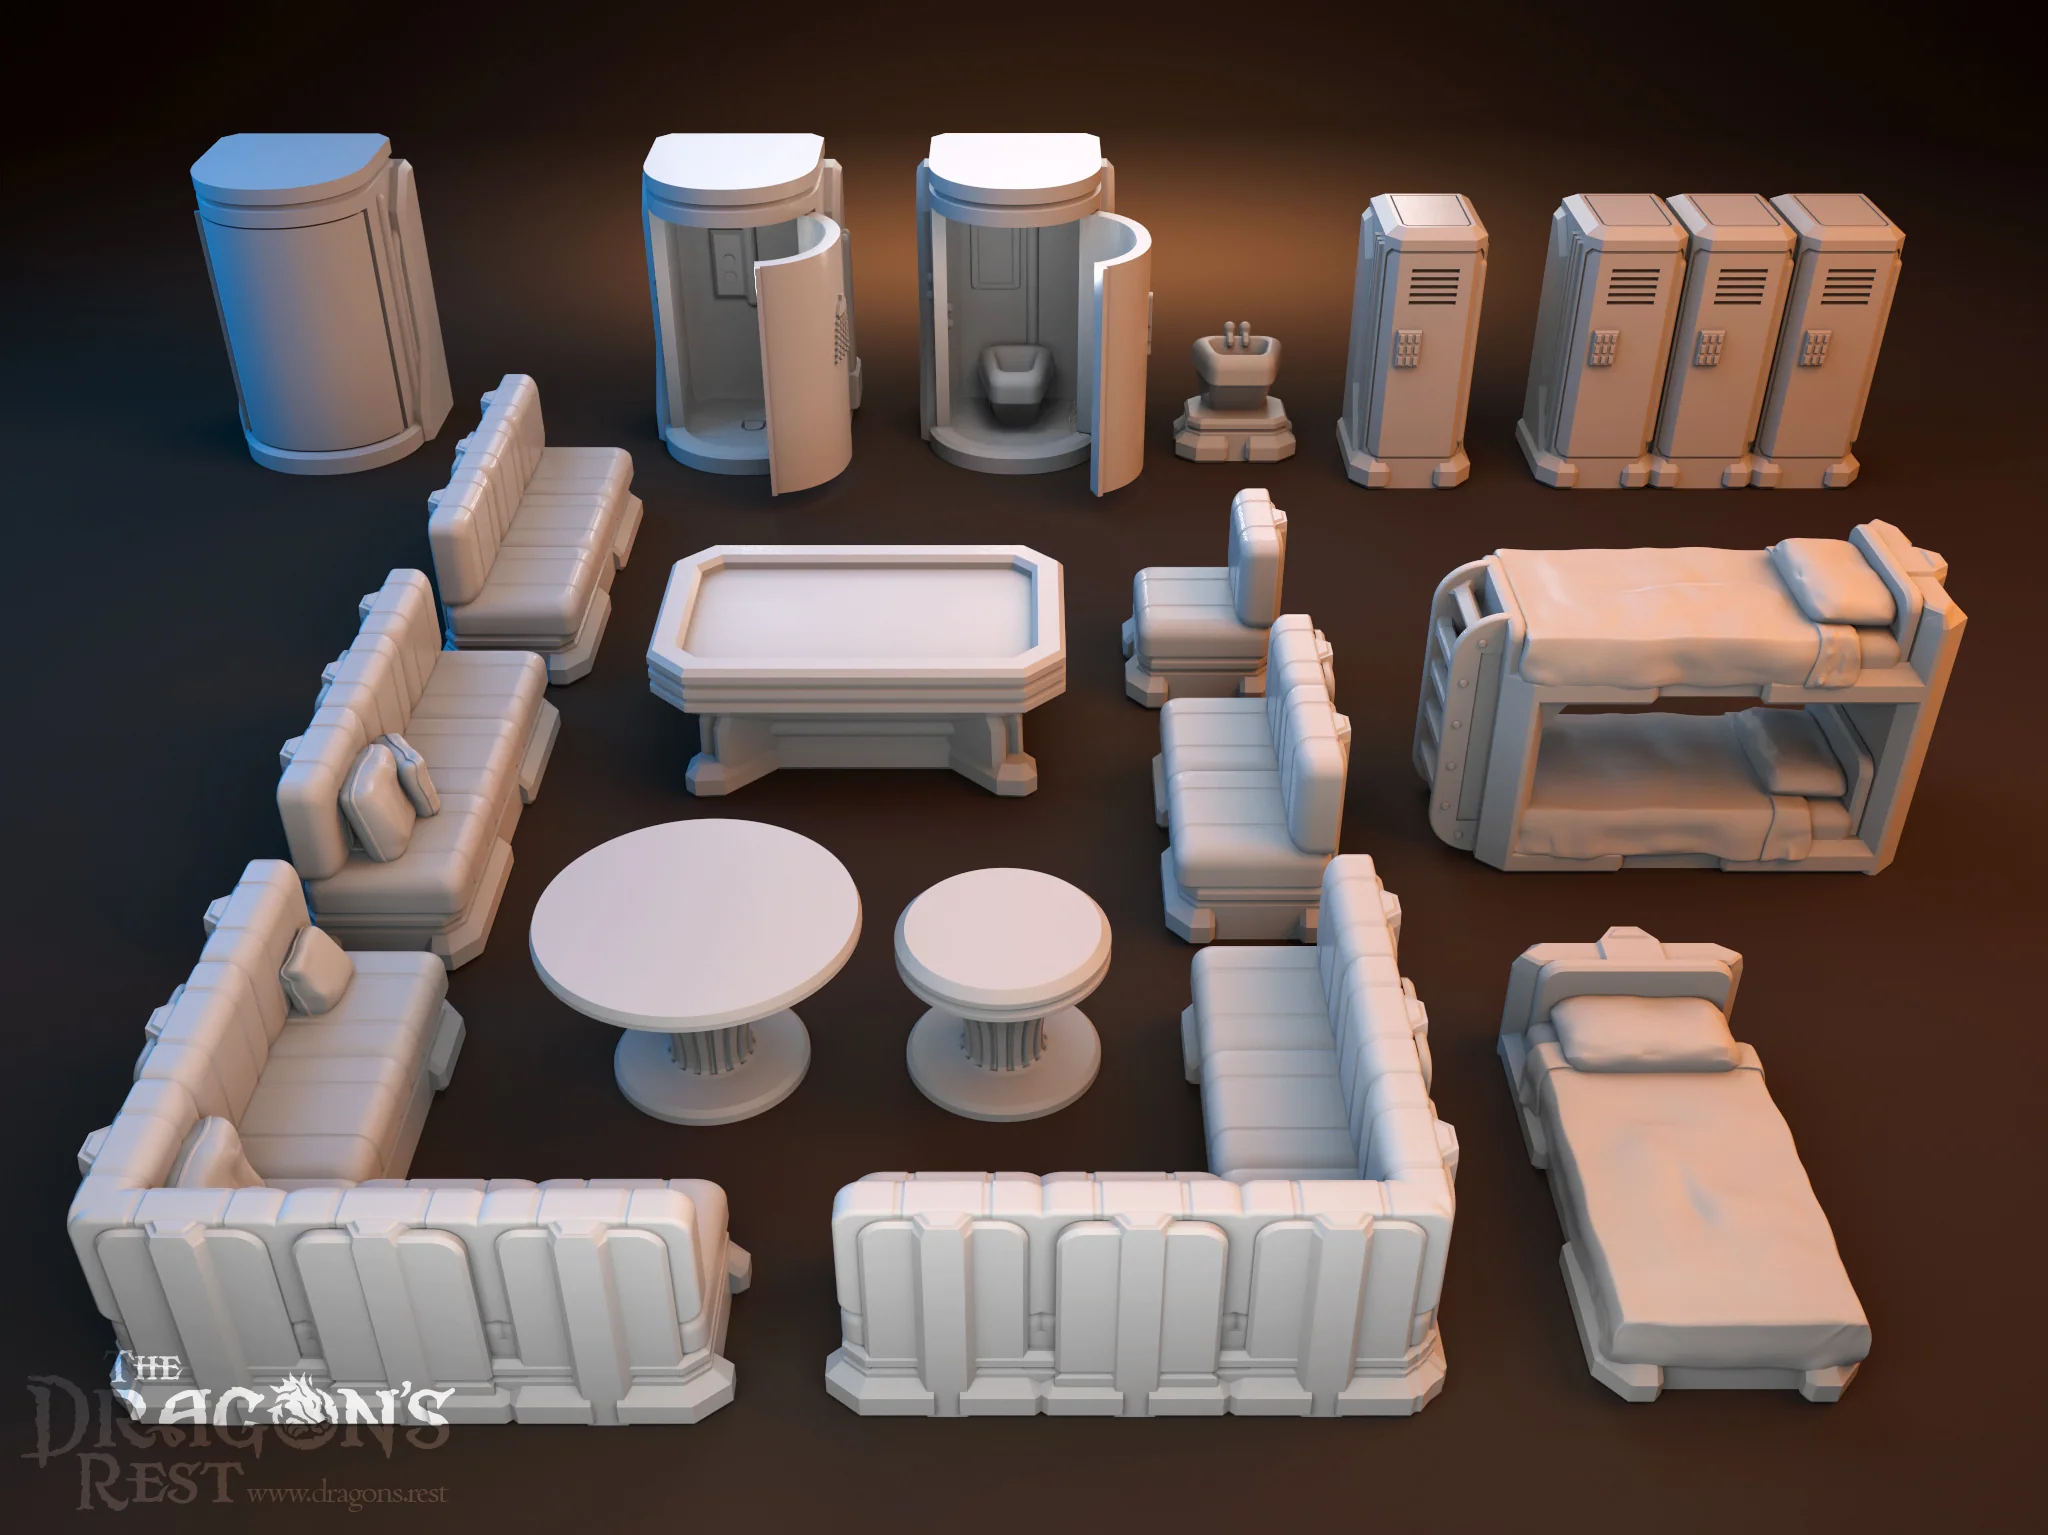
Sci-FiSci-Fi Zubehör-Set: 28mm Maßstab
Dieses Szenerie-Set enthält die folgenden Elemente:
1 x Kommunikationsturm (B129 x T61,38 x H185,37 mm)
1 x Solarmodul Größe (B177,62 x T183,08 x H144,03 mm)
1 x Sauerstoffpumpe Größe (B82 x T127 x 91 mm)
1 x Stromerzeuger Größe (B138 x T152 x H70 mm)(0 reviews) -
%22%20transform%3D%22translate(.6%20.6)%20scale(1.17188)%22%20fill-opacity%3D%22.5%22%3E%3Cellipse%20fill%3D%22%23d5d5dd%22%20rx%3D%221%22%20ry%3D%221%22%20transform%3D%22rotate(-75.8%20102.2%20-58)%20scale(40.30482%2068.06544)%22%2F%3E%3Cellipse%20fill%3D%22%23a39e2f%22%20rx%3D%221%22%20ry%3D%221%22%20transform%3D%22rotate(59.6%2086.8%20216.3)%20scale(78.89076%2043.42391)%22%2F%3E%3Cellipse%20fill%3D%22%235e5d6b%22%20rx%3D%221%22%20ry%3D%221%22%20transform%3D%22rotate(-112.7%20135.6%2025.7)%20scale(39.66726%2050.56665)%22%2F%3E%3Cellipse%20fill%3D%22%23d9d8e3%22%20rx%3D%221%22%20ry%3D%221%22%20transform%3D%22rotate(132.9%20-28.7%2082.8)%20scale(44.71986%2079.60524)%22%2F%3E%3Cellipse%20fill%3D%22%239db13c%22%20rx%3D%221%22%20ry%3D%221%22%20transform%3D%22matrix(-11.48676%20-24.12739%2042.05326%20-20.02105%2022.7%2077.7)%22%2F%3E%3Cellipse%20fill%3D%22%2384642e%22%20rx%3D%221%22%20ry%3D%221%22%20transform%3D%22matrix(14.38607%20-12.1142%2018.47168%2021.93583%20237.8%209.7)%22%2F%3E%3Cpath%20fill%3D%22%23cada95%22%20d%3D%22M212%2060l-46-36%2042%2069z%22%2F%3E%3Cellipse%20fill%3D%22%23df7c5d%22%20cx%3D%22255%22%20cy%3D%2235%22%20rx%3D%2237%22%20ry%3D%2219%22%2F%3E%3Cellipse%20fill%3D%22%239b9aa6%22%20rx%3D%221%22%20ry%3D%221%22%20transform%3D%22matrix(1.9763%2017.66332%20-60.77089%206.79948%20167.3%20106.5)%22%2F%3E%3Cellipse%20fill%3D%22%239c9ba8%22%20cx%3D%2286%22%20cy%3D%22123%22%20rx%3D%2240%22%20ry%3D%2240%22%2F%3E%3Cpath%20fill%3D%22%238d8f84%22%20d%3D%22M65%2027h10v37H65z%22%2F%3E%3Cpath%20fill%3D%22%239baf3a%22%20d%3D%22M264.6%20194.6l-27.8-3.4%202.6-21.8%2027.8%203.4z%22%2F%3E%3Cellipse%20fill%3D%22%23797880%22%20rx%3D%221%22%20ry%3D%221%22%20transform%3D%22rotate(-34.7%20323.6%20-263.6)%20scale(8.87831%2017.35729)%22%2F%3E%3Cpath%20fill%3D%22%23c3c2c6%22%20d%3D%22M213%2085L79%203l21%2092z%22%2F%3E%3Cellipse%20fill%3D%22%239c9ba8%22%20rx%3D%221%22%20ry%3D%221%22%20transform%3D%22matrix(-5.7891%20-28.6367%2050.36725%20-10.18207%2032.3%2017)%22%2F%3E%3Cellipse%20fill%3D%22%23a4b86f%22%20rx%3D%221%22%20ry%3D%221%22%20transform%3D%22matrix(-5.56541%20-36.75512%2020.91844%20-3.16744%20198.3%2031.3)%22%2F%3E%3Cpath%20fill%3D%22%239fab62%22%20d%3D%22M52.8%2052L-16%2043.4l41.2%2062.2%2050.6-41.5z%22%2F%3E%3Cpath%20fill%3D%22%239b9aa6%22%20d%3D%22M200.3%20190.5l24.6-91.8%2032.8%208.8-24.6%2091.8z%22%2F%3E%3Cellipse%20fill%3D%22%239a9aa6%22%20cx%3D%22145%22%20rx%3D%2233%22%20ry%3D%2221%22%2F%3E%3Cpath%20fill%3D%22%236f9447%22%20d%3D%22M209.8-4.6l43.6-17.6%2010.8%2026.8-43.6%2017.6z%22%2F%3E%3C%2Fg%3E%3C%2Fsvg%3E) Sci-Fi
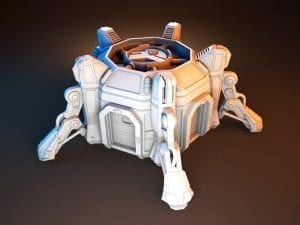
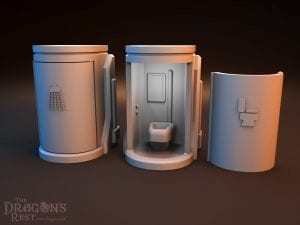
Sci-FiSci-Fi Habitat – Wüsten-Sci-Fi-Gebäude für den Sci-Fi-Forscher in dir
Futuristisches Design: Unsere Geländestücke sind elegant, modern und galaktisch inspiriert – perfekt für Spiele mit Sci-Fi-Themen. Stellen Sie sich hoch aufragende Türme, kantige Gehwege und holografische Schnittstellen vor – die Essenz einer Zukunft, in der Technologie mit dem Kosmos tanzt.
(0 reviews) -
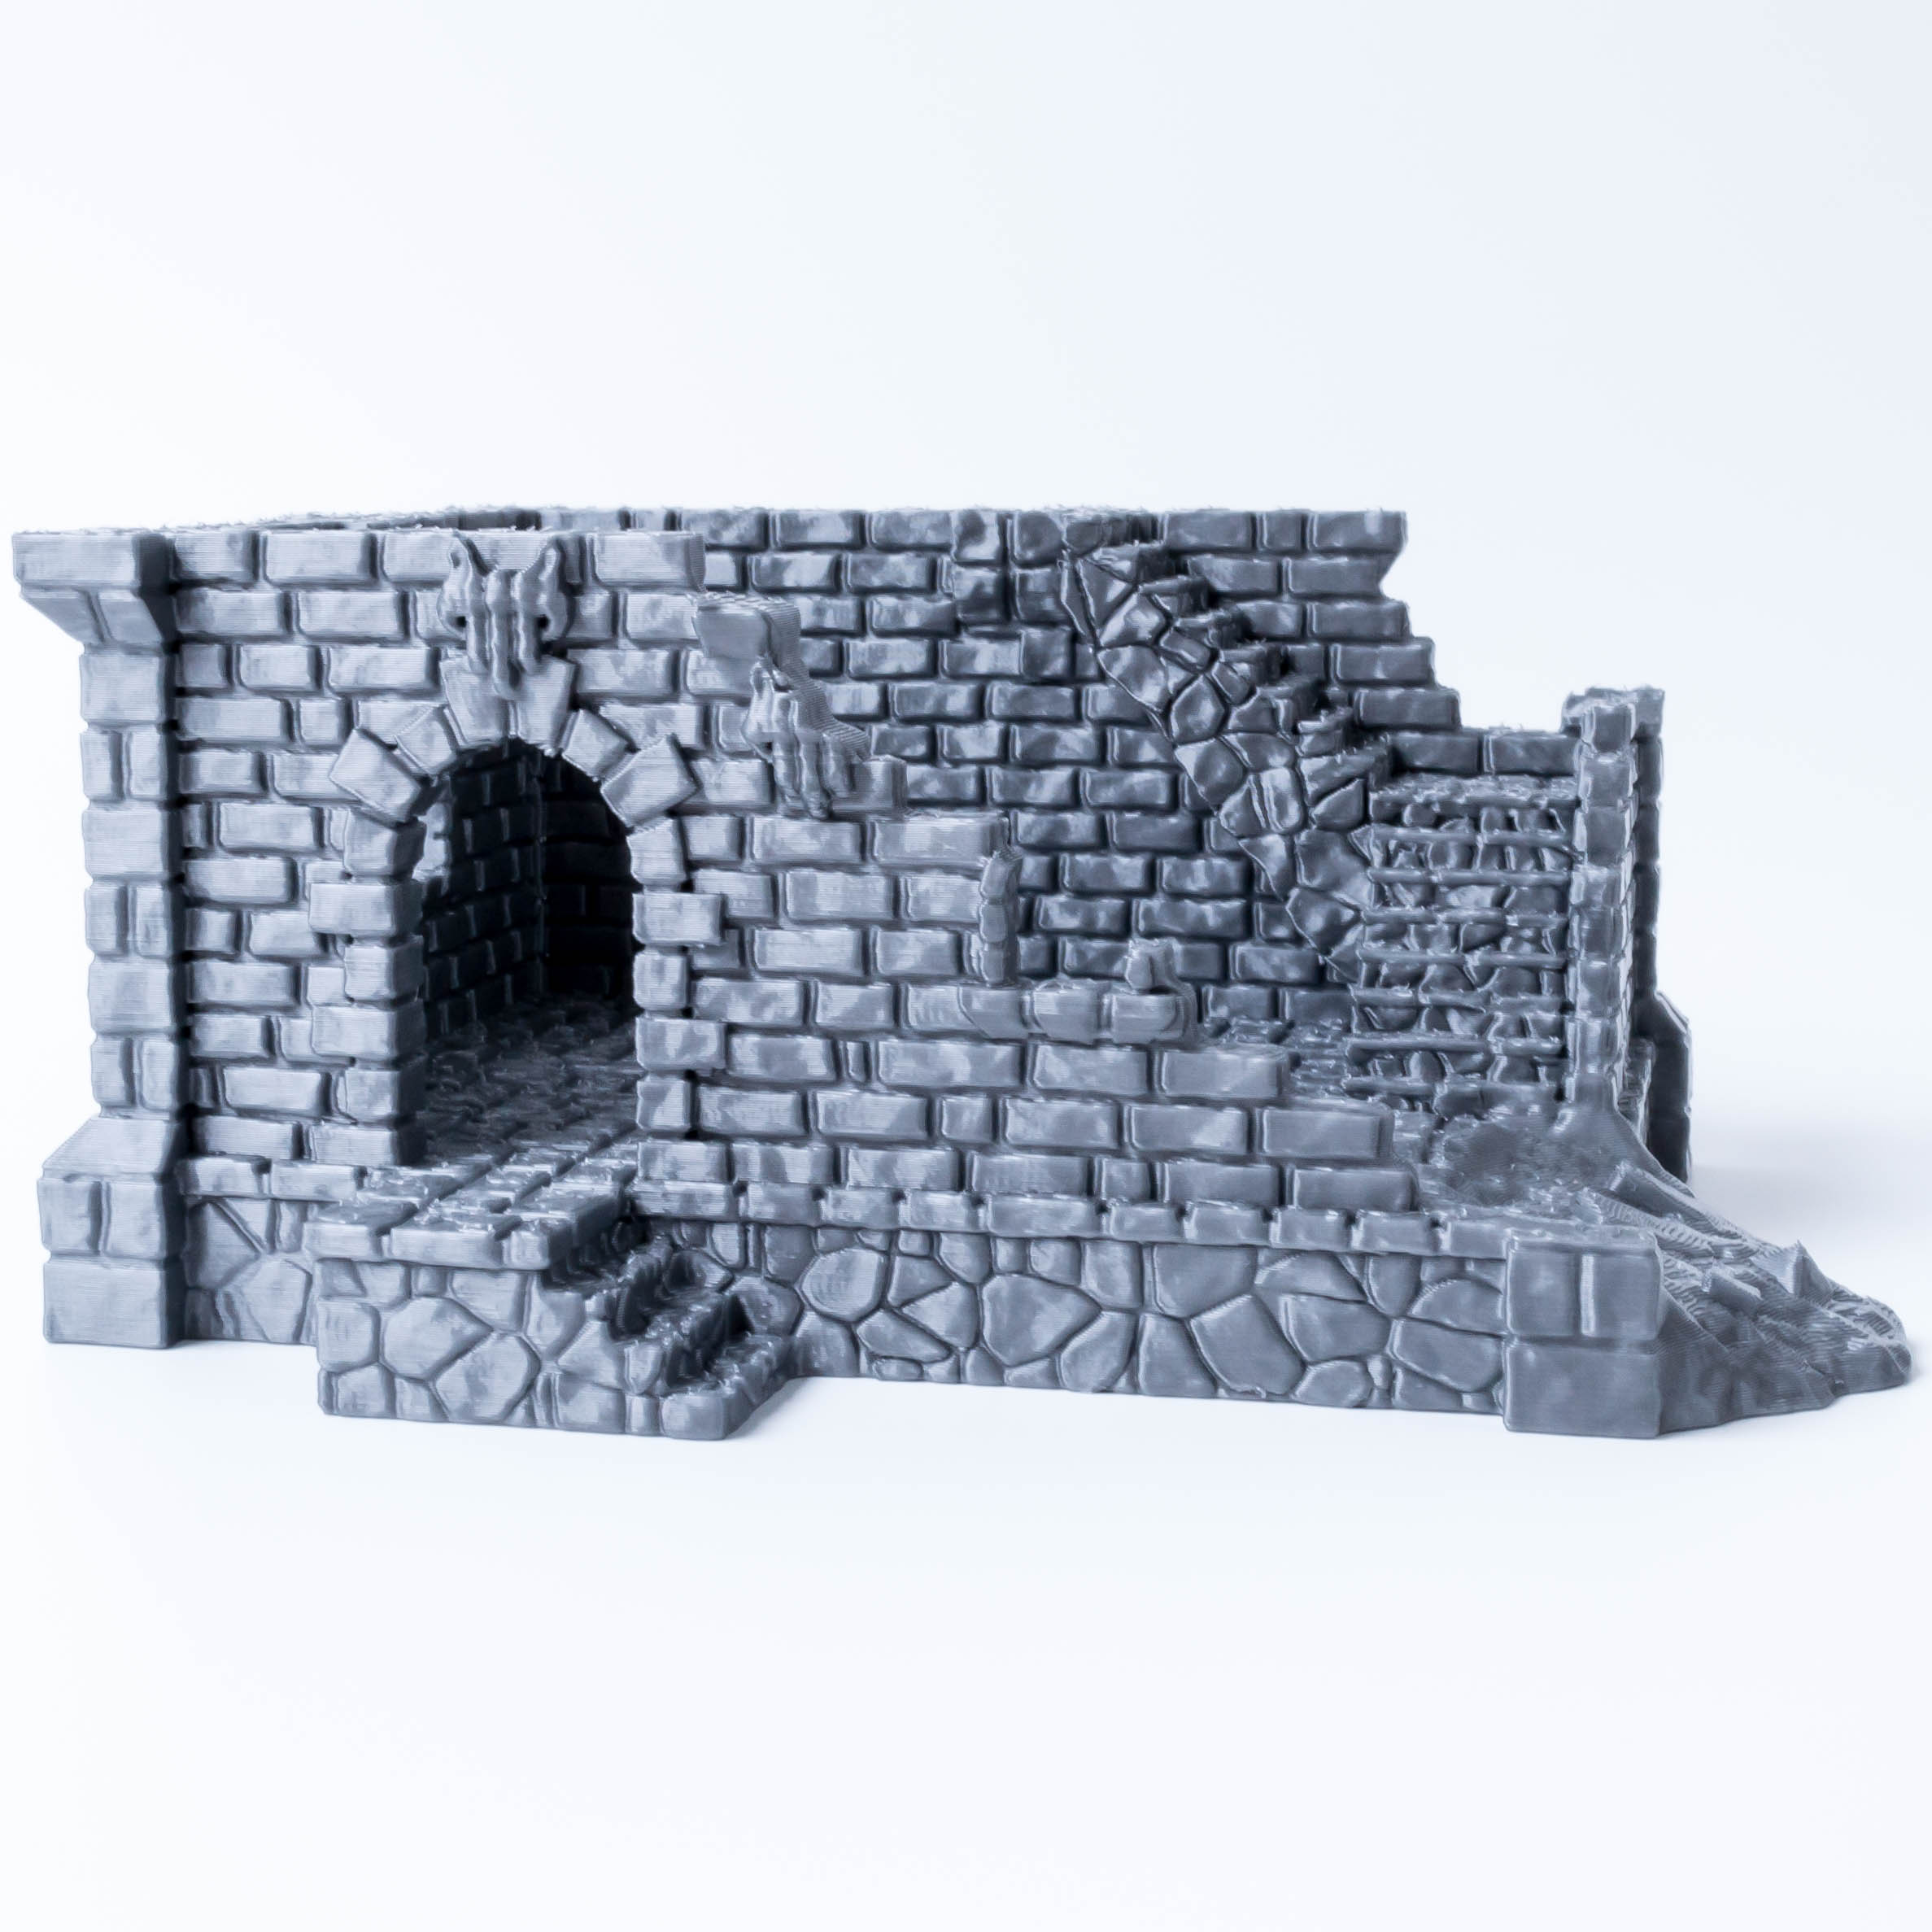
%22%20transform%3D%22translate(.6%20.6)%20scale(1.17188)%22%20fill-opacity%3D%22.5%22%3E%3Cellipse%20fill%3D%22%23282c2f%22%20rx%3D%221%22%20ry%3D%221%22%20transform%3D%22matrix(1.8481%20-48.92404%2077.62856%202.9324%20137.8%2094.1)%22%2F%3E%3Cellipse%20fill%3D%22%23feffff%22%20rx%3D%221%22%20ry%3D%221%22%20transform%3D%22matrix(8.88773%2034.7731%20-75.39631%2019.2707%20235.8%20190.2)%22%2F%3E%3Cellipse%20fill%3D%22%23f5f9fc%22%20rx%3D%221%22%20ry%3D%221%22%20transform%3D%22matrix(-65.27467%20-43.52323%2020.33808%20-30.50237%2034.2%20191)%22%2F%3E%3Cpath%20fill%3D%22%23c5c9cc%22%20d%3D%22M69.8%208.8l14.6-63.3L282.2-8.8l-14.6%2063.3z%22%2F%3E%3Cellipse%20fill%3D%22%23bb482e%22%20rx%3D%221%22%20ry%3D%221%22%20transform%3D%22matrix(16.71184%2025.24884%20-36.13056%2023.9143%2020.3%2082.7)%22%2F%3E%3Cellipse%20fill%3D%22%23b4b6b8%22%20cx%3D%22123%22%20cy%3D%22183%22%20rx%3D%2296%22%20ry%3D%2222%22%2F%3E%3Cellipse%20fill%3D%22%232a2a2a%22%20rx%3D%221%22%20ry%3D%221%22%20transform%3D%22rotate(-77.9%20119.6%20-28.6)%20scale(24.72901%2032.48376)%22%2F%3E%3Cellipse%20fill%3D%22%23696c69%22%20rx%3D%221%22%20ry%3D%221%22%20transform%3D%22matrix(-10.82458%2025.01414%20-132.36502%20-57.27946%20206.7%2083.2)%22%2F%3E%3Cellipse%20fill%3D%22%23b0b4ae%22%20rx%3D%221%22%20ry%3D%221%22%20transform%3D%22matrix(13.19012%20-18.15465%2043.60624%2031.68179%2042.3%20151.4)%22%2F%3E%3Cellipse%20fill%3D%22%23b0b4b7%22%20rx%3D%221%22%20ry%3D%221%22%20transform%3D%22matrix(64.28109%203.05662%20-.77747%2016.3503%2018.7%2010.2)%22%2F%3E%3Cellipse%20fill%3D%22%23f7f8fa%22%20rx%3D%221%22%20ry%3D%221%22%20transform%3D%22matrix(-32.02202%207.16575%20-3.71592%20-16.60554%20242.9%20194.4)%22%2F%3E%3Cellipse%20fill%3D%22%23a7bd45%22%20rx%3D%221%22%20ry%3D%221%22%20transform%3D%22matrix(5.19485%20-27.68739%2020.3276%203.81397%20255%20136.9)%22%2F%3E%3Cellipse%20fill%3D%22%23d4d4d4%22%20cx%3D%22255%22%20rx%3D%2283%22%20ry%3D%2223%22%2F%3E%3Cellipse%20fill%3D%22%23fbfbfb%22%20cx%3D%226%22%20cy%3D%22197%22%20rx%3D%2221%22%20ry%3D%2221%22%2F%3E%3Cellipse%20fill%3D%22%23abadb0%22%20rx%3D%221%22%20ry%3D%221%22%20transform%3D%22rotate(157.4%2087.7%20100.2)%20scale(35.34111%2012.93459)%22%2F%3E%3C%2Fg%3E%3C%2Fsvg%3E) Gebäude und Zelte
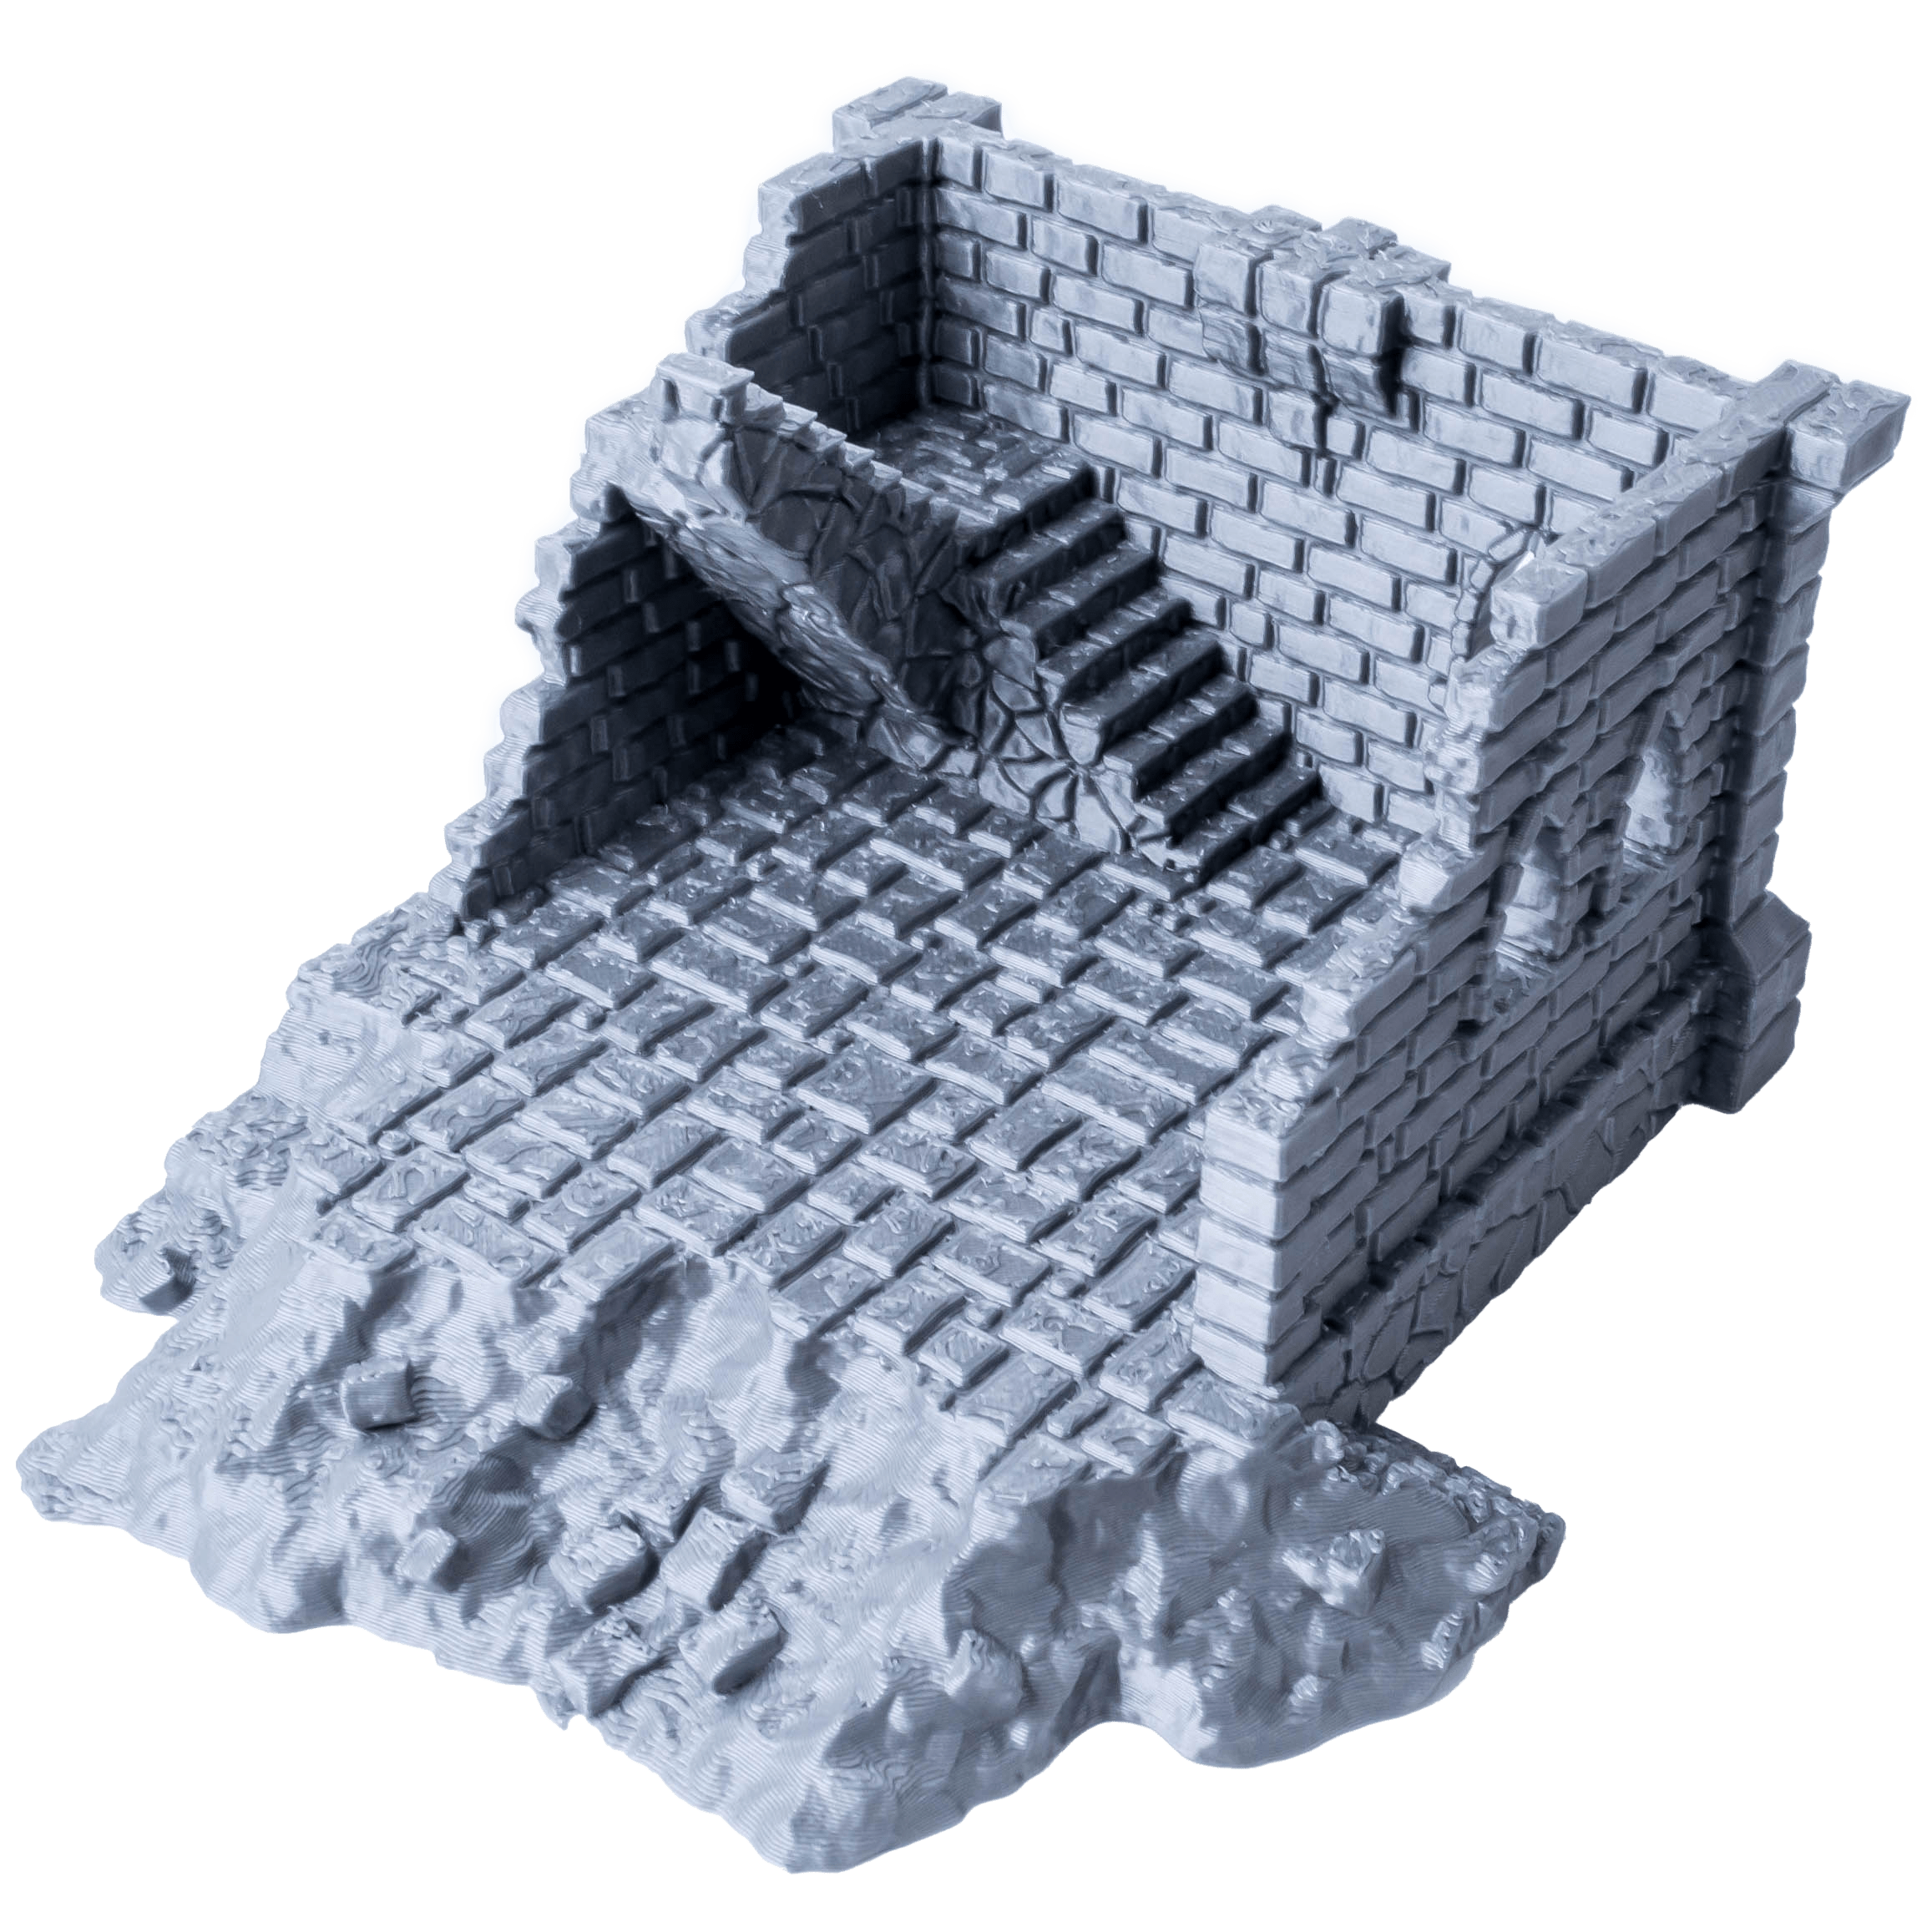
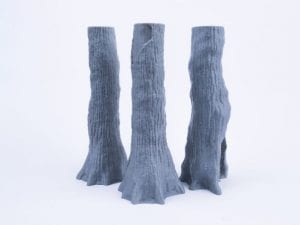
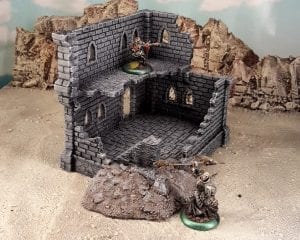
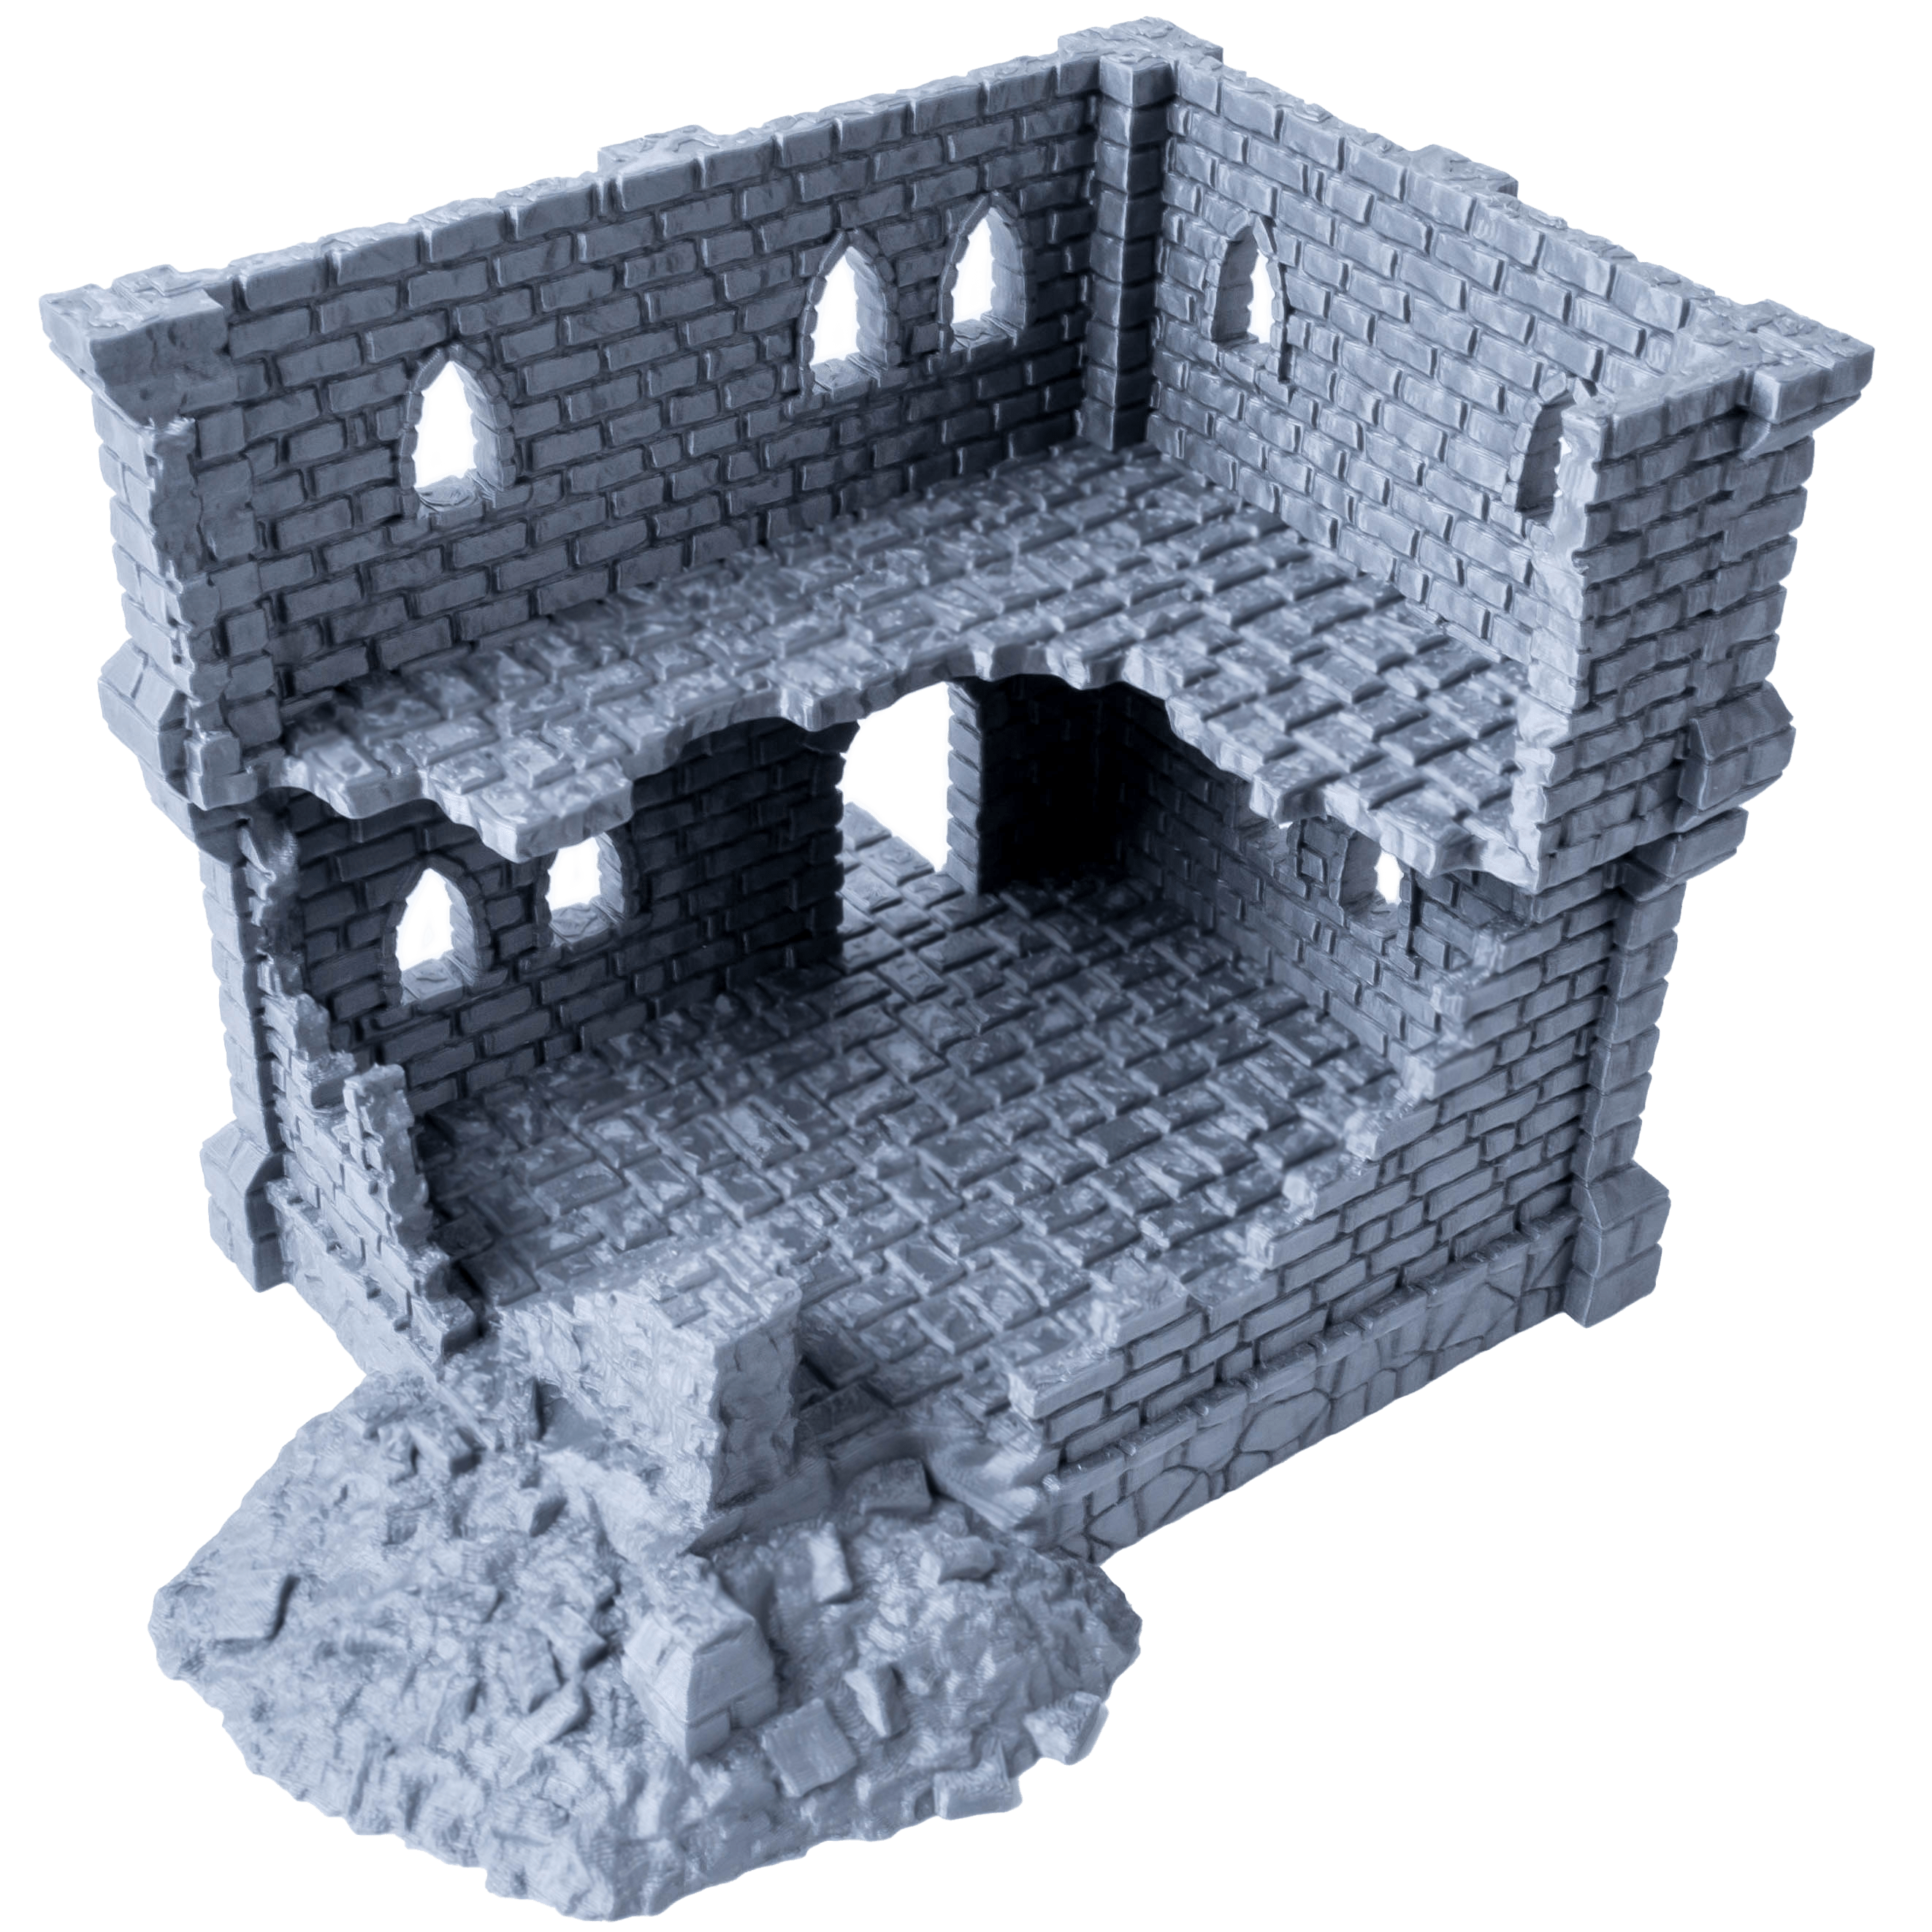
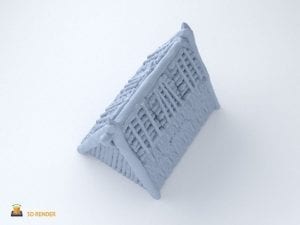
Gebäude und ZelteZweistufige 28mm Fantasy-Ruinen für Epic Adventures
Dieses sorgfältig gefertigte Geländestück ist mehr als eine bloße Kulisse und bietet ein beeindruckendes Schlachtfeld für mittelalterliche Scharmützel, fantastische Quests und spannende Frostgrave-Kämpfe.
(0 reviews) -
%22%20transform%3D%22translate(.6%20.6)%20scale(1.17188)%22%20fill-opacity%3D%22.5%22%3E%3Cellipse%20fill%3D%22%238c8c8c%22%20rx%3D%221%22%20ry%3D%221%22%20transform%3D%22matrix(129.92111%20-13.64043%205.99614%2057.11145%20137%20133.4)%22%2F%3E%3Cellipse%20fill%3D%22%23fff%22%20rx%3D%221%22%20ry%3D%221%22%20transform%3D%22matrix(254.72853%20-11.76333%201.90894%2041.33709%2099%2026.6)%22%2F%3E%3Cellipse%20fill%3D%22%23fff%22%20rx%3D%221%22%20ry%3D%221%22%20transform%3D%22matrix(231.9193%20-1.59982%20.18508%2026.8304%2089.6%20238.2)%22%2F%3E%3Cpath%20fill%3D%22%23fff%22%20d%3D%22M-19.5-33.6l229.3-28.1%2011.7%2095.3L-7.8%2061.7z%22%2F%3E%3Cellipse%20fill%3D%22%23fff%22%20cx%3D%22163%22%20cy%3D%22246%22%20rx%3D%22255%22%20ry%3D%2216%22%2F%3E%3Cellipse%20fill%3D%22%23919191%22%20cx%3D%22180%22%20cy%3D%22135%22%20rx%3D%2242%22%20ry%3D%2242%22%2F%3E%3Cellipse%20fill%3D%22%23d4d4d4%22%20cx%3D%22121%22%20cy%3D%22180%22%20rx%3D%2233%22%20ry%3D%2245%22%2F%3E%3Cpath%20fill%3D%22%239a9a9a%22%20d%3D%22M42%20109h47v95H42z%22%2F%3E%3Cellipse%20fill%3D%22%23d3d3d3%22%20rx%3D%221%22%20ry%3D%221%22%20transform%3D%22rotate(-84.4%20112.9%20-49.1)%20scale(27.202%2082.32569)%22%2F%3E%3Cellipse%20fill%3D%22%23bababa%22%20rx%3D%221%22%20ry%3D%221%22%20transform%3D%22rotate(151%201%2060.4)%20scale(83.61908%2018.00576)%22%2F%3E%3Cellipse%20fill%3D%22%23cbcbcb%22%20rx%3D%221%22%20ry%3D%221%22%20transform%3D%22matrix(-49.78543%20-87.6382%2014.8321%20-8.4258%2021.3%20150.8)%22%2F%3E%3Cellipse%20fill%3D%22%23949494%22%20cx%3D%22110%22%20cy%3D%22116%22%20rx%3D%2240%22%20ry%3D%2221%22%2F%3E%3Cellipse%20fill%3D%22%23dadada%22%20rx%3D%221%22%20ry%3D%221%22%20transform%3D%22matrix(16.29992%20-.02845%20.19016%20108.95573%20158.4%2069.7)%22%2F%3E%3Cellipse%20fill%3D%22%23fff%22%20cx%3D%2219%22%20rx%3D%22186%22%20ry%3D%2248%22%2F%3E%3Cellipse%20fill%3D%22%23b0b0b0%22%20rx%3D%221%22%20ry%3D%221%22%20transform%3D%22matrix(-6.21445%20-13.68604%2035.24585%20-16.00416%20196.4%20184)%22%2F%3E%3Cellipse%20fill%3D%22%23fafafa%22%20rx%3D%221%22%20ry%3D%221%22%20transform%3D%22matrix(-13.76506%201.08584%20-6.49723%20-82.36445%2014.4%20231.4)%22%2F%3E%3Cellipse%20fill%3D%22%23fff%22%20rx%3D%221%22%20ry%3D%221%22%20transform%3D%22matrix(253.99047%20-22.66805%201.68612%2018.89264%20113.6%20253.2)%22%2F%3E%3Cellipse%20fill%3D%22%23e7e7e7%22%20rx%3D%221%22%20ry%3D%221%22%20transform%3D%22matrix(45.53417%20-39.75%2014.57539%2016.6963%20247.2%20188)%22%2F%3E%3Cellipse%20fill%3D%22%23fff%22%20rx%3D%221%22%20ry%3D%221%22%20transform%3D%22matrix(-10.03004%20-28.16761%2061.75715%20-21.99073%2025.6%2034.6)%22%2F%3E%3Cpath%20fill%3D%22%23b9b9b9%22%20d%3D%22M271%2085l-71-11%2068%20105z%22%2F%3E%3C%2Fg%3E%3C%2Fsvg%3E) Terrain & Szenerie
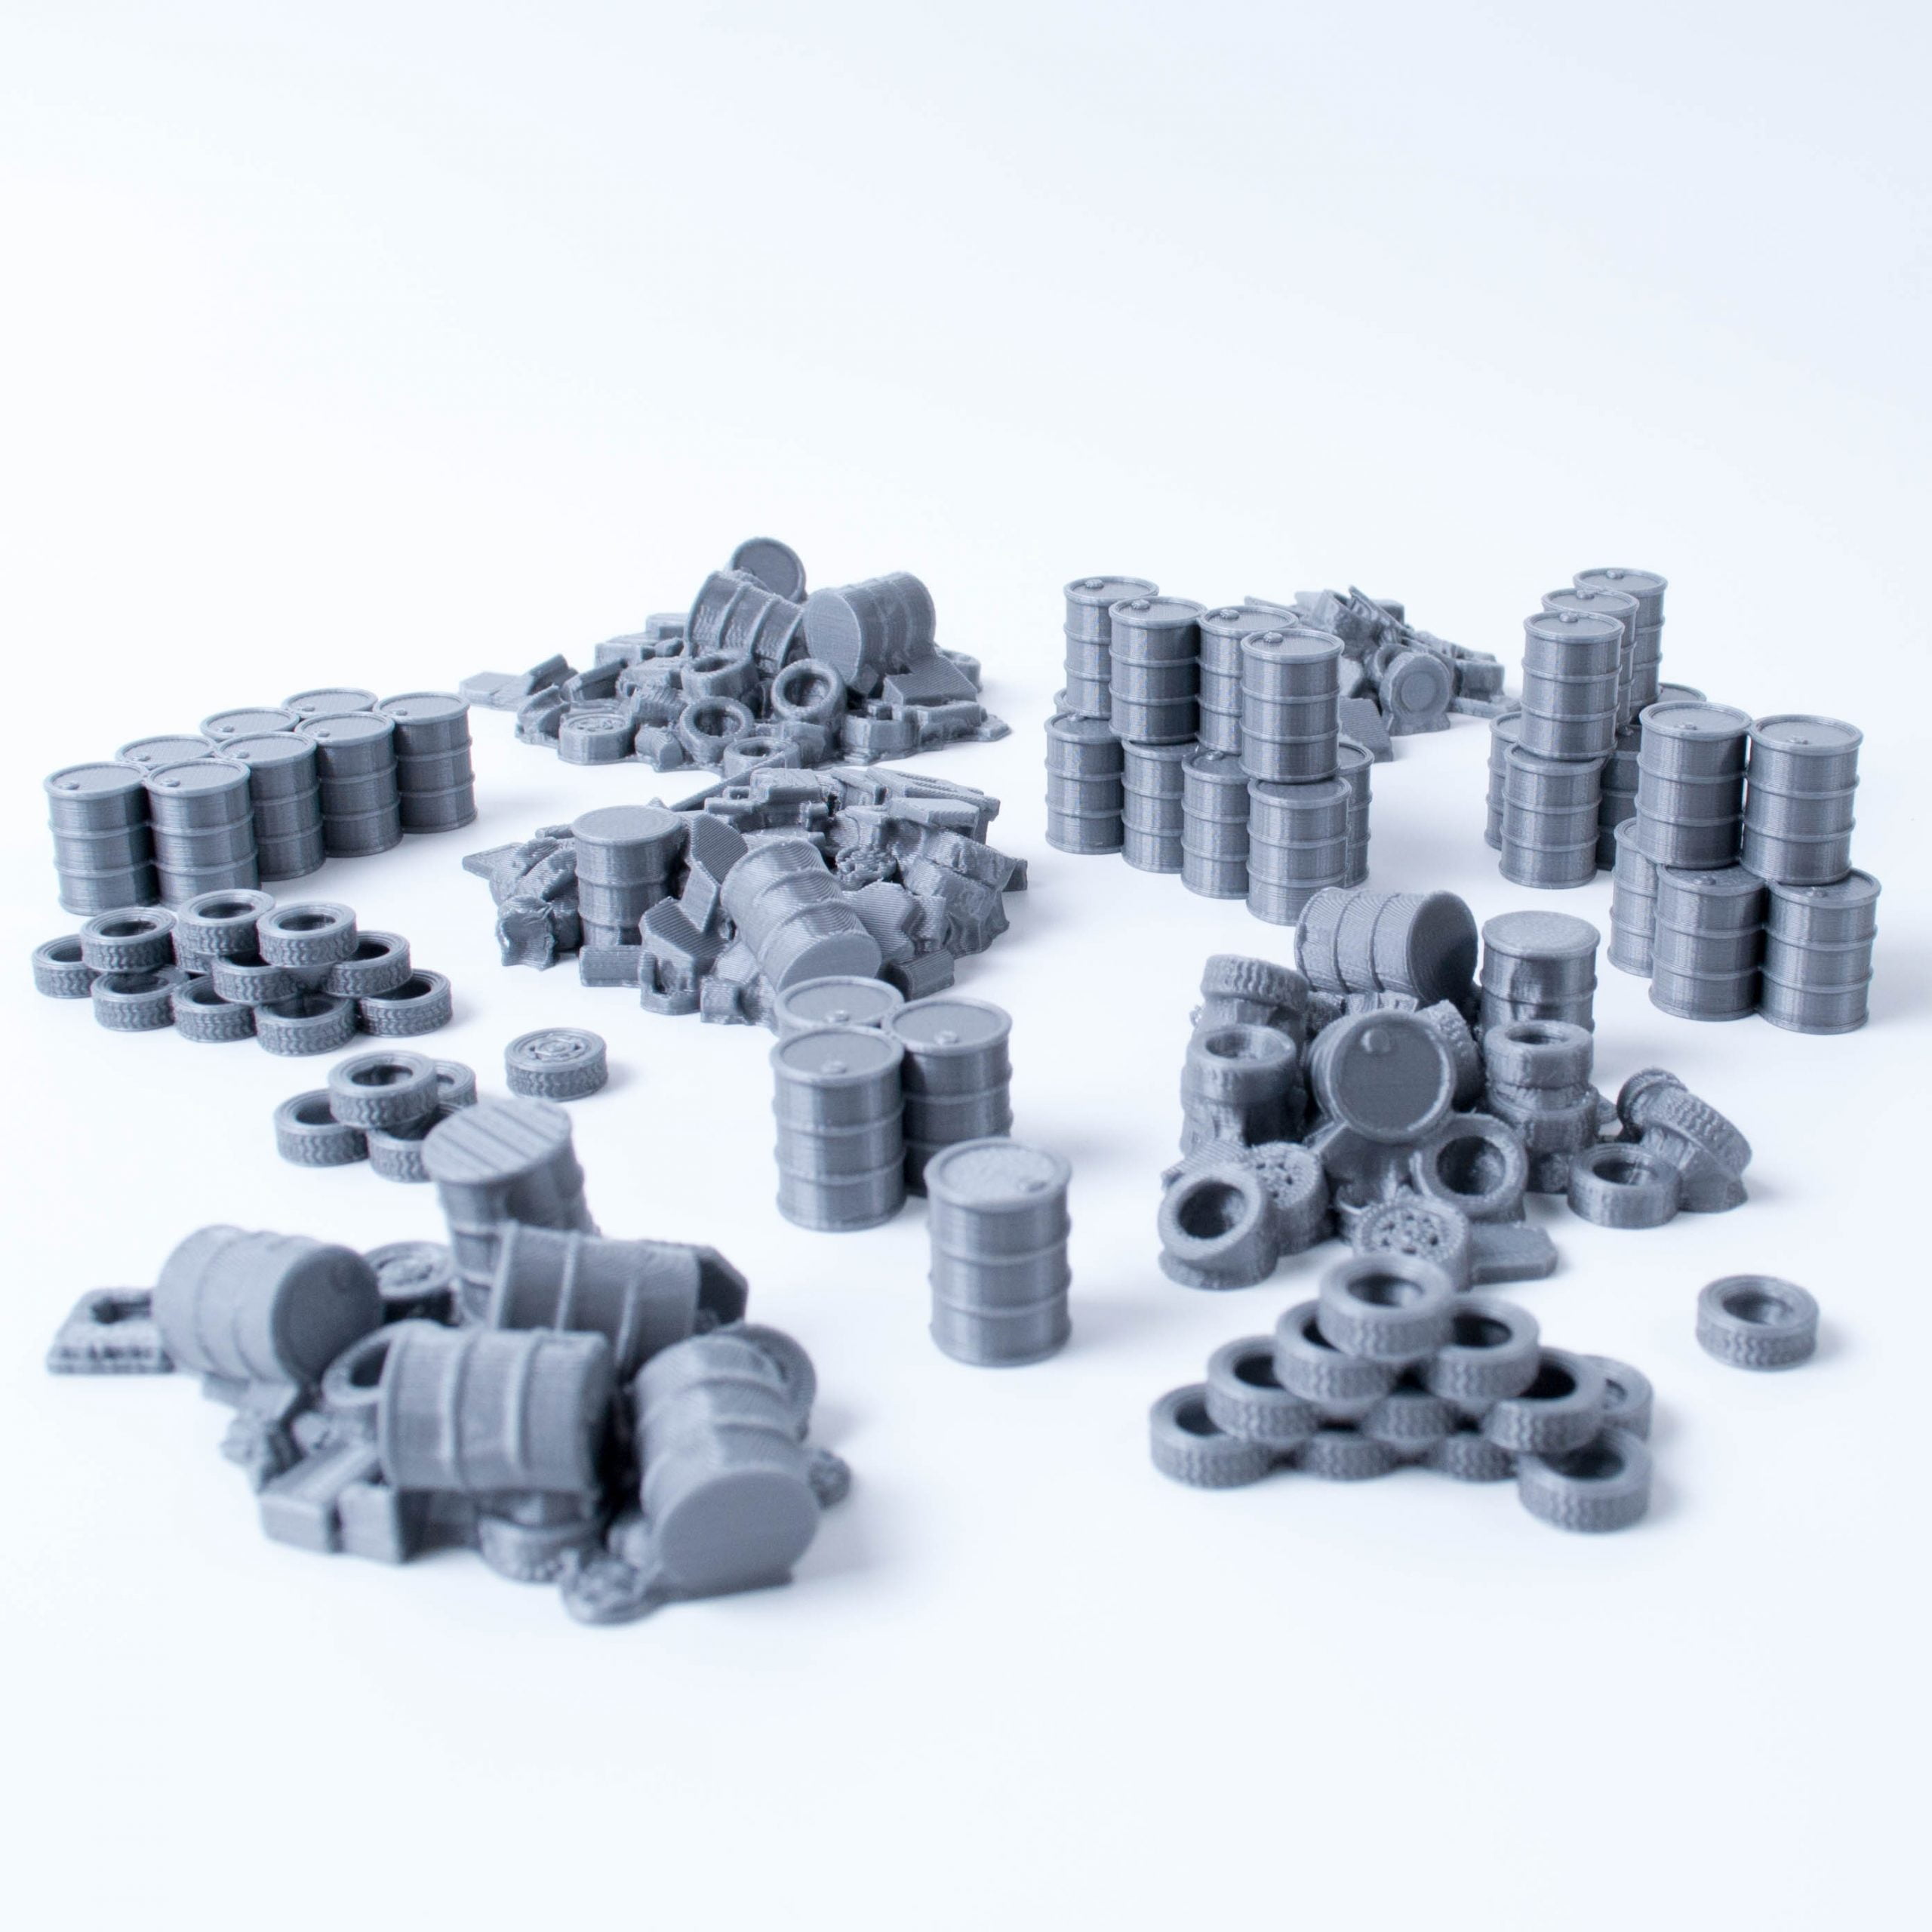
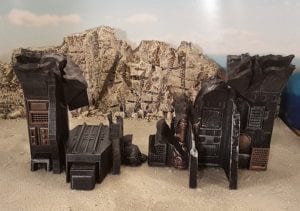
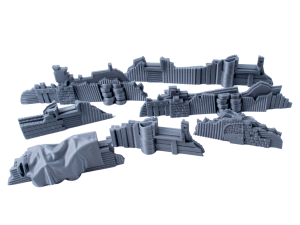
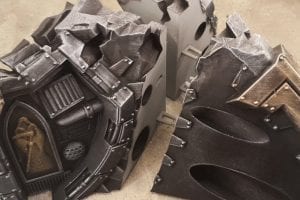
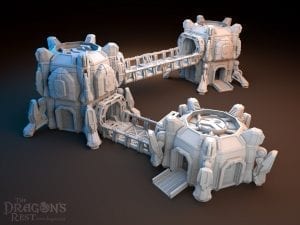
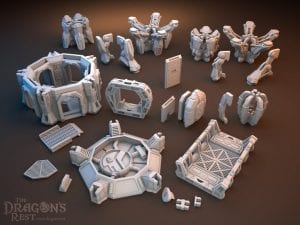
Terrain & SzenerieIndustrielles Trümmerstreu-Gelände: Immersive Warhammer 40k Schlachtfelder (28mm)
Inmitten der endlosen Kriege des 41. Jahrtausends zerfallen selbst die mächtigsten Industriezentren… und machen sie zum perfekten Beutegebiet für jeden Ork, der etwas auf sich hält! Dieses massive 16-teilige Warhammer 40k-Geländeset bringt Schrotthaufen, zerstörte Gehwege und umgestürzte Kriegsmaschinen direkt auf dein Tabletop. Es ist ein ganzes Schlachtfeld, das nur darauf wartet, ein Ork-Spielplatz zu werden! Jedes Stück Metall erzählt die Geschichte einer untergegangenen Industrie – aber noch wichtiger ist, dass es potenzielle Beute, Baumaterial und Schrott ist, um Streitigkeiten auf die gute alte Art und Weise beizulegen.
(0 reviews) -
%22%20transform%3D%22translate(.6%20.6)%20scale(1.17188)%22%20fill-opacity%3D%22.5%22%3E%3Cellipse%20fill%3D%22%235a5a5a%22%20rx%3D%221%22%20ry%3D%221%22%20transform%3D%22matrix(-4.68877%20-41.15283%2071.80781%20-8.18147%20206%2081.5)%22%2F%3E%3Cellipse%20fill%3D%22%23fff%22%20rx%3D%221%22%20ry%3D%221%22%20transform%3D%22matrix(106.89618%20-21.68303%208.75459%2043.15965%2071%201)%22%2F%3E%3Cellipse%20fill%3D%22%23fff%22%20rx%3D%221%22%20ry%3D%221%22%20transform%3D%22rotate(-49.3%20211.2%2075.4)%20scale(27.32638%2053.95067)%22%2F%3E%3Cellipse%20fill%3D%22%238d8d8d%22%20cx%3D%22102%22%20cy%3D%22111%22%20rx%3D%2275%22%20ry%3D%2246%22%2F%3E%3Cellipse%20fill%3D%22%23fff%22%20rx%3D%221%22%20ry%3D%221%22%20transform%3D%22matrix(.7884%20-21.82803%2078.02115%202.81805%2014.6%200)%22%2F%3E%3Cellipse%20fill%3D%22%23cfcfcf%22%20rx%3D%221%22%20ry%3D%221%22%20transform%3D%22rotate(-7.8%201373.5%20-1298.2)%20scale(172.82071%2027.89638)%22%2F%3E%3Cellipse%20fill%3D%22%23999%22%20rx%3D%221%22%20ry%3D%221%22%20transform%3D%22matrix(-4.9323%20-16.31763%2064.61918%20-19.5323%20226%20119.5)%22%2F%3E%3Cpath%20fill%3D%22%23ccc%22%20d%3D%22M-16%20132L3%2038l61%20153z%22%2F%3E%3Cpath%20fill%3D%22%23d3d3d3%22%20d%3D%22M93%2068L-16%2056%20226-9z%22%2F%3E%3Cellipse%20fill%3D%22%23838383%22%20cx%3D%22204%22%20cy%3D%2257%22%20rx%3D%2265%22%20ry%3D%2237%22%2F%3E%3Cellipse%20fill%3D%22%23fff%22%20rx%3D%221%22%20ry%3D%221%22%20transform%3D%22matrix(-51.95952%202.63216%20-.88321%20-17.43481%2040.4%200)%22%2F%3E%3Cpath%20fill%3D%22%236a6a6a%22%20d%3D%22M65%20128l32%201-16-24z%22%2F%3E%3Cellipse%20fill%3D%22%23cacaca%22%20cx%3D%22233%22%20cy%3D%228%22%20rx%3D%2278%22%20ry%3D%2212%22%2F%3E%3Cpath%20fill%3D%22%23a9a9a9%22%20d%3D%22M186%20148l85-51-37-2z%22%2F%3E%3Cellipse%20fill%3D%22%23e9e9e9%22%20rx%3D%221%22%20ry%3D%221%22%20transform%3D%22matrix(-80.99358%2035.42304%20-6.6329%20-15.1659%20112%209)%22%2F%3E%3C%2Fg%3E%3C%2Fsvg%3E) Sci-Fi
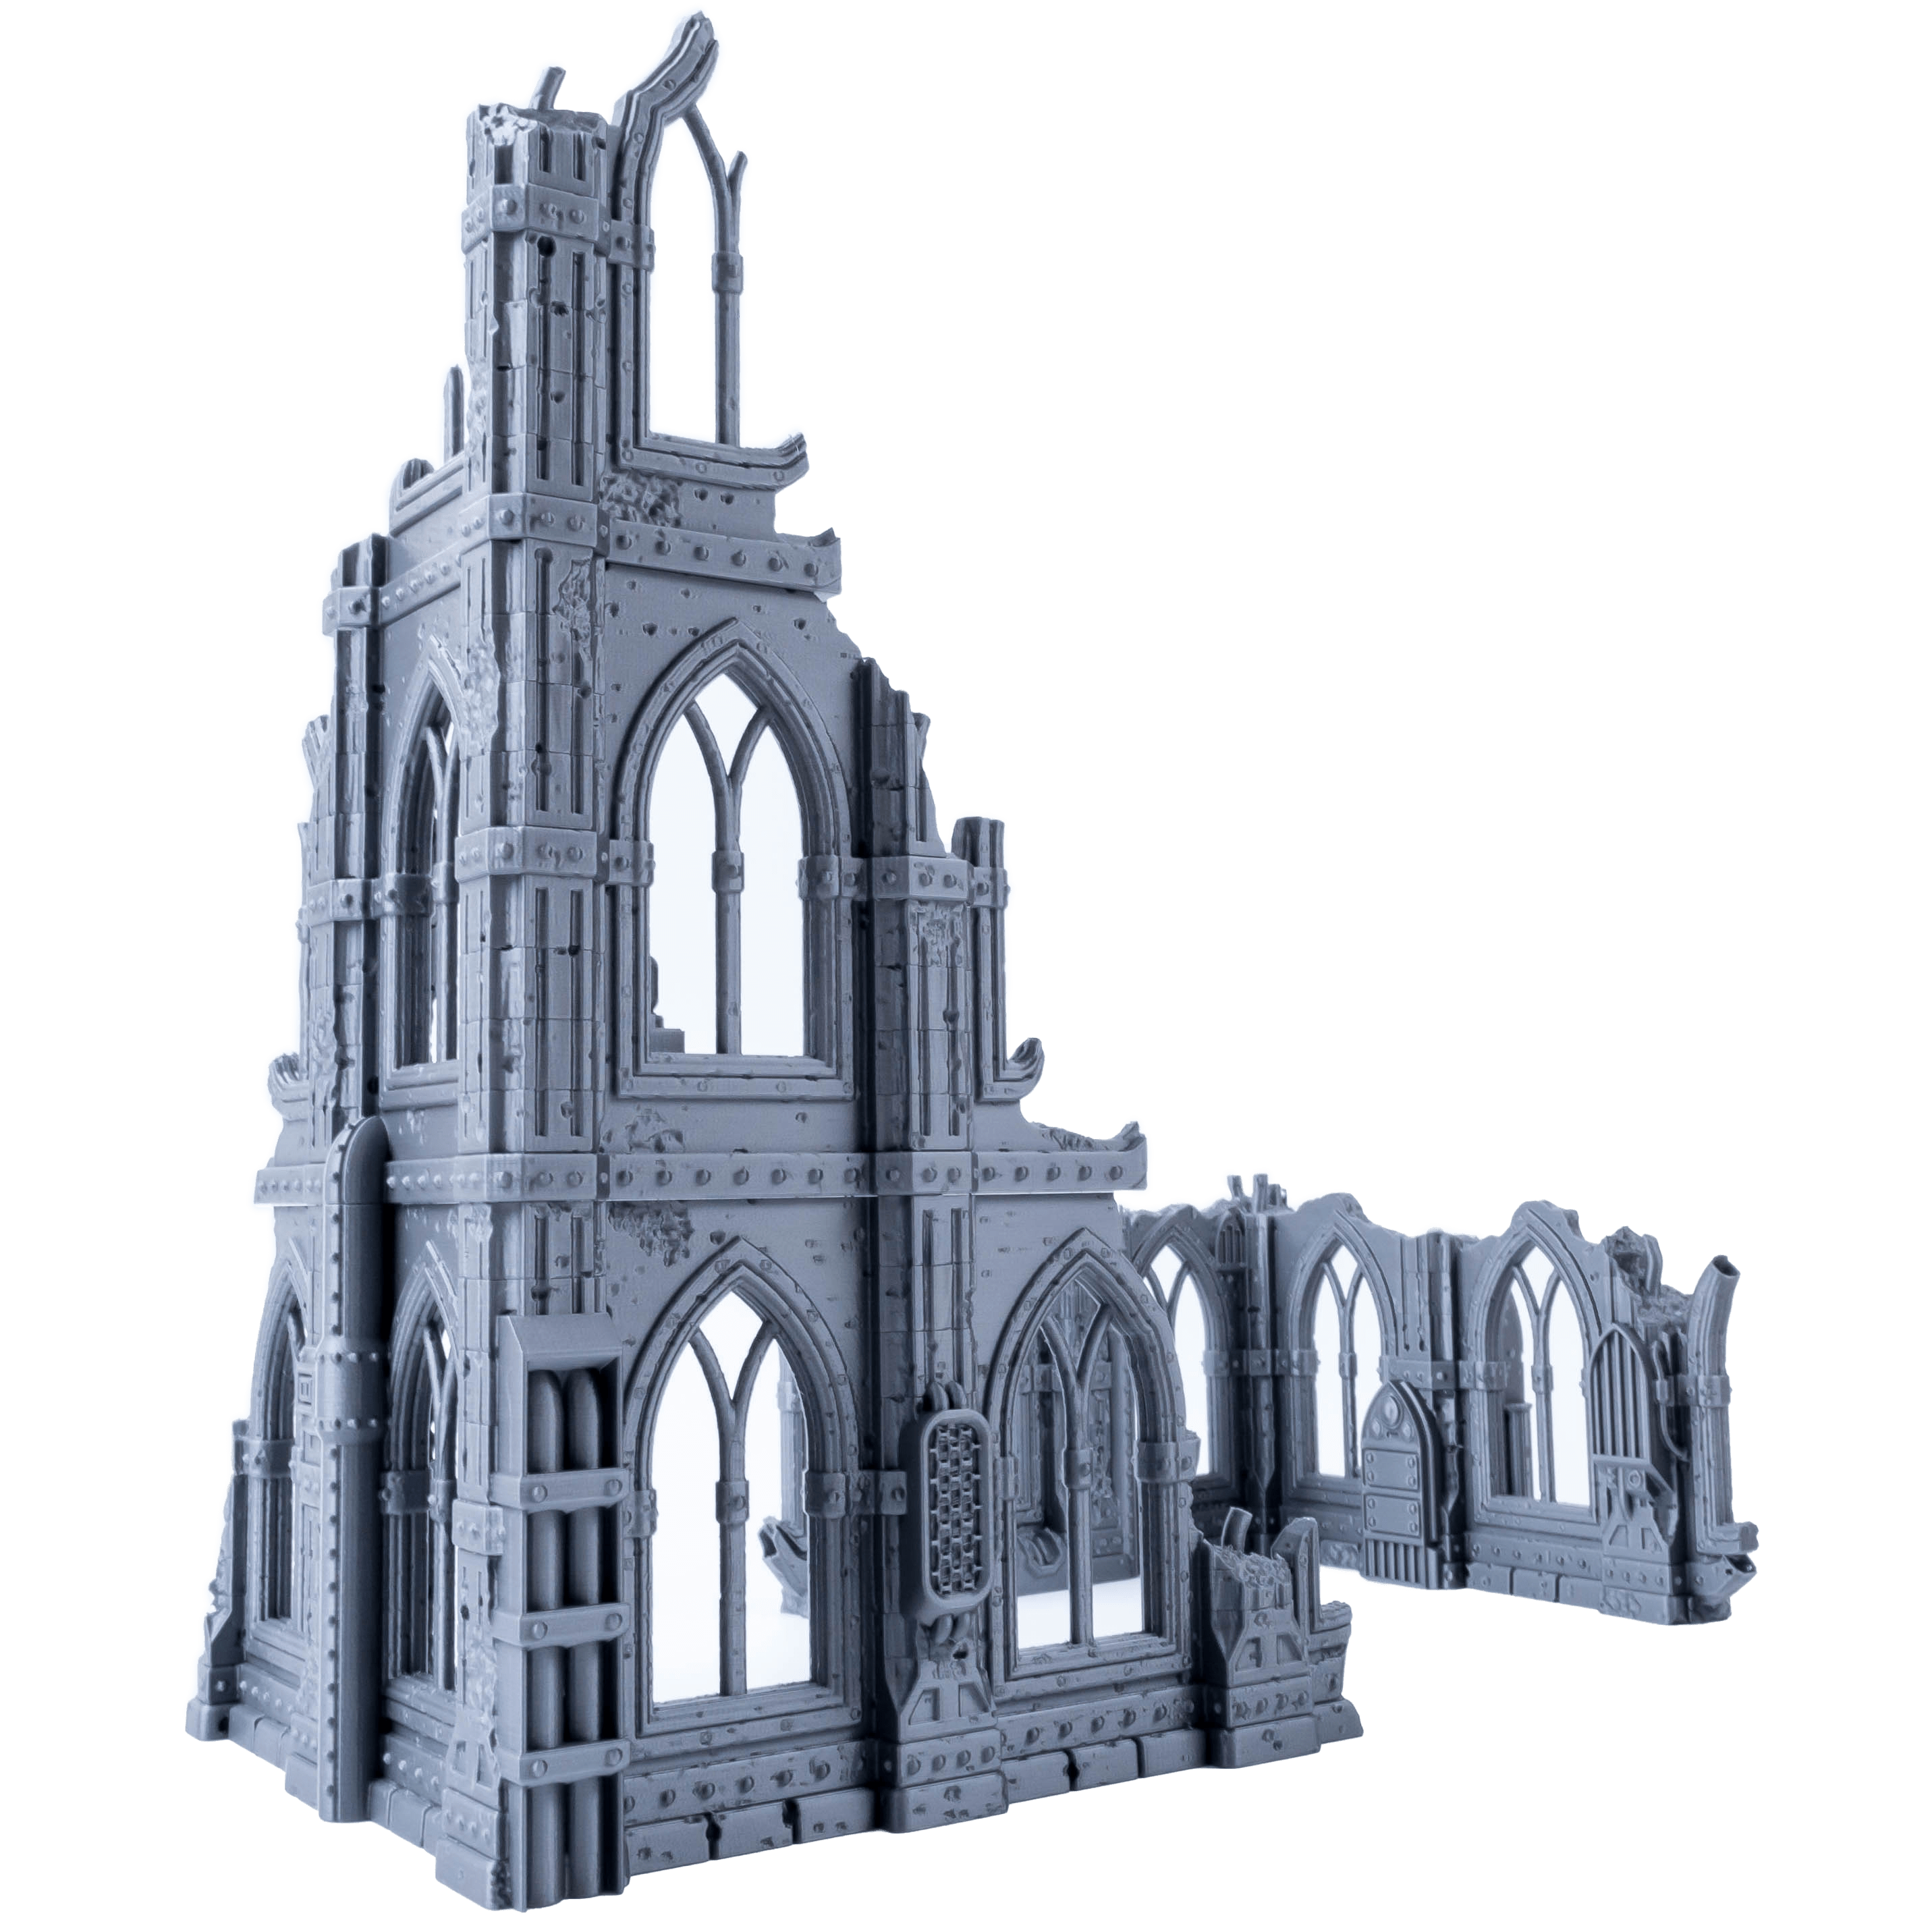
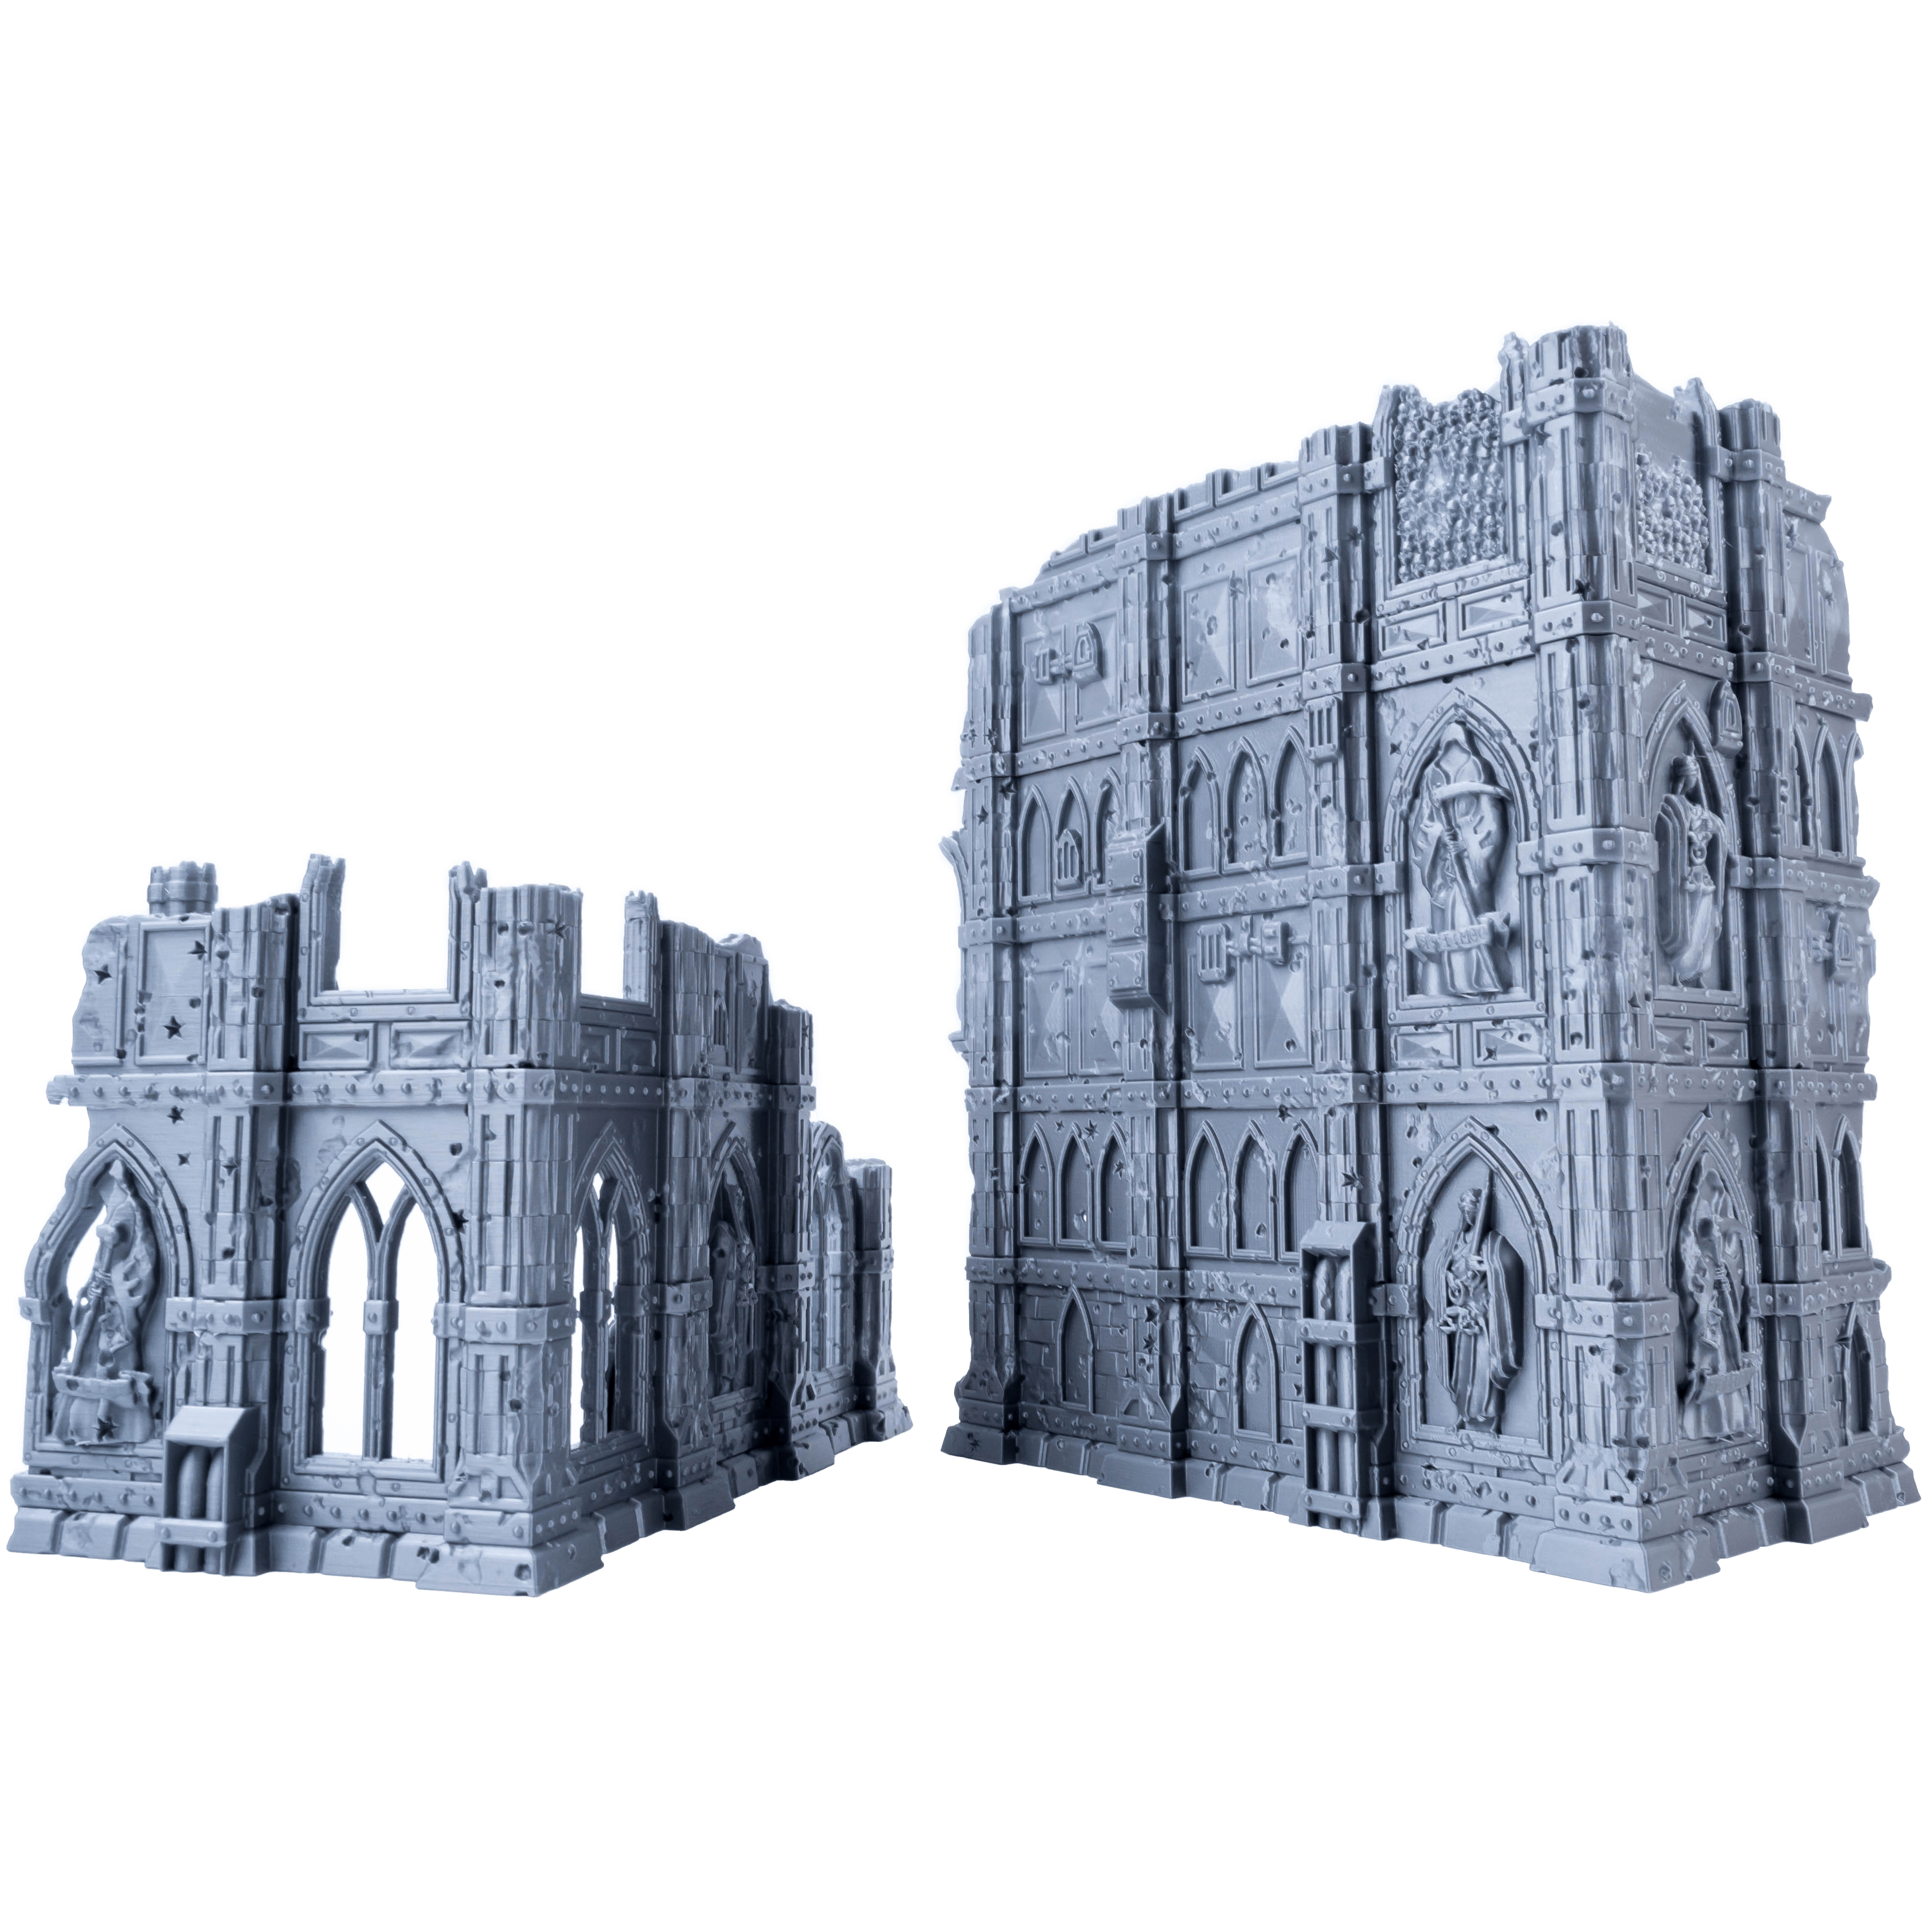
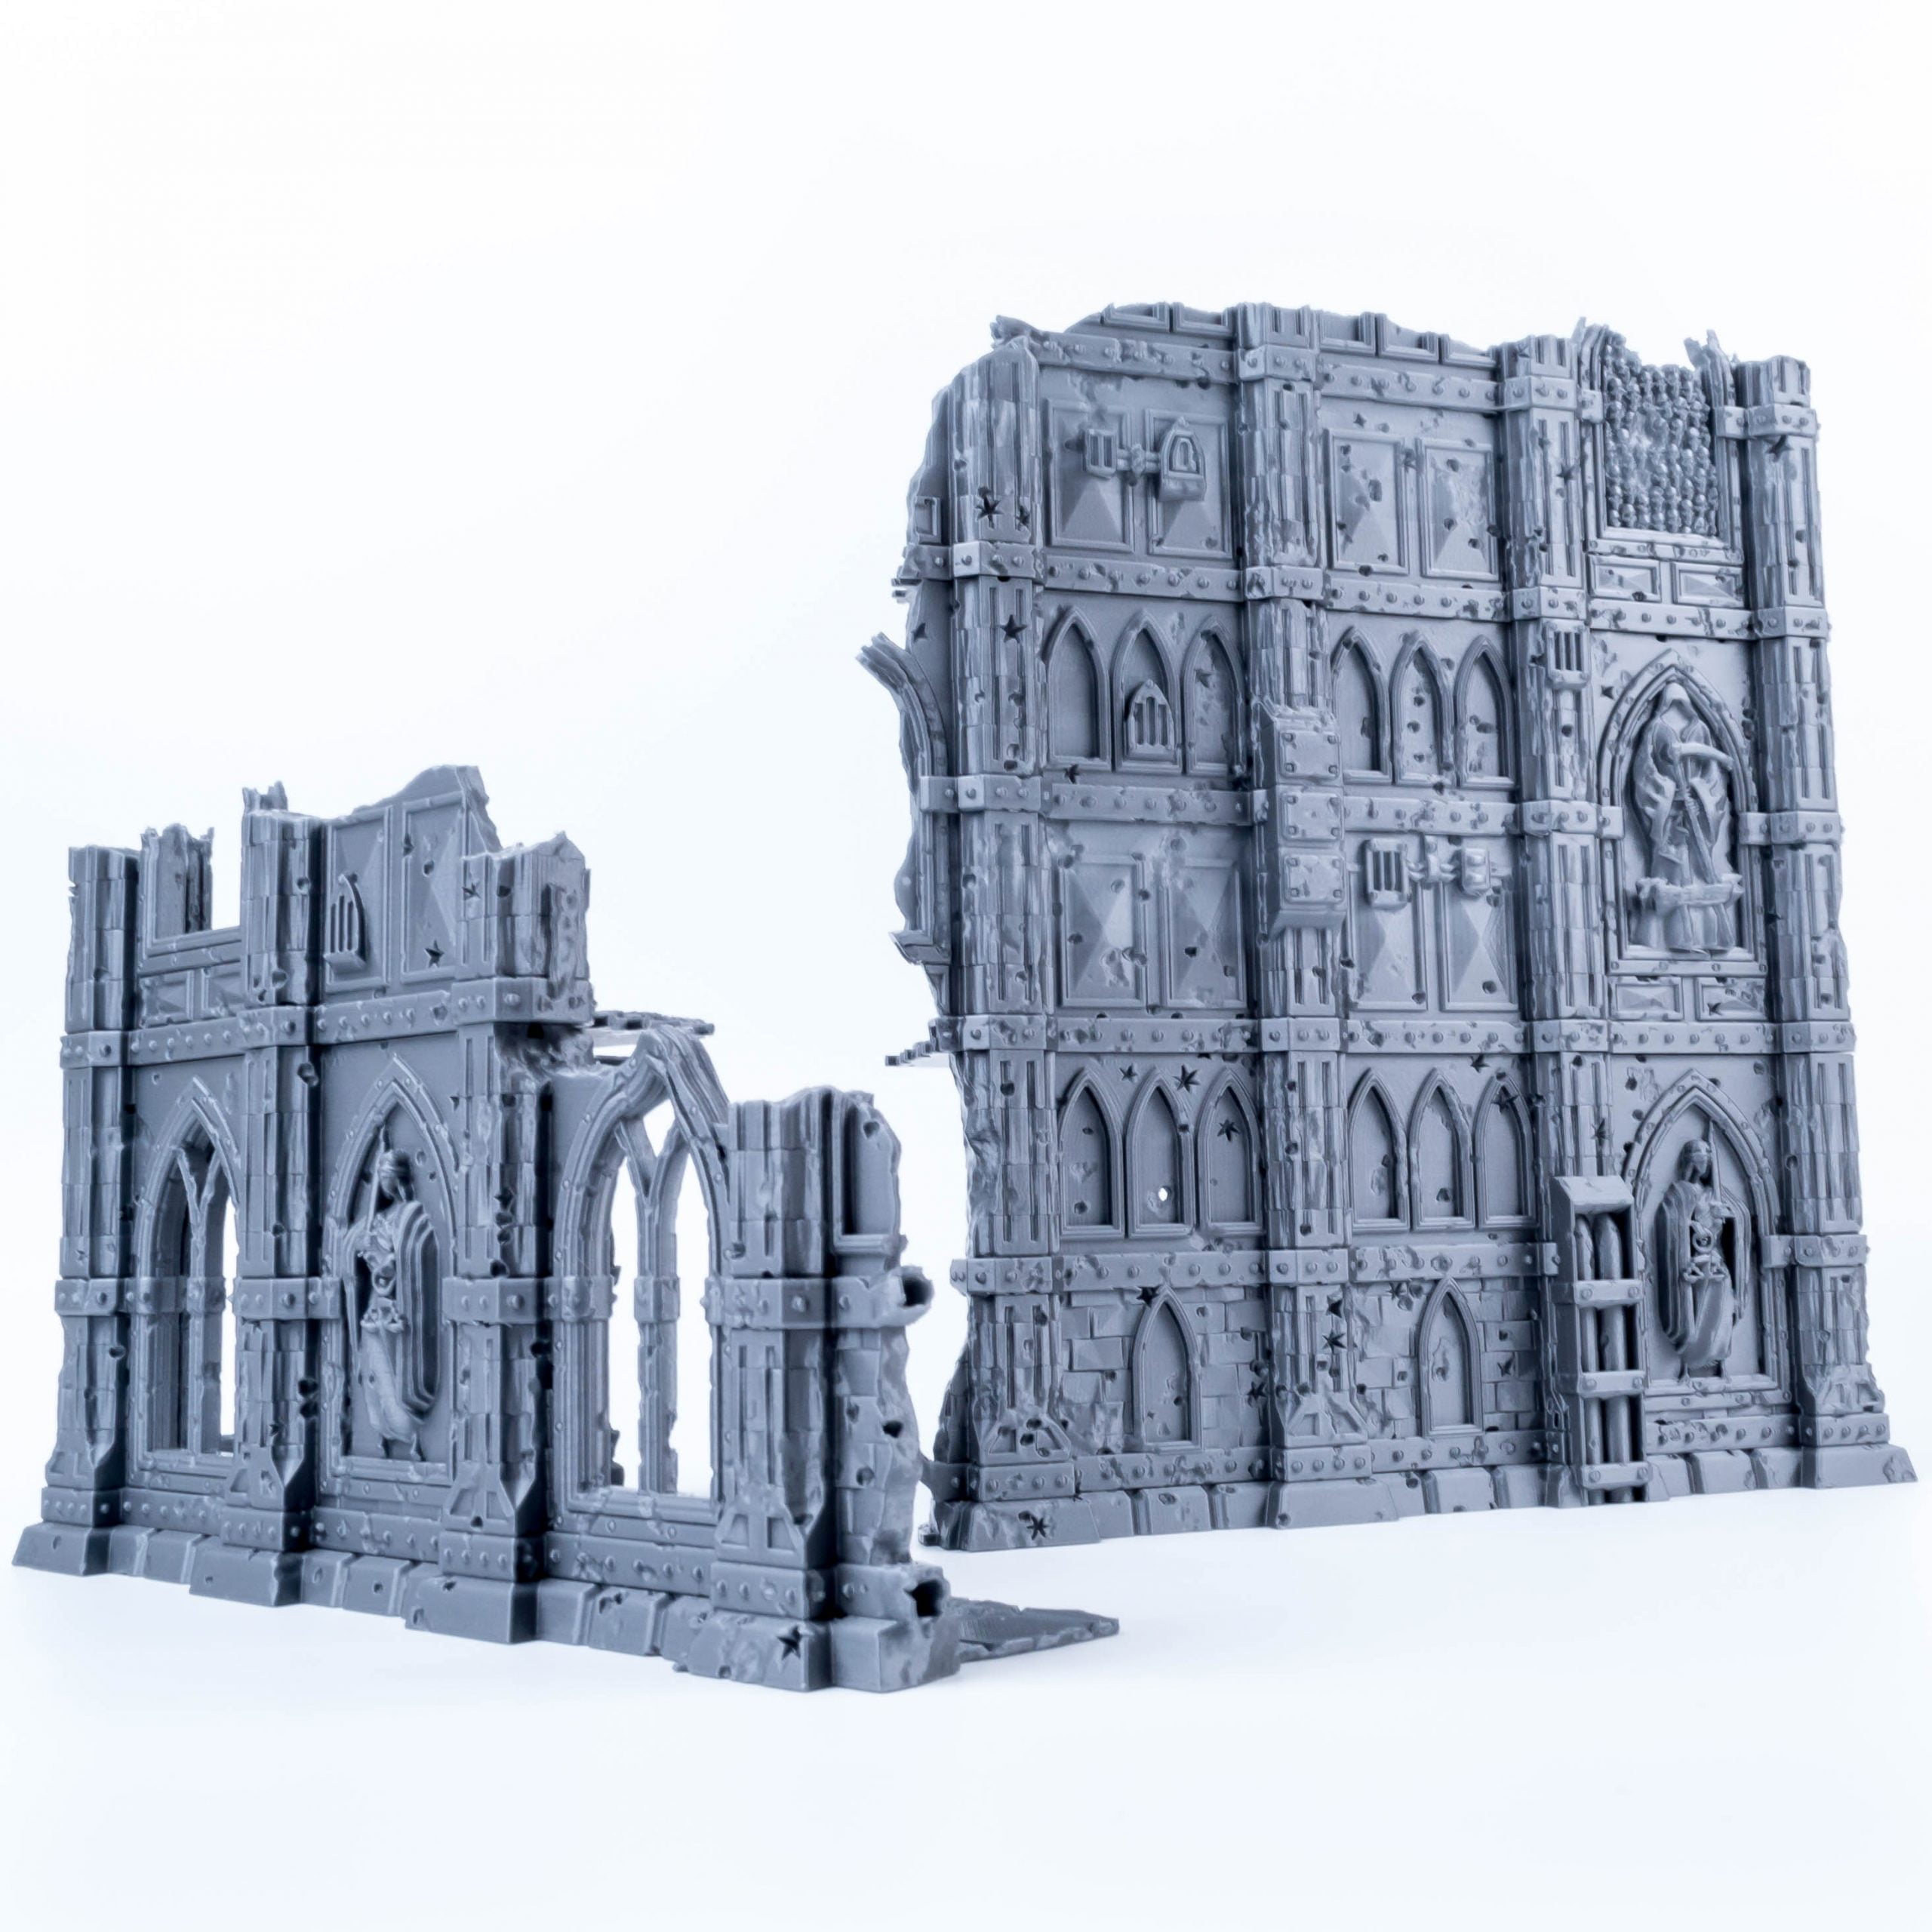
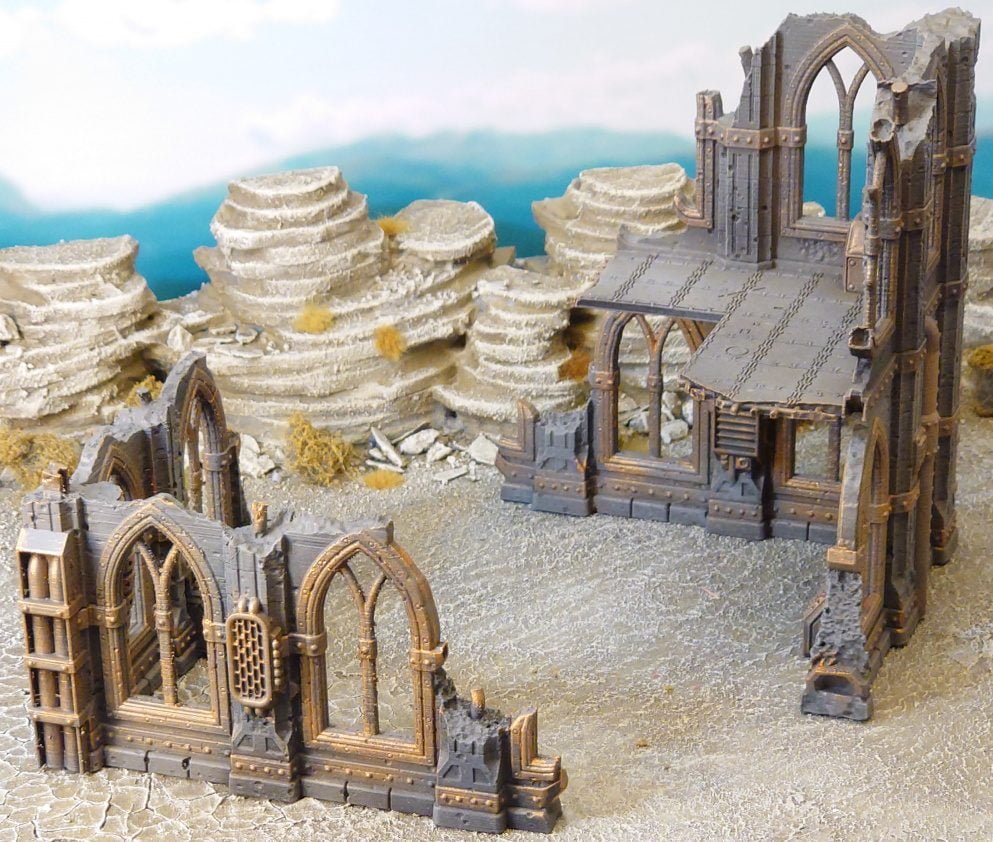
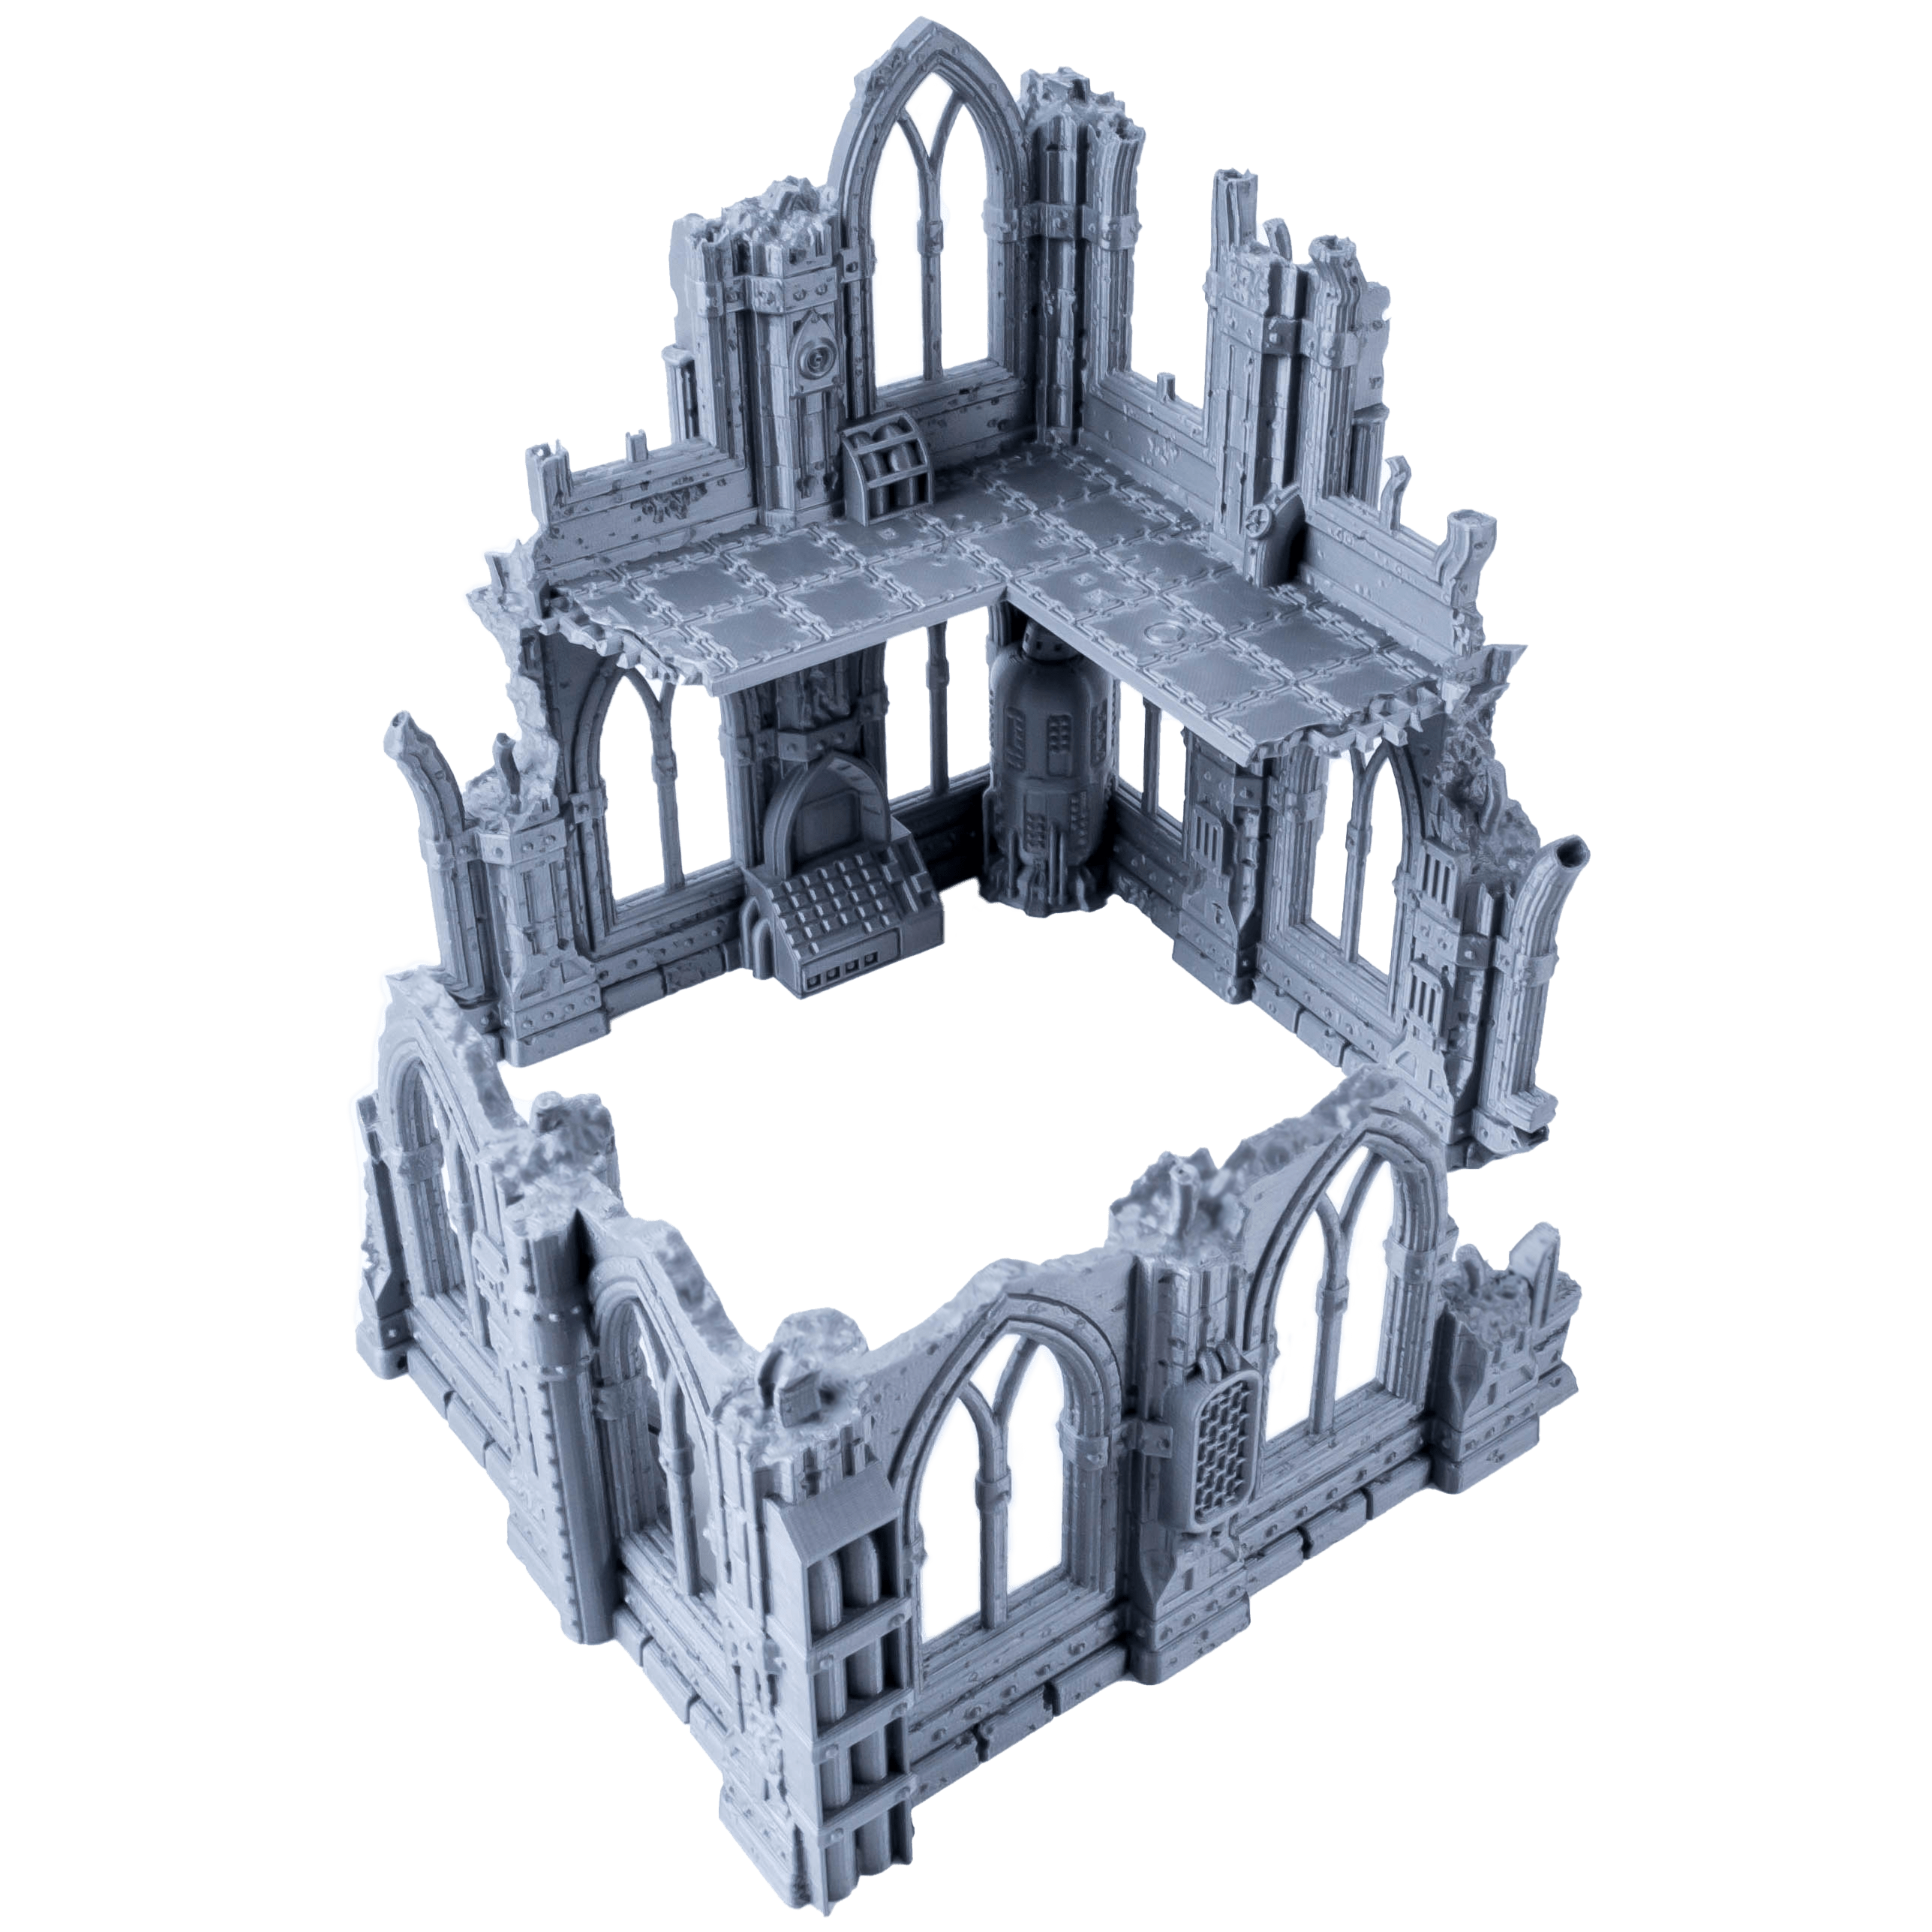
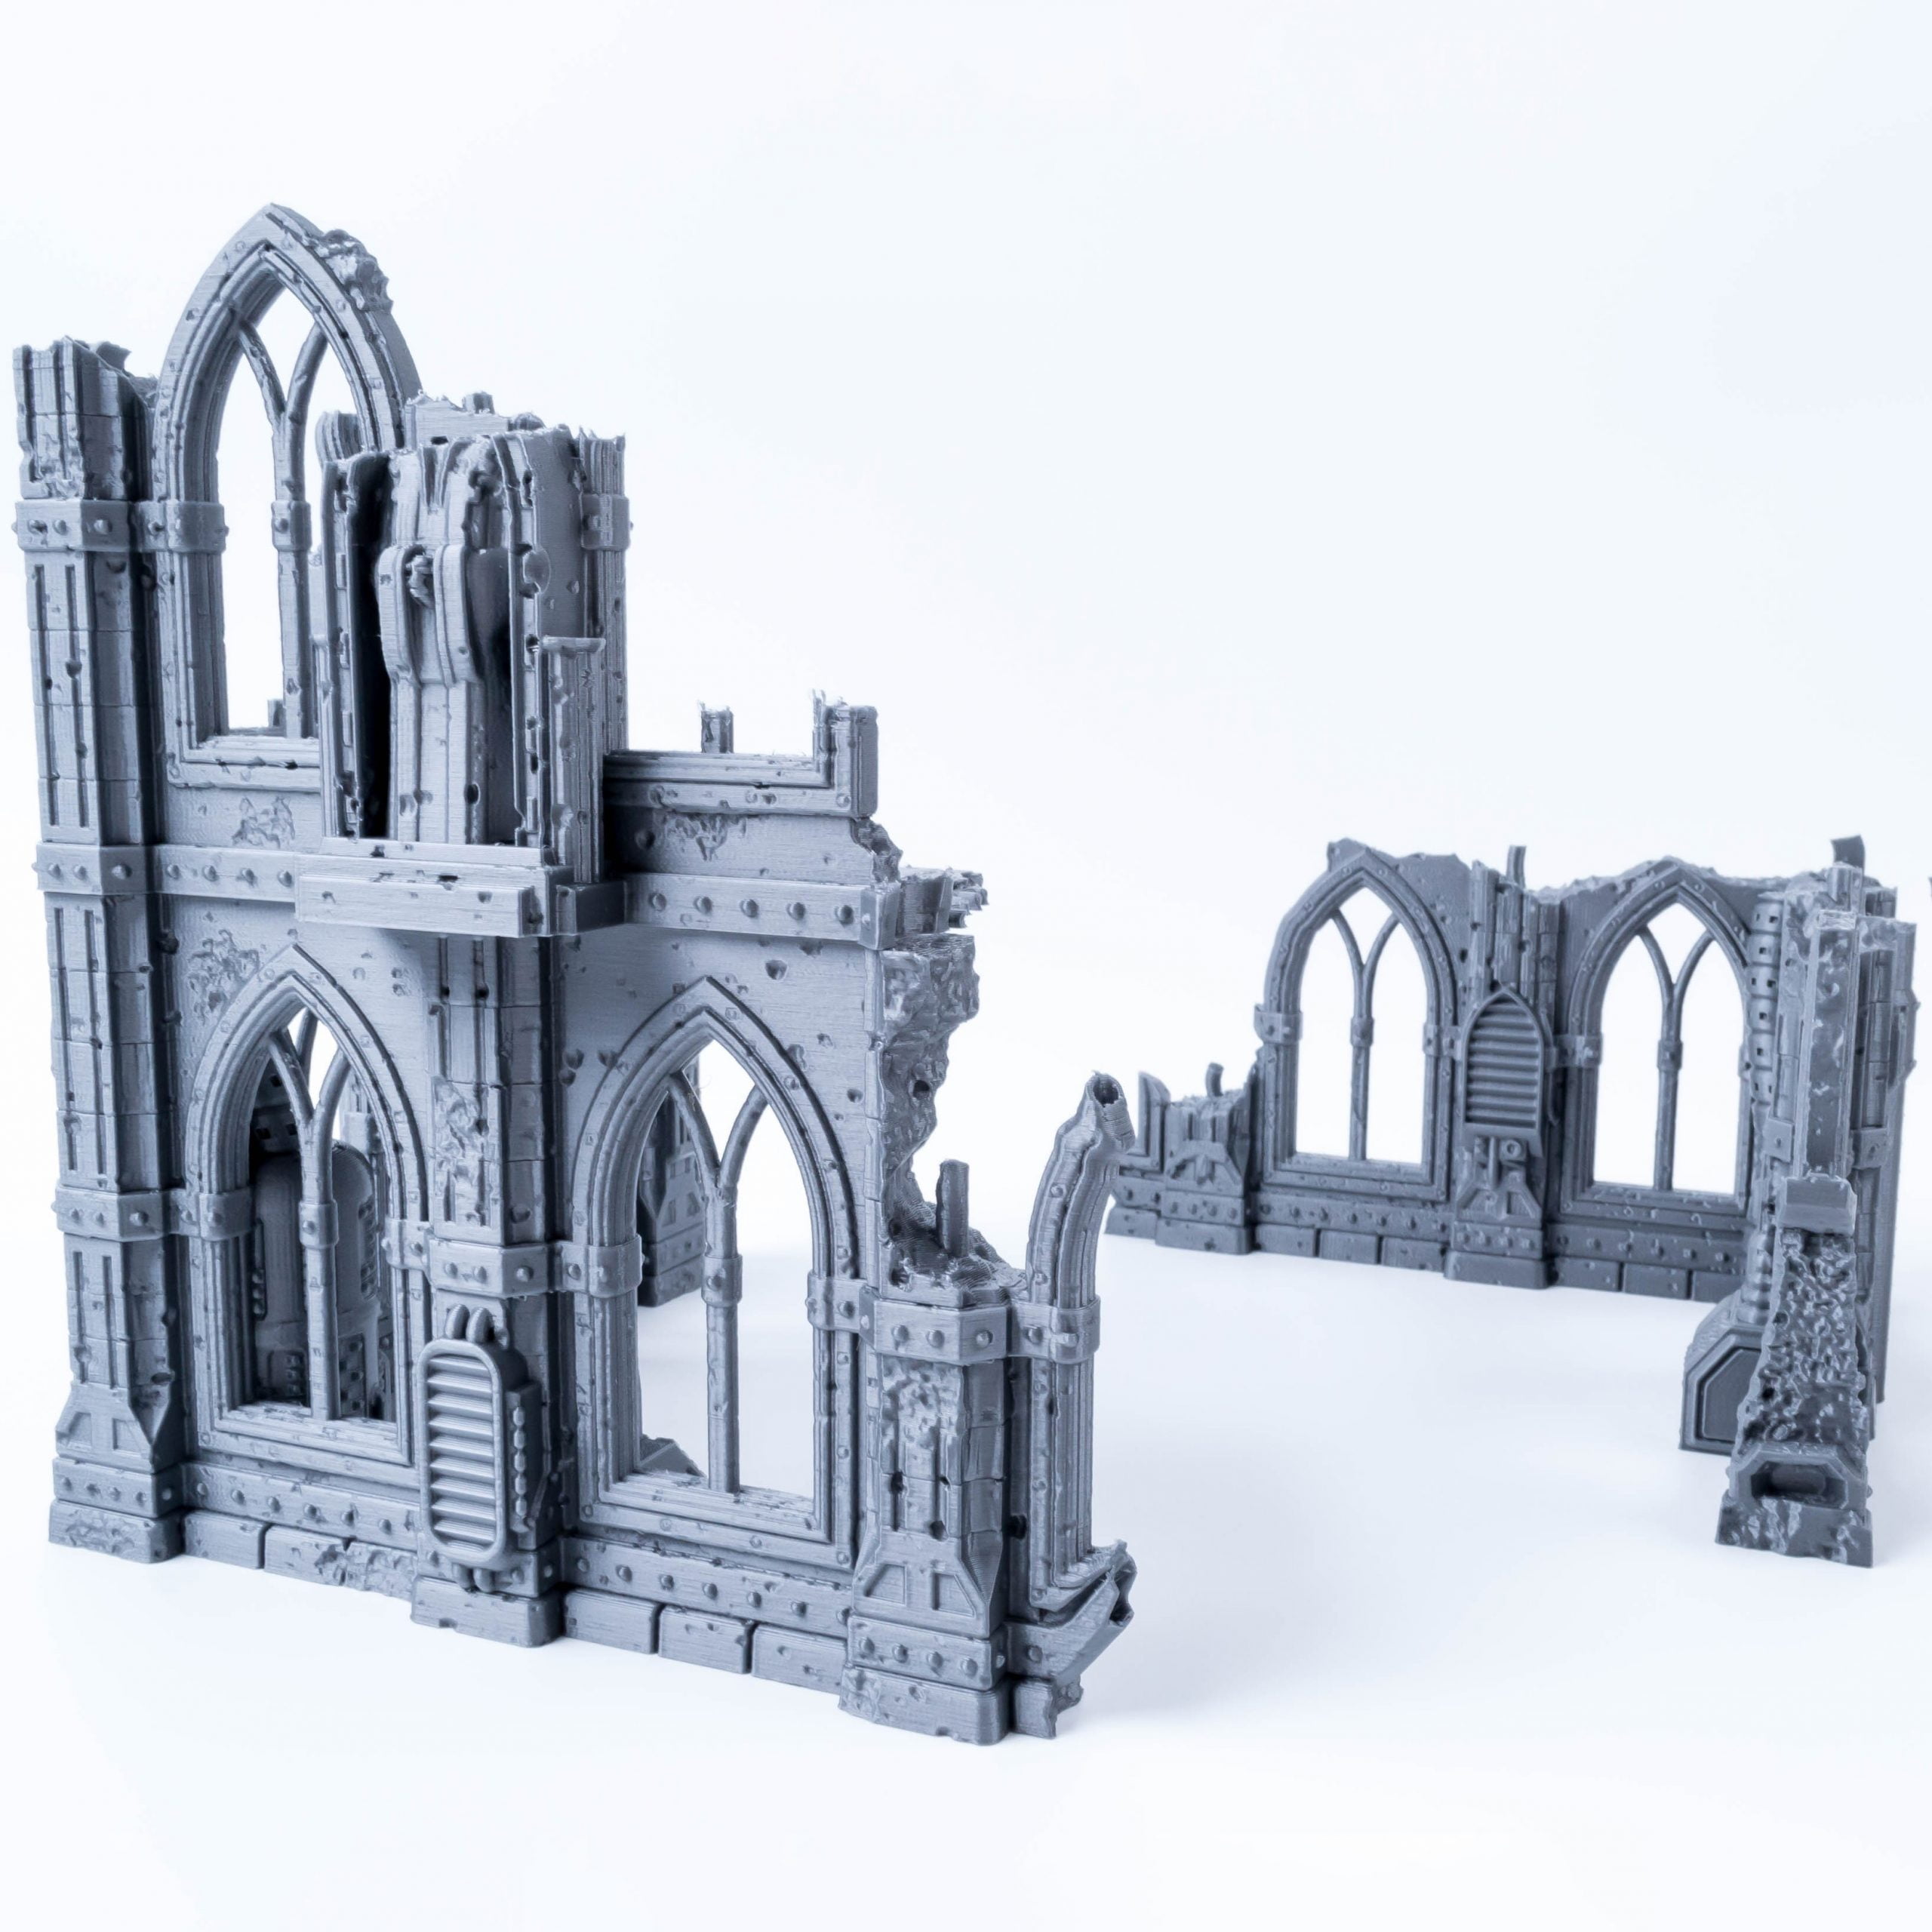
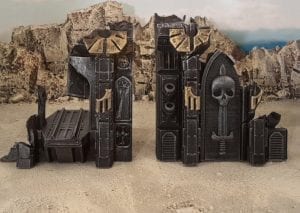
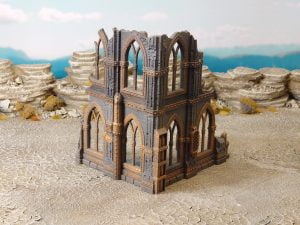
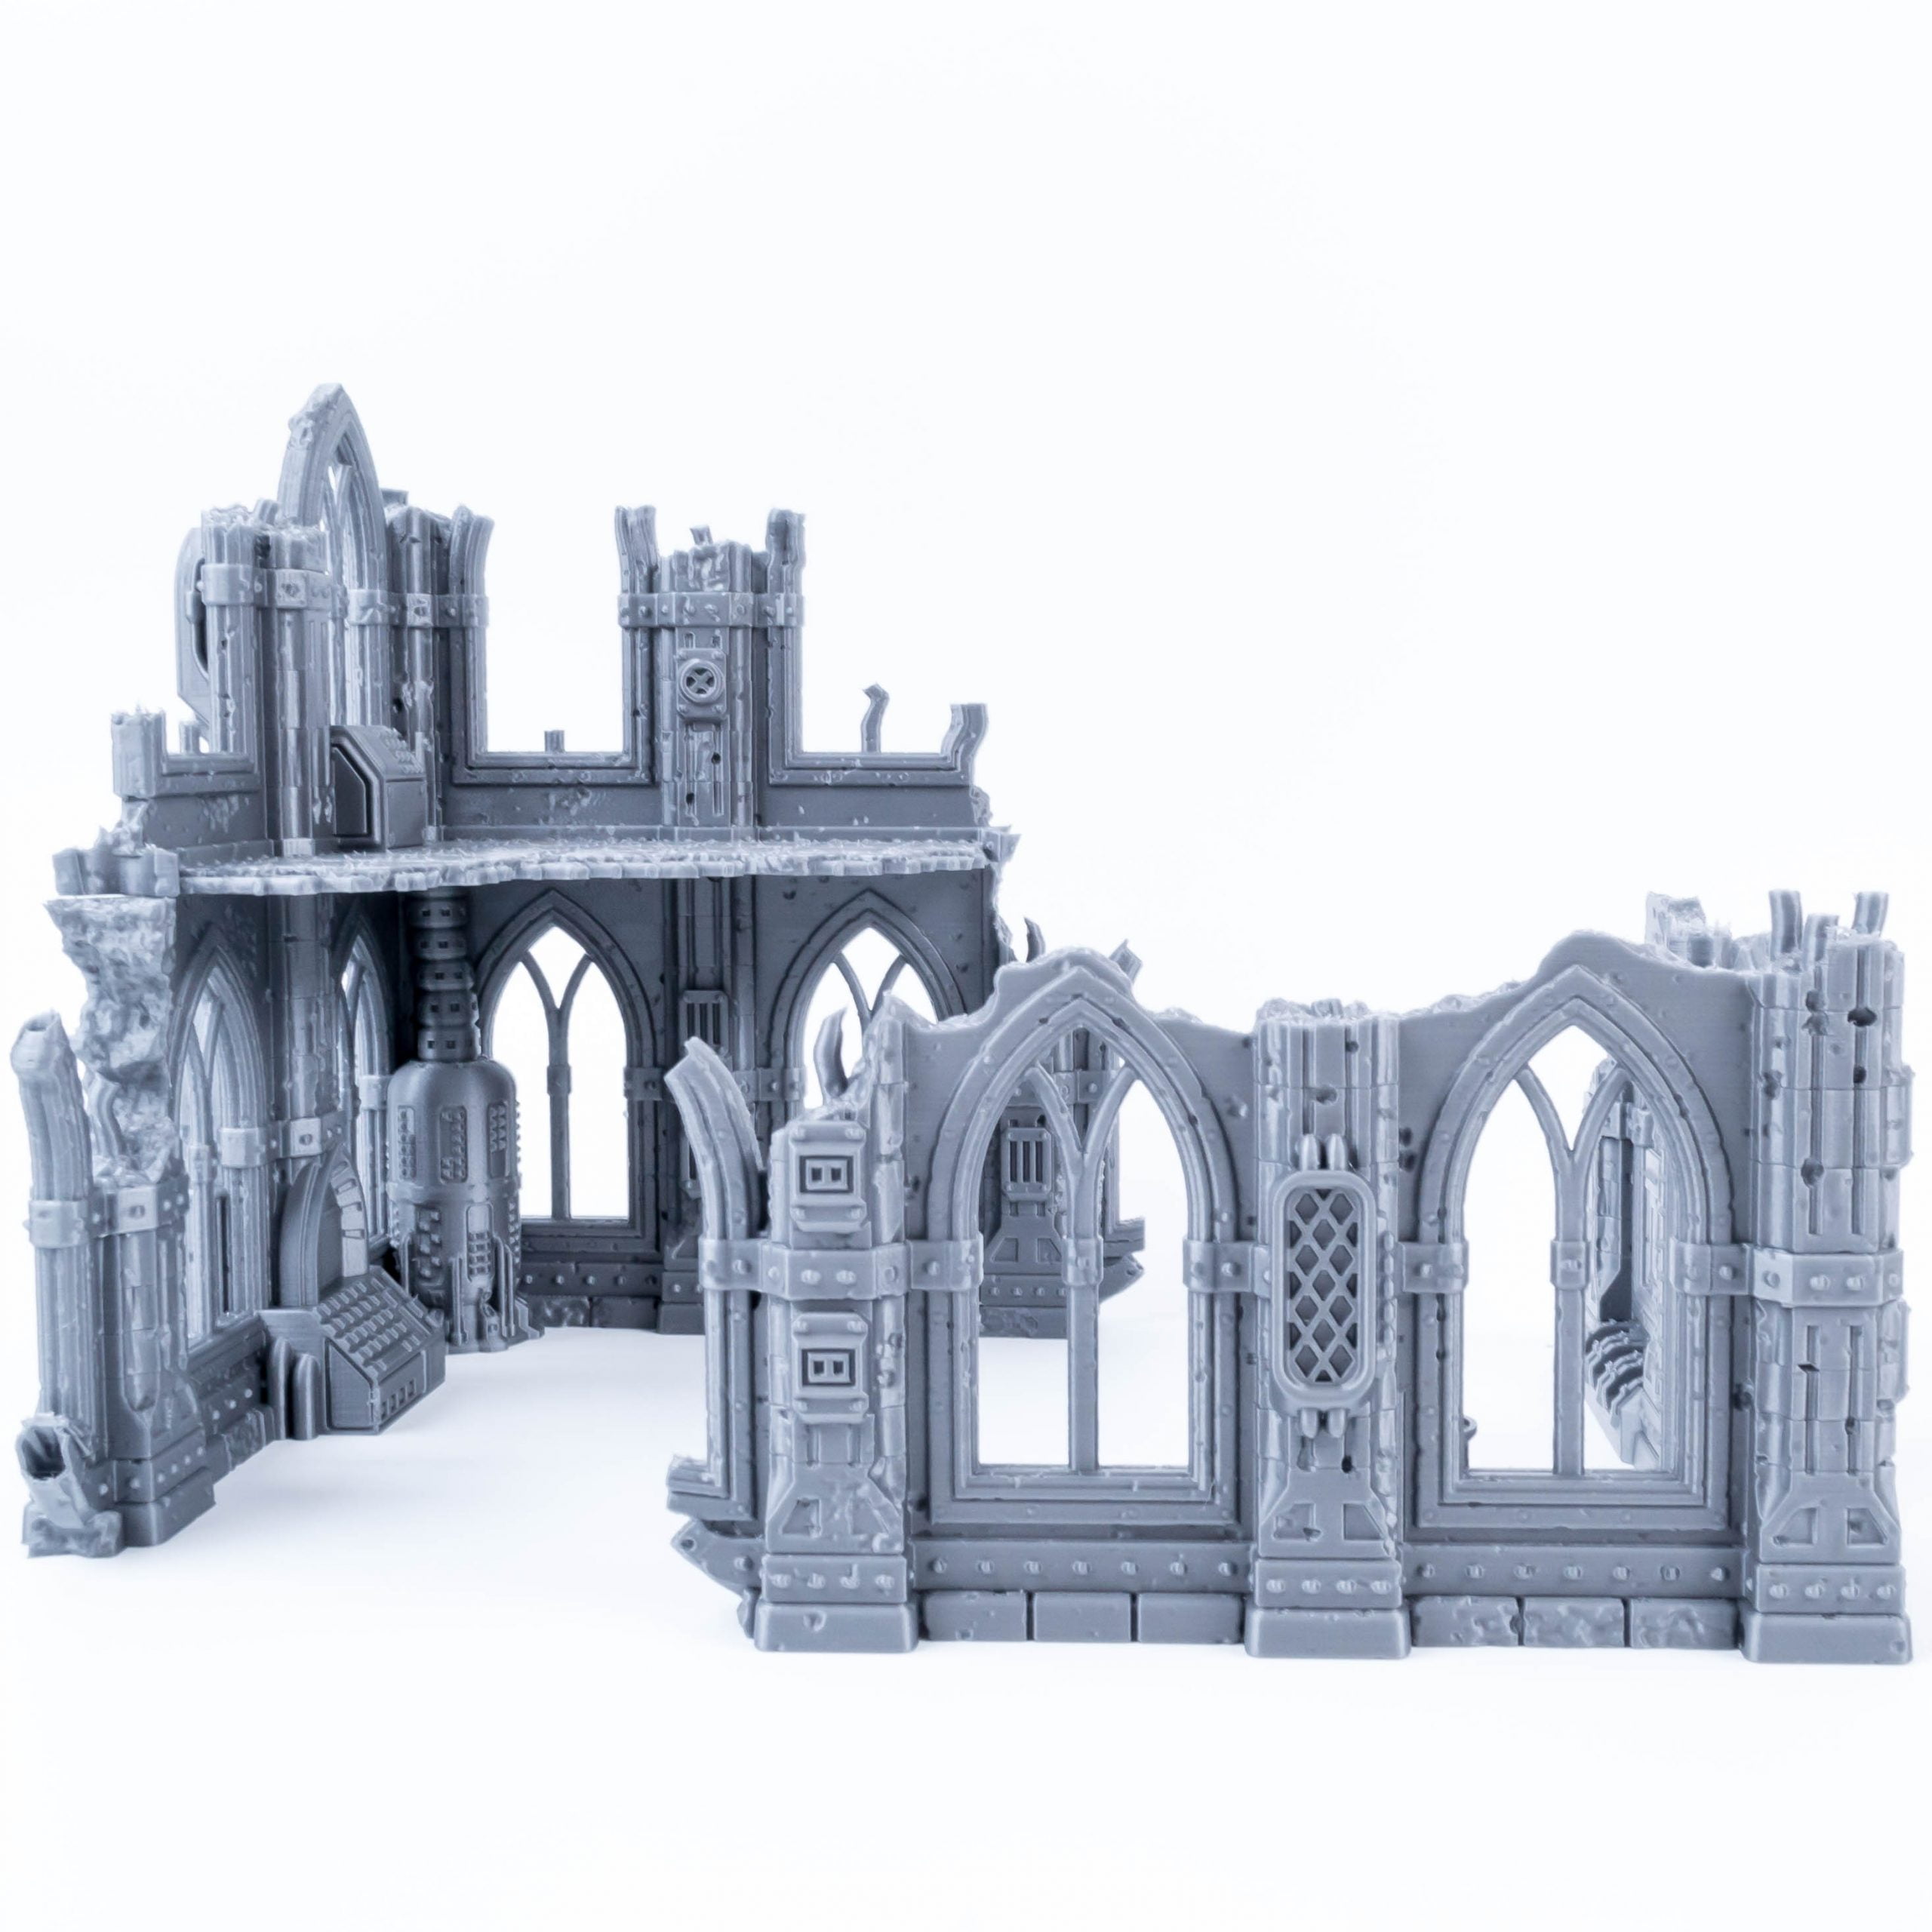
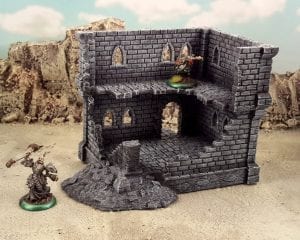
Sci-FiGothic Ruins Set 2: Ruinierte Kathedrale für Fantasy und Sci-Fi Spiele
Die Ruinenkathedrale besteht aus drei modularen Teilen, die je nach Bedarf auf unterschiedliche Weise angeordnet werden können. Man kann sie stapeln, um ein hoch aufragendes Bauwerk zu schaffen, das die Landschaft dominiert, oder man kann sie einzeln verwenden, um eine kleinere, ebenerdige Ruine zu errichten, die Schutz bietet und fasziniert. Sie können auch mit anderen Sets aus dem Gothic Ruins Set kombiniert werden, um endlose Variationen zu schaffen.
(0 reviews) -
%22%20transform%3D%22translate(.6%20.6)%20scale(1.17188)%22%20fill-opacity%3D%22.5%22%3E%3Cellipse%20fill%3D%22%23fff%22%20rx%3D%221%22%20ry%3D%221%22%20transform%3D%22rotate(122.5%20-42.2%20103)%20scale(39.00519%2088.8136)%22%2F%3E%3Cellipse%20fill%3D%22%239a8e2e%22%20rx%3D%221%22%20ry%3D%221%22%20transform%3D%22matrix(-41.83129%2022.95599%20-42.33134%20-77.1378%20242.9%2038)%22%2F%3E%3Cellipse%20fill%3D%22%237d7a96%22%20cx%3D%22159%22%20cy%3D%22141%22%20rx%3D%2261%22%20ry%3D%2240%22%2F%3E%3Cellipse%20fill%3D%22%23cbcbd1%22%20rx%3D%221%22%20ry%3D%221%22%20transform%3D%22matrix(-19.76064%2027.49984%20-64.24007%20-46.16117%20124.8%2055)%22%2F%3E%3Cellipse%20fill%3D%22%23c3d571%22%20rx%3D%221%22%20ry%3D%221%22%20transform%3D%22matrix(-30.85894%20-38.90662%2045.42714%20-36.03072%2054%20103.2)%22%2F%3E%3Cellipse%20fill%3D%22%23ccc9e4%22%20rx%3D%221%22%20ry%3D%221%22%20transform%3D%22matrix(29.9182%2014.99129%20-25.16462%2050.22119%20232.8%20181.8)%22%2F%3E%3Cellipse%20fill%3D%22%238b984c%22%20rx%3D%221%22%20ry%3D%221%22%20transform%3D%22rotate(-109.1%2031.3%2037)%20scale(26.28963%2040.74113)%22%2F%3E%3Cellipse%20fill%3D%22%236c6c6c%22%20rx%3D%221%22%20ry%3D%221%22%20transform%3D%22matrix(-1.38478%2020.63486%20-30.00573%20-2.01365%20150%20143)%22%2F%3E%3Cellipse%20fill%3D%22%23918fa9%22%20rx%3D%221%22%20ry%3D%221%22%20transform%3D%22matrix(-35.7067%20-1.71171%201.78268%20-37.18712%2028.7%2020.3)%22%2F%3E%3Cellipse%20fill%3D%22%23cddb87%22%20rx%3D%221%22%20ry%3D%221%22%20transform%3D%22matrix(-23.9338%2010.95379%20-38.93502%20-85.0722%2078%20170.9)%22%2F%3E%3Cellipse%20fill%3D%22%237d672f%22%20rx%3D%221%22%20ry%3D%221%22%20transform%3D%22matrix(8.41075%2025.3315%20-19.89744%206.6065%20245.8%2014.6)%22%2F%3E%3Cellipse%20fill%3D%22%23c6d977%22%20rx%3D%221%22%20ry%3D%221%22%20transform%3D%22rotate(-57.9%20149.4%20-136.5)%20scale(20.5911%2033.29133)%22%2F%3E%3Cellipse%20fill%3D%22%23e37f61%22%20rx%3D%221%22%20ry%3D%221%22%20transform%3D%22rotate(23.1%2012%20638.4)%20scale(31.28794%2020.43889)%22%2F%3E%3Cellipse%20fill%3D%22%239fb664%22%20cx%3D%22238%22%20cy%3D%2295%22%20rx%3D%2228%22%20ry%3D%2228%22%2F%3E%3Cellipse%20fill%3D%22%238f8da4%22%20cx%3D%22140%22%20cy%3D%225%22%20rx%3D%2248%22%20ry%3D%2216%22%2F%3E%3C%2Fg%3E%3C%2Fsvg%3E) Sci-Fi
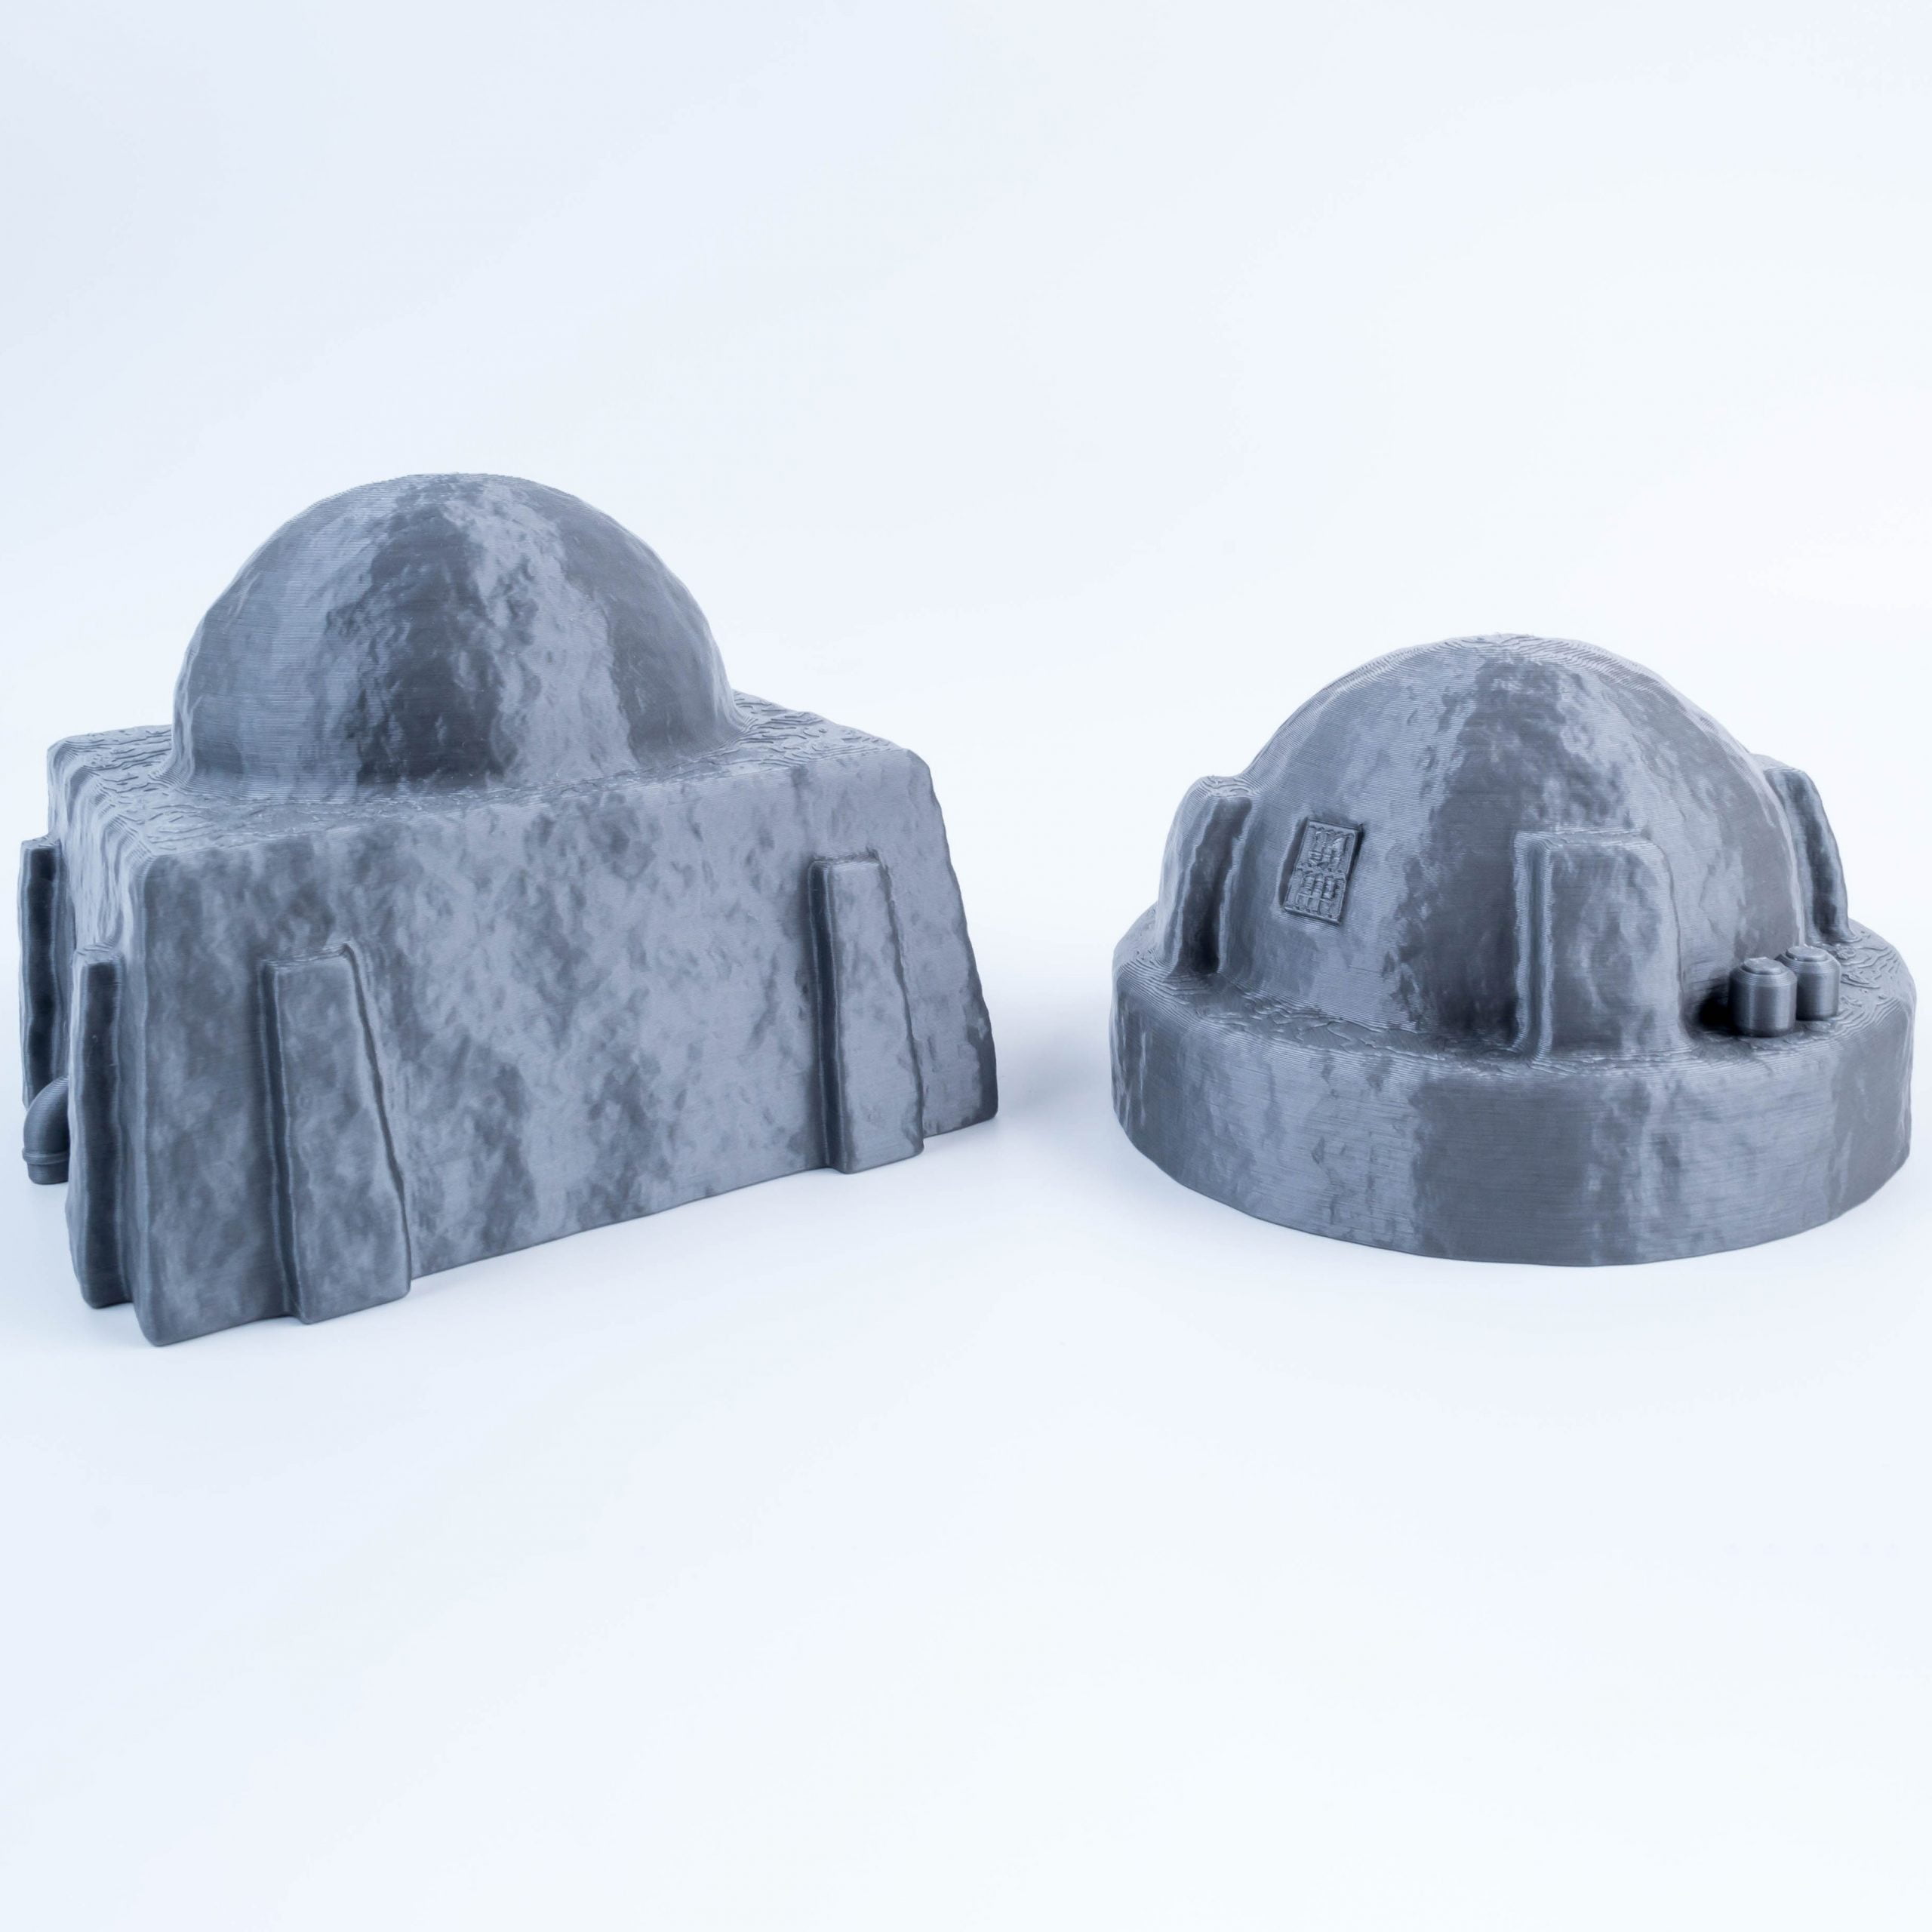
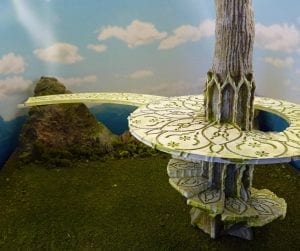
Sci-FiWüste Geländebau 28mm Maßstab
Dieses Gelände im 28mm-Maßstab ist mit anderen RPG-Miniaturen wie D&D, Pathfinder und Imperial Assault kompatibel. Es ist an das Thema und den Stil von Star Wars Legion angepasst, einem Tabletop-Spiel, mit dem man epische Schlachten aus der Star Wars-Saga nachspielen kann.
(0 reviews) -
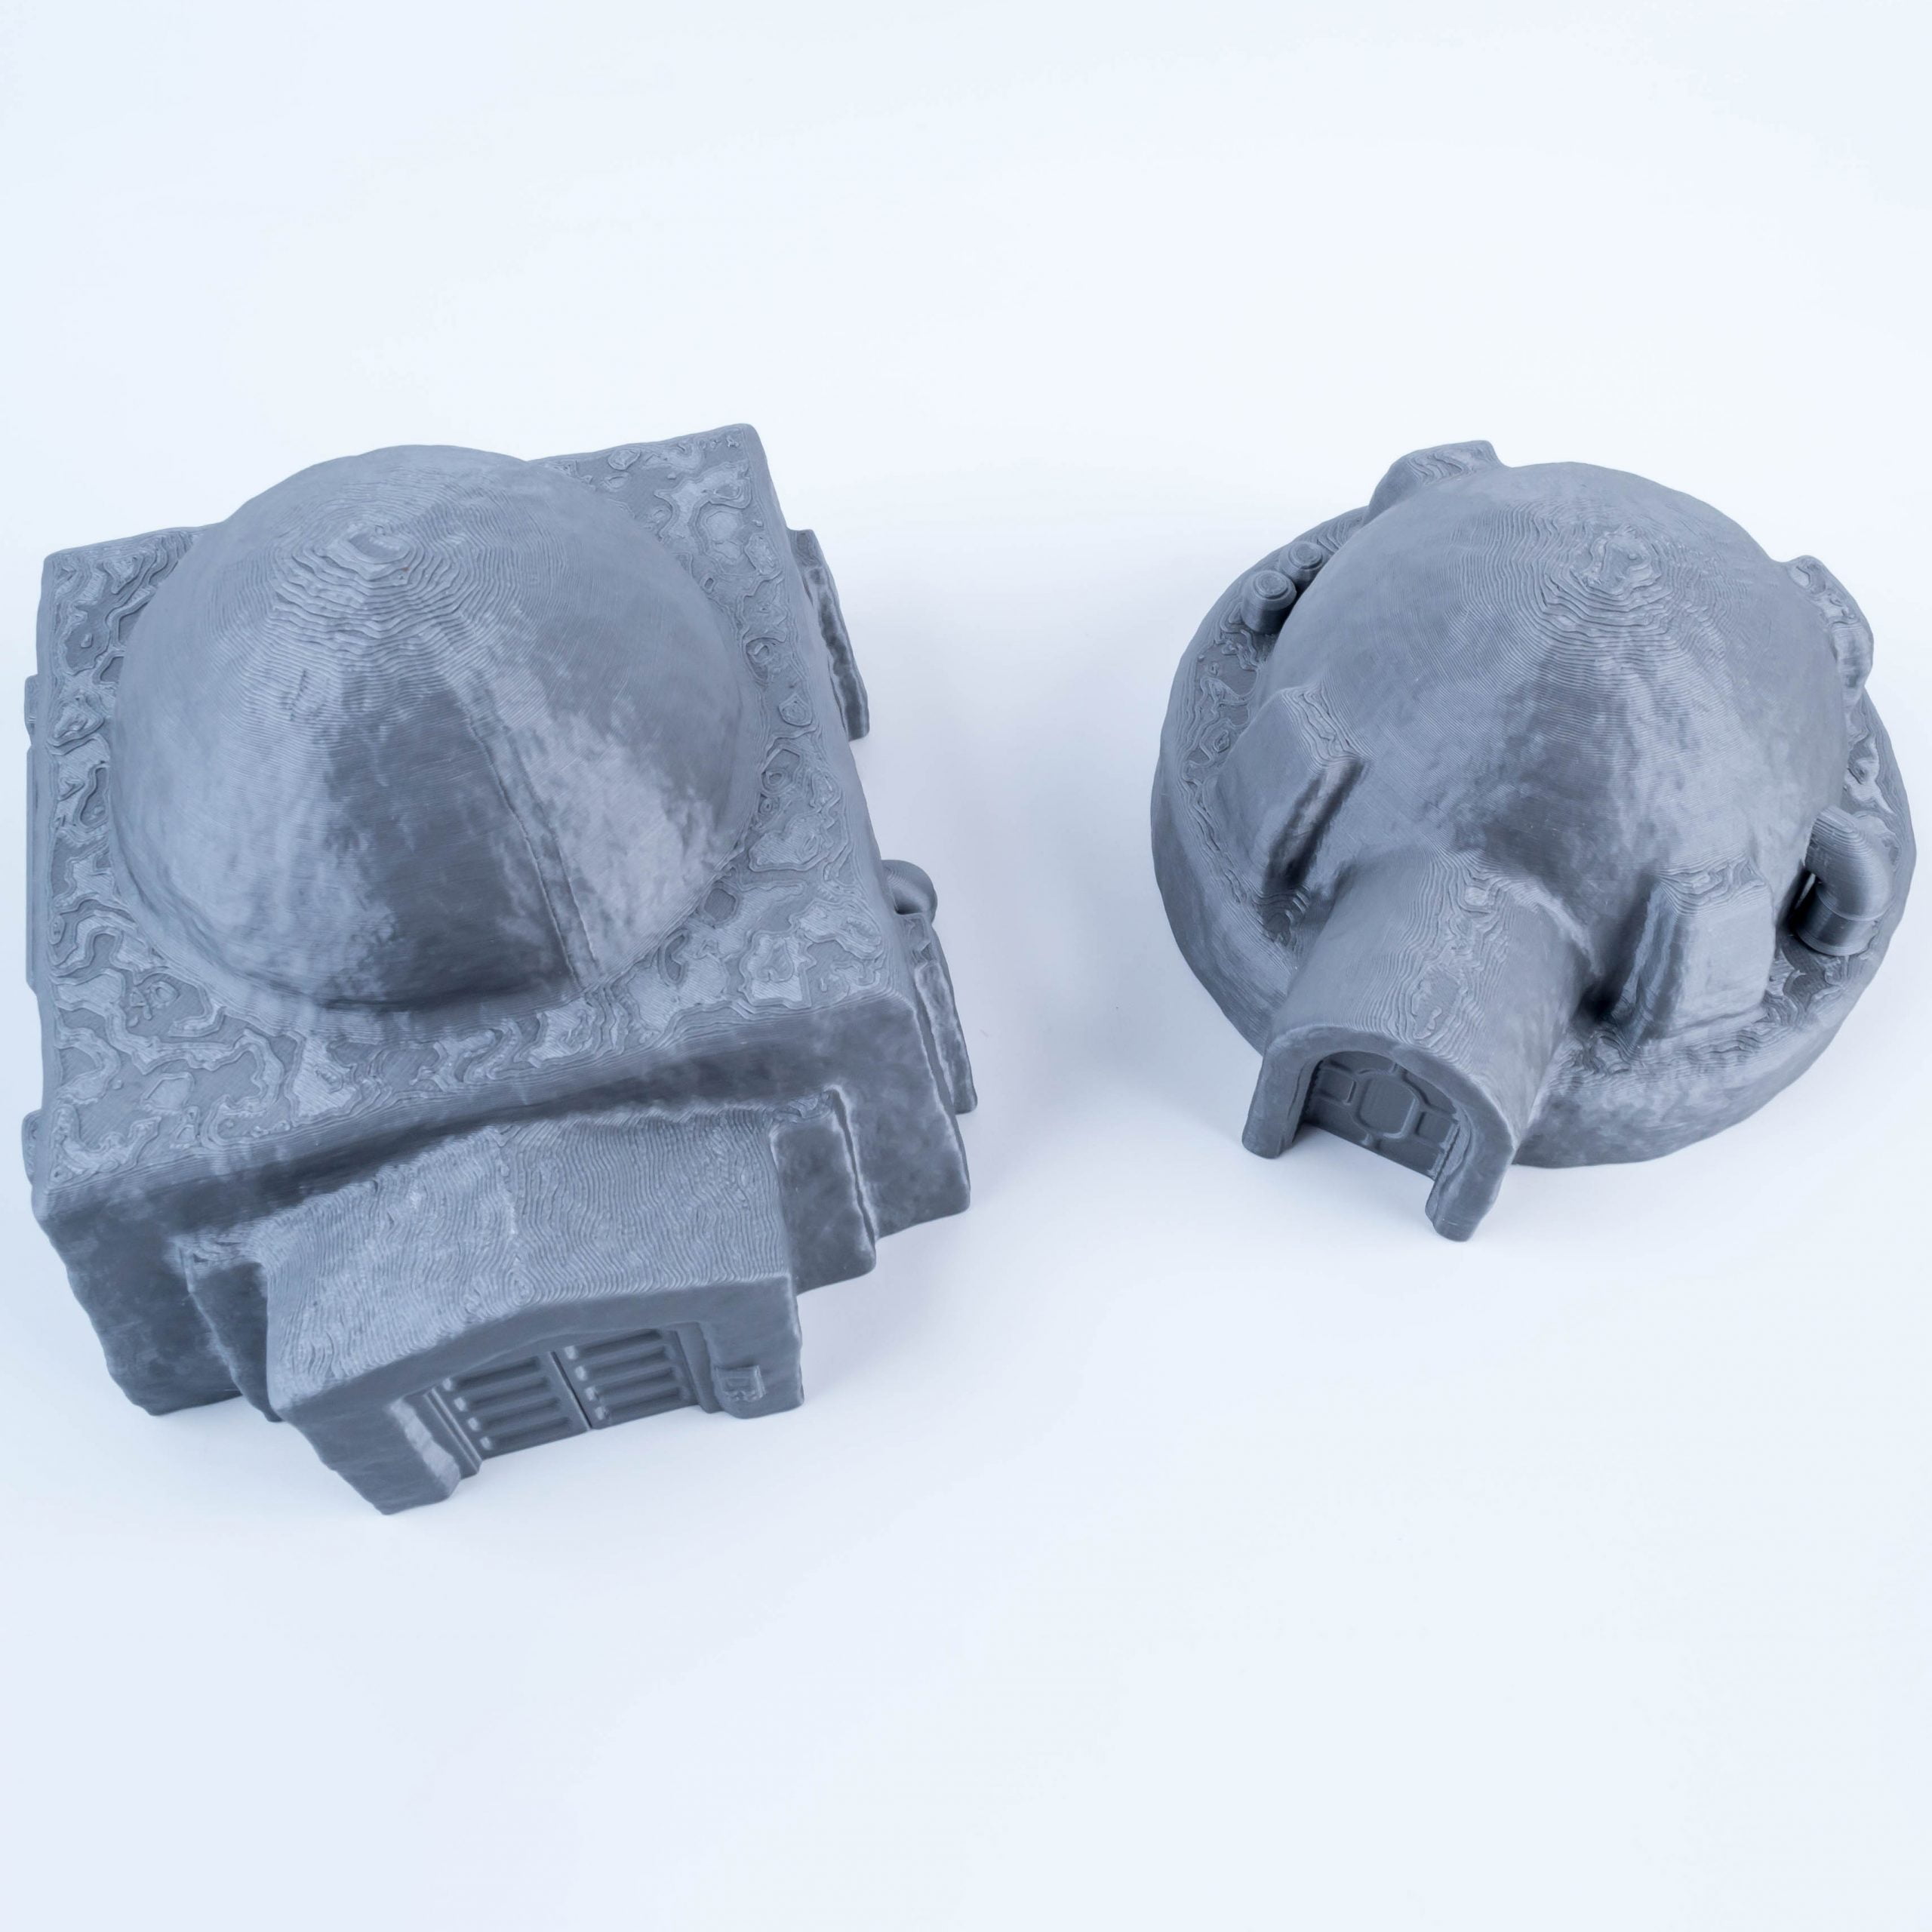
%22%20transform%3D%22translate(.6%20.6)%20scale(1.17188)%22%20fill-opacity%3D%22.5%22%3E%3Cellipse%20fill%3D%22%2329292b%22%20rx%3D%221%22%20ry%3D%221%22%20transform%3D%22rotate(-166.3%2060.7%2045.8)%20scale(90.12644%2058.86244)%22%2F%3E%3Cellipse%20fill%3D%22%23fff%22%20rx%3D%221%22%20ry%3D%221%22%20transform%3D%22matrix(-4.70598%2033.1823%20-112.94327%20-16.01783%20210.1%2012.4)%22%2F%3E%3Cellipse%20fill%3D%22%23d9dec5%22%20rx%3D%221%22%20ry%3D%221%22%20transform%3D%22matrix(12.70052%20-70.18408%2031.54256%205.70795%20224.9%20192.2)%22%2F%3E%3Cellipse%20fill%3D%22%23d4d4d6%22%20rx%3D%221%22%20ry%3D%221%22%20transform%3D%22rotate(74.1%2011.2%2027)%20scale(24.42173%2095.17645)%22%2F%3E%3Cellipse%20fill%3D%22%23c6c7c5%22%20rx%3D%221%22%20ry%3D%221%22%20transform%3D%22matrix(177.28201%2048.16646%20-6.60036%2024.29336%2027.6%20192)%22%2F%3E%3Cellipse%20fill%3D%22%232d2d2d%22%20rx%3D%221%22%20ry%3D%221%22%20transform%3D%22rotate(25.9%20-155.1%20306.8)%20scale(55.12246%2032.01501)%22%2F%3E%3Cellipse%20fill%3D%22%23b0b0b1%22%20rx%3D%221%22%20ry%3D%221%22%20transform%3D%22matrix(-130.457%20-39.9329%205.17752%20-16.91447%20202.3%2043.3)%22%2F%3E%3Cellipse%20fill%3D%22%23fafafb%22%20cx%3D%22242%22%20rx%3D%2293%22%20ry%3D%2220%22%2F%3E%3Cpath%20fill%3D%22%2392a62c%22%20d%3D%22M232%2082h24v67h-24z%22%2F%3E%3Cellipse%20fill%3D%22%23696969%22%20rx%3D%221%22%20ry%3D%221%22%20transform%3D%22matrix(-6.41101%2024.09435%20-66.2549%20-17.62907%2083.7%20142.2)%22%2F%3E%3Cellipse%20fill%3D%22%23d1d2c4%22%20rx%3D%221%22%20ry%3D%221%22%20transform%3D%22matrix(26.24187%206.8355%20-13.48965%2051.78756%20242.9%20193.7)%22%2F%3E%3Cpath%20fill%3D%22%23d9dccc%22%20d%3D%22M0%20183h34v21H0z%22%2F%3E%3Cellipse%20fill%3D%22%236e6e6f%22%20rx%3D%221%22%20ry%3D%221%22%20transform%3D%22matrix(64.9906%20-59.80054%2014.47264%2015.72871%2038%2081.8)%22%2F%3E%3Cellipse%20fill%3D%22%23d0d0d0%22%20rx%3D%221%22%20ry%3D%221%22%20transform%3D%22matrix(-1.41666%20-12.26269%2037.44663%20-4.32606%2025.8%207.7)%22%2F%3E%3Cellipse%20fill%3D%22%23939395%22%20cx%3D%22112%22%20cy%3D%22180%22%20rx%3D%2226%22%20ry%3D%2226%22%2F%3E%3C%2Fg%3E%3C%2Fsvg%3E) Gebäude und Zelte
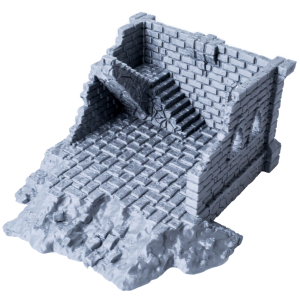
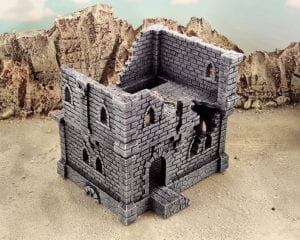
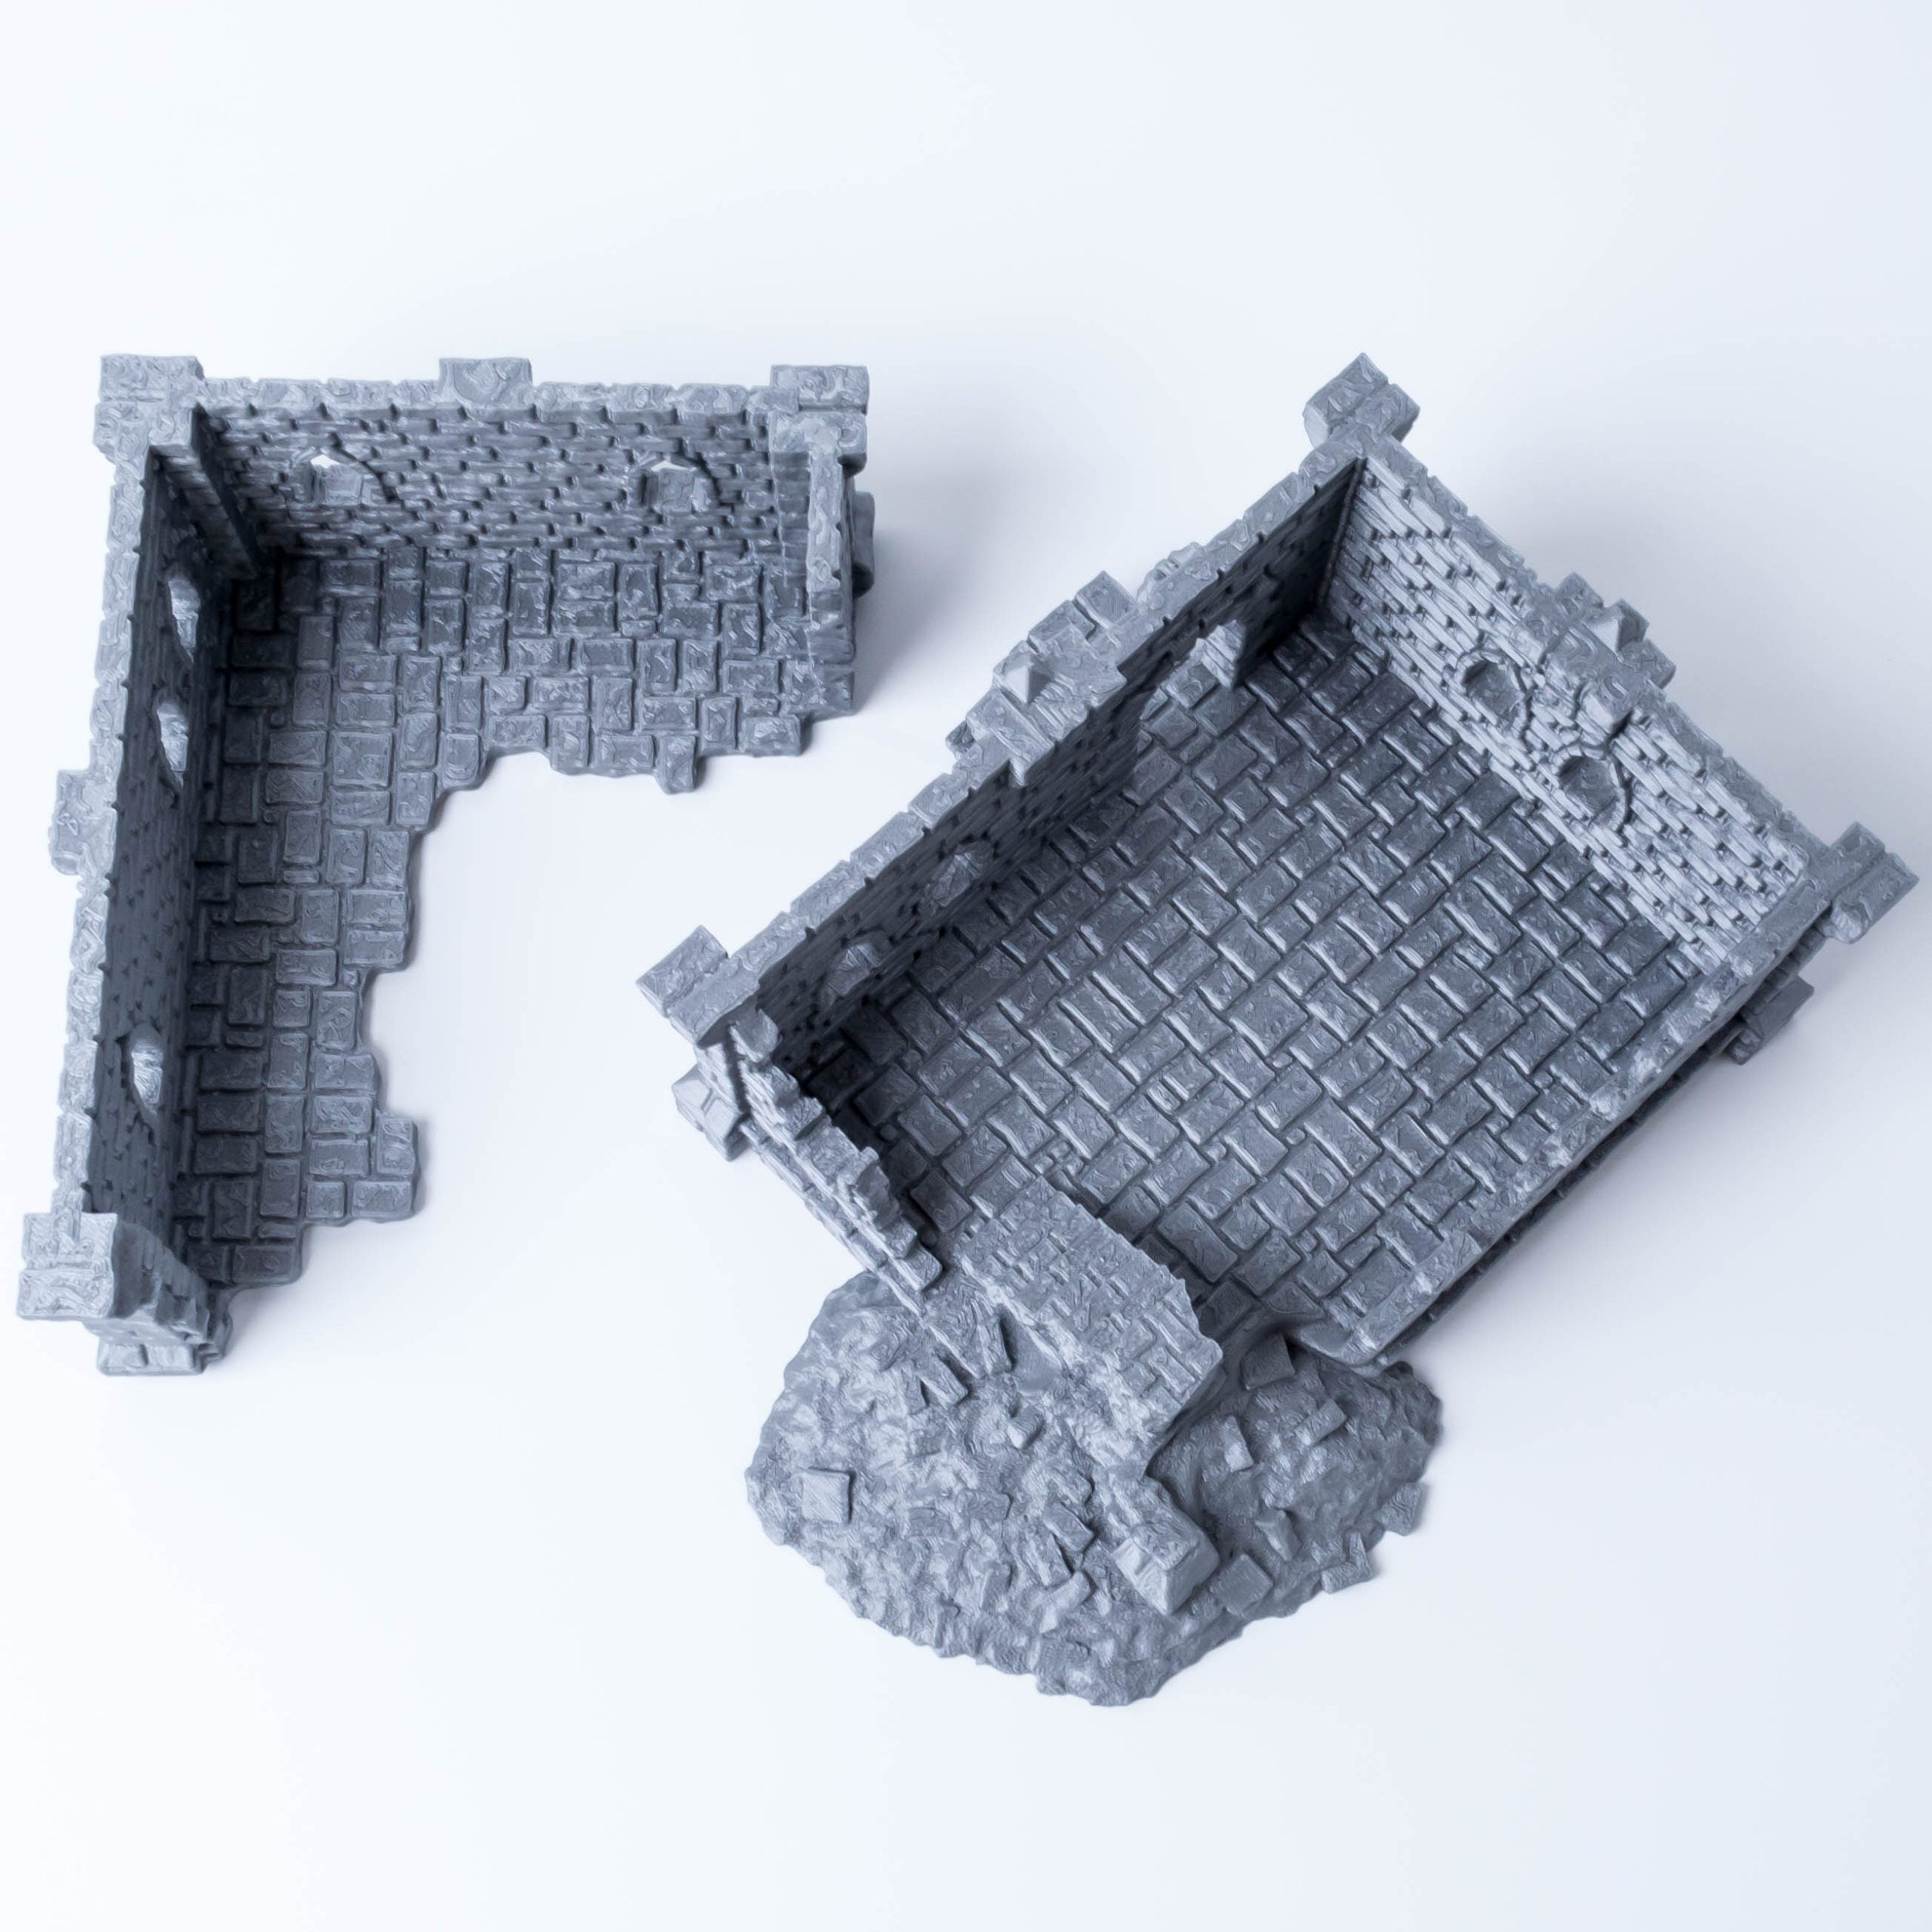
Gebäude und Zelte28mm Mittelalterliches Gelände: Ruine eines Steingebäudes
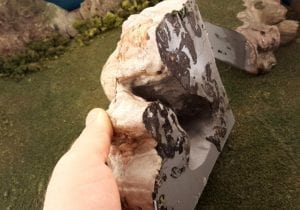
Wenn du auf der Suche nach einem realistischen und realitätsnahen Geländestück für deine Mittelalter- oder Fantasy-Wargames bist, wirst du dieses verfallene Steingebäude lieben. Dieses Modell besteht aus zwei Teilen (Ober- und Unterteil), die zur Lagerung und zum Transport leicht zusammen- und auseinandergebaut werden können.
(0 reviews) -
%22%20transform%3D%22translate(.6%20.6)%20scale(1.17188)%22%20fill-opacity%3D%22.5%22%3E%3Cellipse%20fill%3D%22%23919dc6%22%20rx%3D%221%22%20ry%3D%221%22%20transform%3D%22matrix(-25.8052%20-56.36346%2089.25443%20-40.86387%20120.9%20114.2)%22%2F%3E%3Cellipse%20fill%3D%22%23674b2a%22%20cx%3D%229%22%20cy%3D%22214%22%20rx%3D%2259%22%20ry%3D%22255%22%2F%3E%3Cellipse%20fill%3D%22%2300264f%22%20rx%3D%221%22%20ry%3D%221%22%20transform%3D%22matrix(253.31006%2029.30897%20-3.16766%2027.3773%20121.5%200)%22%2F%3E%3Cellipse%20fill%3D%22%23004077%22%20rx%3D%221%22%20ry%3D%221%22%20transform%3D%22matrix(-33.15761%20-51.4392%20162.46345%20-104.72364%20194.3%20227.2)%22%2F%3E%3Cellipse%20fill%3D%22%238e827f%22%20rx%3D%221%22%20ry%3D%221%22%20transform%3D%22matrix(-30.241%20.15834%20-.41043%20-78.38488%2062.8%20135.2)%22%2F%3E%3Cellipse%20fill%3D%22%233e89c1%22%20cx%3D%22157%22%20cy%3D%22144%22%20rx%3D%2252%22%20ry%3D%2252%22%2F%3E%3Cpath%20fill%3D%22%23232020%22%20d%3D%22M-5.7%20166.4l113%20101.7-53.6%2059.5-113-101.7z%22%2F%3E%3Cellipse%20fill%3D%22%23200%22%20rx%3D%221%22%20ry%3D%221%22%20transform%3D%22matrix(-36.96991%20-22.80332%209.36534%20-15.18356%20246.4%2012)%22%2F%3E%3Cellipse%20fill%3D%22%230a5b90%22%20rx%3D%221%22%20ry%3D%221%22%20transform%3D%22matrix(159.99053%2080.45154%20-11.99959%2023.86307%20166.4%2022.1)%22%2F%3E%3Cellipse%20fill%3D%22%233b87bb%22%20rx%3D%221%22%20ry%3D%221%22%20transform%3D%22matrix(-34.72845%20-49.90483%2025.68041%20-17.87083%20199.2%2081.8)%22%2F%3E%3Cellipse%20fill%3D%22%238b66b0%22%20rx%3D%221%22%20ry%3D%221%22%20transform%3D%22matrix(5.53167%2042.08041%20-47.16026%206.19944%20117.7%2078.8)%22%2F%3E%3Cpath%20fill%3D%22%235c4da2%22%20d%3D%22M66%2073l89-29L36%2024z%22%2F%3E%3Cellipse%20fill%3D%22%2339332e%22%20rx%3D%221%22%20ry%3D%221%22%20transform%3D%22matrix(-40.17795%20120.317%20-28.90768%20-9.65326%200%2019.8)%22%2F%3E%3Cpath%20fill%3D%22%232b6fa1%22%20d%3D%22M94%20226l-10-42%20147-48z%22%2F%3E%3Cellipse%20fill%3D%22%236b85ca%22%20rx%3D%221%22%20ry%3D%221%22%20transform%3D%22matrix(11.49118%207.10103%20-19.78546%2032.01764%2097.4%20170.5)%22%2F%3E%3C%2Fg%3E%3C%2Fsvg%3E) Gebäude und Zelte
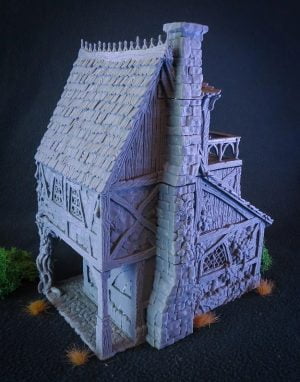
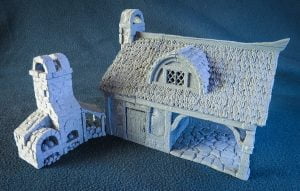
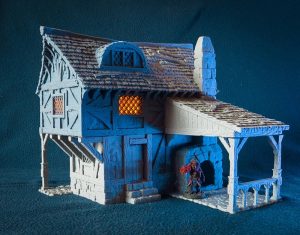
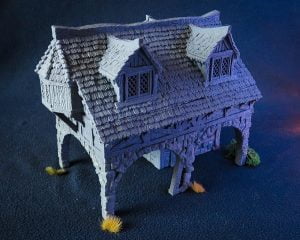
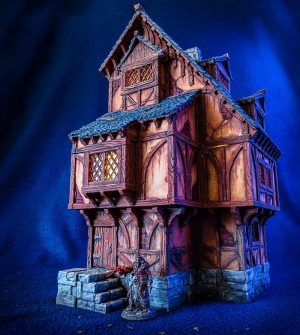
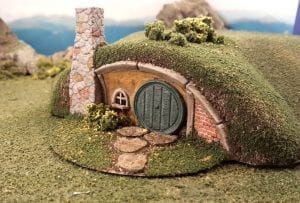
Gebäude und ZelteHütte und Bäckerei im 28mm Maßstab für mittelalterliche und Fantasy-Dörfer. Stadt Tarok
Das ist das Cottage und die Bäckerei aus der Serie. Sie können die Türen öffnen und schließen, um Ihre Tischplatte lebendiger zu gestalten. Alle Risse und jedes Detail werden individuell modelliert. Bei diesem Modell gibt es einige sich wiederholende Muster.
(0 reviews) -
%22%20transform%3D%22translate(.6%20.6)%20scale(1.17188)%22%20fill-opacity%3D%22.5%22%3E%3Cellipse%20fill%3D%22%2361607f%22%20rx%3D%221%22%20ry%3D%221%22%20transform%3D%22matrix(30.15841%2032.81034%20-35.39005%2032.52962%20128.8%20137.6)%22%2F%3E%3Cellipse%20fill%3D%22%23dfe3e2%22%20rx%3D%221%22%20ry%3D%221%22%20transform%3D%22rotate(-54.6%20163%2072.5)%20scale(21.45127%2054.50553)%22%2F%3E%3Cellipse%20fill%3D%22%23d8ea91%22%20rx%3D%221%22%20ry%3D%221%22%20transform%3D%22matrix(-9.25675%20-18.77692%2036.20312%20-17.8476%2078.3%2069.3)%22%2F%3E%3Cellipse%20fill%3D%22%23dcee96%22%20cx%3D%22246%22%20cy%3D%22170%22%20rx%3D%2249%22%20ry%3D%2234%22%2F%3E%3Cellipse%20fill%3D%22%23c26e36%22%20rx%3D%221%22%20ry%3D%221%22%20transform%3D%22rotate(121.5%20119.4%2086)%20scale(49.09519%2040.14566)%22%2F%3E%3Cellipse%20fill%3D%22%239491bb%22%20rx%3D%221%22%20ry%3D%221%22%20transform%3D%22matrix(2.78206%2025.4507%20-105.33198%2011.514%2072.5%2013.6)%22%2F%3E%3Cellipse%20fill%3D%22%23696c5e%22%20rx%3D%221%22%20ry%3D%221%22%20transform%3D%22matrix(-20.97717%20-8.95601%2038.50618%20-90.19089%200%2034)%22%2F%3E%3Cpath%20fill%3D%22%239eaf55%22%20d%3D%22M271%2091L152%2017l17%20181z%22%2F%3E%3Cpath%20fill%3D%22%235e8b3a%22%20d%3D%22M222.3%2021.8L216.8-.6l36.9-9.2%205.5%2022.4z%22%2F%3E%3Cellipse%20fill%3D%22%23a4b55c%22%20rx%3D%221%22%20ry%3D%221%22%20transform%3D%22matrix(28.61742%2081.49845%20-23.92735%208.40187%2043.4%20130.8)%22%2F%3E%3Cpath%20fill%3D%22%2346454c%22%20d%3D%22M128%20109h15v35h-15z%22%2F%3E%3Cpath%20fill%3D%22%23ababb4%22%20d%3D%22M108%20164l4%2034-44-59z%22%2F%3E%3Cpath%20fill%3D%22%23727e32%22%20d%3D%22M176%20153v-43l-30-26z%22%2F%3E%3Cellipse%20fill%3D%22%23dc9f74%22%20rx%3D%221%22%20ry%3D%221%22%20transform%3D%22rotate(40%2036.6%20349.3)%20scale(26.99144%2011.49341)%22%2F%3E%3Cellipse%20fill%3D%22%23a3b35a%22%20rx%3D%221%22%20ry%3D%221%22%20transform%3D%22matrix(-24.65017%203.25696%20-4.28933%20-32.4636%20195%2012.1)%22%2F%3E%3C%2Fg%3E%3C%2Fsvg%3E) Sci-Fi
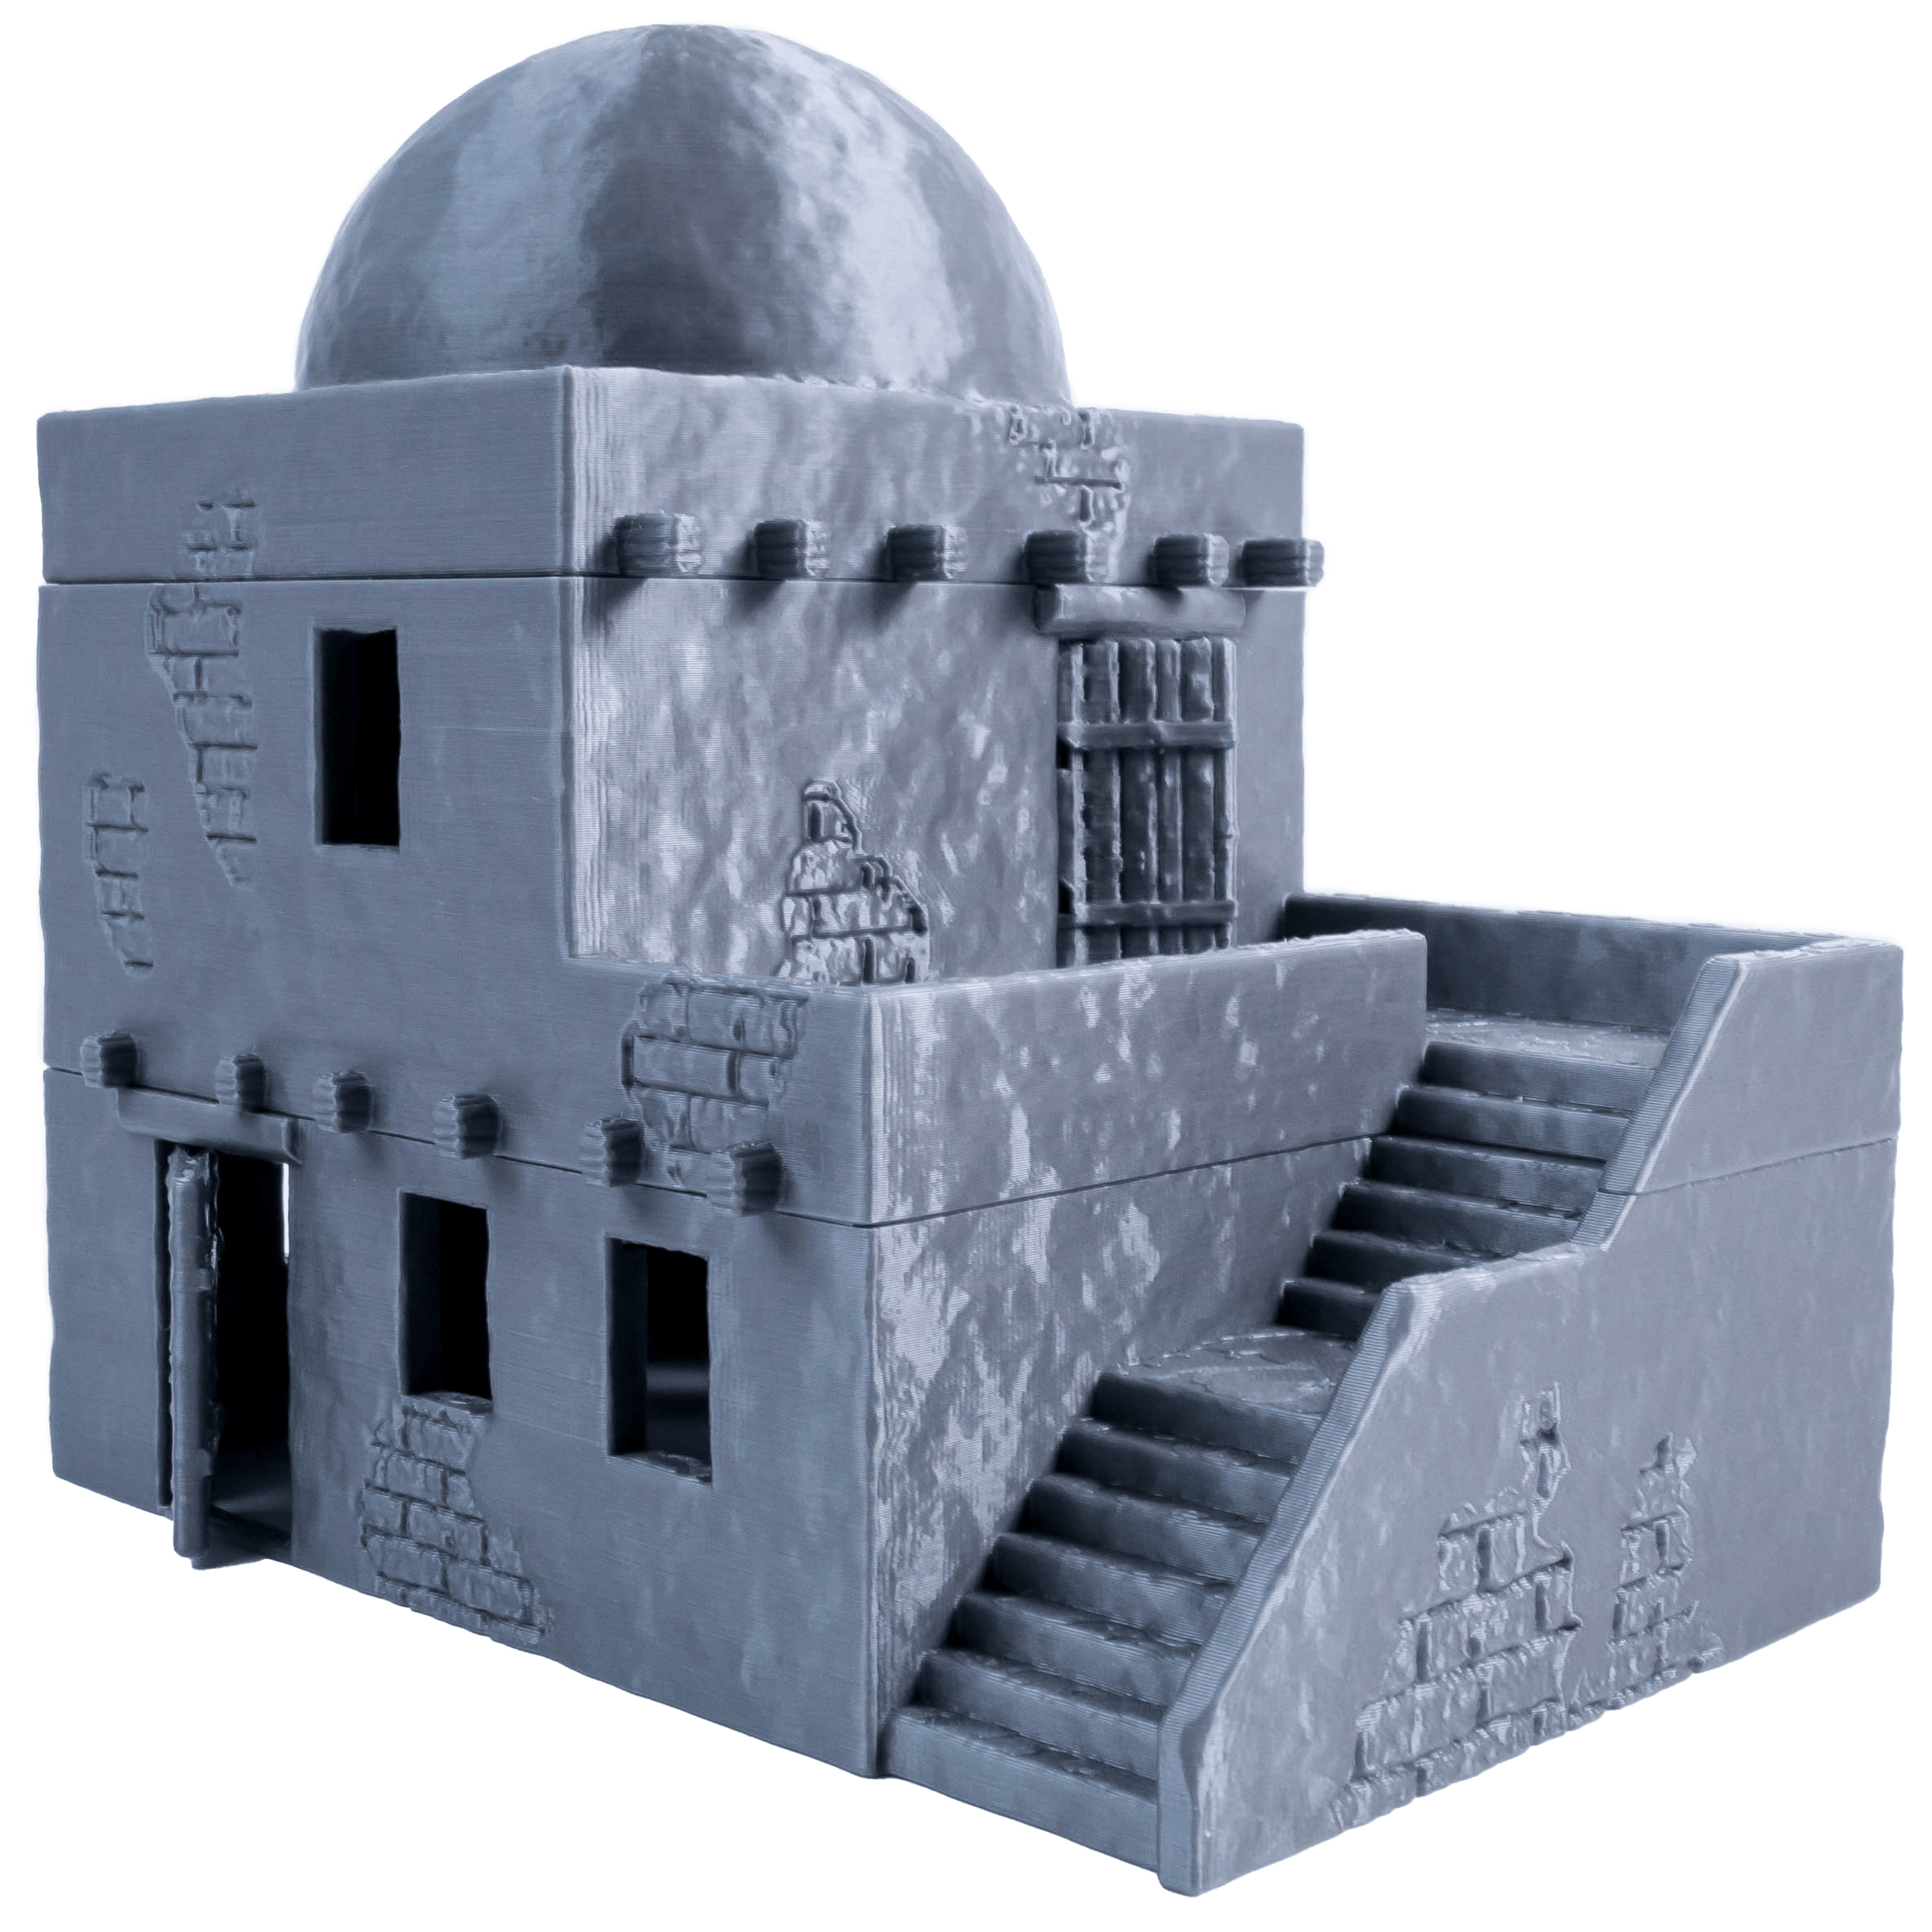
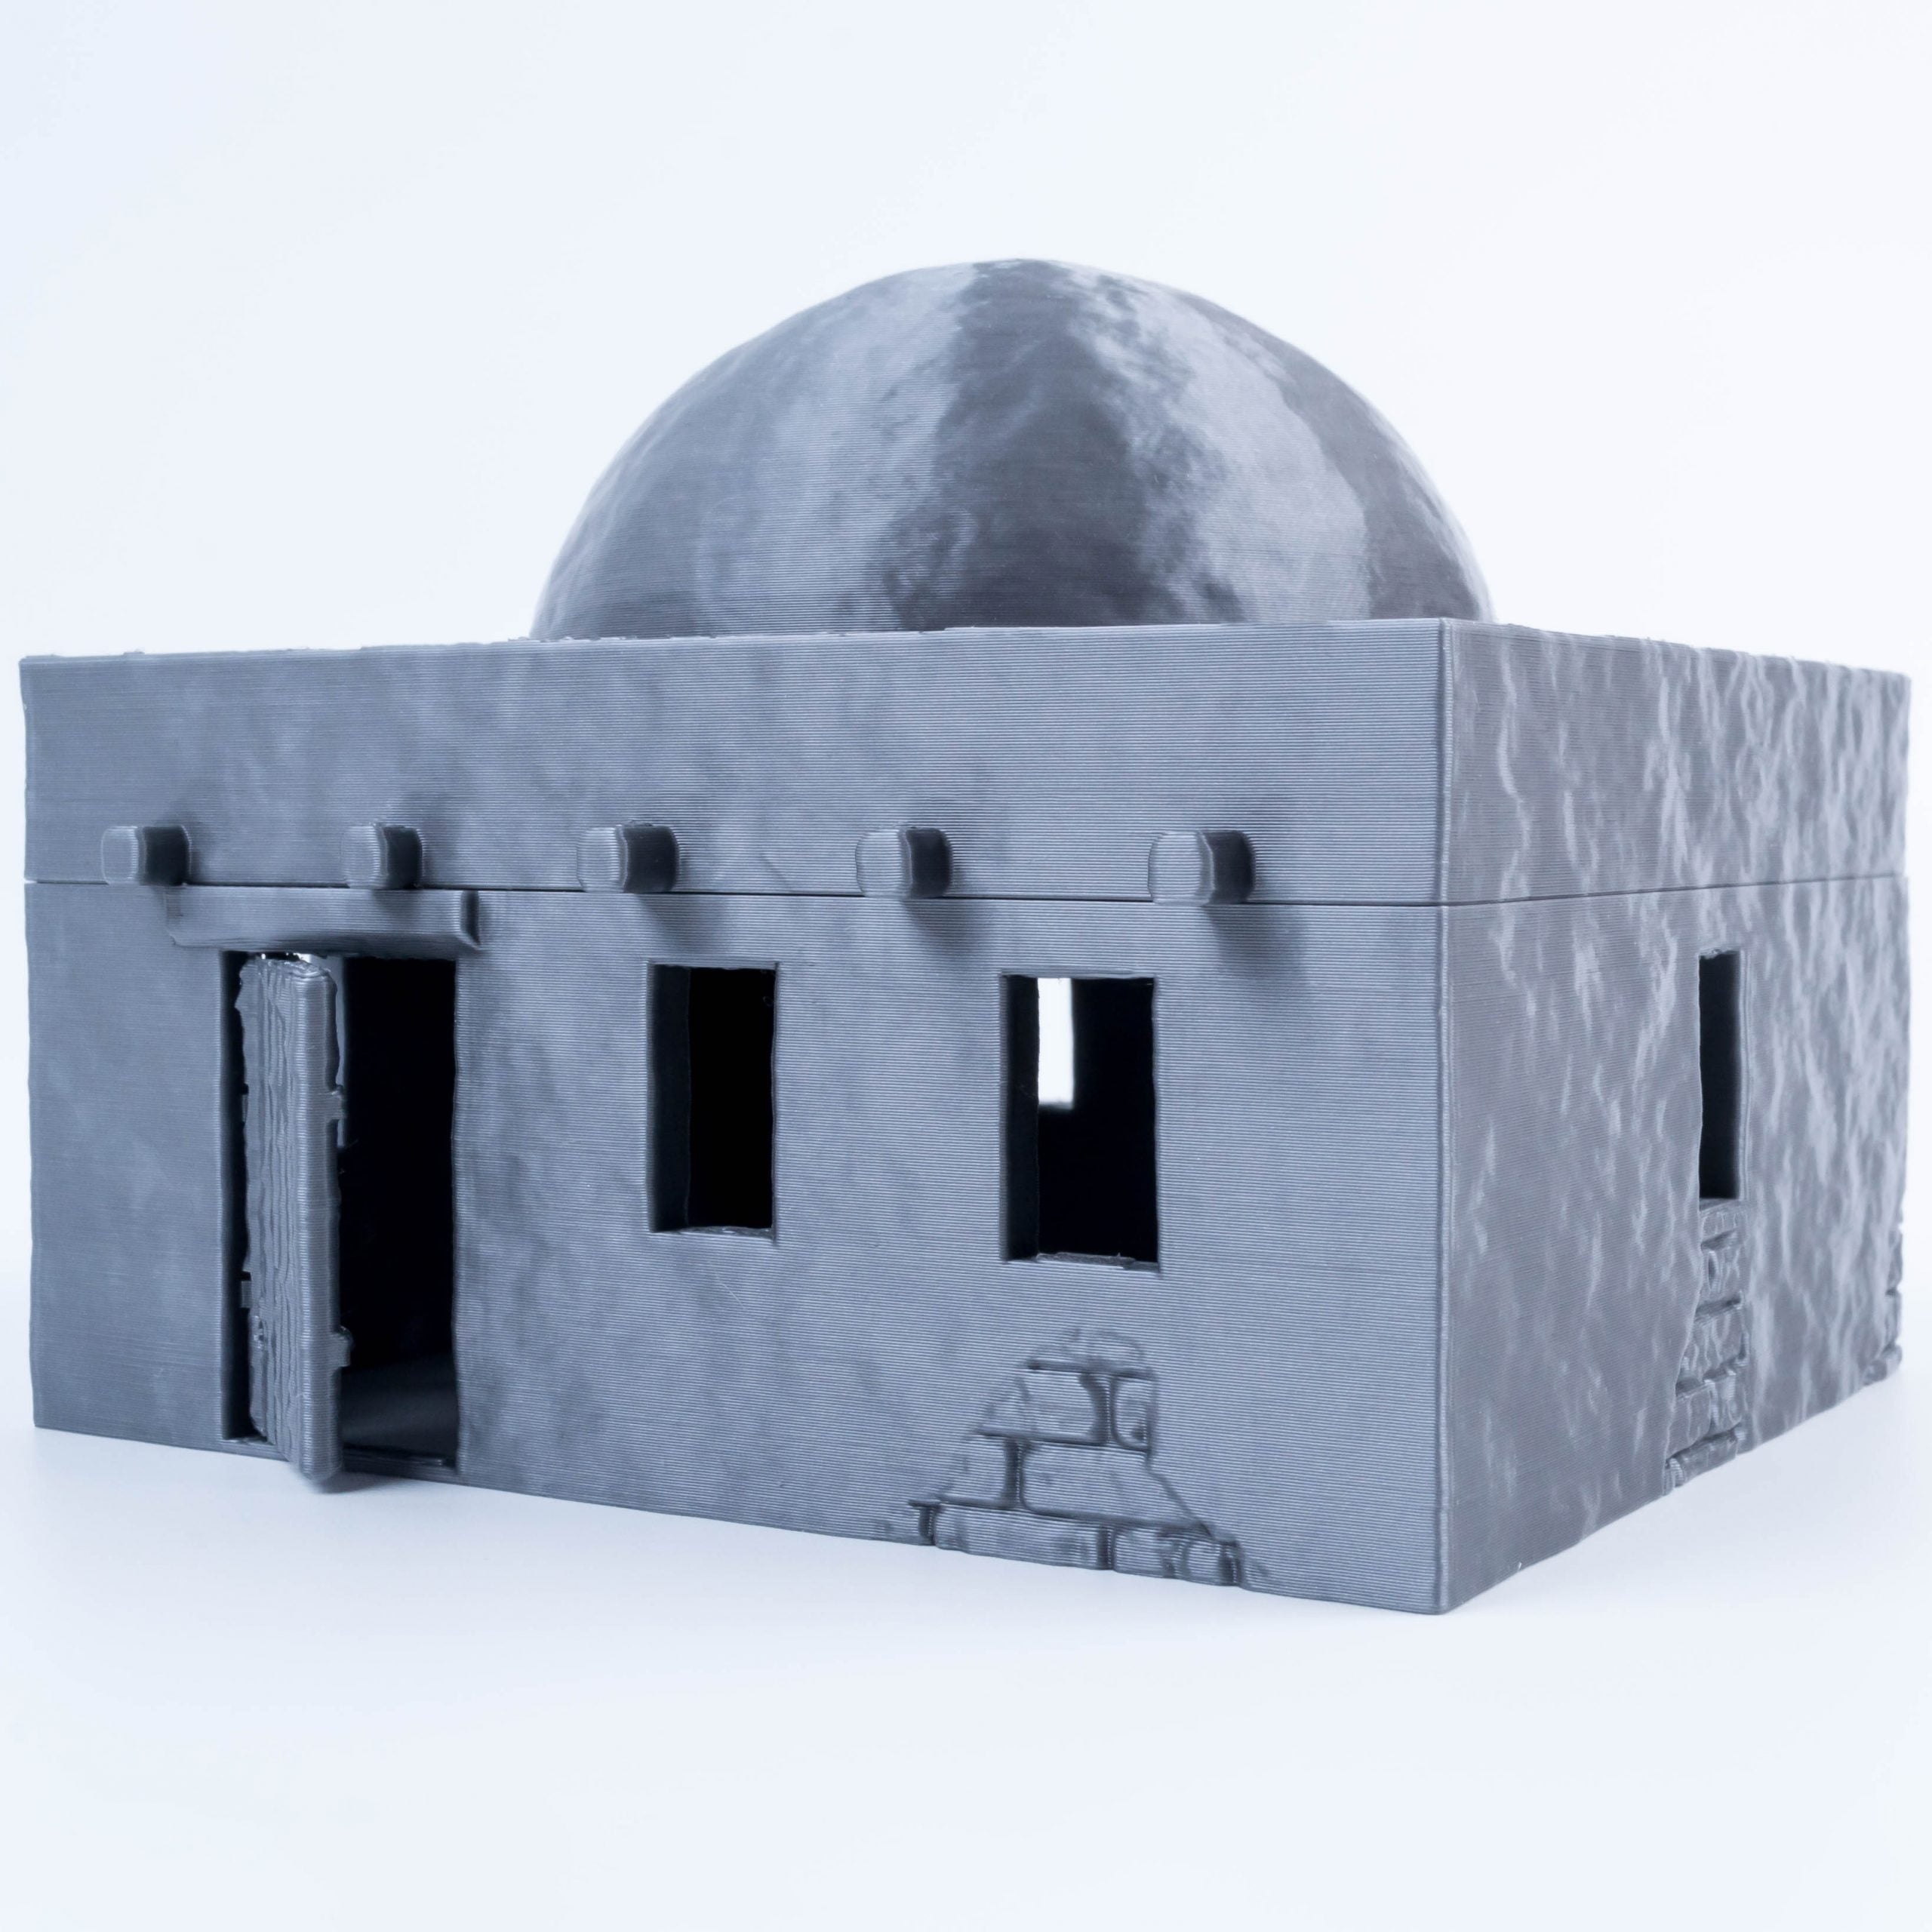
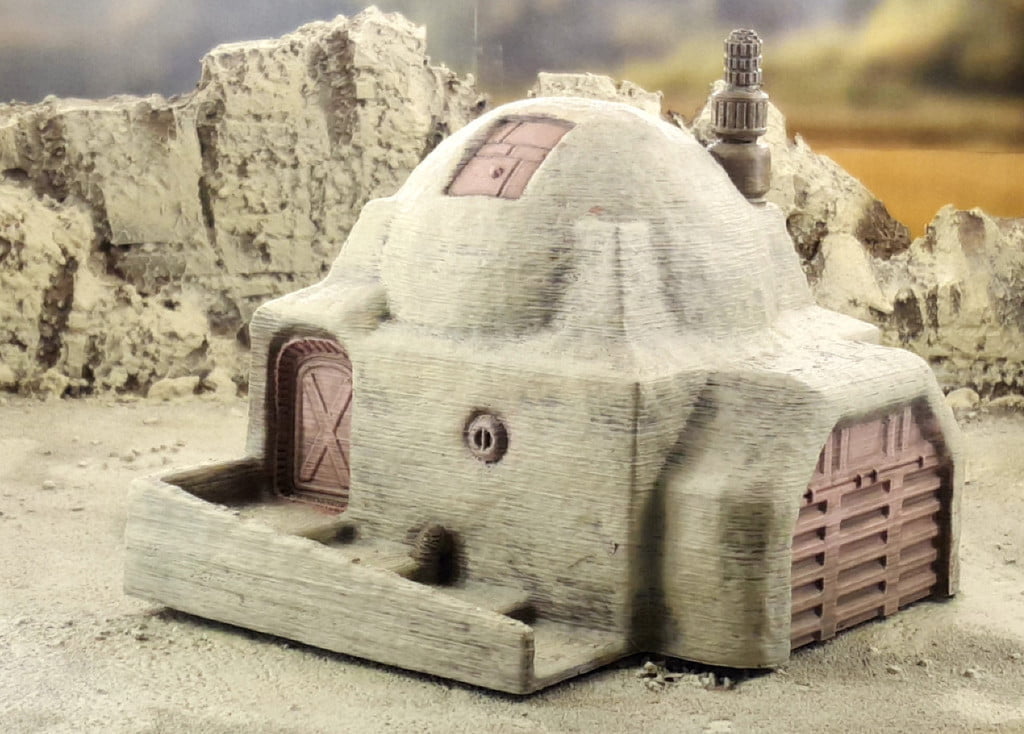
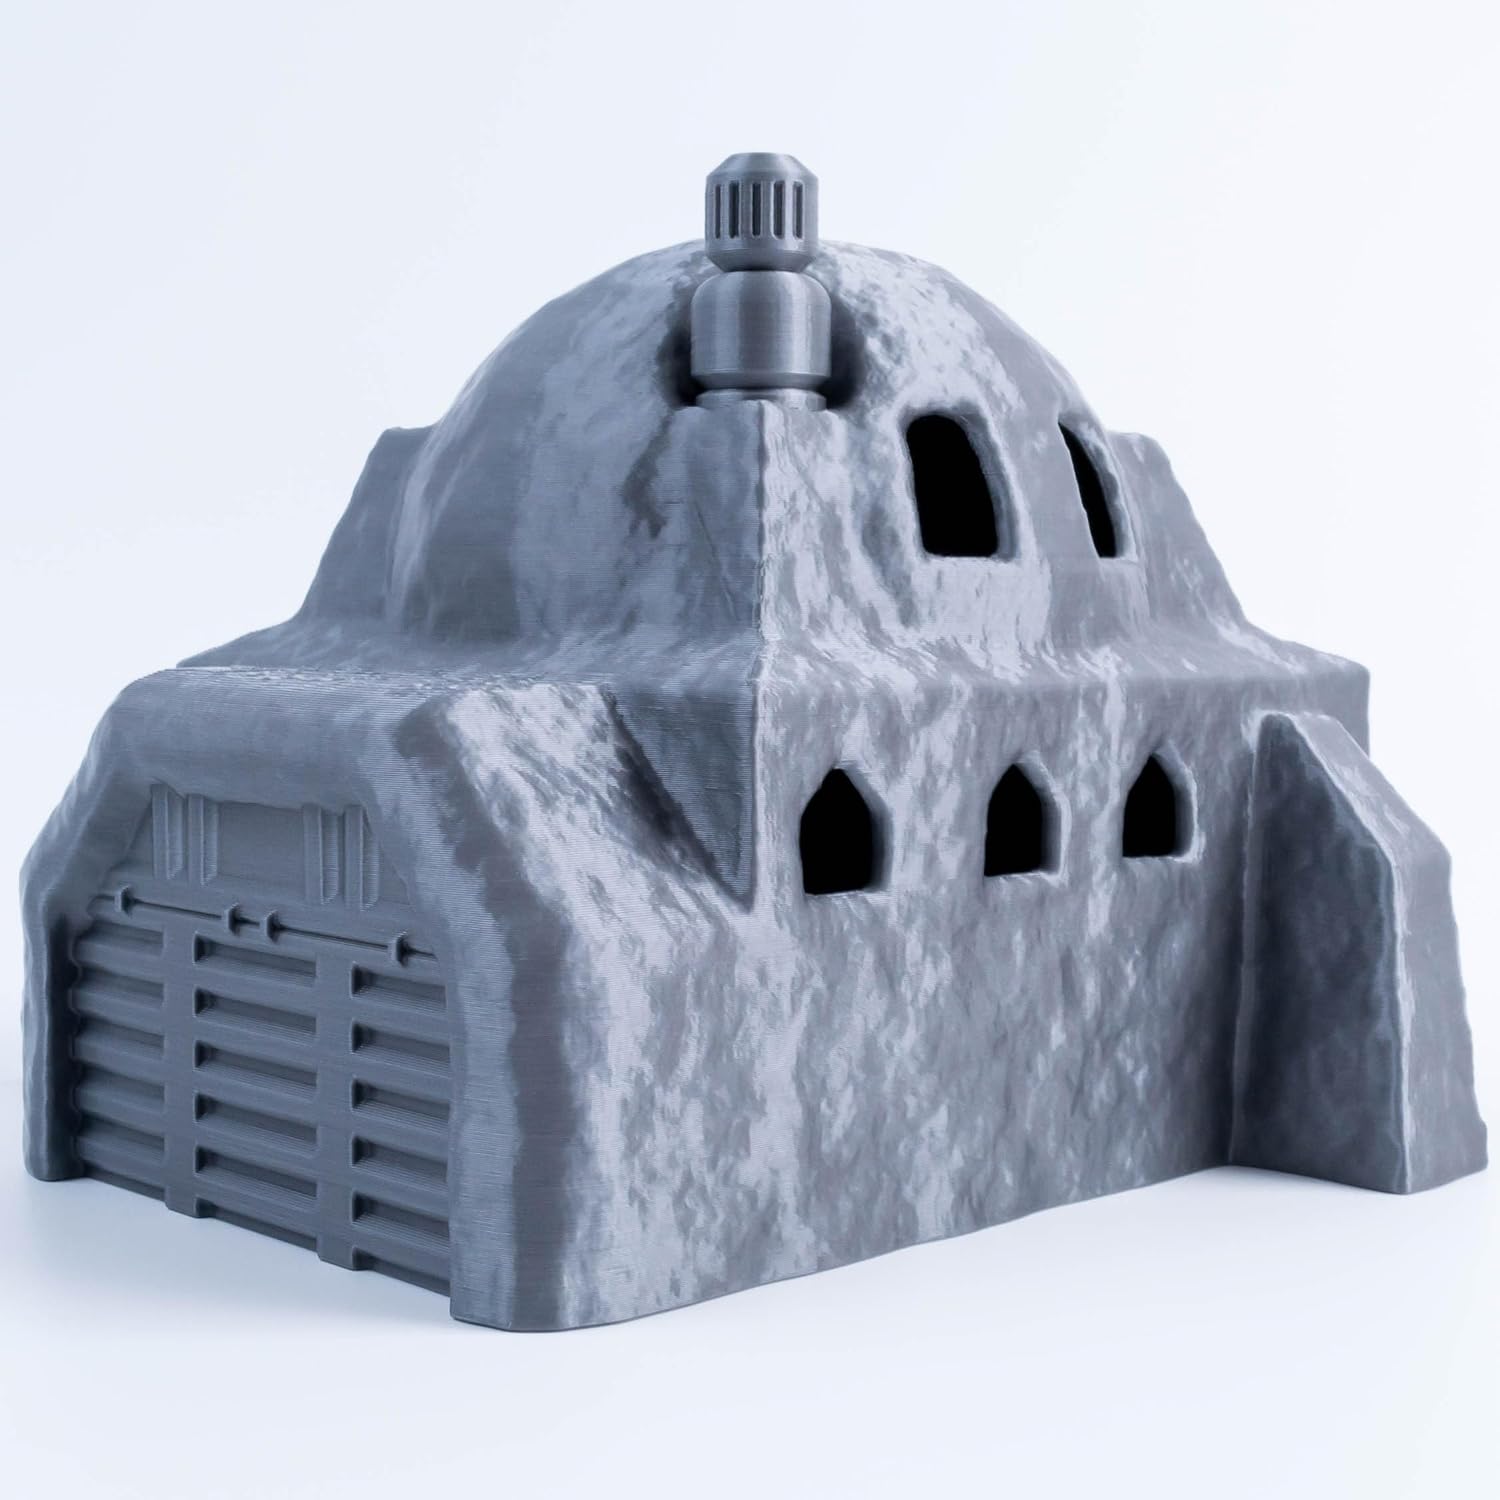
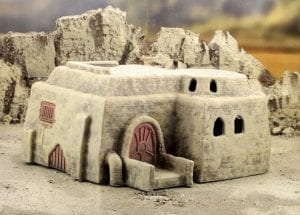
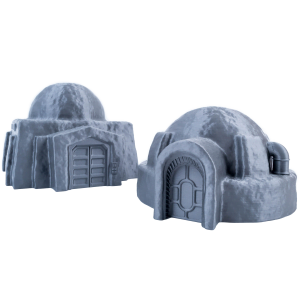
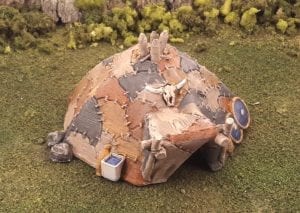
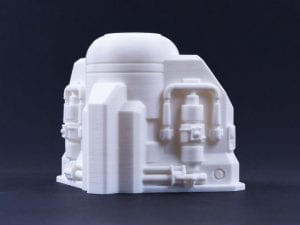
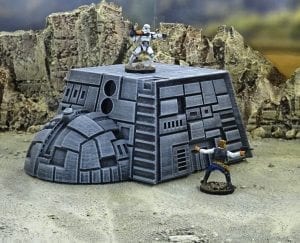
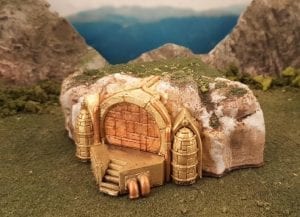
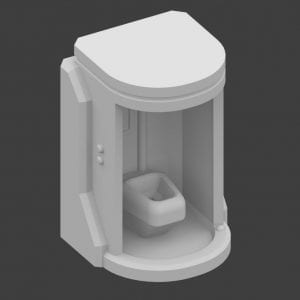
Sci-FiWüste Sci-Fi Star Wars Legion Kompatibel Gebäude 28mm 32mm Maßstab
Dieses Gebäude ist so konzipiert, dass es perfekt zu Star Wars Legion und anderen RPG-Miniaturen (Star Wars, Dungeons & Dragons, Pathfinder), Warhammer oder anderen Tabletop-Spielen passt. Es weist eine detaillierte und robuste Struktur auf, mit einem kuppelförmigen Dach, einem runden Eingang und Fenstern. Das Gebäude hat eine sandsteinähnliche Textur und ist grau gefärbt, was ihm einen realistischen Wüstenlook verleiht.
(0 reviews) -
%22%20transform%3D%22translate(.9%20.9)%20scale(1.76172)%22%20fill-opacity%3D%22.5%22%3E%3Cellipse%20fill%3D%22%23afafad%22%20rx%3D%221%22%20ry%3D%221%22%20transform%3D%22matrix(-1.65463%20-105.32855%2034.04169%20-.53477%2065.3%20129.1)%22%2F%3E%3Cellipse%20fill%3D%22%2300031a%22%20rx%3D%221%22%20ry%3D%221%22%20transform%3D%22matrix(-38.25574%20-9.04327%2021.73933%20-91.96386%20153.2%20213)%22%2F%3E%3Cellipse%20fill%3D%22%23191917%22%20cx%3D%229%22%20cy%3D%22127%22%20rx%3D%2214%22%20ry%3D%22169%22%2F%3E%3Cpath%20fill%3D%22%2321211f%22%20d%3D%22M-16%200l197%2045%202-61z%22%2F%3E%3Cellipse%20fill%3D%22%23757573%22%20rx%3D%221%22%20ry%3D%221%22%20transform%3D%22matrix(-34.5998%20-5.59303%209.3556%20-57.87591%20114%2089.6)%22%2F%3E%3Cpath%20fill%3D%22%23ababab%22%20d%3D%22M36%2051l39%208-15%20132z%22%2F%3E%3Cellipse%20fill%3D%22%23383736%22%20cx%3D%2243%22%20cy%3D%22255%22%20rx%3D%22103%22%20ry%3D%2234%22%2F%3E%3Cellipse%20fill%3D%22%23001174%22%20rx%3D%221%22%20ry%3D%221%22%20transform%3D%22matrix(-20.67099%20-5.07528%209.89077%20-40.28394%20164%20237.1)%22%2F%3E%3Cellipse%20fill%3D%22%232a2925%22%20rx%3D%221%22%20ry%3D%221%22%20transform%3D%22matrix(-7.2909%20-143.92455%2013.8632%20-.70228%20163.3%2061.8)%22%2F%3E%3Cellipse%20fill%3D%22%2320201f%22%20rx%3D%221%22%20ry%3D%221%22%20transform%3D%22rotate(-121%2010.8%2010.6)%20scale(24.74506%2032.17868)%22%2F%3E%3Cellipse%20fill%3D%22%2317160d%22%20rx%3D%221%22%20ry%3D%221%22%20transform%3D%22rotate(-62.9%20222.7%20-36.3)%20scale(43.21885%2017.04662)%22%2F%3E%3Cpath%20fill%3D%22%2370706f%22%20d%3D%22M51%2011l-37%2089%2020%2077z%22%2F%3E%3Cellipse%20fill%3D%22%23747473%22%20rx%3D%221%22%20ry%3D%221%22%20transform%3D%22matrix(-3.05087%20-25.26069%2039.00758%20-4.71115%2071.3%20214.7)%22%2F%3E%3Cellipse%20fill%3D%22%230f0f10%22%20rx%3D%221%22%20ry%3D%221%22%20transform%3D%22matrix(-11.31646%203.76448%20-43.51686%20-130.8165%20-.1%20220.2)%22%2F%3E%3Cellipse%20fill%3D%22%2347463e%22%20rx%3D%221%22%20ry%3D%221%22%20transform%3D%22matrix(10.9973%20.42794%20-2.72905%2070.13196%20122.6%20218)%22%2F%3E%3C%2Fg%3E%3C%2Fsvg%3E) Gebäude und Zelte
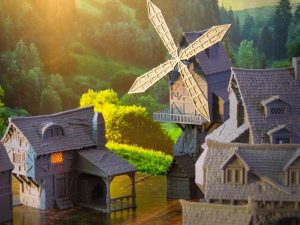
Gebäude und ZelteWindmühle 28mm Maßstab Gebäude für mittelalterliche und Fantasy-Dorf. Stadt Tarok
Das Rad und der obere Teil sind drehbar! Und Sie können die Türen öffnen und schließen, um Ihre Tischplatte lebendiger zu gestalten. Alle Risse und jedes Detail werden individuell modelliert. Bei diesem Modell gibt es einige sich wiederholende Muster.
(0 reviews) -
%22%20transform%3D%22translate(.6%20.6)%20scale(1.17188)%22%20fill-opacity%3D%22.5%22%3E%3Cellipse%20fill%3D%22%23533c23%22%20rx%3D%221%22%20ry%3D%221%22%20transform%3D%22matrix(28.0205%20-36.93616%20114.1943%2086.63008%2061.7%2014)%22%2F%3E%3Cellipse%20fill%3D%22%23276294%22%20cx%3D%22176%22%20cy%3D%22132%22%20rx%3D%22143%22%20ry%3D%2265%22%2F%3E%3Cellipse%20fill%3D%22%23002348%22%20rx%3D%221%22%20ry%3D%221%22%20transform%3D%22matrix(13.18372%20-37.4372%20240.52179%2084.7011%20154.4%200)%22%2F%3E%3Cellipse%20fill%3D%22%23658270%22%20rx%3D%221%22%20ry%3D%221%22%20transform%3D%22matrix(-25.61168%20-16.56894%2018.99548%20-29.36254%2050.4%2075.9)%22%2F%3E%3Cellipse%20fill%3D%22%237a645b%22%20cx%3D%22155%22%20cy%3D%2281%22%20rx%3D%2228%22%20ry%3D%2236%22%2F%3E%3Cellipse%20fill%3D%22%230c632e%22%20rx%3D%221%22%20ry%3D%221%22%20transform%3D%22matrix(31.44088%20-5.84147%2028.96832%20155.9177%2019.1%20137.7)%22%2F%3E%3Cellipse%20fill%3D%22%23001a05%22%20rx%3D%221%22%20ry%3D%221%22%20transform%3D%22matrix(-231.63382%2033.90728%20-2.06586%20-14.1127%2061.8%203.4)%22%2F%3E%3Cellipse%20fill%3D%22%23407daf%22%20rx%3D%221%22%20ry%3D%221%22%20transform%3D%22matrix(3.38245%20-38.66158%2025.52938%202.23353%20193%20124.1)%22%2F%3E%3Cellipse%20fill%3D%22%23428481%22%20rx%3D%221%22%20ry%3D%221%22%20transform%3D%22matrix(-30.7482%2013.15046%20-21.02333%20-49.15643%2063.1%20126.8)%22%2F%3E%3Cellipse%20fill%3D%22%23443233%22%20rx%3D%221%22%20ry%3D%221%22%20transform%3D%22matrix(19.00998%20-12.2836%2020.39462%2031.56251%20117%2071.4)%22%2F%3E%3Cellipse%20fill%3D%22%23165a94%22%20rx%3D%221%22%20ry%3D%221%22%20transform%3D%22matrix(28.29574%2034.49965%20-14.93648%2012.25052%20184.6%2049.4)%22%2F%3E%3Cellipse%20fill%3D%22%2300346c%22%20cx%3D%22238%22%20cy%3D%22138%22%20rx%3D%2220%22%20ry%3D%22255%22%2F%3E%3Cellipse%20fill%3D%22%23034176%22%20rx%3D%221%22%20ry%3D%221%22%20transform%3D%22rotate(143%2048.8%20113.8)%20scale(29.88325%2087.94353)%22%2F%3E%3Cellipse%20fill%3D%22%23035a28%22%20cx%3D%22120%22%20cy%3D%228%22%20rx%3D%2238%22%20ry%3D%2226%22%2F%3E%3Cellipse%20fill%3D%22%232f68ad%22%20rx%3D%221%22%20ry%3D%221%22%20transform%3D%22matrix(18.80157%2040.13705%20-15.72503%207.36614%2080.8%20120.4)%22%2F%3E%3C%2Fg%3E%3C%2Fsvg%3E) Gebäude und Zelte
Gebäude und ZelteSchmied im 28mm Maßstab für mittelalterliche und Fantasy-Dörfer. Stadt Tarok
Dies ist der Schmied aus der Serie. Sie können die Türen öffnen und schließen, um Ihre Tischplatte lebendiger zu gestalten. Alle Risse und jedes Detail werden individuell modelliert. Bei diesem Modell gibt es einige sich wiederholende Muster.
(0 reviews) -
%22%20transform%3D%22translate(.6%20.6)%20scale(1.17188)%22%20fill-opacity%3D%22.5%22%3E%3Cellipse%20fill%3D%22%23c6c5c7%22%20rx%3D%221%22%20ry%3D%221%22%20transform%3D%22rotate(178.5%2077.8%2087.2)%20scale(118.85146%2064.76339)%22%2F%3E%3Cellipse%20fill%3D%22%23393b2d%22%20rx%3D%221%22%20ry%3D%221%22%20transform%3D%22rotate(-110.7%20128.6%20-65)%20scale(65.59177%2053.70852)%22%2F%3E%3Cellipse%20fill%3D%22%234b4b49%22%20rx%3D%221%22%20ry%3D%221%22%20transform%3D%22rotate(-150.4%2022.7%2022)%20scale(56.36879%2083.91114)%22%2F%3E%3Cellipse%20fill%3D%22%23494a42%22%20cx%3D%22194%22%20cy%3D%2212%22%20rx%3D%22130%22%20ry%3D%2223%22%2F%3E%3Cellipse%20fill%3D%22%23dbdbdb%22%20rx%3D%221%22%20ry%3D%221%22%20transform%3D%22matrix(-23.11402%201.23047%20-2.26093%20-42.4709%20118.5%20191)%22%2F%3E%3Cpath%20fill%3D%22%23939294%22%20d%3D%22M95%2028l55%20138L43%2025z%22%2F%3E%3Cellipse%20fill%3D%22%23435500%22%20rx%3D%221%22%20ry%3D%221%22%20transform%3D%22matrix(-1.49934%2015.00069%20-30.76468%20-3.07497%20255%2026.8)%22%2F%3E%3Cellipse%20fill%3D%22%2368676d%22%20rx%3D%221%22%20ry%3D%221%22%20transform%3D%22rotate(74.1%2070.8%20159.8)%20scale(51.90297%2028.34925)%22%2F%3E%3Cellipse%20fill%3D%22%23a4a4a4%22%20rx%3D%221%22%20ry%3D%221%22%20transform%3D%22matrix(42.85903%20-6.89406%203.67373%2022.83884%20117.5%20126)%22%2F%3E%3Cpath%20fill%3D%22%23aeaeaf%22%20d%3D%22M221%20116h35v17h-35z%22%2F%3E%3Cpath%20fill%3D%22%236f6e6f%22%20d%3D%22M169%20108h59v8h-59z%22%2F%3E%3Cellipse%20fill%3D%22%235c6f00%22%20rx%3D%2214%22%20ry%3D%2220%22%2F%3E%3Cellipse%20fill%3D%22%23222123%22%20cx%3D%2215%22%20cy%3D%2285%22%20rx%3D%2223%22%20ry%3D%224%22%2F%3E%3Cpath%20fill%3D%22%236e6e6f%22%20d%3D%22M37.3%20170.5L60%20147.9l3-45.3%2030.7-46z%22%2F%3E%3Cellipse%20fill%3D%22%23858486%22%20rx%3D%221%22%20ry%3D%221%22%20transform%3D%22matrix(9.82975%20-13.6423%2020.16974%2014.533%20170.8%2046.6)%22%2F%3E%3C%2Fg%3E%3C%2Fsvg%3E) Terrain & Scenery
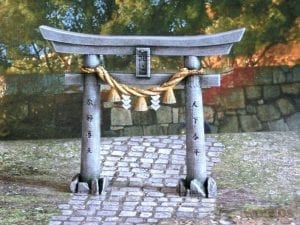
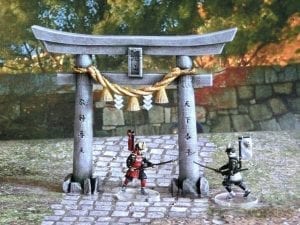
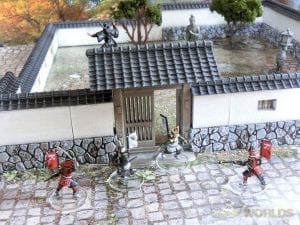
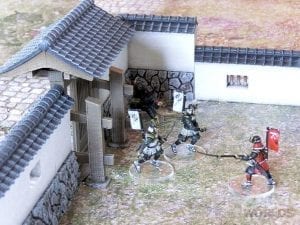
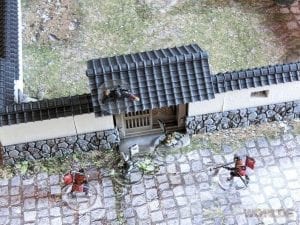
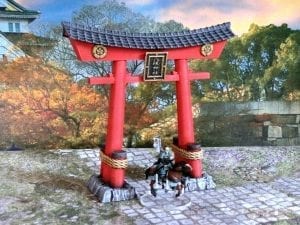
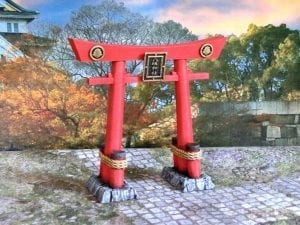
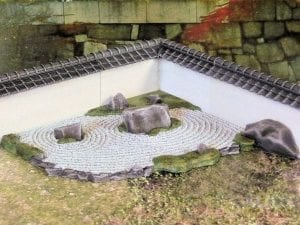
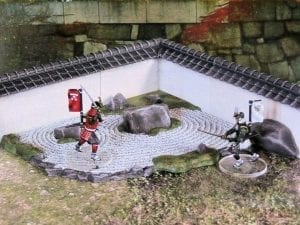
Terrain & SceneryTorii Gates From Old Japan 28mm Scale
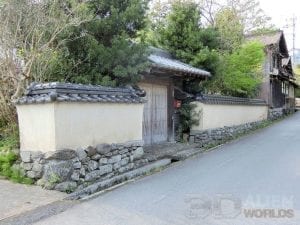
This is a stone torii gate, typically found in local shrines and rustic locations. The stone torii gate features plain pillars, another version with engraved kanji on the pillars, and a third version with rope and paper tassles.
The items will come unpainted. Printed white.
(1 review) -
%22%20transform%3D%22translate(.6%20.6)%20scale(1.17188)%22%20fill-opacity%3D%22.5%22%3E%3Cellipse%20fill%3D%22%239e9e9e%22%20rx%3D%221%22%20ry%3D%221%22%20transform%3D%22matrix(65.27854%20-16.77354%2012.13111%2047.21135%20114.3%20108)%22%2F%3E%3Cellipse%20fill%3D%22%23fff%22%20rx%3D%221%22%20ry%3D%221%22%20transform%3D%22rotate(170.1%2031.4%2012.2)%20scale(179.16005%2031.81833)%22%2F%3E%3Cellipse%20fill%3D%22%23fff%22%20rx%3D%221%22%20ry%3D%221%22%20transform%3D%22rotate(-60.2%20267.3%20-114.9)%20scale(144.06099%2043.66113)%22%2F%3E%3Cpath%20fill%3D%22%23868686%22%20d%3D%22M102%2096h28v34h-28z%22%2F%3E%3Cellipse%20fill%3D%22%23fff%22%20rx%3D%221%22%20ry%3D%221%22%20transform%3D%22matrix(137.043%20-11.25156%201.79078%2021.81157%2076.1%2015.4)%22%2F%3E%3Cellipse%20fill%3D%22%23fff%22%20rx%3D%221%22%20ry%3D%221%22%20transform%3D%22rotate(-55.1%20273%20-152.4)%20scale(144.0577%2036.01811)%22%2F%3E%3Cpath%20fill%3D%22%23fff%22%20d%3D%22M1%2075L122-5l-138-6z%22%2F%3E%3Cellipse%20fill%3D%22%23d9d9d9%22%20cx%3D%2292%22%20cy%3D%2252%22%20rx%3D%2250%22%20ry%3D%2220%22%2F%3E%3Cellipse%20fill%3D%22%23fff%22%20rx%3D%221%22%20ry%3D%221%22%20transform%3D%22matrix(6.90376%20-59.1968%2029.17275%203.40224%20240%20147.3)%22%2F%3E%3Cpath%20fill%3D%22%23fff%22%20d%3D%22M0%200h204v26H0z%22%2F%3E%3Cellipse%20fill%3D%22%23dfdfdf%22%20rx%3D%221%22%20ry%3D%221%22%20transform%3D%22matrix(11.55387%20-28.3119%2023.16704%209.4543%20192.7%20130.7)%22%2F%3E%3Cpath%20fill%3D%22silver%22%20d%3D%22M98%2061h73v30H98z%22%2F%3E%3Cpath%20fill%3D%22%23fff%22%20d%3D%22M-16%2087L1-16l74%2037z%22%2F%3E%3Cellipse%20fill%3D%22%23fff%22%20rx%3D%221%22%20ry%3D%221%22%20transform%3D%22rotate(154.6%2088.6%20110.5)%20scale(43.3322%2017.67061)%22%2F%3E%3Cpath%20fill%3D%22silver%22%20d%3D%22M120%20123h16v34h-16z%22%2F%3E%3C%2Fg%3E%3C%2Fsvg%3E) Gebäude und Zelte
Gebäude und ZelteGoblinhütte Typ 2 für Tabletop-Spiele
“Goblins sind kleine Goblinoide, die von vielen nur als lästig empfunden werden. Sie haben flache Gesichter, breite Nasen, spitze Ohren und kleine, scharfe Reißzähne. Ihre Stirn ist nach hinten geneigt, und ihre Augenfarbe variiert von rot bis gelb. Ihre Hautfarbe reicht von Gelb über alle Orangetöne bis hin zu tiefem Rot. Normalerweise haben alle Mitglieder eines Stammes die gleiche Hautfarbe, aber es gibt auch Grüntöne. Goblins tragen in der Regel dunkles Leder, das durch mangelnde Hygiene verschmutzt ist und eine ähnliche Färbung wie ihre Haut hat.”
(0 reviews) -
%22%20transform%3D%22translate(.6%20.6)%20scale(1.17188)%22%20fill-opacity%3D%22.5%22%3E%3Cellipse%20fill%3D%22%23818181%22%20rx%3D%221%22%20ry%3D%221%22%20transform%3D%22matrix(-60.55008%20-3.9156%202.7704%20-42.84108%20119.7%2071.7)%22%2F%3E%3Cellipse%20rx%3D%221%22%20ry%3D%221%22%20transform%3D%22matrix(-43.24508%20-17.02835%2048.62914%20-123.4982%200%2038)%22%2F%3E%3Cellipse%20fill%3D%22%23090909%22%20rx%3D%221%22%20ry%3D%221%22%20transform%3D%22rotate(124.2%2073.4%20139.4)%20scale(69.35234%2042.45813)%22%2F%3E%3Cellipse%20fill%3D%22%23090909%22%20rx%3D%221%22%20ry%3D%221%22%20transform%3D%22matrix(-1.35454%2022.46433%20-236.8353%20-14.2805%20174.9%204.3)%22%2F%3E%3Cellipse%20fill%3D%22%23131313%22%20rx%3D%221%22%20ry%3D%221%22%20transform%3D%22matrix(-42.92775%20-8.53006%203.34039%20-16.81058%20233.4%2033)%22%2F%3E%3Cellipse%20rx%3D%221%22%20ry%3D%221%22%20transform%3D%22matrix(-13.74701%20-11.89985%2066.17602%20-76.44822%2019%207.4)%22%2F%3E%3Cellipse%20fill%3D%22%23484848%22%20cx%3D%2270%22%20cy%3D%22174%22%20rx%3D%2278%22%20ry%3D%2278%22%2F%3E%3Cellipse%20fill%3D%22%23454545%22%20rx%3D%221%22%20ry%3D%221%22%20transform%3D%22matrix(23.60208%2011.25762%20-28.39531%2059.532%20178.9%20116.1)%22%2F%3E%3Cellipse%20fill%3D%22%23101010%22%20cx%3D%22170%22%20cy%3D%22191%22%20rx%3D%2221%22%20ry%3D%2221%22%2F%3E%3Cpath%20fill%3D%22%23454545%22%20d%3D%22M212.7%2048.6l-169.6-22%20122.6-9%202.8-1.2z%22%2F%3E%3Cpath%20fill%3D%22%23636363%22%20d%3D%22M85%2034h66v83H85z%22%2F%3E%3Cellipse%20rx%3D%221%22%20ry%3D%221%22%20transform%3D%22rotate(-138.8%209.2%202.2)%20scale(18.04672%2071.01177)%22%2F%3E%3Cpath%20fill%3D%22%23262626%22%20d%3D%22M52.7-16L6.2%20141.4l48-108.7%2021-20.4z%22%2F%3E%3Cellipse%20fill%3D%22%23454545%22%20rx%3D%221%22%20ry%3D%221%22%20transform%3D%22rotate(111%2087.3%20110.6)%20scale(19.39859%2055.75875)%22%2F%3E%3Cellipse%20fill%3D%22%23464646%22%20rx%3D%221%22%20ry%3D%221%22%20transform%3D%22rotate(108.4%202.9%2049.8)%20scale(40.44264%2012.93062)%22%2F%3E%3C%2Fg%3E%3C%2Fsvg%3E) Sci-Fi
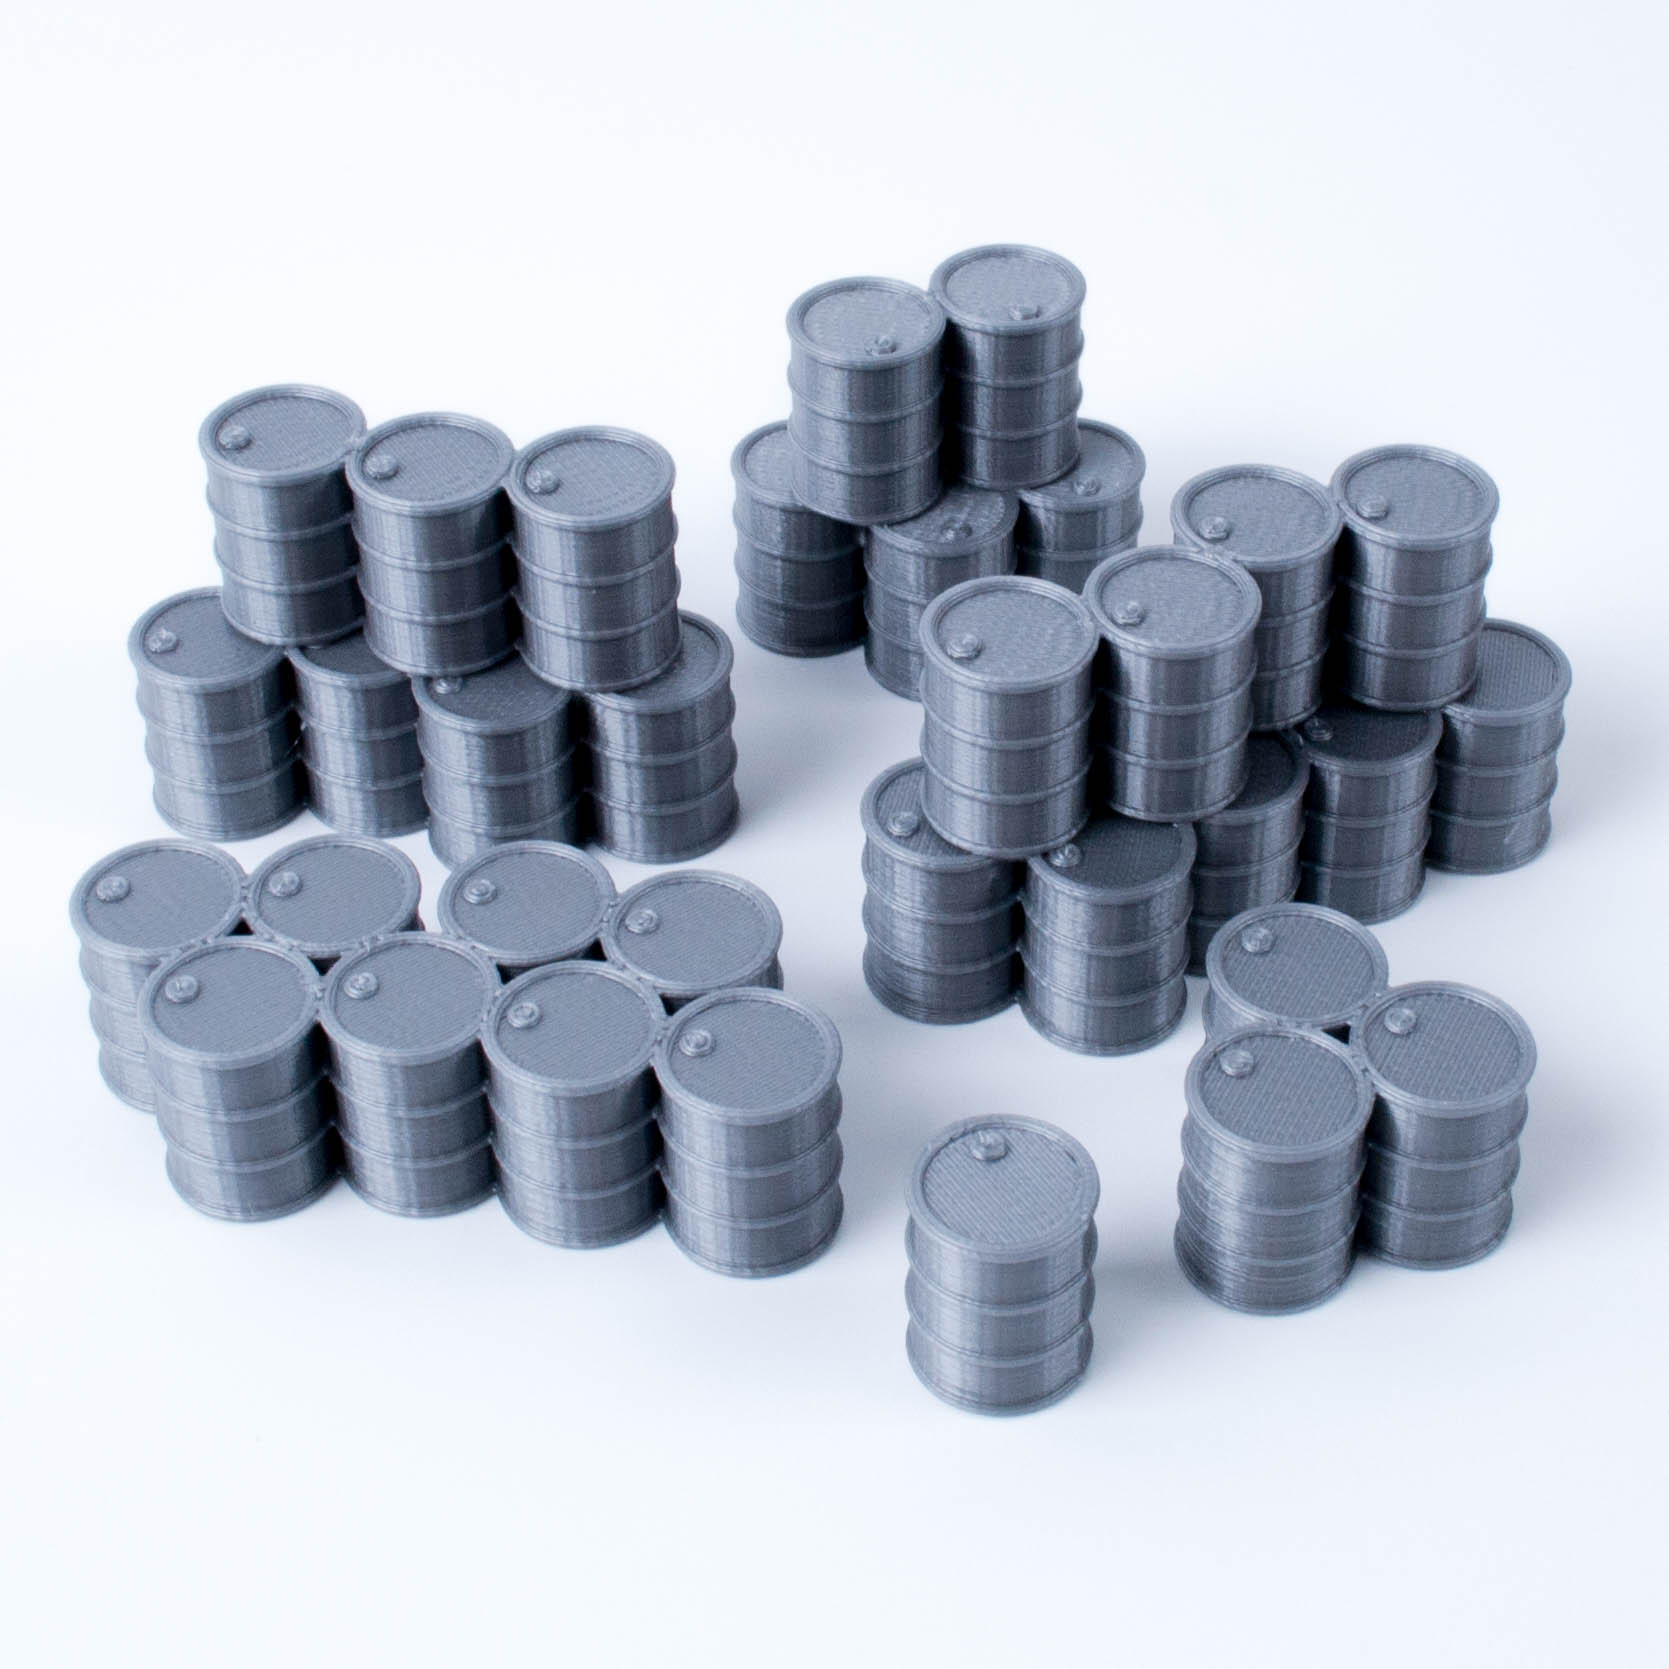
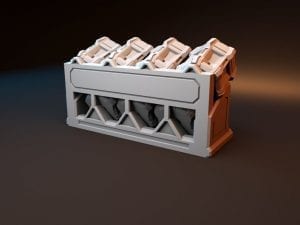
Sci-FiSci-Fi Gelände: Gepanzerte Fässer-Set im 28mm Maßstab
Ein einziger Lauf ist 28 mm hoch und bietet durch sein stark gepanzertes Gehäuse eine hervorragende Deckung.
(0 reviews) -
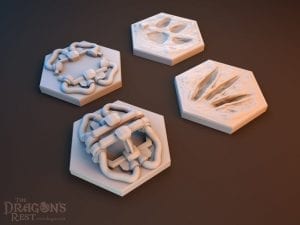
%22%20transform%3D%22translate(.6%20.6)%20scale(1.17188)%22%20fill-opacity%3D%22.5%22%3E%3Cellipse%20fill%3D%22%2325232f%22%20rx%3D%221%22%20ry%3D%221%22%20transform%3D%22matrix(-27.97507%2046.39253%20-47.70048%20-28.76377%20125.6%2078.2)%22%2F%3E%3Cellipse%20fill%3D%22%23c8dc64%22%20rx%3D%221%22%20ry%3D%221%22%20transform%3D%22rotate(76.9%20-8.9%20237.5)%20scale(62.56934%2048.32705)%22%2F%3E%3Cellipse%20fill%3D%22%23cad788%22%20rx%3D%221%22%20ry%3D%221%22%20transform%3D%22rotate(-77%20136.2%2092)%20scale(76.81508%2046.58126)%22%2F%3E%3Cellipse%20fill%3D%22%23a19fab%22%20rx%3D%221%22%20ry%3D%221%22%20transform%3D%22rotate(-163.2%20104.4%20-15.4)%20scale(60.01217%2030.52398)%22%2F%3E%3Cellipse%20fill%3D%22%234c4b52%22%20cx%3D%22115%22%20cy%3D%2258%22%20rx%3D%22165%22%20ry%3D%2239%22%2F%3E%3Cellipse%20fill%3D%22%234a494e%22%20cx%3D%22116%22%20cy%3D%22145%22%20rx%3D%2228%22%20ry%3D%22255%22%2F%3E%3Cellipse%20fill%3D%22%23919193%22%20rx%3D%221%22%20ry%3D%221%22%20transform%3D%22matrix(-23.05665%209.45622%20-22.05721%20-53.78103%2057%20146.8)%22%2F%3E%3Cellipse%20fill%3D%22%23858683%22%20rx%3D%221%22%20ry%3D%221%22%20transform%3D%22matrix(-3.21112%2022.07687%20-72.69982%20-10.57431%20222.9%20119.6)%22%2F%3E%3Cellipse%20fill%3D%22%238d8d8f%22%20rx%3D%221%22%20ry%3D%221%22%20transform%3D%22matrix(-8.65643%2051.1799%20-14.89598%20-2.51947%20166.7%20181.1)%22%2F%3E%3Cellipse%20fill%3D%22%23363632%22%20cx%3D%22131%22%20cy%3D%2267%22%20rx%3D%2240%22%20ry%3D%2234%22%2F%3E%3Cellipse%20fill%3D%22%238c8a95%22%20cx%3D%2225%22%20cy%3D%226%22%20rx%3D%2250%22%20ry%3D%2222%22%2F%3E%3Cellipse%20fill%3D%22%23676769%22%20rx%3D%221%22%20ry%3D%221%22%20transform%3D%22matrix(15.68006%2046.86276%20-17.02136%205.69527%2088.9%20115.4)%22%2F%3E%3Cellipse%20fill%3D%22%23a29bc4%22%20rx%3D%221%22%20ry%3D%221%22%20transform%3D%22rotate(112.9%20-65.7%20107.8)%20scale(21.74125%2018.84963)%22%2F%3E%3Cellipse%20fill%3D%22%235d5c60%22%20rx%3D%221%22%20ry%3D%221%22%20transform%3D%22matrix(27.33558%20-52.71918%2011.70768%206.07059%20166.1%20108.2)%22%2F%3E%3Cellipse%20fill%3D%22%23a4b258%22%20rx%3D%221%22%20ry%3D%221%22%20transform%3D%22matrix(-20.15928%2011.88163%20-17.16182%20-29.11806%2034%20174.4)%22%2F%3E%3C%2Fg%3E%3C%2Fsvg%3E) Sci-Fi
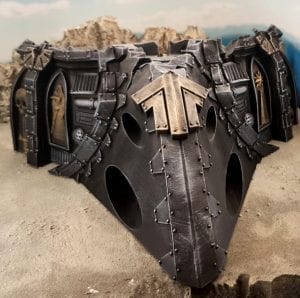
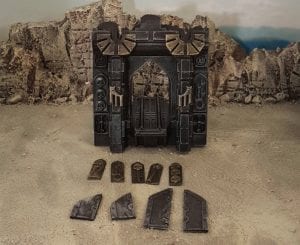
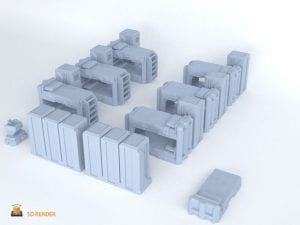
Sci-FiWandstück eines gotischen Raumschiffwracks 28mm Maßstab
Dies ist eine Wandarbeit mit einem massiven modularen Raumschiffwrack und 5 verschiedenen dekorativen Symbolen. Dieses Stück ist Teil der Serie der gotischen Raumschiffwracks. Wird unbemalt geliefert.
(0 reviews) -
%22%20transform%3D%22translate(.6%20.6)%20scale(1.17188)%22%20fill-opacity%3D%22.5%22%3E%3Cellipse%20fill%3D%22%23ebeaf1%22%20rx%3D%221%22%20ry%3D%221%22%20transform%3D%22matrix(-16.74003%2040.39742%20-151.49226%20-62.7759%2034.6%20185)%22%2F%3E%3Cellipse%20fill%3D%22%235b584b%22%20rx%3D%221%22%20ry%3D%221%22%20transform%3D%22matrix(15.68143%2046.6213%20-103.5049%2034.81466%20177.9%2092)%22%2F%3E%3Cellipse%20fill%3D%22%23b5b4bf%22%20cx%3D%2216%22%20cy%3D%2216%22%20rx%3D%22126%22%20ry%3D%2239%22%2F%3E%3Cellipse%20fill%3D%22%23eaf4bd%22%20rx%3D%221%22%20ry%3D%221%22%20transform%3D%22matrix(-20.4%2032.77397%20-34.0821%20-21.21424%20254.9%20181.6)%22%2F%3E%3Cellipse%20fill%3D%22%23a7a83c%22%20rx%3D%221%22%20ry%3D%221%22%20transform%3D%22rotate(-92.2%20155.8%20-83.6)%20scale(74.73545%2027.46233)%22%2F%3E%3Cellipse%20fill%3D%22%234d4e5a%22%20cx%3D%22180%22%20cy%3D%22104%22%20rx%3D%2232%22%20ry%3D%2249%22%2F%3E%3Cellipse%20fill%3D%22%23869b22%22%20rx%3D%221%22%20ry%3D%221%22%20transform%3D%22rotate(145.7%20-7%2045.5)%20scale(31.41052%2022.90293)%22%2F%3E%3Cellipse%20fill%3D%22%239c9ca4%22%20rx%3D%221%22%20ry%3D%221%22%20transform%3D%22rotate(-159.6%2063.8%2069.4)%20scale(91.64192%2020.63065)%22%2F%3E%3Cellipse%20fill%3D%22%23b0b0ba%22%20cx%3D%22186%22%20cy%3D%227%22%20rx%3D%2250%22%20ry%3D%2214%22%2F%3E%3Cellipse%20fill%3D%22%23787782%22%20rx%3D%221%22%20ry%3D%221%22%20transform%3D%22matrix(-12.4541%20-23.17167%2077.51316%20-41.6611%20115.2%2067.3)%22%2F%3E%3Cellipse%20fill%3D%22%23fefeff%22%20cy%3D%22177%22%20rx%3D%2221%22%20ry%3D%2221%22%2F%3E%3Cellipse%20fill%3D%22%2376767e%22%20rx%3D%221%22%20ry%3D%221%22%20transform%3D%22matrix(55.54185%203.91232%20-1.4341%2020.35955%2096%20130.9)%22%2F%3E%3Cellipse%20fill%3D%22%23b5b2c6%22%20cx%3D%22215%22%20cy%3D%22177%22%20rx%3D%2224%22%20ry%3D%2224%22%2F%3E%3Cellipse%20fill%3D%22%23b6c278%22%20rx%3D%221%22%20ry%3D%221%22%20transform%3D%22rotate(70.3%20-83.5%2058.8)%20scale(20.60687%2035.30257)%22%2F%3E%3Cellipse%20fill%3D%22%23ca5b3d%22%20cx%3D%22255%22%20cy%3D%2264%22%20rx%3D%2224%22%20ry%3D%2218%22%2F%3E%3C%2Fg%3E%3C%2Fsvg%3E) Sci-Fi
Sci-FiSchiffswrack-Gelände im Maßstab 28mm
Begeben Sie sich auf ein episches maritimes Abenteuer mit unserem sorgfältig gefertigten 3D-gedruckten Schiffswrack-Geländestück, das das Erlebnis Ihrer Tabletop-Spiele noch intensiver macht. Dieses ikonische Requisit, das die Erhabenheit eines gesunkenen Schiffes einfängt, wird zum Mittelpunkt deines Schlachtfeldes und inspiriert unzählige Geschichten von Tapferkeit und Eroberung.
(0 reviews) -
%22%20transform%3D%22translate(.6%20.6)%20scale(1.17188)%22%20fill-opacity%3D%22.5%22%3E%3Cellipse%20fill%3D%22%23222125%22%20rx%3D%221%22%20ry%3D%221%22%20transform%3D%22matrix(-99.49787%202.72748%20-1.0924%20-39.85058%20142%2089.4)%22%2F%3E%3Cellipse%20fill%3D%22%23d6d5d9%22%20rx%3D%221%22%20ry%3D%221%22%20transform%3D%22matrix(5.24421%20-23.48302%2072.66555%2016.22763%20197%200)%22%2F%3E%3Cellipse%20fill%3D%22%23c7ccab%22%20rx%3D%221%22%20ry%3D%221%22%20transform%3D%22rotate(-1.4%207012.1%20-3178.8)%20scale(255%2022.3083)%22%2F%3E%3Cpath%20fill%3D%22%2399989c%22%20d%3D%22M184%2026.5H0v-53h184z%22%2F%3E%3Cellipse%20fill%3D%22%234c4b4e%22%20cx%3D%2247%22%20cy%3D%2284%22%20rx%3D%2251%22%20ry%3D%2251%22%2F%3E%3Cellipse%20fill%3D%22%23a5b74a%22%20rx%3D%221%22%20ry%3D%221%22%20transform%3D%22matrix(59.26796%203.99856%20-.95843%2014.20625%20125.4%20174)%22%2F%3E%3Cellipse%20fill%3D%22%237f7e81%22%20rx%3D%221%22%20ry%3D%221%22%20transform%3D%22matrix(-7.49165%2022.52072%20-33.00158%20-10.97816%20118%20128.2)%22%2F%3E%3Cpath%20fill%3D%22%234e4d4f%22%20d%3D%22M251%2051l-113%2084%20133-10z%22%2F%3E%3Cellipse%20fill%3D%22%23585759%22%20rx%3D%221%22%20ry%3D%221%22%20transform%3D%22matrix(92.46452%20-6.99962%201.2253%2016.1862%2094.5%2046.3)%22%2F%3E%3Cellipse%20fill%3D%22%238b8991%22%20cx%3D%22206%22%20cy%3D%22146%22%20rx%3D%22255%22%20ry%3D%2211%22%2F%3E%3Cellipse%20fill%3D%22%238e8e90%22%20rx%3D%221%22%20ry%3D%221%22%20transform%3D%22rotate(15.2%20-17.3%20855.4)%20scale(69.52944%2013.42038)%22%2F%3E%3Cellipse%20fill%3D%22%23bababa%22%20cx%3D%2213%22%20cy%3D%222%22%20rx%3D%2234%22%20ry%3D%2212%22%2F%3E%3Cellipse%20fill%3D%22%23393939%22%20cx%3D%22155%22%20cy%3D%2278%22%20rx%3D%2249%22%20ry%3D%2232%22%2F%3E%3Cellipse%20fill%3D%22%23636365%22%20rx%3D%221%22%20ry%3D%221%22%20transform%3D%22matrix(-10.85792%2012.60935%20-60.38013%20-51.99335%20255%2093.1)%22%2F%3E%3Cellipse%20fill%3D%22%23a3a0b0%22%20rx%3D%221%22%20ry%3D%221%22%20transform%3D%22matrix(2.81545%2015.4732%20-49.90262%209.0801%20226.2%20166.4)%22%2F%3E%3C%2Fg%3E%3C%2Fsvg%3E) Sci-Fi
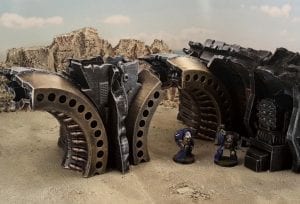
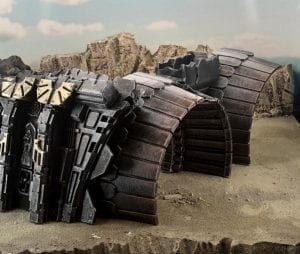
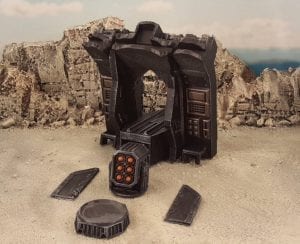
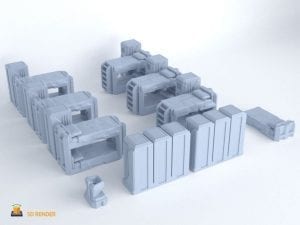
Sci-FiWrackteile eines Massive Modular Gothic Raumschiffwracks im 28mm Maßstab
Dieses Set enthält zwei Wrackteile aus der Serie der gotischen Raumschiffwracks. Eines mit Schießscharte und ein anderes mit einer Nische für ein dekoratives Symbol (3 verschiedene Symbole sind enthalten, außerdem 5 kleinere für die Schießscharte).
(0 reviews) -
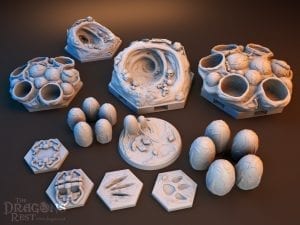
%22%20transform%3D%22translate(.6%20.6)%20scale(1.17188)%22%20fill-opacity%3D%22.5%22%3E%3Cellipse%20fill%3D%22%23f79b71%22%20rx%3D%221%22%20ry%3D%221%22%20transform%3D%22matrix(-7.06429%2065.42782%20-131.24217%20-14.17031%20133.5%209.5)%22%2F%3E%3Cellipse%20fill%3D%22%23375307%22%20cx%3D%2240%22%20cy%3D%22140%22%20rx%3D%2271%22%20ry%3D%2271%22%2F%3E%3Cellipse%20fill%3D%22%23b3c0c5%22%20rx%3D%221%22%20ry%3D%221%22%20transform%3D%22matrix(31.5435%20.27576%20-.25278%2028.91478%20153.5%20101.7)%22%2F%3E%3Cellipse%20fill%3D%22%23305a0a%22%20rx%3D%221%22%20ry%3D%221%22%20transform%3D%22matrix(-21.19835%20-34.22241%2029.24229%20-18.11352%20244.5%20119.7)%22%2F%3E%3Cellipse%20fill%3D%22%23b4623e%22%20rx%3D%221%22%20ry%3D%221%22%20transform%3D%22matrix(-6.77961%2026.41074%20-82.16711%20-21.09222%2057.2%2061.6)%22%2F%3E%3Cellipse%20fill%3D%22%236f9545%22%20cx%3D%22172%22%20cy%3D%22172%22%20rx%3D%2279%22%20ry%3D%2257%22%2F%3E%3Cellipse%20fill%3D%22%23a3683d%22%20rx%3D%221%22%20ry%3D%221%22%20transform%3D%22rotate(11.5%20-195%201141.3)%20scale(49.31824%2017.95204)%22%2F%3E%3Cellipse%20fill%3D%22%23d8ae12%22%20cx%3D%2210%22%20rx%3D%2258%22%20ry%3D%2220%22%2F%3E%3Cellipse%20fill%3D%22%23ffd7b1%22%20cx%3D%22245%22%20rx%3D%2228%22%20ry%3D%2214%22%2F%3E%3Cellipse%20fill%3D%22%23d49972%22%20rx%3D%221%22%20ry%3D%221%22%20transform%3D%22matrix(20.74945%2012.30302%20-24.14957%2040.72904%20147.6%2051)%22%2F%3E%3Cellipse%20fill%3D%22%23698b3e%22%20cx%3D%22202%22%20cy%3D%2295%22%20rx%3D%2219%22%20ry%3D%2228%22%2F%3E%3Cellipse%20fill%3D%22%239c9eb6%22%20rx%3D%221%22%20ry%3D%221%22%20transform%3D%22matrix(-4.28688%20-15.45798%2026.98756%20-7.48431%20150%2098.9)%22%2F%3E%3Cpath%20fill%3D%22%239c4824%22%20d%3D%22M14.4%2074.7l58-9.2L1%2096.6l-17-23.8z%22%2F%3E%3Cellipse%20fill%3D%22%23d3996f%22%20cx%3D%22139%22%20cy%3D%2221%22%20rx%3D%22119%22%20ry%3D%2221%22%2F%3E%3Cpath%20fill%3D%22%23aeb867%22%20d%3D%22M186%20105l-56%2020%2034%2011z%22%2F%3E%3C%2Fg%3E%3C%2Fsvg%3E) Gebäude und Zelte
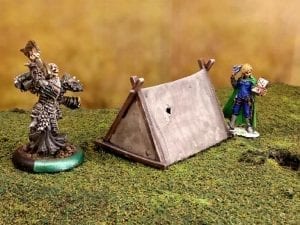
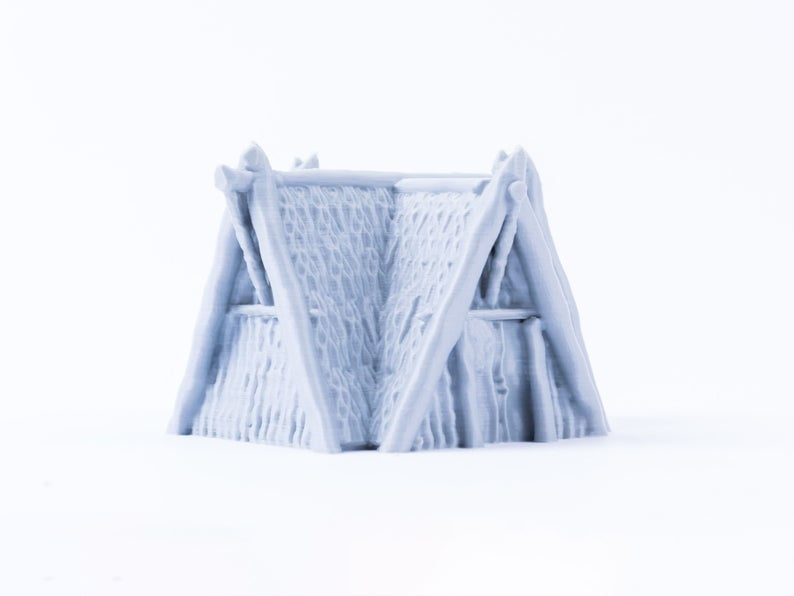
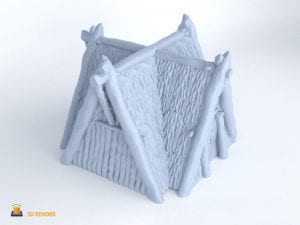
Gebäude und ZelteWikinger-Zelt für Ihr Fantasy-Gelände im Maßstab 28mm
Begeben Sie sich mit dem außergewöhnlichen Wikingerzelt auf ein spannendes Abenteuer inmitten der faszinierenden Landschaften Ihres Fantasiereichs. Dieses von einem genialen Kunsthandwerker entworfene Miniatur-Meisterwerk fängt die Essenz der Wikingerkultur mit tadellosen Details ein.
(0 reviews) -
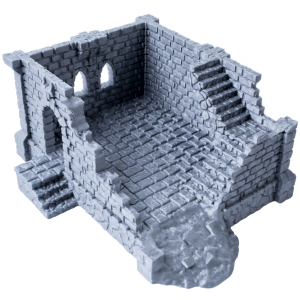
%22%20transform%3D%22translate(.6%20.6)%20scale(1.17188)%22%20fill-opacity%3D%22.5%22%3E%3Cellipse%20cx%3D%2215%22%20cy%3D%2230%22%20rx%3D%2247%22%20ry%3D%2282%22%2F%3E%3Cellipse%20fill%3D%22%23cbcbcb%22%20rx%3D%221%22%20ry%3D%221%22%20transform%3D%22rotate(115.1%20-18.8%20120)%20scale(58.03928%20100.50673)%22%2F%3E%3Cellipse%20rx%3D%221%22%20ry%3D%221%22%20transform%3D%22matrix(-68.72198%20135.45843%20-39.4723%20-20.02544%20244.4%20207.8)%22%2F%3E%3Cellipse%20fill%3D%22%23c6c6c6%22%20rx%3D%221%22%20ry%3D%221%22%20transform%3D%22matrix(-15.5048%2027.1828%20-79.53798%20-45.36766%20151.8%2029.2)%22%2F%3E%3Cellipse%20rx%3D%221%22%20ry%3D%221%22%20transform%3D%22matrix(-44.49508%2020.84302%20-10.51227%20-22.4413%2022.2%20255)%22%2F%3E%3Cellipse%20rx%3D%221%22%20ry%3D%221%22%20transform%3D%22matrix(-38.75112%20-19.82995%2065.80375%20-128.5918%2010.2%2026.5)%22%2F%3E%3Cellipse%20cx%3D%22226%22%20cy%3D%223%22%20rx%3D%2246%22%20ry%3D%2211%22%2F%3E%3Cpath%20d%3D%22M164%20294l85.4-136.6%2058.5%2036.6-85.3%20136.6z%22%2F%3E%3Cellipse%20fill%3D%22%23d5d5d5%22%20rx%3D%221%22%20ry%3D%221%22%20transform%3D%22matrix(21.97635%2018.44467%20-29.34122%2034.9593%2013%20182.5)%22%2F%3E%3Cellipse%20fill%3D%22%23848484%22%20cx%3D%22158%22%20cy%3D%22154%22%20rx%3D%2224%22%20ry%3D%22103%22%2F%3E%3Cellipse%20rx%3D%221%22%20ry%3D%221%22%20transform%3D%22matrix(60.19327%20-5.902%201.77011%2018.05299%202.5%20256.6)%22%2F%3E%3Cellipse%20rx%3D%221%22%20ry%3D%221%22%20transform%3D%22matrix(29.58647%2013.16244%20-53.9075%20121.17304%2030.2%204.9)%22%2F%3E%3Cellipse%20fill%3D%22%234d4d4d%22%20rx%3D%221%22%20ry%3D%221%22%20transform%3D%22rotate(-60.9%20248%20-108.3)%20scale(114.28904%2023.63281)%22%2F%3E%3Cellipse%20cx%3D%22224%22%20cy%3D%222%22%20rx%3D%2245%22%20ry%3D%229%22%2F%3E%3Cpath%20fill%3D%22%236b6b6b%22%20d%3D%22M50%2039l106%201-139%2089z%22%2F%3E%3C%2Fg%3E%3C%2Fsvg%3E) Gebäude und Zelte
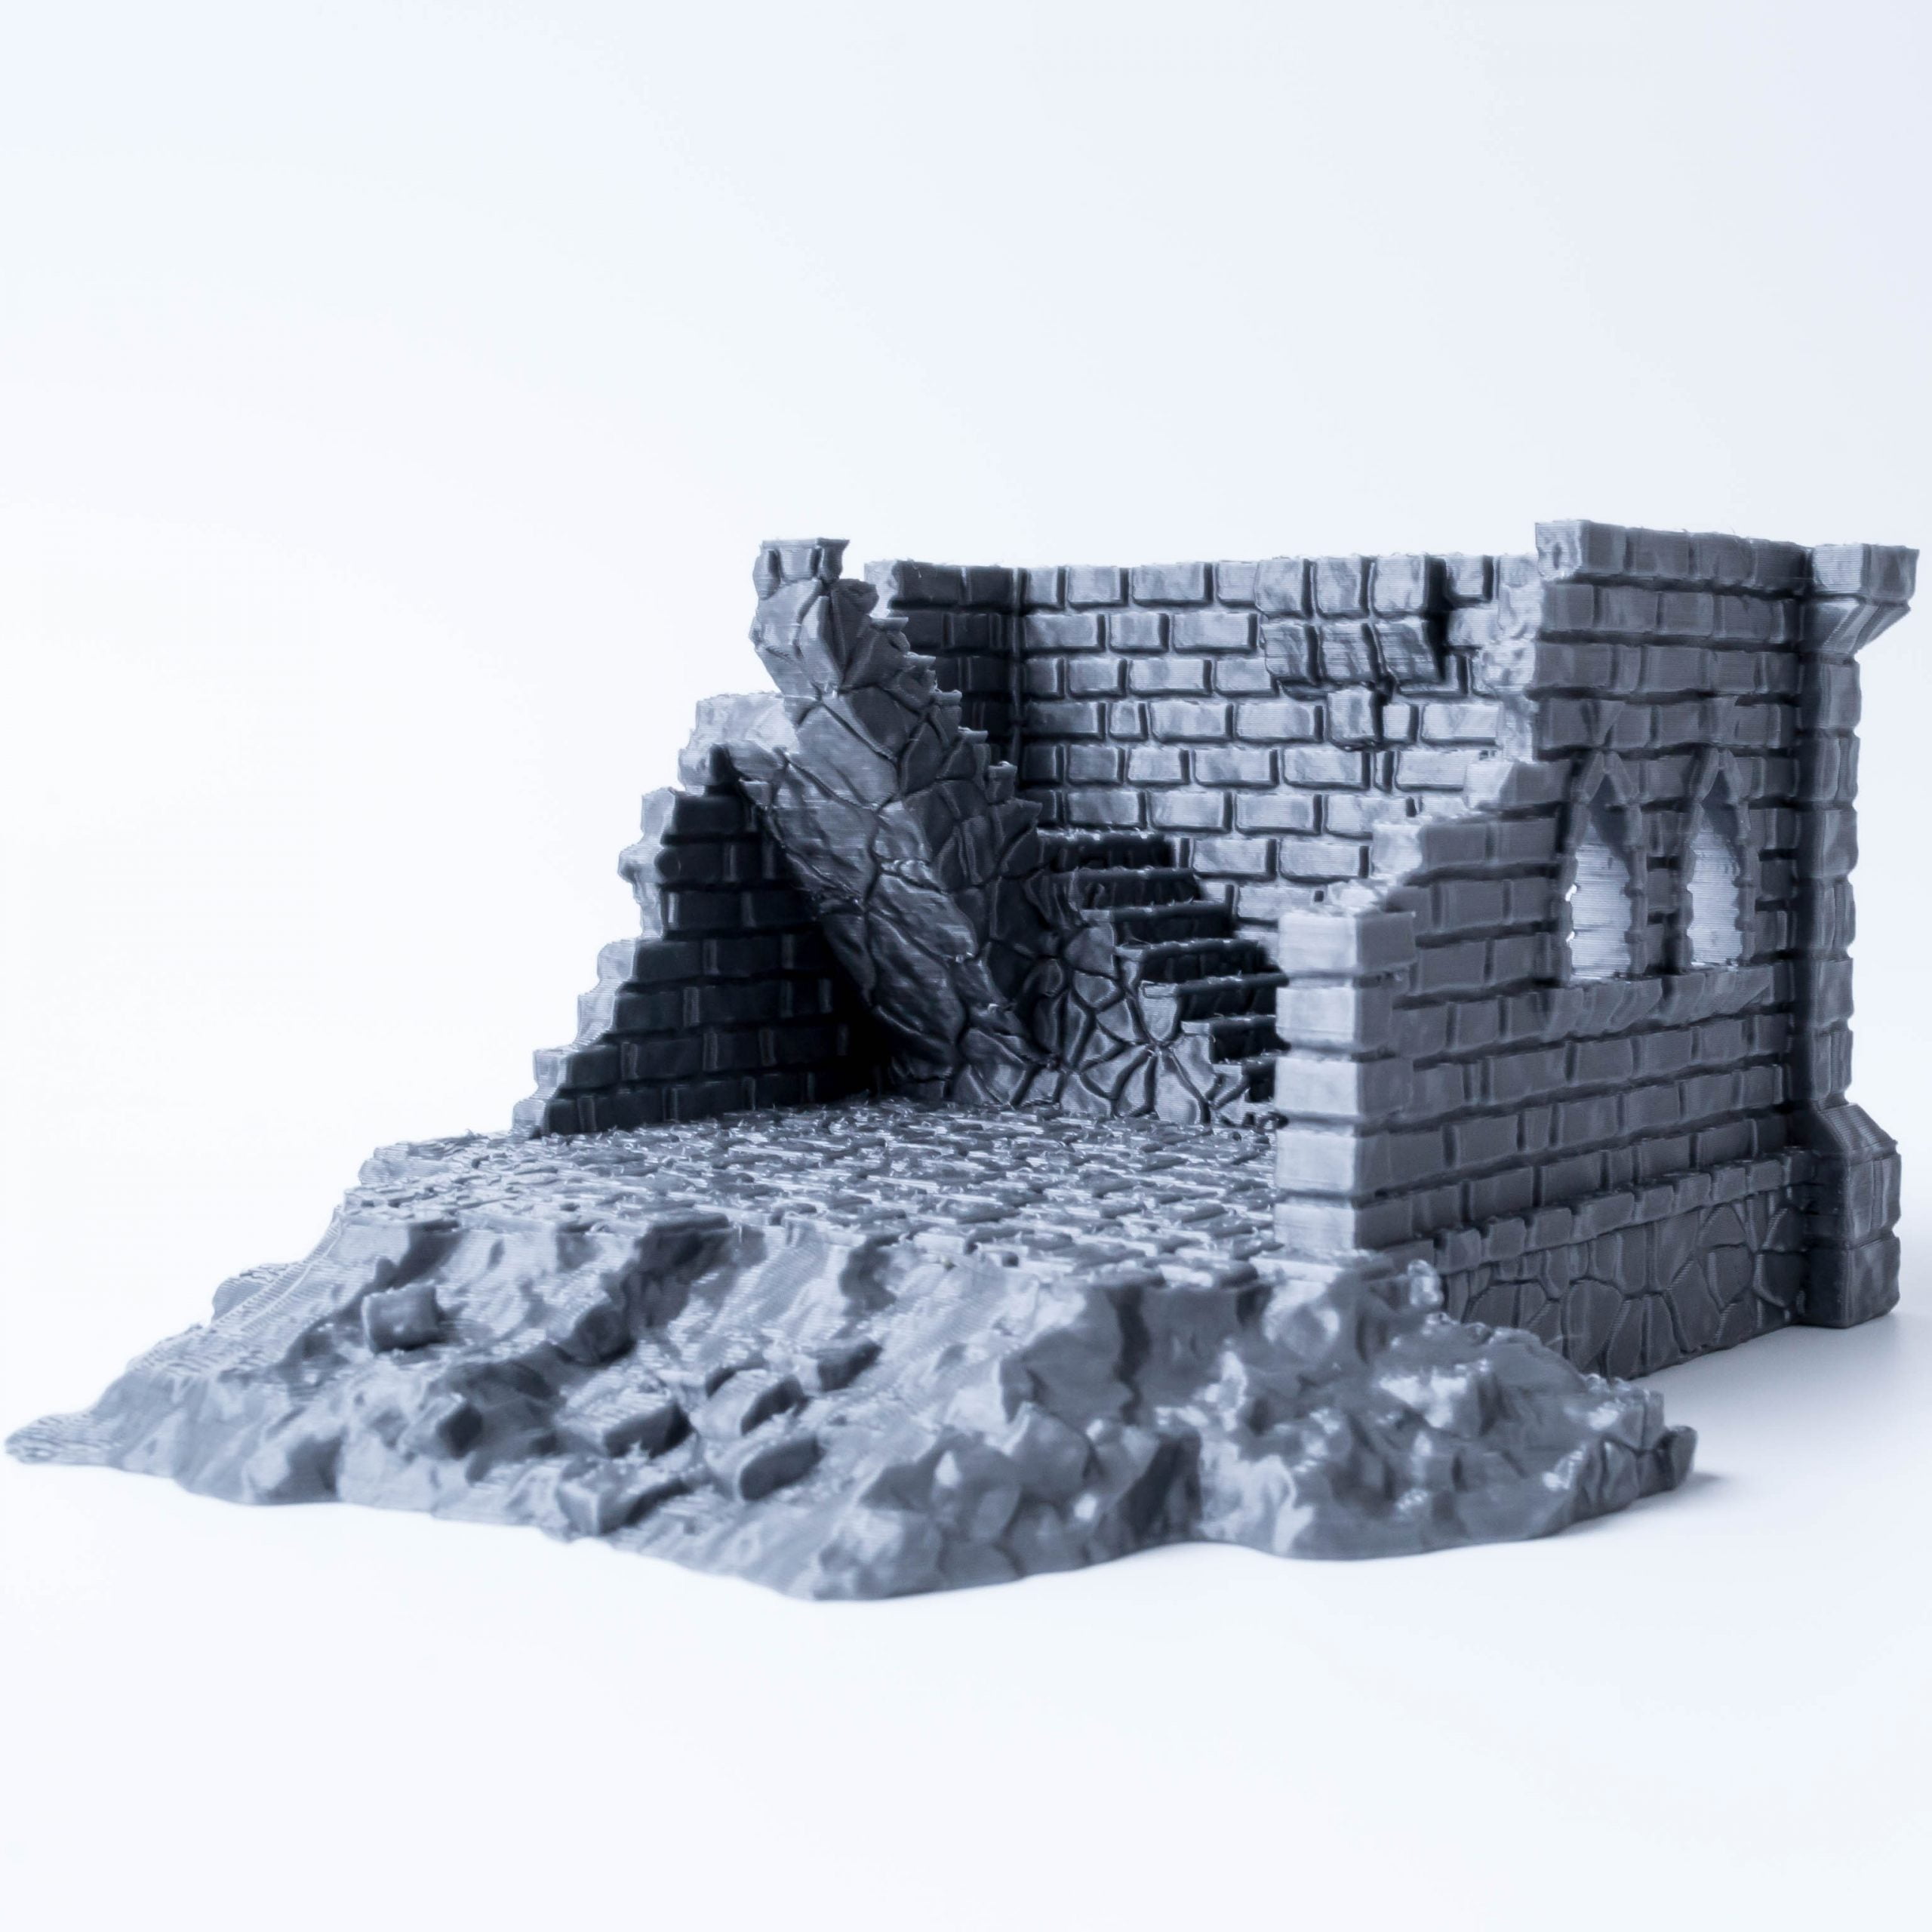
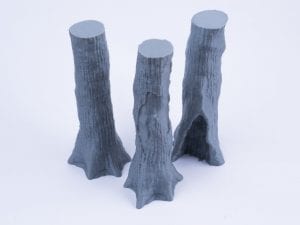
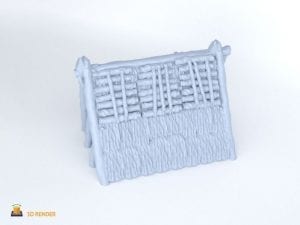
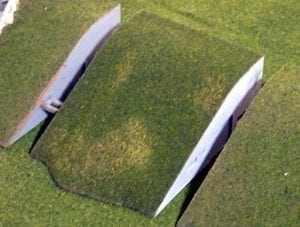
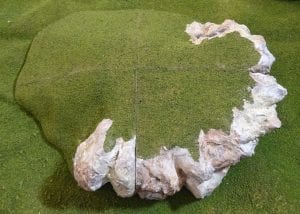
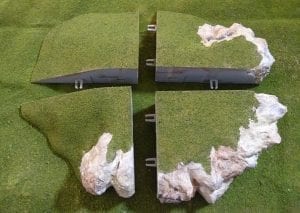
Gebäude und ZelteEinstufige 28mm Fantasy-Ruinen für Epic Adventures
Dieses sorgfältig gefertigte Geländestück ist mehr als eine bloße Kulisse und bietet ein beeindruckendes Schlachtfeld für mittelalterliche Scharmützel, fantastische Quests und spannende Frostgrave-Kämpfe.
(0 reviews) -
%22%20transform%3D%22translate(.6%20.6)%20scale(1.17188)%22%20fill-opacity%3D%22.5%22%3E%3Cellipse%20fill%3D%22%23bfbfbf%22%20cx%3D%22105%22%20cy%3D%22117%22%20rx%3D%22189%22%20ry%3D%2250%22%2F%3E%3Cellipse%20rx%3D%221%22%20ry%3D%221%22%20transform%3D%22matrix(-243.17051%20-43.91936%2011.57526%20-64.08934%20141.4%20255)%22%2F%3E%3Cellipse%20rx%3D%221%22%20ry%3D%221%22%20transform%3D%22rotate(-82.8%2094.8%20-80.4)%20scale(40.41929%20254.99998)%22%2F%3E%3Cellipse%20fill%3D%22%238a8a8a%22%20rx%3D%221%22%20ry%3D%221%22%20transform%3D%22matrix(-117.36878%20-17.31023%206.26329%20-42.46704%20215.9%20152.7)%22%2F%3E%3Cellipse%20fill%3D%22%23a2a2a2%22%20rx%3D%221%22%20ry%3D%221%22%20transform%3D%22rotate(28.7%20-126.5%20164.8)%20scale(53.17899%2037.2926)%22%2F%3E%3Cellipse%20rx%3D%221%22%20ry%3D%221%22%20transform%3D%22matrix(-7.11017%2043.24118%20-251.6211%20-41.37419%20131%20240.6)%22%2F%3E%3Cellipse%20rx%3D%221%22%20ry%3D%221%22%20transform%3D%22matrix(2.40167%20-39.44867%20178.95827%2010.89513%20130.3%2022.5)%22%2F%3E%3Cellipse%20fill%3D%22%233f3f3f%22%20rx%3D%221%22%20ry%3D%221%22%20transform%3D%22matrix(-97.14312%20-7.20748%201.42249%20-19.17243%2064.8%20155.9)%22%2F%3E%3Cellipse%20fill%3D%22%23b5b5b5%22%20rx%3D%221%22%20ry%3D%221%22%20transform%3D%22matrix(-42.91335%20-3.15361%201.43655%20-19.54807%20122.7%20103.5)%22%2F%3E%3Cellipse%20rx%3D%221%22%20ry%3D%221%22%20transform%3D%22matrix(-18.15567%2019.41214%20-74.02574%20-69.23434%20213.3%2035.6)%22%2F%3E%3Cpath%20d%3D%22M271%202L109%2080l1-96z%22%2F%3E%3Cellipse%20fill%3D%22%23828282%22%20cx%3D%2262%22%20cy%3D%2250%22%20rx%3D%2224%22%20ry%3D%2217%22%2F%3E%3Cpath%20d%3D%22M23%20177l248%2077-287%202z%22%2F%3E%3Cellipse%20fill%3D%22%23585858%22%20rx%3D%221%22%20ry%3D%221%22%20transform%3D%22rotate(-83.1%20189.5%20-4)%20scale(22.36924%2051.13485)%22%2F%3E%3Cellipse%20fill%3D%22%23555%22%20cx%3D%22195%22%20cy%3D%2272%22%20rx%3D%2244%22%20ry%3D%2212%22%2F%3E%3Cellipse%20fill%3D%22%23919191%22%20rx%3D%221%22%20ry%3D%221%22%20transform%3D%22matrix(67.6722%20-.36832%20.0863%2015.85599%20255%20163.7)%22%2F%3E%3Cellipse%20rx%3D%221%22%20ry%3D%221%22%20transform%3D%22matrix(165.16882%2010.81346%20-1.43659%2021.94295%20118.8%2019.2)%22%2F%3E%3Cellipse%20fill%3D%22%239b9b9b%22%20cx%3D%2227%22%20cy%3D%2283%22%20rx%3D%2284%22%20ry%3D%2222%22%2F%3E%3Cpath%20d%3D%22M-16%2060l26-76v75zm58.3%20204l-3.6-42%20253-22%203.6%2041.8z%22%2F%3E%3C%2Fg%3E%3C%2Fsvg%3E) Sci-Fi
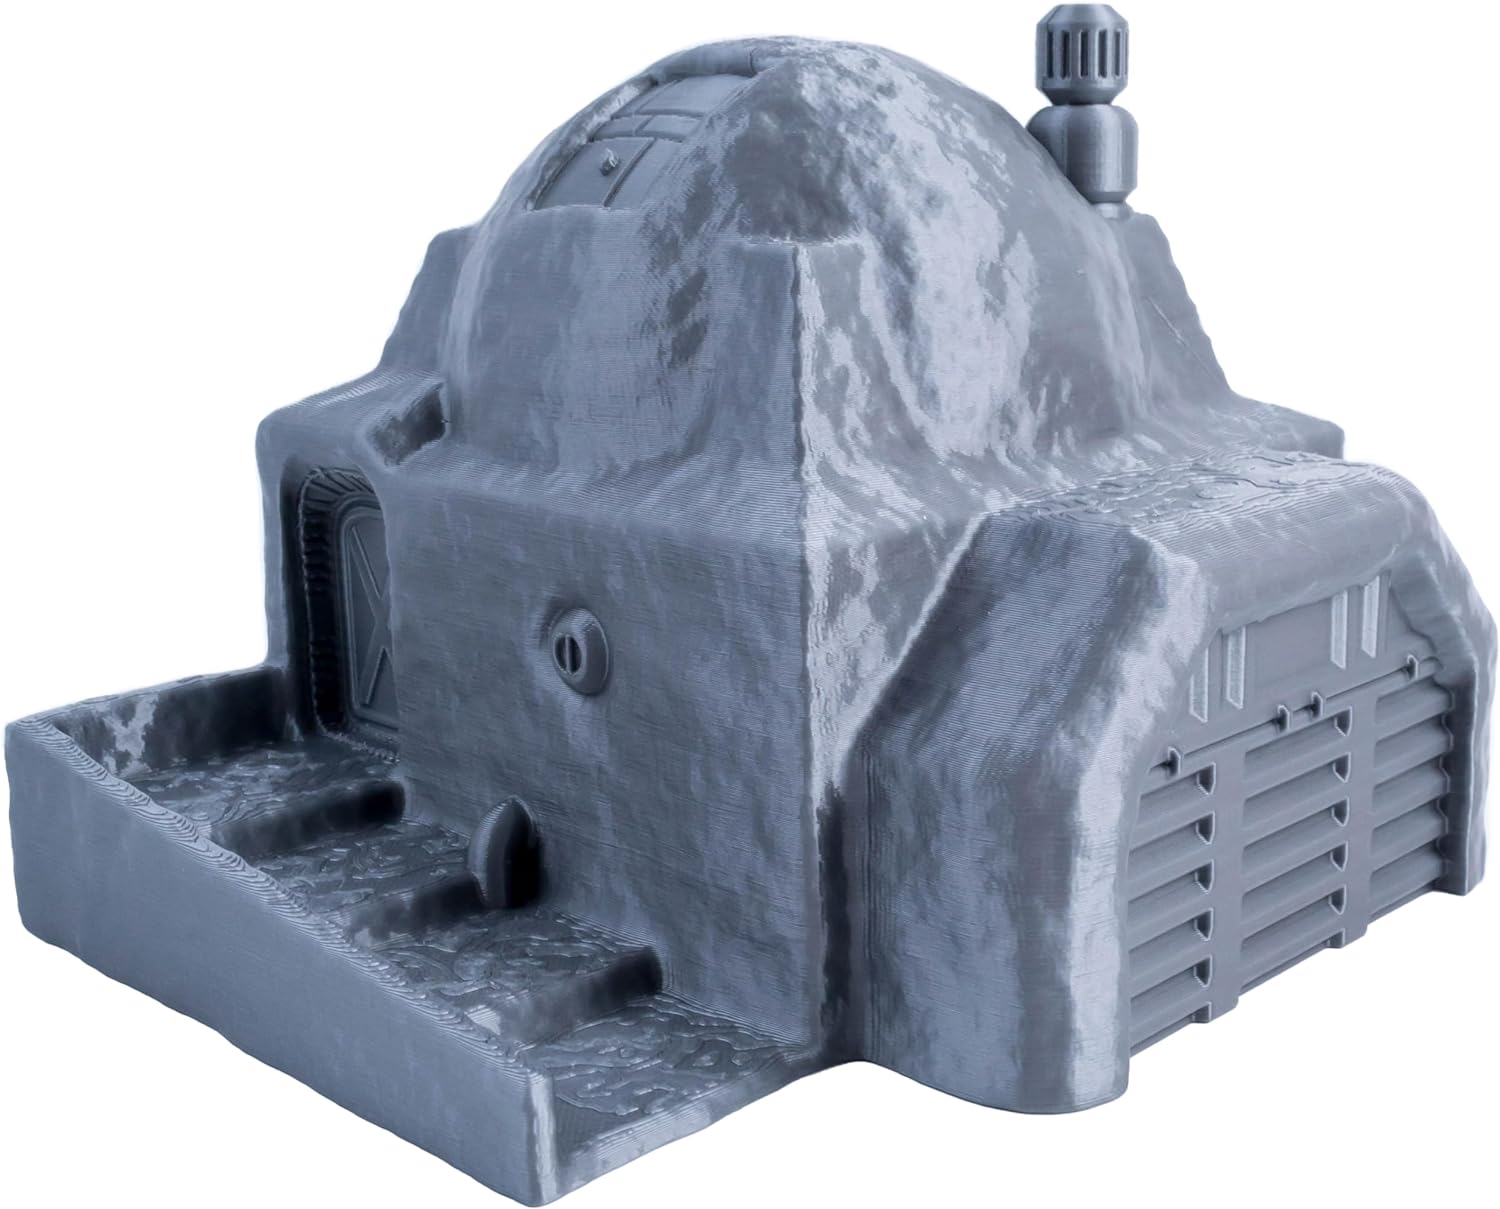
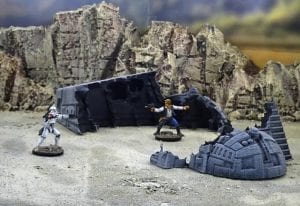
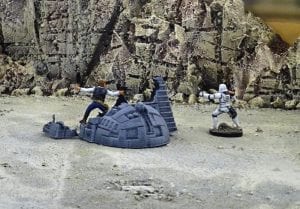
Sci-FiSci-Fi-Außenposten in der Wüste: Bauen Sie Ihre eigene Sci-Fi-Oase
Star Wars Terrain Building, eine fesselnde Ergänzung zu deinen Tabletop-Abenteuern. Tauchen Sie mit diesem sorgfältig gefertigten Geländestück in das ikonische Universum von Star Wars ein.
(0 reviews) -
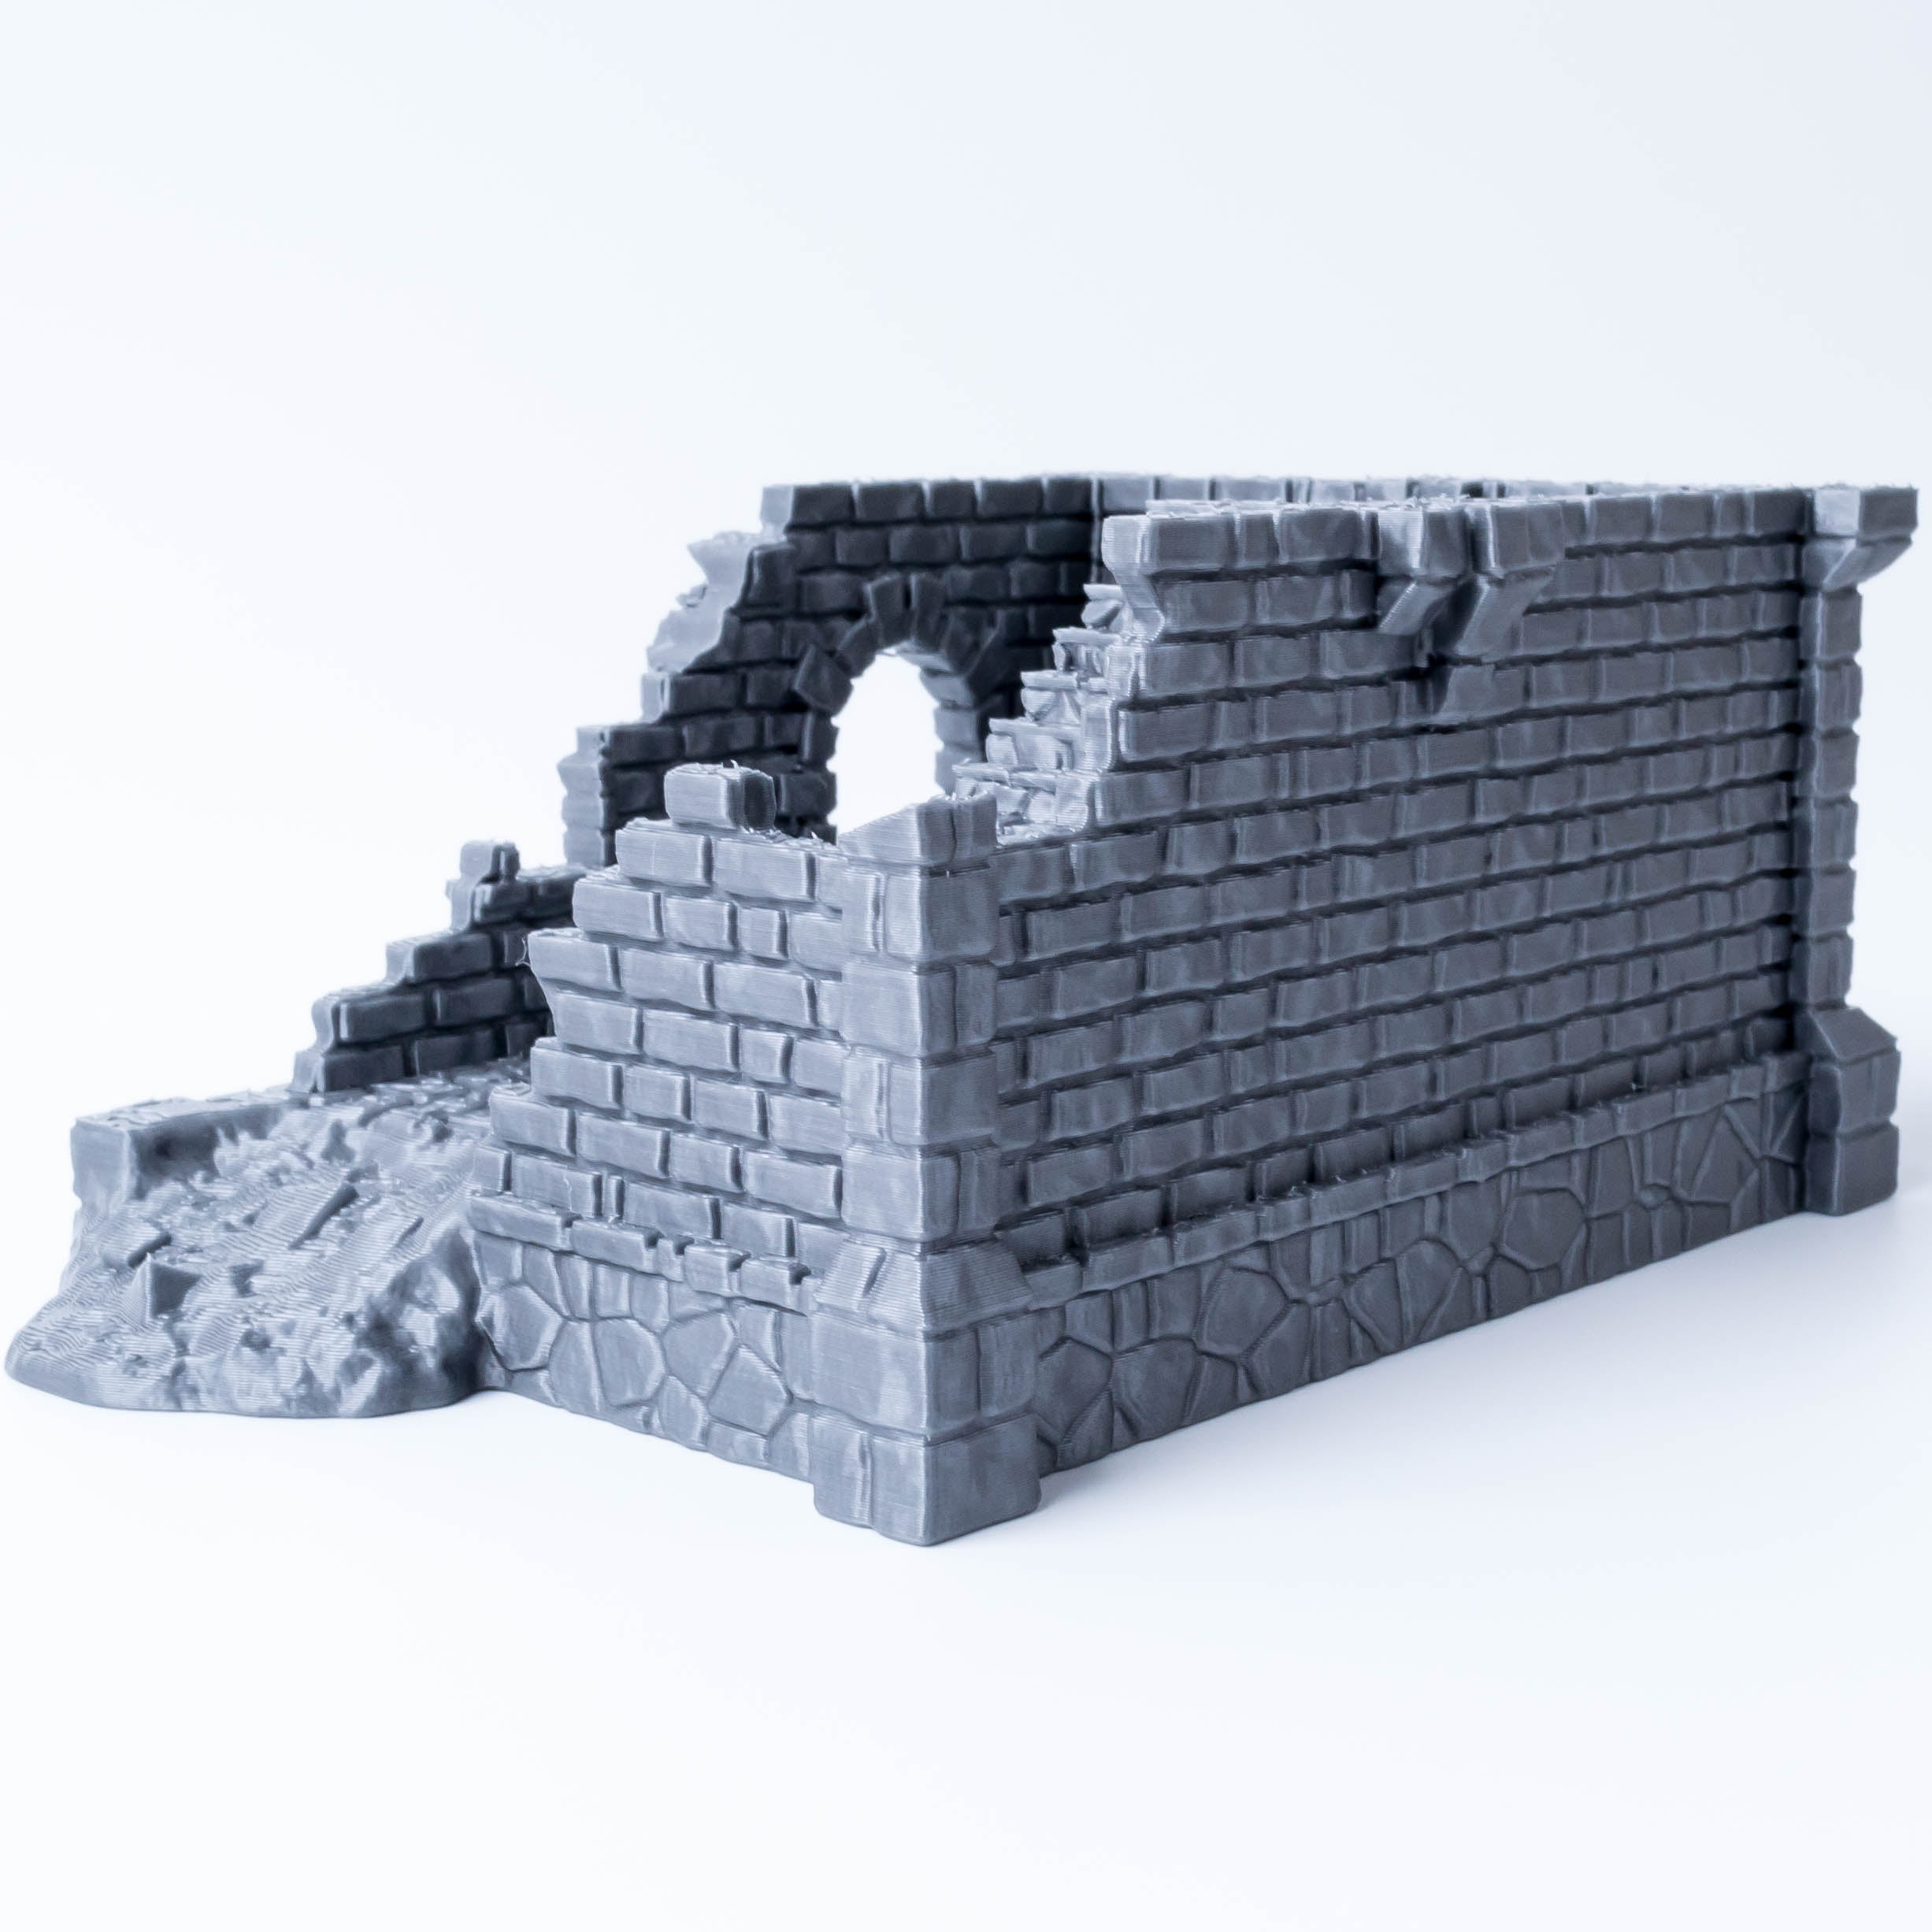
%22%20transform%3D%22translate(.6%20.6)%20scale(1.17188)%22%20fill-opacity%3D%22.5%22%3E%3Cellipse%20rx%3D%221%22%20ry%3D%221%22%20transform%3D%22matrix(-17.59786%2031.80303%20-73.6224%20-40.73814%2020%20226.9)%22%2F%3E%3Cellipse%20rx%3D%221%22%20ry%3D%221%22%20transform%3D%22rotate(103.3%2032.1%20204.3)%20scale(63.35606%2039.16496)%22%2F%3E%3Cpath%20d%3D%22M271-16v94L165-2z%22%2F%3E%3Cellipse%20fill%3D%22%23bbb%22%20rx%3D%221%22%20ry%3D%221%22%20transform%3D%22rotate(-132.5%2063%2057.7)%20scale(179.17225%2038.84912)%22%2F%3E%3Cpath%20fill%3D%22%23d6d6d6%22%20d%3D%22M145-16l94%20104L52%2010z%22%2F%3E%3Cellipse%20rx%3D%221%22%20ry%3D%221%22%20transform%3D%22matrix(-6.50454%2036.15073%20-57.5867%20-10.36148%2028.2%20240.4)%22%2F%3E%3Cpath%20d%3D%22M62%206.4L-9.3%2022.8-16-6.4l71-16.4z%22%2F%3E%3Cellipse%20rx%3D%221%22%20ry%3D%221%22%20transform%3D%22matrix(.59236%20-49.14229%2037.95401%20.4575%20247.1%20235.2)%22%2F%3E%3Cpath%20d%3D%22M245.1%2066.8l-42.5-63L245-24.8l42.5%2063z%22%2F%3E%3Cellipse%20fill%3D%22%23949494%22%20cx%3D%22180%22%20cy%3D%2287%22%20rx%3D%2248%22%20ry%3D%2279%22%2F%3E%3Cellipse%20fill%3D%22%234e4e4e%22%20rx%3D%221%22%20ry%3D%221%22%20transform%3D%22rotate(19.4%20-165.3%20344.4)%20scale(40.54413%2051.04788)%22%2F%3E%3Cellipse%20fill%3D%22%239d9d9d%22%20rx%3D%221%22%20ry%3D%221%22%20transform%3D%22matrix(-40.42112%20-13.9181%2025.70195%20-74.64389%20136.3%20215.8)%22%2F%3E%3Cellipse%20rx%3D%221%22%20ry%3D%221%22%20transform%3D%22matrix(-54.38888%20-31.67956%2014.26371%20-24.48857%2032%20236.6)%22%2F%3E%3Cpath%20fill%3D%22%23b0b0b0%22%20d%3D%22M-16%2087L80-16l82%2020z%22%2F%3E%3Cellipse%20fill%3D%22%23adadad%22%20cy%3D%22118%22%20rx%3D%2235%22%20ry%3D%2253%22%2F%3E%3C%2Fg%3E%3C%2Fsvg%3E) Gebäude und Zelte
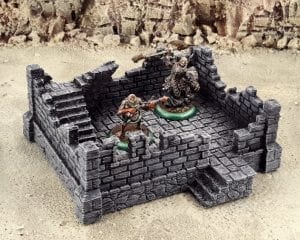
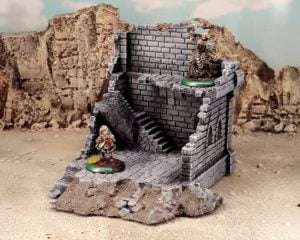
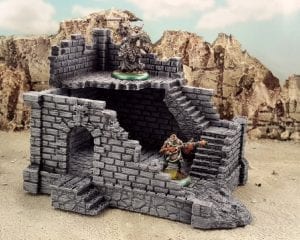
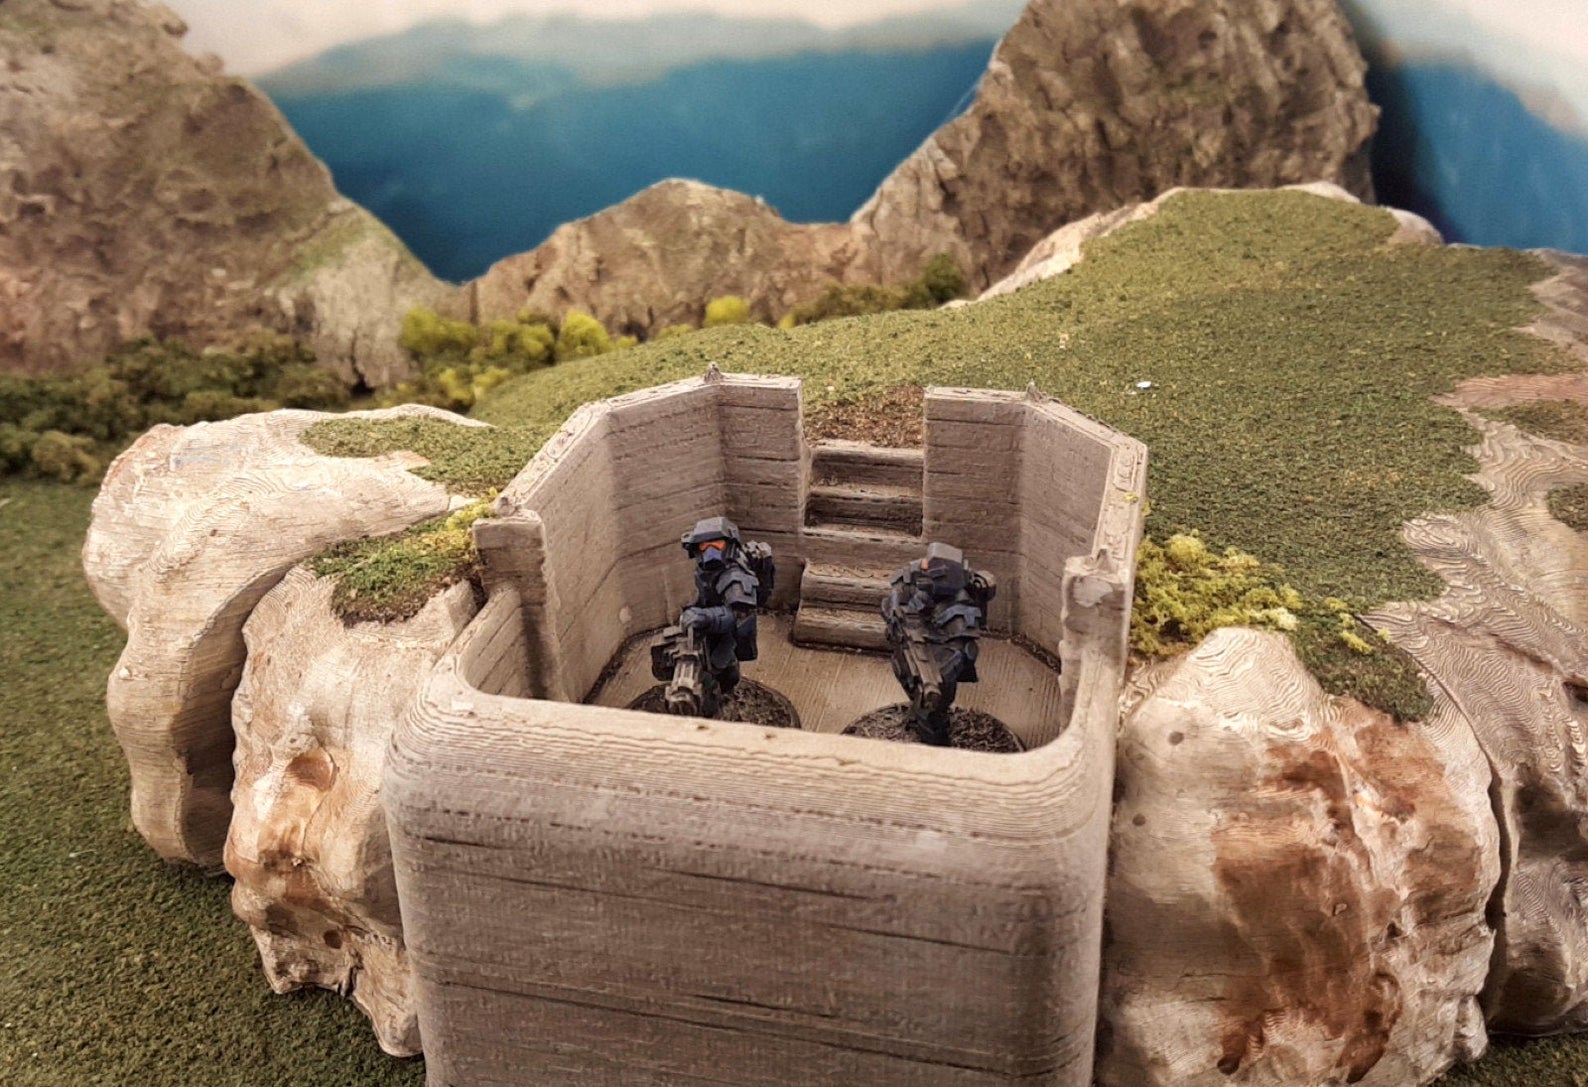
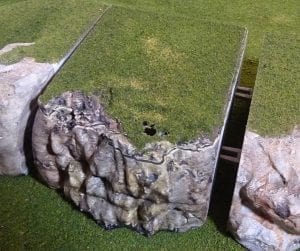
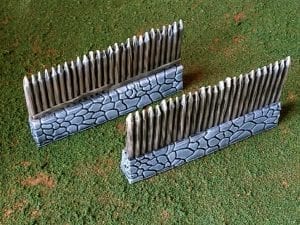
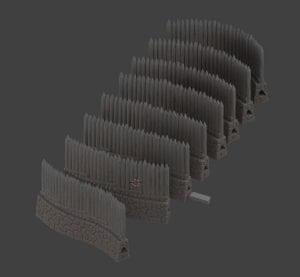
Gebäude und ZelteRuinen-Außenposten aus Stein: 28mm Fantasy-Ruinen für Epic Adventures
Geschmiedet aus den Feuern der Fantasie und mit akribischer Detailarbeit gefertigt, entführt die Ulvheim Ruins Series: Stone Ruined Outpost entführt deine Tabletop-Abenteuer in ein Reich der vergessenen Geschichten und spannenden Begegnungen.
(0 reviews) -
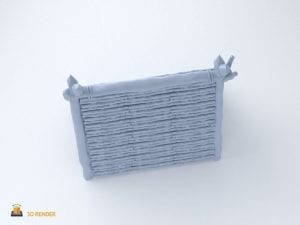
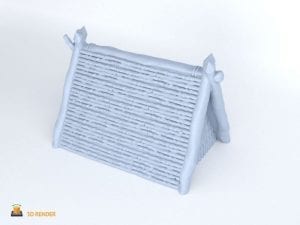
%22%20transform%3D%22translate(.6%20.6)%20scale(1.17188)%22%20fill-opacity%3D%22.5%22%3E%3Cellipse%20fill%3D%22%23b6b6b6%22%20rx%3D%221%22%20ry%3D%221%22%20transform%3D%22matrix(229.18711%201.24995%20-.23212%2042.56187%20135%20109)%22%2F%3E%3Cellipse%20rx%3D%221%22%20ry%3D%221%22%20transform%3D%22rotate(-3.8%203383.5%20-2271.3)%20scale(255%2052.85661)%22%2F%3E%3Cellipse%20rx%3D%221%22%20ry%3D%221%22%20transform%3D%22matrix(-166.36063%20-5.15786%201.6279%20-52.50593%20117.4%2022.7)%22%2F%3E%3Cellipse%20fill%3D%22%238e8e8e%22%20rx%3D%221%22%20ry%3D%221%22%20transform%3D%22matrix(29.0369%2049.33442%20-32.95043%2019.39372%2070%20134)%22%2F%3E%3Cellipse%20rx%3D%221%22%20ry%3D%221%22%20transform%3D%22matrix(-3.72611%2047.22483%20-243.94935%20-19.24798%20110.3%20220.2)%22%2F%3E%3Cellipse%20rx%3D%221%22%20ry%3D%221%22%20transform%3D%22matrix(20.76975%20-12.13873%2049.5954%2084.85927%2024.5%20193)%22%2F%3E%3Cellipse%20rx%3D%221%22%20ry%3D%221%22%20transform%3D%22matrix(-187.96593%20-1.70186%20.33474%20-36.97116%20137.7%2025.3)%22%2F%3E%3Cpath%20fill%3D%22%23444%22%20d%3D%22M100%20136h156v24H100z%22%2F%3E%3Cellipse%20fill%3D%22%23575757%22%20rx%3D%221%22%20ry%3D%221%22%20transform%3D%22matrix(174.27454%20-4.48483%20.2421%209.40742%2093.6%2071.8)%22%2F%3E%3Cellipse%20fill%3D%22%23919191%22%20cx%3D%22198%22%20cy%3D%22106%22%20rx%3D%22255%22%20ry%3D%2217%22%2F%3E%3Cellipse%20fill%3D%22%234f4f4f%22%20rx%3D%221%22%20ry%3D%221%22%20transform%3D%22matrix(-8.7263%2010.69346%20-41.76902%20-34.08521%2041.4%20153.3)%22%2F%3E%3Cellipse%20cx%3D%22161%22%20cy%3D%22193%22%20rx%3D%2240%22%20ry%3D%2237%22%2F%3E%3Cpath%20fill%3D%22%235b5b5b%22%20d%3D%22M198%20147h36v24h-36z%22%2F%3E%3Cellipse%20fill%3D%22%23aeaeae%22%20rx%3D%221%22%20ry%3D%221%22%20transform%3D%22rotate(101.6%20-18.2%2081.9)%20scale(12.26195%2030.62259)%22%2F%3E%3Cellipse%20cx%3D%22187%22%20cy%3D%22227%22%20rx%3D%22252%22%20ry%3D%2244%22%2F%3E%3Cellipse%20rx%3D%221%22%20ry%3D%221%22%20transform%3D%22matrix(-190.41991%2011.43905%20-2.09113%20-34.80999%20108.6%2025.4)%22%2F%3E%3Cpath%20fill%3D%22%23434343%22%20d%3D%22M126%20123h51v31h-51z%22%2F%3E%3Cpath%20fill%3D%22%23525252%22%20d%3D%22M131%2099L80%2073l116%201z%22%2F%3E%3Cpath%20fill%3D%22%23393939%22%20d%3D%22M158.9%20145L33.6%20185.7l102.9-1.2-14-41z%22%2F%3E%3Cellipse%20fill%3D%22%234c4c4c%22%20cx%3D%2258%22%20cy%3D%2268%22%20rx%3D%22255%22%20ry%3D%227%22%2F%3E%3C%2Fg%3E%3C%2Fsvg%3E) Terrain & Szenerie
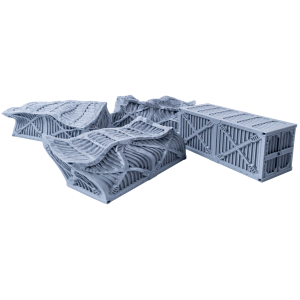
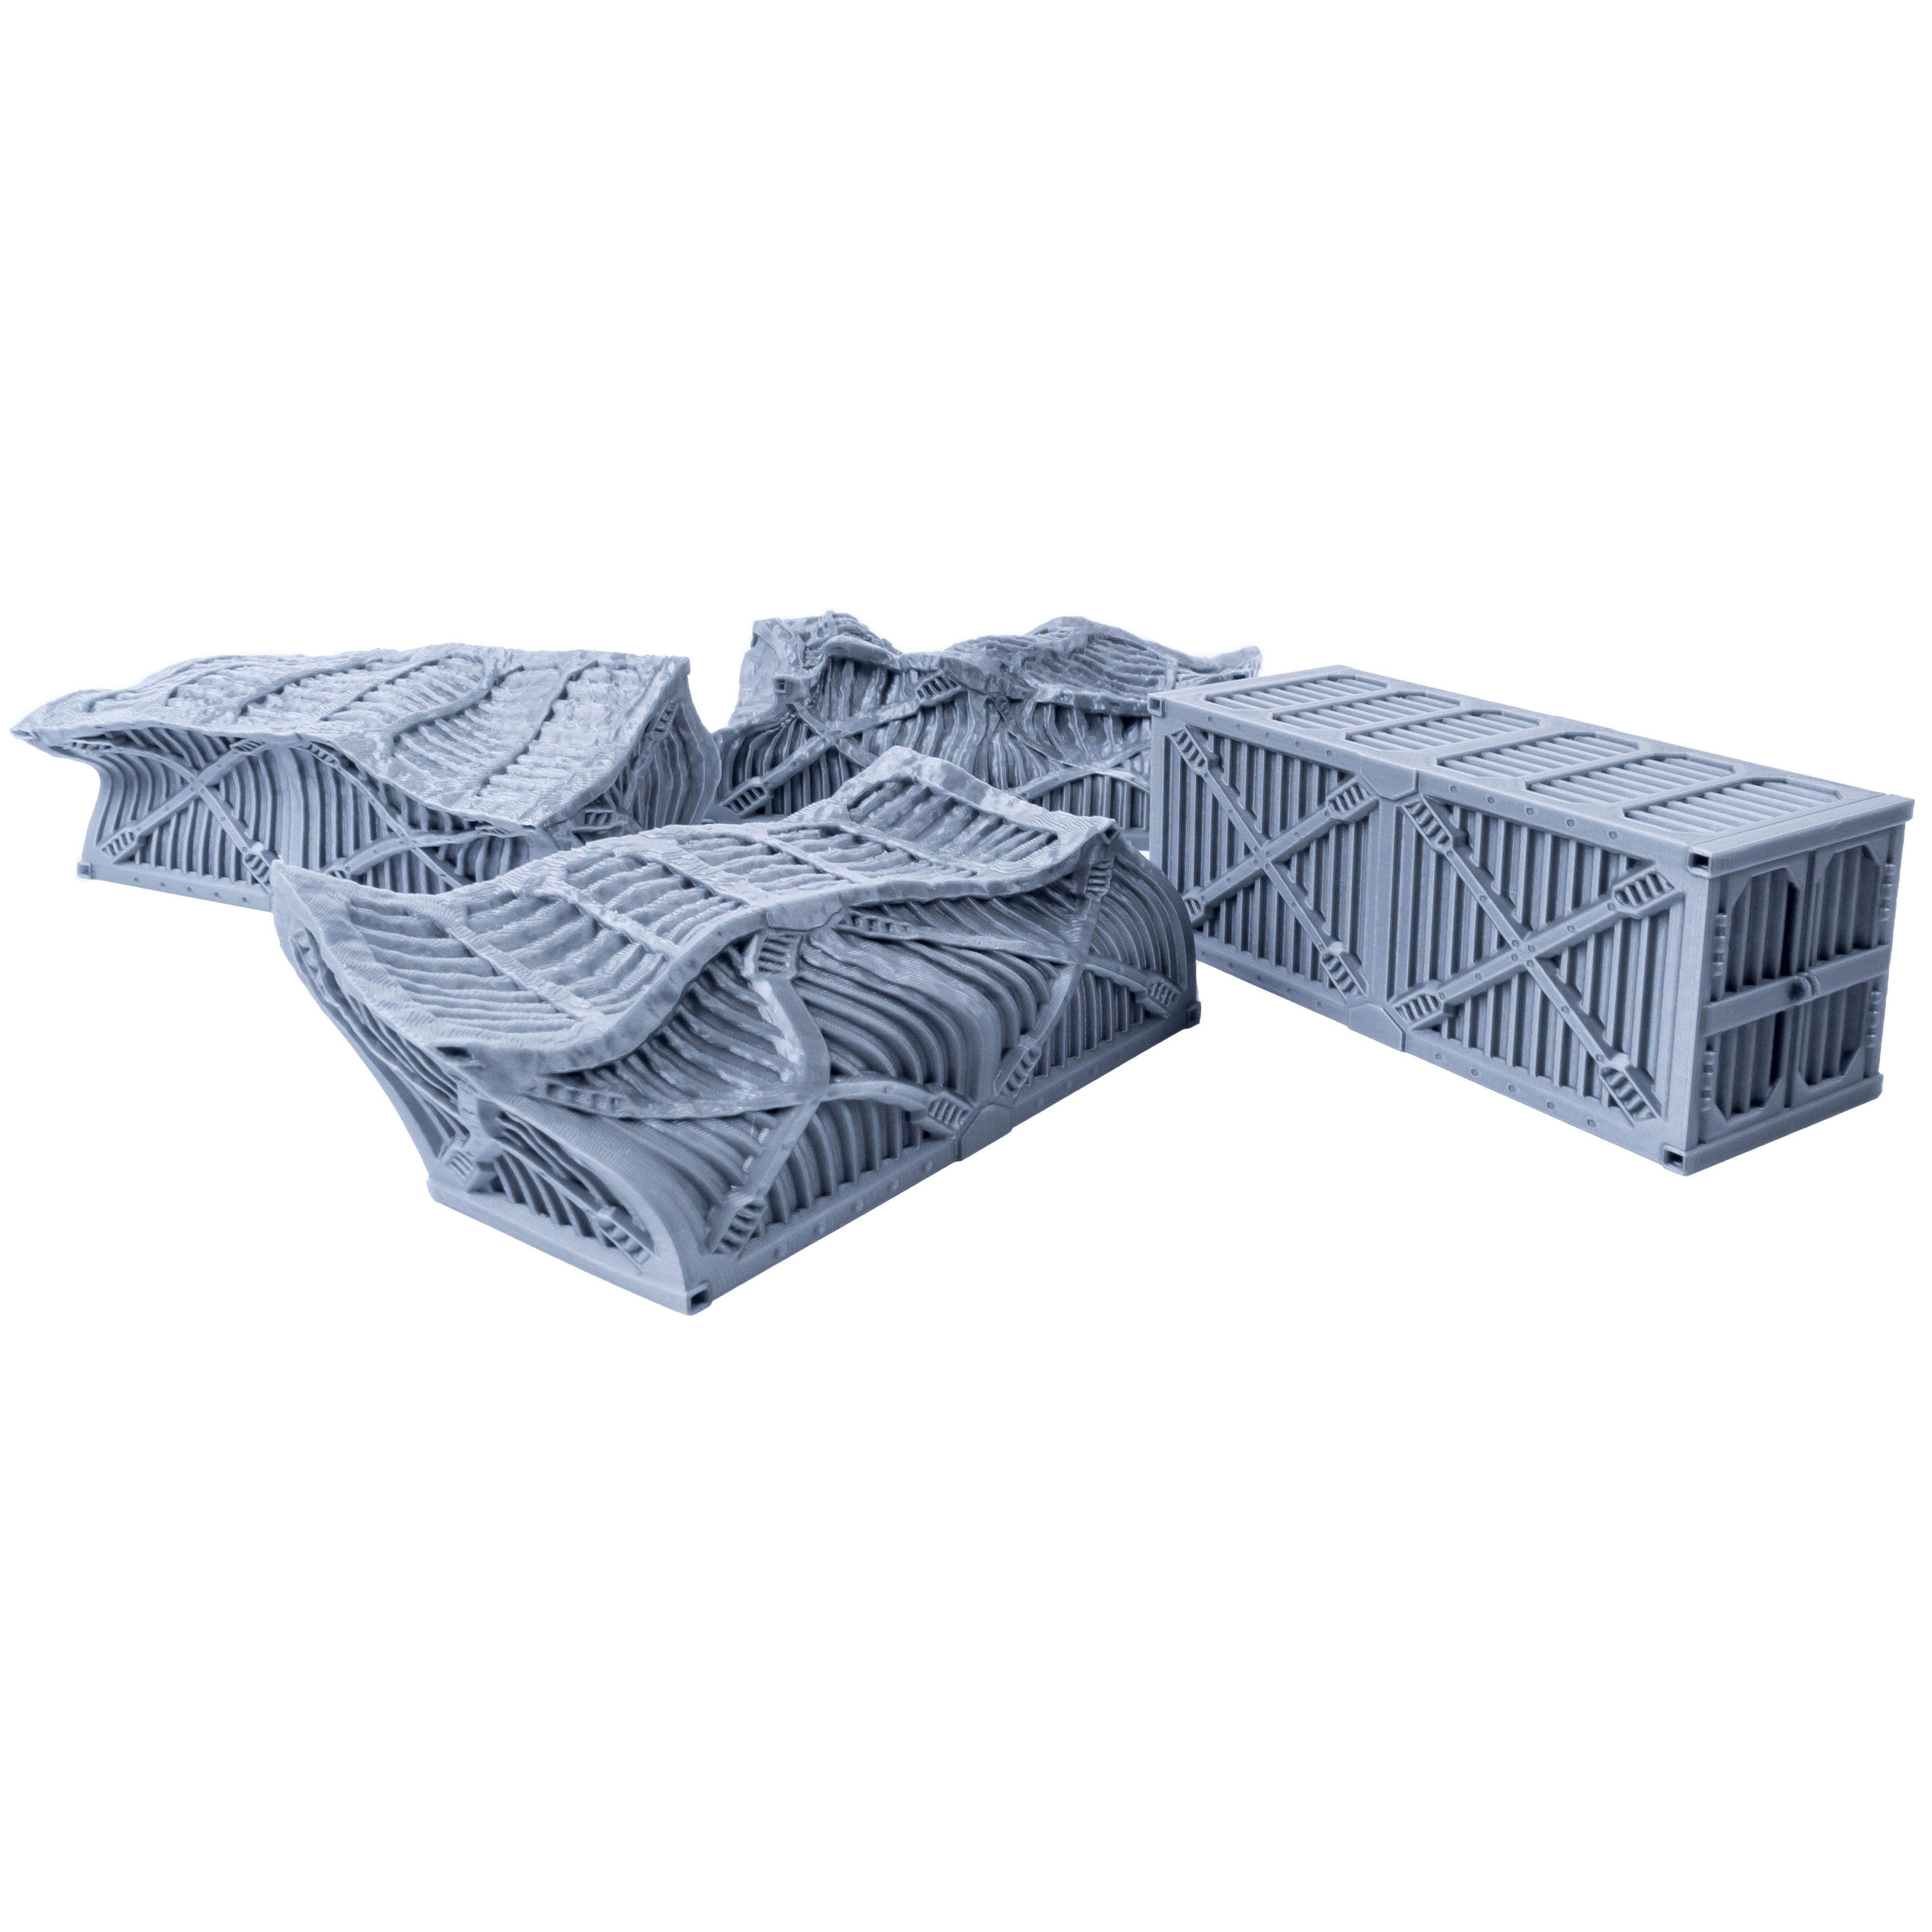
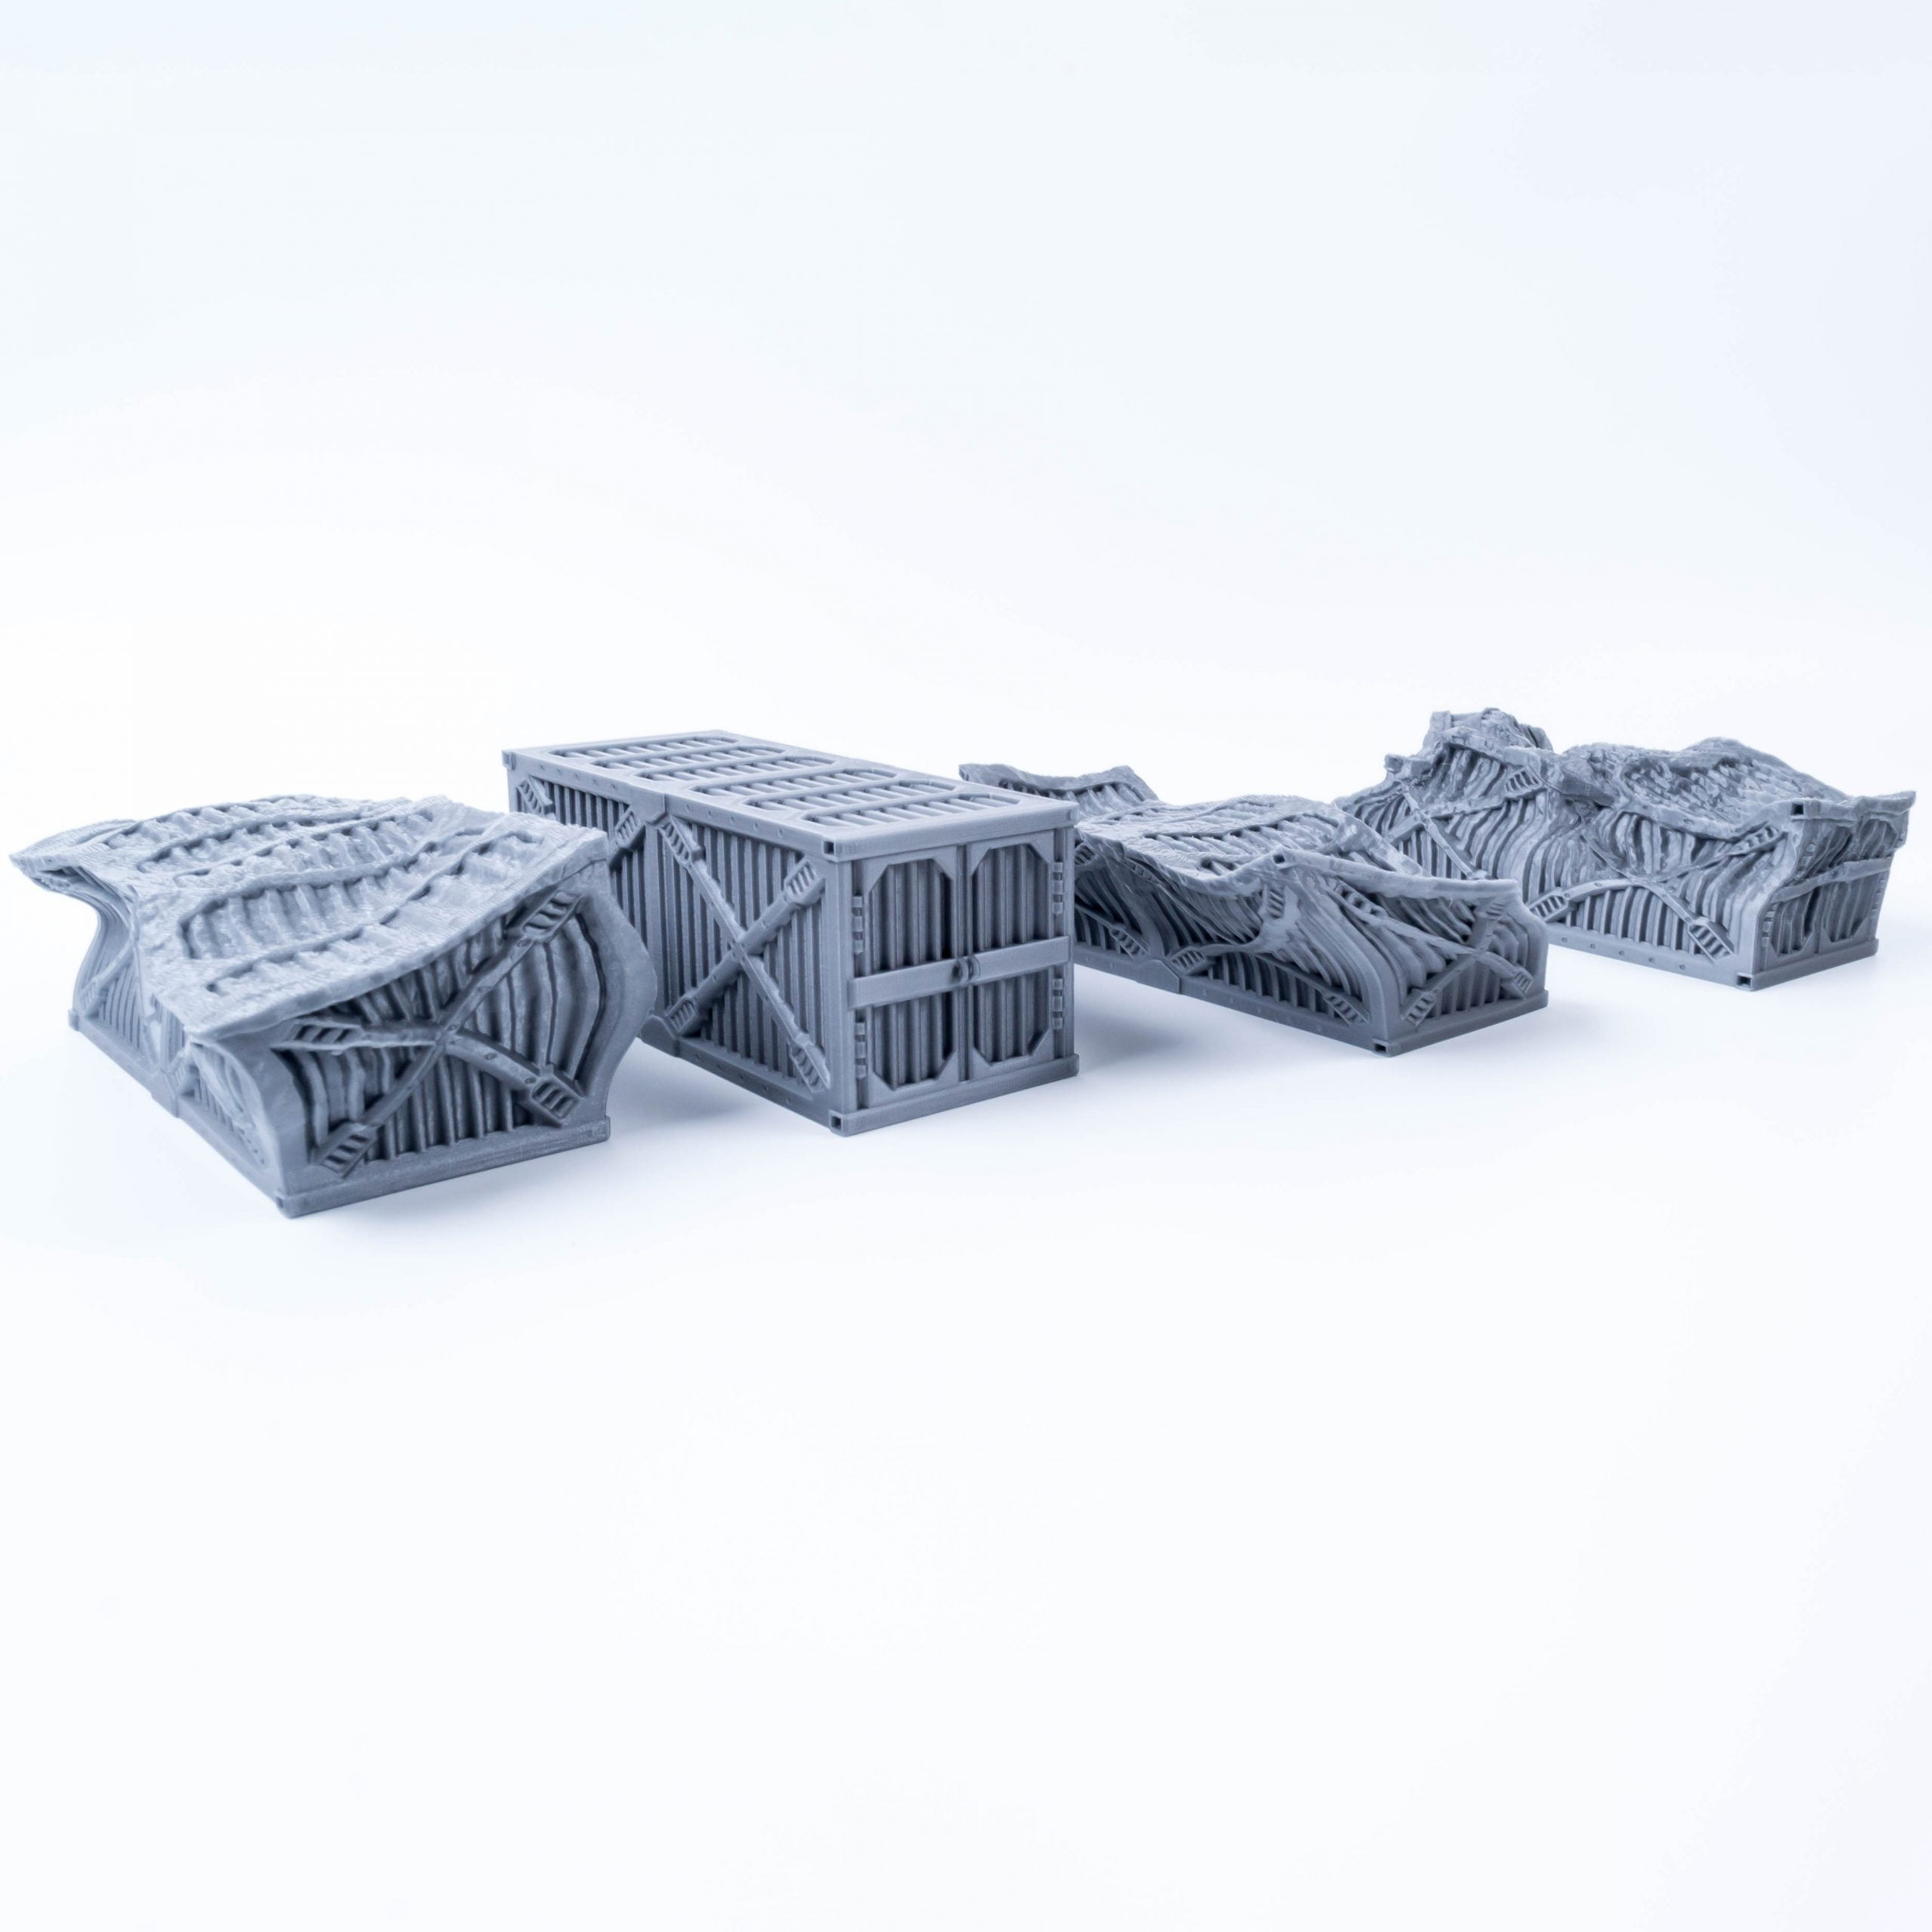
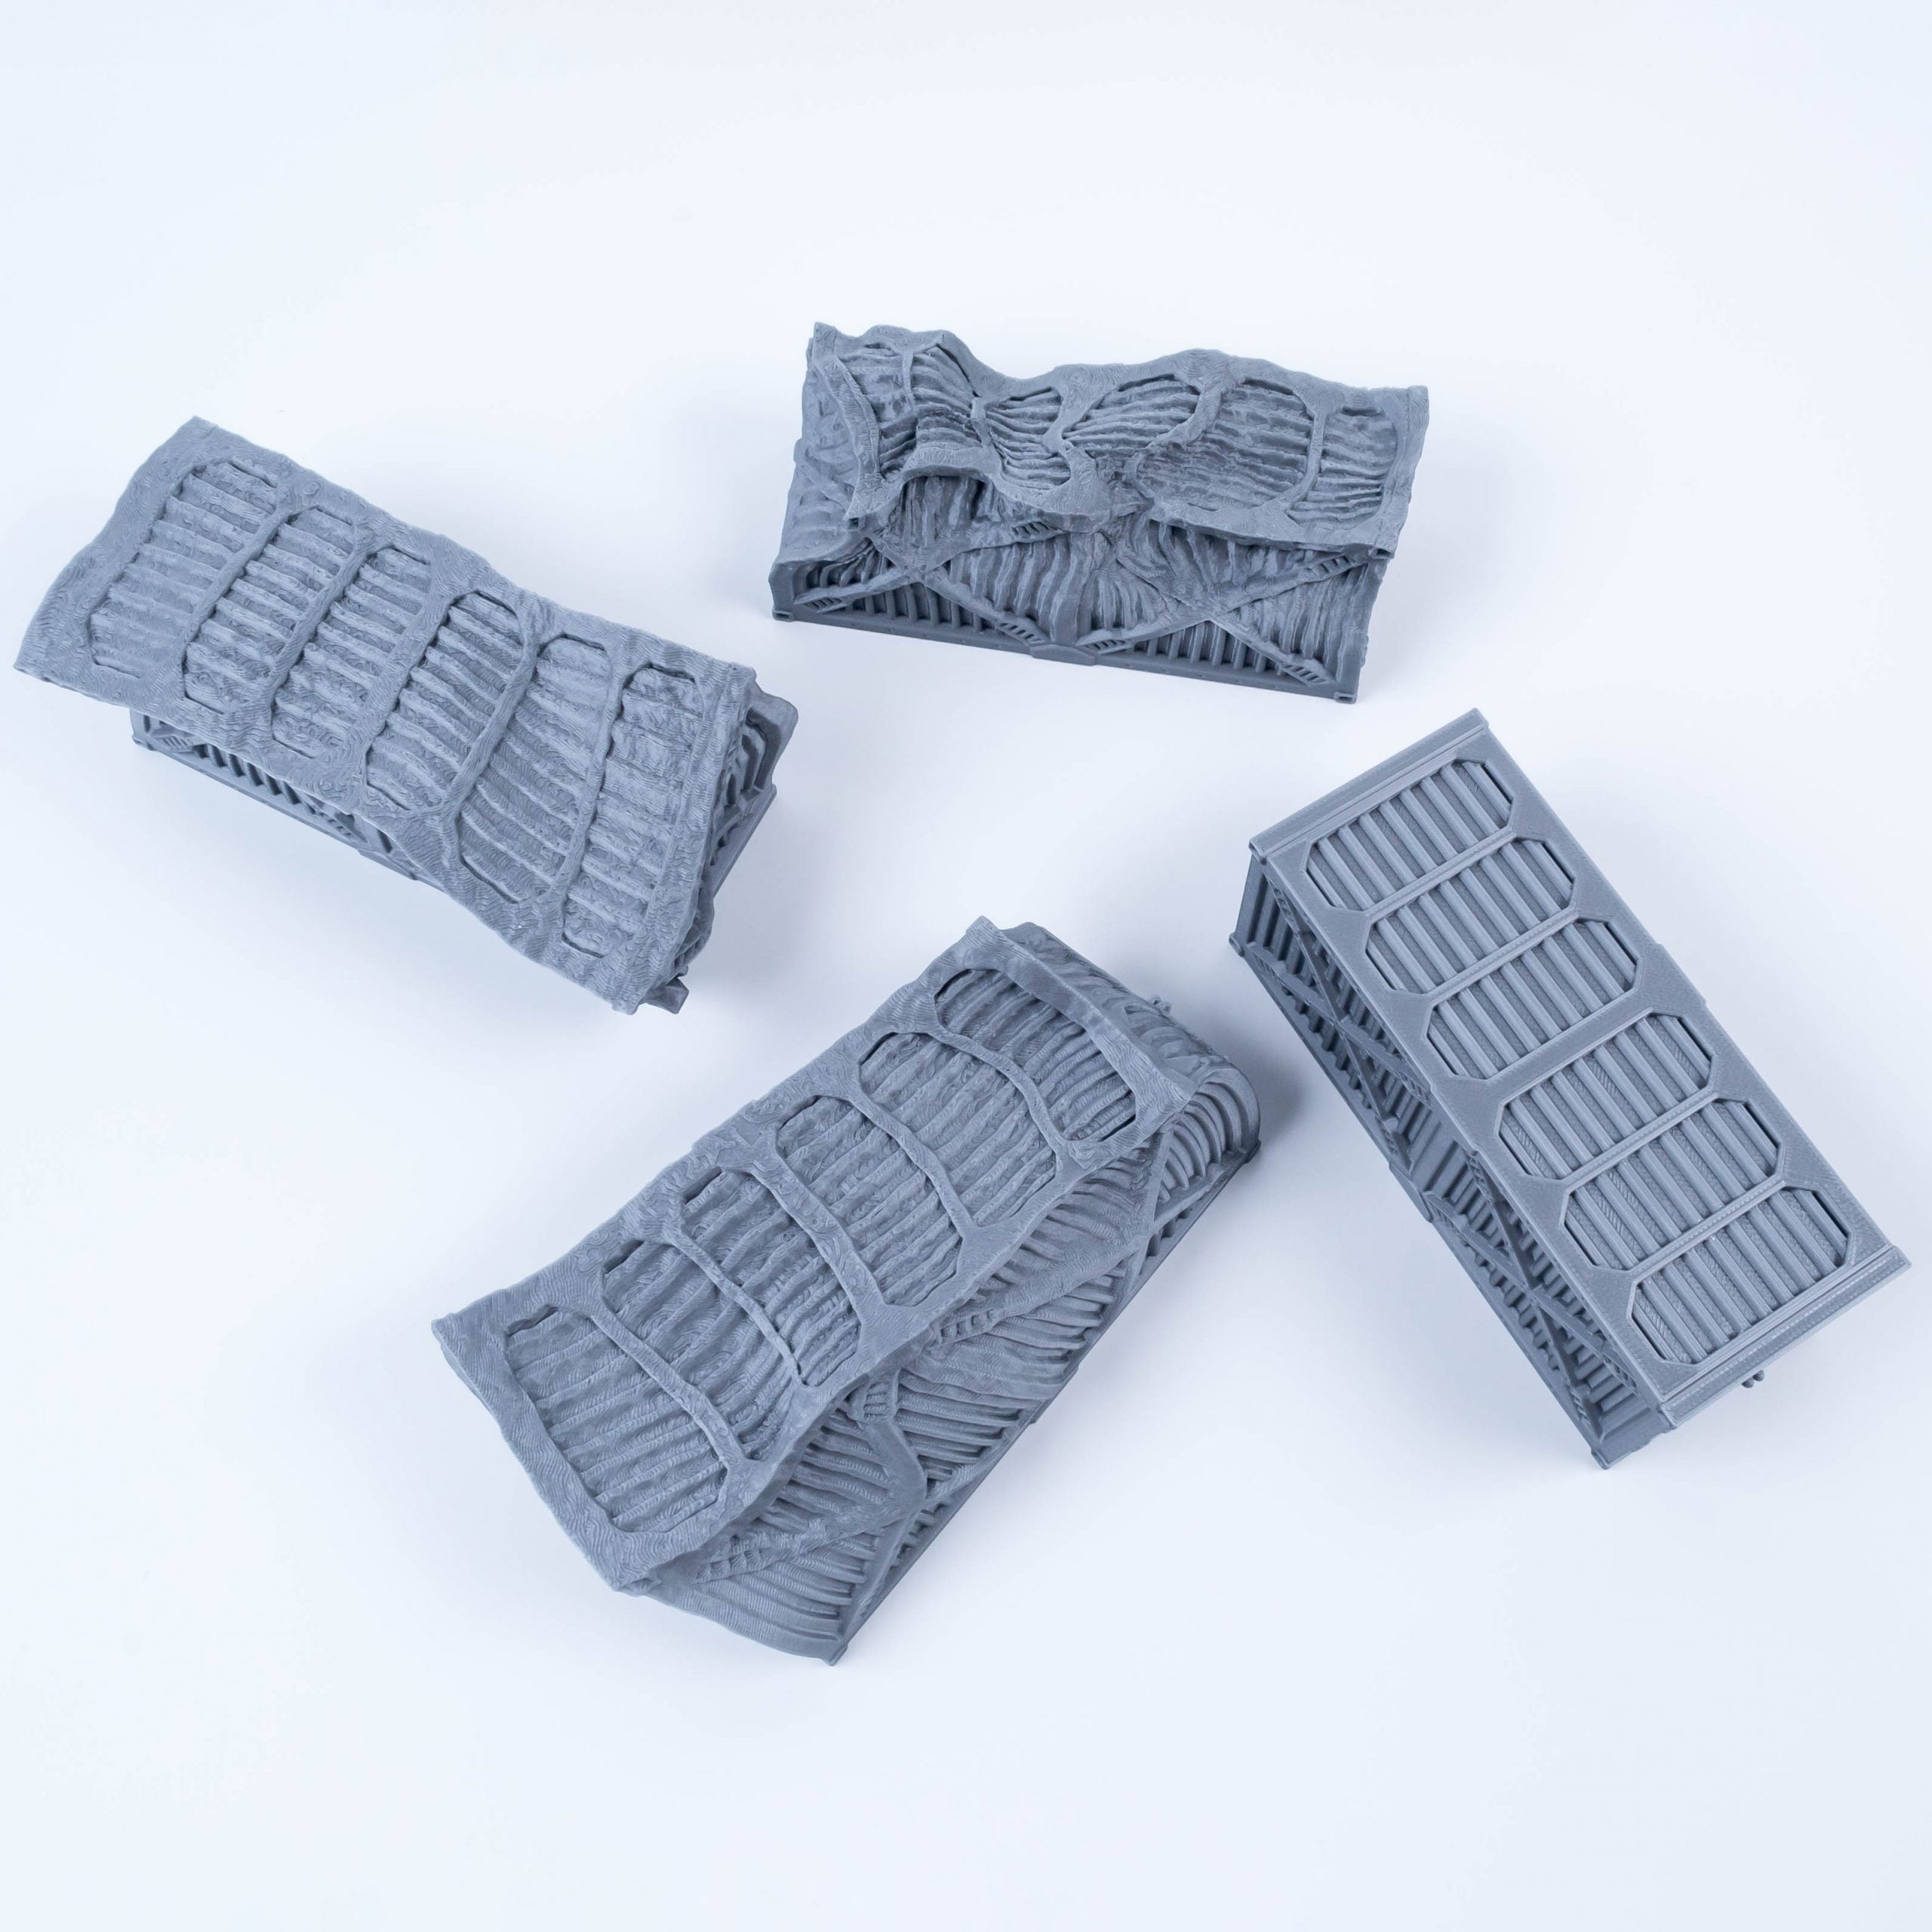
Terrain & SzenerieKriegsführungs-Versandcontainer: Für deine Tabletop-Schlachtfelder (4-teiliges Set)
Verwandeln Sie Ihre Spielfläche mit diesen 28mm Wargaming-Schiffscontainern in ein trostloses Kriegsgebiet oder industrielles Ödland. Dieses 4-teilige Set wurde speziell für Wargames im 28-mm- und 32-mm-Maßstab entwickelt und verleiht deinen Warhammer 40k-, Necromunda-, Kill Team-, Infinity- oder anderen Modern/Sci-Fi-Scharmützeln düsteren Realismus, Deckungsmöglichkeiten und taktische Tiefe.
(0 reviews) -
%22%20transform%3D%22translate(.6%20.6)%20scale(1.17188)%22%20fill-opacity%3D%22.5%22%3E%3Cellipse%20fill%3D%22%23969696%22%20rx%3D%221%22%20ry%3D%221%22%20transform%3D%22matrix(202.94272%20-28.25774%206.37976%2045.81841%20106%2093.2)%22%2F%3E%3Cellipse%20rx%3D%221%22%20ry%3D%221%22%20transform%3D%22matrix(187.17024%20-19.46643%204.63973%2044.61113%20149.4%20191)%22%2F%3E%3Cellipse%20rx%3D%221%22%20ry%3D%221%22%20transform%3D%22matrix(-254.0549%208.91106%20-.84544%20-24.10344%20114.6%209.2)%22%2F%3E%3Cellipse%20rx%3D%221%22%20ry%3D%221%22%20transform%3D%22rotate(-6.4%201736.8%20-1120.4)%20scale(154.45338%2033.38614)%22%2F%3E%3Cellipse%20rx%3D%221%22%20ry%3D%221%22%20transform%3D%22matrix(-3.74127%20-24.86643%20252.16192%20-37.93895%2057.8%2015.3)%22%2F%3E%3Cellipse%20fill%3D%22%23919191%22%20rx%3D%221%22%20ry%3D%221%22%20transform%3D%22matrix(-6.80331%20-23.26552%20127.63877%20-37.32419%2026.5%20114.6)%22%2F%3E%3Cellipse%20rx%3D%221%22%20ry%3D%221%22%20transform%3D%22rotate(160.2%20120.1%2028.5)%20scale(26.97254%2042.52433)%22%2F%3E%3Cpath%20fill%3D%22%235c5c5c%22%20d%3D%22M149%2034h107v97H149z%22%2F%3E%3Cpath%20fill%3D%22%23818181%22%20d%3D%22M94%2032h64v77H94z%22%2F%3E%3Cpath%20fill%3D%22%235f5f5f%22%20d%3D%22M183.9%2012.8l-42.4%2043.7L271%20152.1%20213.8%2019.2z%22%2F%3E%3Cellipse%20cx%3D%22182%22%20cy%3D%22173%22%20rx%3D%22100%22%20ry%3D%2225%22%2F%3E%3Cpath%20fill%3D%22%234a4a4a%22%20d%3D%22M115.8%20107.3l53%2022.8-144.1%2048%2050.1-61z%22%2F%3E%3Cellipse%20cx%3D%2226%22%20cy%3D%2210%22%20rx%3D%22167%22%20ry%3D%2224%22%2F%3E%3Cpath%20fill%3D%22%237b7b7b%22%20d%3D%22M0%20146h58v11H0z%22%2F%3E%3Cpath%20d%3D%22M30.6-16L-16%2040.4%2014.1%2069l-8.7-1.6z%22%2F%3E%3Cellipse%20fill%3D%22%232d2d2d%22%20rx%3D%221%22%20ry%3D%221%22%20transform%3D%22matrix(37.74198%20-21.35339%206.46899%2011.4339%2098.6%20153)%22%2F%3E%3Cellipse%20fill%3D%22%23545454%22%20cx%3D%2260%22%20cy%3D%2267%22%20rx%3D%2245%22%20ry%3D%2215%22%2F%3E%3Cellipse%20rx%3D%221%22%20ry%3D%221%22%20transform%3D%22matrix(67.4699%2023.71684%20-8.00665%2022.7774%20243.2%207.5)%22%2F%3E%3Cpath%20d%3D%22M0%20177h256v15H0z%22%2F%3E%3Cellipse%20cx%3D%22132%22%20cy%3D%22166%22%20rx%3D%2227%22%20ry%3D%2224%22%2F%3E%3C%2Fg%3E%3C%2Fsvg%3E) Terrain & Szenerie
Terrain & SzenerieShanty-Hindernis-Set: Bauen Sie düstere Schlachtenlandschaften für Ihre Miniaturen
In der sich ausbreitenden Unterwelt der Imperien wimmelt es von Leben … und Konflikten. Egal, ob es sich um den verzweifelten Zufluchtsort von Plünderern in einer gefallenen Bienenstockstadt oder um die befestigten Trümmer handelt, die von brutalen Banden erobert wurden, dieses 7-teilige Shanty-Hindernis-Set bringt diese verzweifelten, behelfsmäßigen Strukturen auf dein Spielfeld.
(0 reviews) -
%22%20transform%3D%22translate(.6%20.6)%20scale(1.17188)%22%20fill-opacity%3D%22.5%22%3E%3Cellipse%20fill%3D%22%239b9b9b%22%20cx%3D%22121%22%20cy%3D%22137%22%20rx%3D%22254%22%20ry%3D%2258%22%2F%3E%3Cellipse%20rx%3D%221%22%20ry%3D%221%22%20transform%3D%22matrix(190.96228%20-19.06057%204.1779%2041.85722%2094.3%20249)%22%2F%3E%3Cellipse%20cx%3D%22200%22%20cy%3D%2220%22%20rx%3D%22247%22%20ry%3D%2235%22%2F%3E%3Cellipse%20cx%3D%2274%22%20cy%3D%2254%22%20rx%3D%2230%22%20ry%3D%2269%22%2F%3E%3Cellipse%20fill%3D%22%23bababa%22%20rx%3D%221%22%20ry%3D%221%22%20transform%3D%22rotate(-177.7%206.3%2051)%20scale(23.8755%2048.16648)%22%2F%3E%3Cpath%20d%3D%22M2%20150l-18%20121%2078-14z%22%2F%3E%3Cellipse%20rx%3D%221%22%20ry%3D%221%22%20transform%3D%22rotate(-89.2%20202.6%2039.2)%20scale(31.17702%20157.36309)%22%2F%3E%3Cellipse%20rx%3D%221%22%20ry%3D%221%22%20transform%3D%22rotate(154.9%20114.3%2040.4)%20scale(28.01982%2097.82509)%22%2F%3E%3Cellipse%20cx%3D%22110%22%20cy%3D%229%22%20rx%3D%22255%22%20ry%3D%2226%22%2F%3E%3Cellipse%20fill%3D%22%23858585%22%20rx%3D%221%22%20ry%3D%221%22%20transform%3D%22matrix(-95.34712%20-72.46498%2015.24049%20-20.05295%20207.4%20134)%22%2F%3E%3Cellipse%20fill%3D%22%23818181%22%20rx%3D%221%22%20ry%3D%221%22%20transform%3D%22matrix(15.0954%2021.50715%20-54.26097%2038.08461%2067.5%20171.4)%22%2F%3E%3Cellipse%20fill%3D%22%234a4a4a%22%20cx%3D%22155%22%20cy%3D%22159%22%20rx%3D%2228%22%20ry%3D%2245%22%2F%3E%3Cellipse%20fill%3D%22%23636363%22%20cx%3D%22193%22%20cy%3D%2266%22%20rx%3D%2235%22%20ry%3D%2220%22%2F%3E%3Cellipse%20cx%3D%2274%22%20cy%3D%2243%22%20rx%3D%2217%22%20ry%3D%2246%22%2F%3E%3Cellipse%20fill%3D%22%23515151%22%20rx%3D%221%22%20ry%3D%221%22%20transform%3D%22matrix(-17.40487%2030.67301%20-21.18723%20-12.02233%20113.3%2074.5)%22%2F%3E%3Cpath%20fill%3D%22%23525252%22%20d%3D%22M73%20146L-14%2024l132%2098z%22%2F%3E%3Cellipse%20cx%3D%22158%22%20cy%3D%22235%22%20rx%3D%22255%22%20ry%3D%2225%22%2F%3E%3Cpath%20d%3D%22M-10.4%20157.7l20-.4.8%2051-20%20.4z%22%2F%3E%3Cpath%20fill%3D%22%23313131%22%20d%3D%22M227.4%2099.3l-36.6-60%2035.6-.8%2022.5%2067.8z%22%2F%3E%3Cellipse%20fill%3D%22%23969696%22%20rx%3D%221%22%20ry%3D%221%22%20transform%3D%22rotate(140.6%20-12%2063.9)%20scale(20.91716%2084.81693)%22%2F%3E%3C%2Fg%3E%3C%2Fsvg%3E) Terrain & Szenerie
Terrain & SzenerieBaum-Geländeset (28/32mm) für Tabletop RPGs & Wargames
Tauche ein in dichte Wälder, erschaffe taktische Deckung mit gewundenen Ästen und verleihe deinen Spielen atemberaubenden Realismus! Dieses Set aus fachmännisch gearbeiteten PLA-Bäumen bringt die natürliche Note, die deine Miniatur-Abenteuer verdienen. Ob du Krieg in Warhammer 40k oder Age of Sigmar führst, Dungeons in D&D erkundest oder Geschichten in unzähligen Welten schmiedest – diese Bäume werden in dein Spielerlebnis eintauchen lassen.
(0 reviews) -
%22%20transform%3D%22translate(.6%20.6)%20scale(1.17188)%22%20fill-opacity%3D%22.5%22%3E%3Cellipse%20fill%3D%22%23f28b74%22%20rx%3D%221%22%20ry%3D%221%22%20transform%3D%22rotate(93%2021.2%2094.7)%20scale(56.69007%2069.78644)%22%2F%3E%3Cellipse%20fill%3D%22%234a681b%22%20cx%3D%22230%22%20cy%3D%22118%22%20rx%3D%2247%22%20ry%3D%22255%22%2F%3E%3Cellipse%20fill%3D%22%234a5c24%22%20rx%3D%221%22%20ry%3D%221%22%20transform%3D%22rotate(-19.1%20577.6%20-295.8)%20scale(111.83994%2033.11786)%22%2F%3E%3Cellipse%20fill%3D%22%233e5e0f%22%20rx%3D%221%22%20ry%3D%221%22%20transform%3D%22matrix(-19.46322%20-9.29181%2032.56384%20-68.21025%2027.9%2020.5)%22%2F%3E%3Cellipse%20fill%3D%22%2379518d%22%20cx%3D%22163%22%20cy%3D%22123%22%20rx%3D%2227%22%20ry%3D%2228%22%2F%3E%3Cellipse%20fill%3D%22%23969754%22%20rx%3D%221%22%20ry%3D%221%22%20transform%3D%22rotate(167%2092.9%2046.5)%20scale(23.90329%2037.90546)%22%2F%3E%3Cellipse%20fill%3D%22%23dda373%22%20rx%3D%221%22%20ry%3D%221%22%20transform%3D%22matrix(-4.85865%20-34.62557%2048.09807%20-6.7491%20123.4%2076.2)%22%2F%3E%3Cellipse%20fill%3D%22%237e9a4c%22%20rx%3D%221%22%20ry%3D%221%22%20transform%3D%22matrix(-6.06466%2067.99076%20-31.27662%20-2.78982%2026.6%20134)%22%2F%3E%3Cpath%20fill%3D%22%23ac663b%22%20d%3D%22M100%20153l47-21L31%2081z%22%2F%3E%3Cpath%20fill%3D%22%239f6d39%22%20d%3D%22M51%20111l56-96-59%2033z%22%2F%3E%3Cellipse%20fill%3D%22%23a97743%22%20rx%3D%221%22%20ry%3D%221%22%20transform%3D%22matrix(-7.52032%208.17248%20-27.36163%20-25.17819%20148.6%2030.6)%22%2F%3E%3Cpath%20fill%3D%22%2354671e%22%20d%3D%22M168-16l-6%2031%20109%2023z%22%2F%3E%3Cellipse%20fill%3D%22%237e9a4d%22%20rx%3D%221%22%20ry%3D%221%22%20transform%3D%22rotate(-111%2048.7%20-33.5)%20scale(26.87058%2036.86749)%22%2F%3E%3Cpath%20fill%3D%22%235b6b1e%22%20d%3D%22M48%20156h208v25H48z%22%2F%3E%3Cpath%20fill%3D%22%2383924c%22%20d%3D%22M191%2096L146-13l96%20104z%22%2F%3E%3C%2Fg%3E%3C%2Fsvg%3E) Gebäude und Zelte
Gebäude und Zelte28mm Barbaren-Zelt: Perfekt für barbarische Miniaturen & Gelände
“Das Zelt des Barbaren findet man in der Grünen Ebene 9 als Teil des Barbaren-Siedlungs-Questsets. “
(0 reviews) -
%22%20transform%3D%22translate(.6%20.6)%20scale(1.17188)%22%20fill-opacity%3D%22.5%22%3E%3Cellipse%20fill%3D%22%23494848%22%20rx%3D%221%22%20ry%3D%221%22%20transform%3D%22matrix(-61.47656%20-29.19121%2026.11592%20-55%20149%2097)%22%2F%3E%3Cellipse%20fill%3D%22%23fff%22%20rx%3D%221%22%20ry%3D%221%22%20transform%3D%22rotate(63.2%2027.5%2051.3)%20scale(42.28256%20169.44604)%22%2F%3E%3Cellipse%20fill%3D%22%23dedddf%22%20rx%3D%221%22%20ry%3D%221%22%20transform%3D%22rotate(132.3%20-24.4%2093)%20scale(47.84796%20192.72449)%22%2F%3E%3Cellipse%20fill%3D%22%23e5e4e6%22%20rx%3D%221%22%20ry%3D%221%22%20transform%3D%22matrix(-79.99585%20-5.25298%201.35565%20-20.64473%20215.5%2012.6)%22%2F%3E%3Cellipse%20fill%3D%22%23818664%22%20cx%3D%22233%22%20cy%3D%2292%22%20rx%3D%2253%22%20ry%3D%2239%22%2F%3E%3Cellipse%20fill%3D%22%234f4f50%22%20cx%3D%22150%22%20cy%3D%2296%22%20rx%3D%2235%22%20ry%3D%2247%22%2F%3E%3Cellipse%20fill%3D%22%23f0f0f1%22%20rx%3D%221%22%20ry%3D%221%22%20transform%3D%22matrix(-84.51988%2022.80521%20-7.0604%20-26.16698%2029.2%209.1)%22%2F%3E%3Cpath%20fill%3D%22%23afc150%22%20d%3D%22M210%20102h46v28h-46z%22%2F%3E%3Cellipse%20fill%3D%22%2399989a%22%20cx%3D%2289%22%20cy%3D%2292%22%20rx%3D%2227%22%20ry%3D%2279%22%2F%3E%3Cpath%20fill%3D%22%237a7787%22%20d%3D%22M182.3%2097.9l-1.5-43%2079-2.8%201.4%2043z%22%2F%3E%3Cellipse%20fill%3D%22%23b4b4b5%22%20rx%3D%221%22%20ry%3D%221%22%20transform%3D%22matrix(4.38896%2012.61798%20-54.1984%2018.85205%2025%2056.6)%22%2F%3E%3Cellipse%20fill%3D%22%23828283%22%20rx%3D%221%22%20ry%3D%221%22%20transform%3D%22rotate(-155.4%2082%2059.1)%20scale(42.12715%2012.16543)%22%2F%3E%3Cpath%20fill%3D%22silver%22%20d%3D%22M64.5%2022.8l118.3-34%204.7%2016.4-118.3%2034z%22%2F%3E%3Cpath%20fill%3D%22%23fcfcfc%22%20d%3D%22M183.6-7l47%201-.2%2013-47-1z%22%2F%3E%3Cellipse%20fill%3D%22%238c8c8d%22%20cx%3D%22147%22%20cy%3D%2244%22%20rx%3D%2241%22%20ry%3D%2211%22%2F%3E%3C%2Fg%3E%3C%2Fsvg%3E) Sci-Fi
Sci-FiGothic Ruins Set 3: Zerfallende Abtei für Fantasy und Sci-Fi Spiele
Die Zerfallende Abtei besteht aus drei separaten Teilen, die du auf verschiedene Weise anordnen kannst, um deine eigenen Ruinen zu erschaffen. Sie können ein hohes und majestätisches Gebäude bauen, das sich von den anderen abhebt, oder eine niedrige und gemütliche Ruine, die sich in die Umgebung einfügt. Sie können auch mit anderen Teilen aus dem Gothic Ruins Set kombiniert werden, um endlose Kombinationen zu schaffen.
(0 reviews) -
%22%20transform%3D%22translate(.6%20.6)%20scale(1.17188)%22%20fill-opacity%3D%22.5%22%3E%3Cellipse%20fill%3D%22%23c2c2c3%22%20rx%3D%221%22%20ry%3D%221%22%20transform%3D%22matrix(-.70137%20-46.37777%20172.12193%20-2.603%20126.7%205.4)%22%2F%3E%3Cellipse%20fill%3D%22%23242425%22%20rx%3D%221%22%20ry%3D%221%22%20transform%3D%22matrix(-4.72217%2037.63766%20-253.01639%20-31.74443%20194.8%20118)%22%2F%3E%3Cellipse%20fill%3D%22%232c2c2c%22%20rx%3D%221%22%20ry%3D%221%22%20transform%3D%22matrix(-25.34012%20-17.1054%2078.6773%20-116.55332%20175.2%20166)%22%2F%3E%3Cellipse%20fill%3D%22%239a9f7e%22%20rx%3D%221%22%20ry%3D%221%22%20transform%3D%22matrix(-1.99751%2018.72263%20-73.9817%20-7.89308%2032%20164.7)%22%2F%3E%3Cellipse%20fill%3D%22%236a6a6b%22%20rx%3D%221%22%20ry%3D%221%22%20transform%3D%22rotate(98.4%2020.5%2065.8)%20scale(22.79219%20111.48989)%22%2F%3E%3Cellipse%20fill%3D%22%23777%22%20rx%3D%221%22%20ry%3D%221%22%20transform%3D%22matrix(5.35955%2013.39983%20-29.74205%2011.89597%20248.7%20146.7)%22%2F%3E%3Cellipse%20fill%3D%22%23aeaeae%22%20rx%3D%221%22%20ry%3D%221%22%20transform%3D%22rotate(86.3%2077.2%2082.6)%20scale(24.43287%20173.26101)%22%2F%3E%3Cellipse%20fill%3D%22%23727272%22%20rx%3D%221%22%20ry%3D%221%22%20transform%3D%22rotate(-94%20128%20-82.9)%20scale(17.09819%2097.60115)%22%2F%3E%3Cellipse%20fill%3D%22%230e0e0e%22%20rx%3D%221%22%20ry%3D%221%22%20transform%3D%22matrix(-4.26457%20-14.9209%2018.5467%20-5.30087%20185.5%20124)%22%2F%3E%3Cellipse%20fill%3D%22%23242425%22%20cx%3D%2217%22%20cy%3D%2265%22%20rx%3D%2226%22%20ry%3D%225%22%2F%3E%3Cpath%20fill%3D%22%2382961f%22%20d%3D%22M0%20157h34v17H0z%22%2F%3E%3Cellipse%20fill%3D%22%23434343%22%20rx%3D%221%22%20ry%3D%221%22%20transform%3D%22rotate(109.3%2066.6%20139.5)%20scale(73.5806%2015.38267)%22%2F%3E%3Cpath%20fill%3D%22%23858585%22%20d%3D%22M103%2061l90-12L57%2024z%22%2F%3E%3Cpath%20fill%3D%22%23838291%22%20d%3D%22M34%20157h68v17H34z%22%2F%3E%3Cellipse%20fill%3D%22%23646465%22%20cx%3D%2295%22%20cy%3D%22145%22%20rx%3D%2233%22%20ry%3D%2210%22%2F%3E%3C%2Fg%3E%3C%2Fsvg%3E) Sci-Fi
Sci-Fi1 x Sci-Fi Block Struktur
Diese Auflistung ist für 1 x Block Struktur für Ihre Fantasy-Szenerie. Wird unbemalt geliefert. Diese Blöcke werden am besten schmutzig und rostig gestrichen.
(0 reviews) -
%22%20transform%3D%22translate(.6%20.6)%20scale(1.17188)%22%20fill-opacity%3D%22.5%22%3E%3Cellipse%20fill%3D%22%230d0c12%22%20cx%3D%22220%22%20cy%3D%2295%22%20rx%3D%22179%22%20ry%3D%2243%22%2F%3E%3Cellipse%20fill%3D%22%23e2e1e7%22%20rx%3D%221%22%20ry%3D%221%22%20transform%3D%22matrix(254.91262%20-6.67512%20.69486%2026.53556%2097%208.2)%22%2F%3E%3Cellipse%20fill%3D%22%239ea76c%22%20rx%3D%221%22%20ry%3D%221%22%20transform%3D%22rotate(-86.7%20124.2%2042.3)%20scale(22.26997%20218.89389)%22%2F%3E%3Cellipse%20fill%3D%22%230a0a0a%22%20rx%3D%221%22%20ry%3D%221%22%20transform%3D%22matrix(-55.08121%20-7.15271%204.0198%20-30.95552%20220.4%2093.7)%22%2F%3E%3Cellipse%20fill%3D%22%2379797b%22%20rx%3D%221%22%20ry%3D%221%22%20transform%3D%22matrix(-37.10664%20-8.77164%204.20453%20-17.78641%20144.7%20131.5)%22%2F%3E%3Cellipse%20fill%3D%22%23919194%22%20rx%3D%221%22%20ry%3D%221%22%20transform%3D%22matrix(235.55372%20-11.93264%20.75736%2014.95057%20103.8%2033.3)%22%2F%3E%3Cellipse%20fill%3D%22%239da47a%22%20rx%3D%221%22%20ry%3D%221%22%20transform%3D%22matrix(32.54981%20-6.85132%209.14974%2043.46934%209.6%20139.8)%22%2F%3E%3Cpath%20fill%3D%22%234f4e50%22%20d%3D%22M47%2048h114v87H47z%22%2F%3E%3Cellipse%20fill%3D%22%23cfcfcf%22%20cx%3D%2248%22%20rx%3D%22105%22%20ry%3D%2214%22%2F%3E%3Cellipse%20fill%3D%22%237c8c2b%22%20cx%3D%22126%22%20cy%3D%22167%22%20rx%3D%2259%22%20ry%3D%2218%22%2F%3E%3Cpath%20fill%3D%22%23d5d5d5%22%20d%3D%22M254.8-16l4.8%2029.3-39.9%201.8L174-12.8z%22%2F%3E%3Cellipse%20fill%3D%22%23747475%22%20rx%3D%221%22%20ry%3D%221%22%20transform%3D%22matrix(-13.1105%20-12.01357%2019.21343%20-20.96778%20135%2052)%22%2F%3E%3Cellipse%20fill%3D%22%237a768d%22%20rx%3D%221%22%20ry%3D%221%22%20transform%3D%22rotate(56.7%20-113.5%20108)%20scale(59.12539%2014.03327)%22%2F%3E%3Cpath%20fill%3D%22%23464548%22%20d%3D%22M155%2041h101v27H155z%22%2F%3E%3Cellipse%20fill%3D%22%23434345%22%20rx%3D%221%22%20ry%3D%221%22%20transform%3D%22matrix(56.65247%2014.6824%20-3.00153%2011.5815%20213.9%20132)%22%2F%3E%3C%2Fg%3E%3C%2Fsvg%3E) Sci-Fi
Sci-FiGotische Raumschiff Wrack Triebwerke 28mm Maßstab
Wenn du auf der Suche nach einem atemberaubenden Gothic-Raumschiff-Wrack bist, um deine Tabletop-Schlachten aufzupeppen, dann sind diese Motoren aus der Terrain4Print Gothic Spaceship Serie genau das Richtige für dich. Diese Triebwerke sind so konzipiert, dass sie perfekt zu den anderen Teilen der Serie passen und eine realistische und beeindruckende Szene eines abgestürzten Raumschiffs schaffen. Perfekt für Warhammer 40k Terrain, Star Wars Legion Scenery und Wargaming insgesamt.
(0 reviews) -
%22%20transform%3D%22translate(.6%20.6)%20scale(1.17188)%22%20fill-opacity%3D%22.5%22%3E%3Cellipse%20fill%3D%22%23edf5bf%22%20rx%3D%221%22%20ry%3D%221%22%20transform%3D%22matrix(-29.81294%2041.034%20-63.04788%20-45.80697%2027.3%20208.3)%22%2F%3E%3Cellipse%20fill%3D%22%23e5e4eb%22%20rx%3D%221%22%20ry%3D%221%22%20transform%3D%22rotate(87.4%2045.3%2059.8)%20scale(22.24619%20188.25551)%22%2F%3E%3Cellipse%20fill%3D%22%23232229%22%20rx%3D%221%22%20ry%3D%221%22%20transform%3D%22matrix(-90.02323%2065.88704%20-27.80719%20-37.9937%20180.7%20118.5)%22%2F%3E%3Cellipse%20fill%3D%22%231d1c23%22%20rx%3D%221%22%20ry%3D%221%22%20transform%3D%22matrix(18.05113%20-37.17483%2056.82728%2027.59384%2060%2098.7)%22%2F%3E%3Cellipse%20fill%3D%22%231c1b21%22%20rx%3D%221%22%20ry%3D%221%22%20transform%3D%22rotate(70.5%20-79%20235.2)%20scale(64.85225%2030.19824)%22%2F%3E%3Cellipse%20fill%3D%22%23bebb49%22%20rx%3D%221%22%20ry%3D%221%22%20transform%3D%22rotate(-34.3%20429.4%20-320.2)%20scale(46.68294%2035.50425)%22%2F%3E%3Cellipse%20fill%3D%22%23868589%22%20cx%3D%22147%22%20cy%3D%2274%22%20rx%3D%2230%22%20ry%3D%2262%22%2F%3E%3Cellipse%20fill%3D%22%2396a841%22%20rx%3D%221%22%20ry%3D%221%22%20transform%3D%22rotate(54%20-210.1%20189.7)%20scale(32.09979%2037.46335)%22%2F%3E%3Cellipse%20fill%3D%22%23cdcbe1%22%20rx%3D%221%22%20ry%3D%221%22%20transform%3D%22matrix(-15.64342%20-1.97622%205.94607%20-47.068%2012%20208.8)%22%2F%3E%3Cellipse%20rx%3D%221%22%20ry%3D%221%22%20transform%3D%22rotate(-95.8%20159.7%20-69.9)%20scale(13.91505%2031.31782)%22%2F%3E%3Cellipse%20fill%3D%22%238e8e90%22%20cx%3D%22105%22%20cy%3D%2229%22%20rx%3D%22159%22%20ry%3D%2212%22%2F%3E%3Cellipse%20fill%3D%22%2387868e%22%20rx%3D%221%22%20ry%3D%221%22%20transform%3D%22matrix(25.46874%2034.13287%20-18.17675%2013.56285%2087%20194.5)%22%2F%3E%3Cellipse%20fill%3D%22%237e7e80%22%20rx%3D%221%22%20ry%3D%221%22%20transform%3D%22matrix(10.3111%2015.00274%20-31.12061%2021.3886%20227.3%20141.7)%22%2F%3E%3Cpath%20fill%3D%22%23d4d4d4%22%20d%3D%22M84-16L-16%2012l206%201z%22%2F%3E%3Cellipse%20fill%3D%22%238f8d9f%22%20rx%3D%221%22%20ry%3D%221%22%20transform%3D%22matrix(-8.40268%2015.80315%20-40.11089%20-21.32734%2024.9%20157.9)%22%2F%3E%3C%2Fg%3E%3C%2Fsvg%3E) Sci-Fi
Sci-FiMassives gotisches Raumschiffwrack im 28mm Maßstab
Das Innere der Nase ist voll von komplizierten Details, die sie realistisch und beeindruckend aussehen lassen. Sie können die Torpedorohr-Luken und die Instrumente zur Steuerung des Schiffes sehen. Sie sind ideal, um Ihren Spielen und Szenarien Tiefe und Interesse zu verleihen. Sie können sie als Zielmarkierungen oder als Teil der Szenerie verwenden.
(0 reviews) -
%22%20transform%3D%22translate(.6%20.6)%20scale(1.17188)%22%20fill-opacity%3D%22.5%22%3E%3Cellipse%20fill%3D%22%23686868%22%20cx%3D%22122%22%20cy%3D%22100%22%20rx%3D%2264%22%20ry%3D%2262%22%2F%3E%3Cellipse%20fill%3D%22%23fafafa%22%20cx%3D%22231%22%20cy%3D%2296%22%20rx%3D%2234%22%20ry%3D%22255%22%2F%3E%3Cellipse%20fill%3D%22%23fbfbfb%22%20cx%3D%2212%22%20cy%3D%22106%22%20rx%3D%2229%22%20ry%3D%22255%22%2F%3E%3Cellipse%20fill%3D%22%23707070%22%20rx%3D%221%22%20ry%3D%221%22%20transform%3D%22rotate(-9.4%20740.9%20-701)%20scale(47.06737%2028.05535)%22%2F%3E%3Cellipse%20fill%3D%22%23f2f2f2%22%20cx%3D%2278%22%20cy%3D%221%22%20rx%3D%22130%22%20ry%3D%2220%22%2F%3E%3Cellipse%20fill%3D%22%23f2f2f2%22%20rx%3D%221%22%20ry%3D%221%22%20transform%3D%22matrix(38.56581%20-42.75075%2019.71884%2017.78853%20171.6%20191)%22%2F%3E%3Cellipse%20fill%3D%22%23afafaf%22%20rx%3D%221%22%20ry%3D%221%22%20transform%3D%22matrix(6.34919%2028.05845%20-67.75338%2015.33153%20123%2058.1)%22%2F%3E%3Cellipse%20fill%3D%22%23f4f4f4%22%20rx%3D%221%22%20ry%3D%221%22%20transform%3D%22matrix(38.0079%2014.45248%20-6.61595%2017.399%2065%20180.2)%22%2F%3E%3Cellipse%20fill%3D%22%23c4c4c4%22%20rx%3D%221%22%20ry%3D%221%22%20transform%3D%22matrix(39.53874%20-20.2617%205.35612%2010.45196%20136.3%2033)%22%2F%3E%3Cellipse%20fill%3D%22%23aeaeae%22%20rx%3D%221%22%20ry%3D%221%22%20transform%3D%22matrix(-9.30892%20-44.73502%2011.24506%20-2.33999%2072%20127)%22%2F%3E%3Cellipse%20fill%3D%22%23b4b4b4%22%20cx%3D%22187%22%20cy%3D%22106%22%20rx%3D%2218%22%20ry%3D%2231%22%2F%3E%3Cellipse%20fill%3D%22%23b1b1b1%22%20rx%3D%221%22%20ry%3D%221%22%20transform%3D%22matrix(-47.06701%203.56326%20-.8203%20-10.83522%20137.4%20153.5)%22%2F%3E%3Cpath%20fill%3D%22%23989898%22%20d%3D%22M90.5%2099l89.3-23.5-4.3-27.8-12.8-15z%22%2F%3E%3Cellipse%20fill%3D%22%23e0e0e0%22%20cx%3D%2224%22%20cy%3D%2218%22%20rx%3D%2230%22%20ry%3D%2238%22%2F%3E%3Cellipse%20fill%3D%22%23e2e2e2%22%20rx%3D%221%22%20ry%3D%221%22%20transform%3D%22matrix(29.176%2048.75092%20-15.80557%209.45917%2040.8%20165)%22%2F%3E%3C%2Fg%3E%3C%2Fsvg%3E) Terrain & Szenerie
Terrain & Szenerie28mm Bäume je 20cm/7.78″ hoch
Diese 28-mm-Bäume sind die perfekte Ergänzung für Ihre Tischspiele. Sie wurden entwickelt, um dein Spielerlebnis zu verbessern, egal ob du Dungeons and Dragons, Warhammer, 40k oder ein anderes Spiel spielst, das Miniaturen beinhaltet.
(0 reviews)Price range: 13.60€ through 20.00€ Select options This product has multiple variants. The options may be chosen on the product page -
%22%20transform%3D%22translate(.6%20.6)%20scale(1.17188)%22%20fill-opacity%3D%22.5%22%3E%3Cellipse%20fill%3D%22%233f3d4a%22%20rx%3D%221%22%20ry%3D%221%22%20transform%3D%22matrix(-36.39104%20-40.98821%2049.4327%20-43.88841%20130.3%2099.5)%22%2F%3E%3Cellipse%20fill%3D%22%23eaf8a5%22%20rx%3D%221%22%20ry%3D%221%22%20transform%3D%22rotate(50.9%20-104.4%20330)%20scale(51.27303%2086.87223)%22%2F%3E%3Cellipse%20fill%3D%22%23d4d2df%22%20rx%3D%221%22%20ry%3D%221%22%20transform%3D%22matrix(-207.9211%20-5.46326%20.43285%20-16.47326%20139.5%2010.3)%22%2F%3E%3Cellipse%20fill%3D%22%23e8f895%22%20rx%3D%221%22%20ry%3D%221%22%20transform%3D%22matrix(18.3893%20-20.28056%20104.9146%2095.13075%2017.1%20183.8)%22%2F%3E%3Cellipse%20fill%3D%22%237a7a6e%22%20rx%3D%221%22%20ry%3D%221%22%20transform%3D%22rotate(11.7%20-358.6%20106.4)%20scale(106.8537%2030.2593)%22%2F%3E%3Cellipse%20fill%3D%22%239caf3a%22%20rx%3D%221%22%20ry%3D%221%22%20transform%3D%22matrix(26.296%20-20.25064%2014.28073%2018.5439%20240.5%20115.8)%22%2F%3E%3Cellipse%20fill%3D%22%23b1acc6%22%20rx%3D%221%22%20ry%3D%221%22%20transform%3D%22matrix(-74.58035%2054.78472%20-12.8447%20-17.48593%20137.2%20203)%22%2F%3E%3Cellipse%20fill%3D%22%2398a431%22%20rx%3D%221%22%20ry%3D%221%22%20transform%3D%22rotate(-91.9%2050.9%2045.1)%20scale(45.06166%2014.02907)%22%2F%3E%3Cellipse%20fill%3D%22%23676767%22%20cx%3D%22236%22%20cy%3D%2277%22%20rx%3D%22132%22%20ry%3D%2231%22%2F%3E%3Cellipse%20fill%3D%22%23acaab6%22%20rx%3D%221%22%20ry%3D%221%22%20transform%3D%22matrix(-66.74294%20-69.31628%2011.78142%20-11.34404%2086.8%20203)%22%2F%3E%3Cpath%20fill%3D%22%2377777f%22%20d%3D%22M18%2058l126-48-79%20163z%22%2F%3E%3Cpath%20fill%3D%22%239b9a9f%22%20d%3D%22M-16%2036L104-3l140%2039z%22%2F%3E%3Cellipse%20fill%3D%22%235c5c5c%22%20cx%3D%22138%22%20cy%3D%2288%22%20rx%3D%2233%22%20ry%3D%2262%22%2F%3E%3Cellipse%20fill%3D%22%23717079%22%20cx%3D%22110%22%20cy%3D%22161%22%20rx%3D%2250%22%20ry%3D%2215%22%2F%3E%3Cellipse%20fill%3D%22%23cbcbcb%22%20cx%3D%22236%22%20rx%3D%22141%22%20ry%3D%2217%22%2F%3E%3C%2Fg%3E%3C%2Fsvg%3E) Gebäude und Zelte
Gebäude und ZelteZwei Level Fantasy Ruinen Geeignet für Mittelalterliche oder Fantasy Szenarien 28mm
Zwei Level Fantasy-Ruinen, geeignet für mittelalterliche oder Fantasy-Szenarien im 28mm-Maßstab! Diese Ruinen sind so gestaltet, dass sie wie alte Backsteingebäude aussehen, die durch Zeit, Wetter oder Krieg teilweise zerstört worden sind.
(0 reviews) -
 Sci-Fi
Solar-Kommunikationsturm 28mm Maßstab
Der Comms Tower ist ein erstaunliches Stück Streugelände, das deinen Spieltisch in ein realistisches und realitätsnahes Schlachtfeld verwandeln kann. Er ist so konzipiert, dass er mit Miniaturen im 28-mm-Maßstab kompatibel ist, und misst im zusammengebauten Zustand 185 mm Höhe.
(0 reviews) -
%22%20transform%3D%22translate(.6%20.6)%20scale(1.17188)%22%20fill-opacity%3D%22.5%22%3E%3Cellipse%20fill%3D%22%23fff%22%20rx%3D%221%22%20ry%3D%221%22%20transform%3D%22matrix(-30.53053%20-46.47829%2059.68618%20-39.2065%20117.2%2089.3)%22%2F%3E%3Cellipse%20cx%3D%22225%22%20cy%3D%22128%22%20rx%3D%2235%22%20ry%3D%22255%22%2F%3E%3Cellipse%20fill%3D%22%23010101%22%20cx%3D%2211%22%20cy%3D%2296%22%20rx%3D%2230%22%20ry%3D%22255%22%2F%3E%3Cellipse%20fill%3D%22%23e7e7e7%22%20rx%3D%221%22%20ry%3D%221%22%20transform%3D%22matrix(38.38871%20-31.56877%2022.72045%2027.62885%20117.2%2088.9)%22%2F%3E%3Cellipse%20cx%3D%22121%22%20cy%3D%22184%22%20rx%3D%22255%22%20ry%3D%2221%22%2F%3E%3Cellipse%20rx%3D%221%22%20ry%3D%221%22%20transform%3D%22rotate(-94.6%20153.1%20-73.3)%20scale(252.16237%2028.96771)%22%2F%3E%3Cellipse%20fill%3D%22%230d0d0d%22%20rx%3D%221%22%20ry%3D%221%22%20transform%3D%22matrix(-14.7843%20-21.83632%2056.62152%20-38.33565%2055.7%2012.2)%22%2F%3E%3Cellipse%20fill%3D%22%23868686%22%20rx%3D%221%22%20ry%3D%221%22%20transform%3D%22matrix(39.88751%20-60.49258%2021.06966%2013.89288%20159.5%20119.2)%22%2F%3E%3Cellipse%20fill%3D%22%23707070%22%20cx%3D%2243%22%20cy%3D%22100%22%20rx%3D%2223%22%20ry%3D%2245%22%2F%3E%3Cellipse%20rx%3D%221%22%20ry%3D%221%22%20transform%3D%22matrix(18.38307%20-22.53986%20143.3974%20116.95207%20201.3%200)%22%2F%3E%3Cpath%20fill%3D%22%23898989%22%20d%3D%22M189%2048l-45-36-78%2031z%22%2F%3E%3Cellipse%20fill%3D%22%23707070%22%20rx%3D%221%22%20ry%3D%221%22%20transform%3D%22matrix(-2.732%209.50149%20-45.79423%20-13.16735%2085.7%20142.5)%22%2F%3E%3Cellipse%20fill%3D%22%23f0f0f0%22%20rx%3D%221%22%20ry%3D%221%22%20transform%3D%22matrix(-21.22486%2018.56532%20-10.88024%20-12.43887%20113.3%2090.3)%22%2F%3E%3Cpath%20fill%3D%22%23575757%22%20d%3D%22M171%2047h34v89h-34z%22%2F%3E%3Cpath%20fill%3D%22%23707070%22%20d%3D%22M71%2035l59-23-98%2096z%22%2F%3E%3C%2Fg%3E%3C%2Fsvg%3E) Science fiction
Science fictionSolarpanel Sci-Fi Scatter Terrain 28mm Maßstab
Die Solaranlage ist modular aufgebaut und besteht aus einem großen Panel, einem Sockel und einer Konsole. Das Panel kann gekippt und gedreht werden, um die optimale Menge an Sonnenlicht einzufangen oder um verschiedene Abdeckungswinkel zu schaffen. Der Sockel ist robust und stabil und kann auf jeder ebenen Fläche befestigt werden. Die Konsole ist ein separates Teil, das an einem beliebigen Ort aufgestellt werden kann und über einen Bildschirm und Tasten zur Steuerung des Arrays verfügt.
(0 reviews) -
%22%20transform%3D%22translate(.6%20.6)%20scale(1.17188)%22%20fill-opacity%3D%22.5%22%3E%3Cellipse%20fill%3D%22%23aaacab%22%20rx%3D%221%22%20ry%3D%221%22%20transform%3D%22rotate(72.4%206.7%20126.8)%20scale(90.82682%2044.84099)%22%2F%3E%3Cellipse%20rx%3D%221%22%20ry%3D%221%22%20transform%3D%22matrix(52.97255%2066.3222%20-33.75792%2026.96297%20232.4%2038.8)%22%2F%3E%3Cellipse%20fill%3D%22%23080b0a%22%20cy%3D%2228%22%20rx%3D%2249%22%20ry%3D%22175%22%2F%3E%3Cpath%20fill%3D%22%23ca6486%22%20d%3D%22M182%2091l-14%2069%2066-18z%22%2F%3E%3Cellipse%20fill%3D%22%23bbb%22%20rx%3D%221%22%20ry%3D%221%22%20transform%3D%22matrix(-1.3112%2032.64602%20-19.80456%20-.79543%20114.6%2056.7)%22%2F%3E%3Cellipse%20fill%3D%22%233e3e3e%22%20cx%3D%22177%22%20cy%3D%2264%22%20rx%3D%2228%22%20ry%3D%2249%22%2F%3E%3Cellipse%20fill%3D%22%236f7070%22%20cx%3D%2282%22%20cy%3D%22131%22%20rx%3D%2269%22%20ry%3D%2232%22%2F%3E%3Cellipse%20fill%3D%22%23322f30%22%20rx%3D%221%22%20ry%3D%221%22%20transform%3D%22matrix(23.81515%208.40574%20-28.30307%2080.18832%20248%20152.4)%22%2F%3E%3Cpath%20fill%3D%22%23353837%22%20d%3D%22M-8%20140l175%2044-132%2023z%22%2F%3E%3Cellipse%20fill%3D%22%233b3c3b%22%20rx%3D%221%22%20ry%3D%221%22%20transform%3D%22matrix(23.37608%20-104.57856%2015.69587%203.50844%2042%2082.4)%22%2F%3E%3Cpath%20fill%3D%22%23646967%22%20d%3D%22M175%20193l53-42-149-12z%22%2F%3E%3Cellipse%20fill%3D%22%23131313%22%20cx%3D%222%22%20cy%3D%2227%22%20rx%3D%2230%22%20ry%3D%22102%22%2F%3E%3Cpath%20fill%3D%22%23858585%22%20d%3D%22M213%20161L83%20131%2059%2042z%22%2F%3E%3Cpath%20fill%3D%22%23494a4a%22%20d%3D%22M110-16L27%20137l12-95z%22%2F%3E%3Cellipse%20fill%3D%22%23151616%22%20cx%3D%22231%22%20cy%3D%2222%22%20rx%3D%2252%22%20ry%3D%2235%22%2F%3E%3C%2Fg%3E%3C%2Fsvg%3E) Sci-Fi
Sci-FiMineralienextraktor Sci-Fi Scatter Terrain 28mm – 32mm Maßstab
Die Automated Mineral Extractors sind fortschrittliche Maschinen, die die wertvollen Mineralien von der Planetenoberfläche abbauen. Sie arbeiten in Gruppen, bohren und graben nach Rohstoffen, die für den Bau und die Erweiterung des Außenpostens unerlässlich sind. Sie sind mit Sensoren und Scannern ausgestattet, die die profitabelsten Stellen für den Abbau aufspüren.
(0 reviews) -
%22%20transform%3D%22translate(.6%20.6)%20scale(1.17188)%22%20fill-opacity%3D%22.5%22%3E%3Cellipse%20fill%3D%22%23f4f4f4%22%20rx%3D%221%22%20ry%3D%221%22%20transform%3D%22matrix(72.7908%208.6526%20-7.612%2064.03674%20123.4%2086.6)%22%2F%3E%3Cellipse%20cx%3D%22239%22%20cy%3D%22108%22%20rx%3D%2236%22%20ry%3D%22255%22%2F%3E%3Cellipse%20rx%3D%221%22%20ry%3D%221%22%20transform%3D%22matrix(1.50809%20216.32691%20-24.8883%20.1735%2016.8%2092.5)%22%2F%3E%3Cellipse%20fill%3D%22%23121212%22%20rx%3D%221%22%20ry%3D%221%22%20transform%3D%22matrix(.67927%20-27.7941%20238.65503%205.8326%20104.8%20191)%22%2F%3E%3Cellipse%20fill%3D%22%23111%22%20rx%3D%221%22%20ry%3D%221%22%20transform%3D%22matrix(109.9652%2053.09706%20-10.51473%2021.77623%20192.4%203.3)%22%2F%3E%3Cellipse%20fill%3D%22%23888%22%20rx%3D%221%22%20ry%3D%221%22%20transform%3D%22matrix(21.75603%2010.73308%20-21.60376%2043.791%20190.9%2099.5)%22%2F%3E%3Cellipse%20fill%3D%22%238b8b8b%22%20rx%3D%221%22%20ry%3D%221%22%20transform%3D%22matrix(-20.98213%207.74045%20-13.99538%20-37.93743%2050.3%20105.5)%22%2F%3E%3Cellipse%20fill%3D%22%23d3d3d3%22%20cx%3D%22117%22%20cy%3D%2275%22%20rx%3D%2253%22%20ry%3D%2234%22%2F%3E%3Cellipse%20fill%3D%22%23131313%22%20rx%3D%221%22%20ry%3D%221%22%20transform%3D%22rotate(-125.2%2025.3%20-13)%20scale(26.63259%20192.53084)%22%2F%3E%3Cpath%20fill%3D%22%23919191%22%20d%3D%22M54%20128l158-38-72%2092z%22%2F%3E%3Cellipse%20fill%3D%22%23171717%22%20rx%3D%221%22%20ry%3D%221%22%20transform%3D%22matrix(-41.09352%2043.27558%20-19.73197%20-18.73704%20221.1%20153.8)%22%2F%3E%3Cellipse%20fill%3D%22%23181818%22%20rx%3D%221%22%20ry%3D%221%22%20transform%3D%22matrix(10.27475%20-21.34934%2045.84164%2022.06209%2043.3%20170.1)%22%2F%3E%3Cpath%20fill%3D%22%23888%22%20d%3D%22M199%2040l-82-28-68%2027z%22%2F%3E%3Cellipse%20fill%3D%22%23868686%22%20rx%3D%221%22%20ry%3D%221%22%20transform%3D%22matrix(-10.59858%20-4.5812%2020.21425%20-46.76563%2061.5%2067.1)%22%2F%3E%3Cellipse%20fill%3D%22%23525252%22%20rx%3D%221%22%20ry%3D%221%22%20transform%3D%22matrix(-13.0631%20-5.58432%2016.00053%20-37.42918%20211.9%20110.1)%22%2F%3E%3C%2Fg%3E%3C%2Fsvg%3E) Sci-Fi
Sci-FiGenerator – Sci Fi Streugelände 28mm Maßstab
Perfekt für Warhammer 40k Terrain, Star Wars Legion Szenerie.
(0 reviews) -
%22%20transform%3D%22translate(.6%20.6)%20scale(1.17188)%22%20fill-opacity%3D%22.5%22%3E%3Cellipse%20fill%3D%22%23dfdfdf%22%20rx%3D%221%22%20ry%3D%221%22%20transform%3D%22matrix(-39.30387%2050.67024%20-56.34938%20-43.70906%20120.8%2086)%22%2F%3E%3Cellipse%20rx%3D%221%22%20ry%3D%221%22%20transform%3D%22matrix(-11.92362%20-254.72108%2026.89776%20-1.2591%20233.4%2059.3)%22%2F%3E%3Cellipse%20fill%3D%22%23292929%22%20rx%3D%221%22%20ry%3D%221%22%20transform%3D%22matrix(1.24332%20249.18529%20-23.22235%20.11587%2017.9%2072.3)%22%2F%3E%3Cellipse%20fill%3D%22%23252525%22%20rx%3D%221%22%20ry%3D%221%22%20transform%3D%22rotate(94.5%20-42.1%20126.6)%20scale(17.20167%2081.09963)%22%2F%3E%3Cellipse%20fill%3D%22%23d8d8d8%22%20rx%3D%221%22%20ry%3D%221%22%20transform%3D%22rotate(-68.3%20108.6%20-62.5)%20scale(25.60272%2039.78715)%22%2F%3E%3Cellipse%20fill%3D%22%23252525%22%20rx%3D%221%22%20ry%3D%221%22%20transform%3D%22rotate(-132%20118.5%20-34.8)%20scale(151.76023%2030.6608)%22%2F%3E%3Cellipse%20fill%3D%22%238d8d8d%22%20rx%3D%221%22%20ry%3D%221%22%20transform%3D%22matrix(-87.48557%20-17.16399%205.00497%20-25.51054%20109%20127.4)%22%2F%3E%3Cellipse%20fill%3D%22%234f4f4f%22%20rx%3D%221%22%20ry%3D%221%22%20transform%3D%22matrix(9.8473%20-112.55522%2017.61597%201.5412%20212.2%20133.6)%22%2F%3E%3Cellipse%20fill%3D%22%23333%22%20rx%3D%221%22%20ry%3D%221%22%20transform%3D%22rotate(44.9%2021.3%2051.5)%20scale(28.42942%2073.39956)%22%2F%3E%3Cellipse%20fill%3D%22%237e7e7e%22%20rx%3D%221%22%20ry%3D%221%22%20transform%3D%22matrix(-35.67762%2044.31493%20-12.05602%20-9.70621%2055.7%2059.3)%22%2F%3E%3Cellipse%20fill%3D%22%23131313%22%20cx%3D%22255%22%20cy%3D%22177%22%20rx%3D%2223%22%20ry%3D%22186%22%2F%3E%3Cpath%20fill%3D%22%23959595%22%20d%3D%22M196%20151l3-87-83-79z%22%2F%3E%3Cellipse%20fill%3D%22%23777%22%20rx%3D%221%22%20ry%3D%221%22%20transform%3D%22matrix(76.43003%2015.411%20-1.814%208.99647%20119.5%20142.8)%22%2F%3E%3Cpath%20fill%3D%22%238f8f8f%22%20d%3D%22M136-16l-5%2040-54%204z%22%2F%3E%3Cellipse%20fill%3D%22%23313131%22%20rx%3D%221%22%20ry%3D%221%22%20transform%3D%22matrix(-13.20797%20-4.18433%2010.76178%20-33.96988%20204.5%20191)%22%2F%3E%3C%2Fg%3E%3C%2Fsvg%3E) Sci-Fi
Sci-FiSauerstoffpumpen Streugelände 28mm – 32mm Maßstab
Kulissenstück für Dragons Rest, Warhammer 40k Gelände und Star Wars Legion Kulissen.
(0 reviews) -
%22%20transform%3D%22translate(.6%20.6)%20scale(1.17188)%22%20fill-opacity%3D%22.5%22%3E%3Cellipse%20fill%3D%22%23e3e3e5%22%20cx%3D%22148%22%20cy%3D%22189%22%20rx%3D%22255%22%20ry%3D%2227%22%2F%3E%3Cellipse%20fill%3D%22%2350524a%22%20rx%3D%221%22%20ry%3D%221%22%20transform%3D%22rotate(-98.4%20110.8%20-26.6)%20scale(59.87844%20166.14216)%22%2F%3E%3Cellipse%20fill%3D%22%235b6d00%22%20rx%3D%221%22%20ry%3D%221%22%20transform%3D%22matrix(-7.16887%20-32.3367%2026.10186%20-5.78664%20243.3%2050.7)%22%2F%3E%3Cellipse%20fill%3D%22%23949498%22%20rx%3D%221%22%20ry%3D%221%22%20transform%3D%22matrix(45.27945%20.24965%20-.1387%2025.15505%20133%2038.7)%22%2F%3E%3Cellipse%20fill%3D%22%23c3c3c3%22%20cx%3D%22237%22%20cy%3D%22172%22%20rx%3D%2237%22%20ry%3D%2237%22%2F%3E%3Cellipse%20fill%3D%22%23555459%22%20rx%3D%221%22%20ry%3D%221%22%20transform%3D%22matrix(-107.93887%20-103.98665%2023.71474%20-24.61607%2010.6%2037)%22%2F%3E%3Cellipse%20fill%3D%22%23bfbfbf%22%20rx%3D%221%22%20ry%3D%221%22%20transform%3D%22rotate(107%20-53%20100)%20scale(30.53486%20102.48943)%22%2F%3E%3Cpath%20fill%3D%22%23929293%22%20d%3D%22M-16%20159l191%2047%2081-57z%22%2F%3E%3Cpath%20fill%3D%22%23474749%22%20d%3D%22M186.5-12.6l-3.3%2030.8-53.7-5.6%203.3-30.8z%22%2F%3E%3Cpath%20fill%3D%22%238d8c8f%22%20d%3D%22M7%20111l-23%2031%20121%2027z%22%2F%3E%3Cpath%20fill%3D%22%238c8b8e%22%20d%3D%22M212.8%20147.2l-8-24.7%2048.4-15.7%208%2024.7z%22%2F%3E%3Cellipse%20fill%3D%22%23c8c8c8%22%20cx%3D%2250%22%20cy%3D%22196%22%20rx%3D%2259%22%20ry%3D%2219%22%2F%3E%3Cellipse%20fill%3D%22%235c5b5f%22%20cx%3D%22146%22%20cy%3D%22125%22%20rx%3D%2257%22%20ry%3D%2219%22%2F%3E%3Cellipse%20fill%3D%22%23838384%22%20rx%3D%221%22%20ry%3D%221%22%20transform%3D%22rotate(-161.3%2045%204.3)%20scale(53.77106%2023.31547)%22%2F%3E%3Cellipse%20fill%3D%22%235d5d5d%22%20rx%3D%221%22%20ry%3D%221%22%20transform%3D%22matrix(22.1712%2074.8487%20-23.21133%206.8755%2021.2%2050.6)%22%2F%3E%3C%2Fg%3E%3C%2Fsvg%3E) Sci-Fi
Sci-Fi28mm Maßstab Sci-Fi Raumschiff
Bringen Sie Ihr Wargaming auf die nächste Stufe mit diesem SciFi Starship! Dies ist ein realistisches und detailliertes Geländestück, das Ihre Spiele noch intensiver und spannender macht. Ob du nun Star Wars Legion, Imperial Assault oder ein anderes Sci-Fi-Rollenspiel spielst, dieses Raumschiff ist perfekt für deine Spiellandschaft.
(0 reviews) -
%27%20fill-opacity%3D%27.5%27%3E%3Cellipse%20fill%3D%22%2330381c%22%20fill-opacity%3D%22.5%22%20rx%3D%221%22%20ry%3D%221%22%20transform%3D%22rotate(25.7%20-340.6%20318.6)%20scale(63.88097%20107.71027)%22%2F%3E%3Cellipse%20fill%3D%22%23b2baa4%22%20fill-opacity%3D%22.5%22%20rx%3D%221%22%20ry%3D%221%22%20transform%3D%22matrix(20.76644%20-62.8686%20283.74914%2093.7266%20217.7%2048)%22%2F%3E%3Cellipse%20fill%3D%22%23e88a2e%22%20fill-opacity%3D%22.5%22%20rx%3D%221%22%20ry%3D%221%22%20transform%3D%22rotate(64.4%20-59.5%2069.4)%20scale(56.3866%2072.73488)%22%2F%3E%3Cellipse%20fill%3D%22%2357595d%22%20fill-opacity%3D%22.5%22%20rx%3D%221%22%20ry%3D%221%22%20transform%3D%22rotate(-120.9%2097.2%204.9)%20scale(57.01769%2037.1438)%22%2F%3E%3Cellipse%20fill%3D%22%23403f59%22%20fill-opacity%3D%22.5%22%20rx%3D%221%22%20ry%3D%221%22%20transform%3D%22matrix(36.7767%20-26.56525%2038.62965%2053.47856%20149.8%20178)%22%2F%3E%3Cellipse%20fill%3D%22%237c7d19%22%20fill-opacity%3D%22.5%22%20rx%3D%221%22%20ry%3D%221%22%20transform%3D%22matrix(54.11431%20-27.98216%2044.83135%2086.69874%2022.2%20179)%22%2F%3E%3Cellipse%20fill%3D%22%23a6ba4f%22%20fill-opacity%3D%22.5%22%20rx%3D%221%22%20ry%3D%221%22%20transform%3D%22matrix(57.33606%20139.11353%20-33.46859%2013.79418%20277%2029.3)%22%2F%3E%3Cellipse%20fill%3D%22%239090a9%22%20fill-opacity%3D%22.5%22%20rx%3D%221%22%20ry%3D%221%22%20transform%3D%22matrix(52.55025%20162.69872%20-40.82626%2013.18652%20199.1%2065)%22%2F%3E%3Cellipse%20fill%3D%22%23d8a47a%22%20fill-opacity%3D%22.5%22%20rx%3D%221%22%20ry%3D%221%22%20transform%3D%22matrix(7.0839%20-24.38297%2061.04402%2017.73493%2023.2%2058.1)%22%2F%3E%3Cellipse%20fill%3D%22%2372791a%22%20fill-opacity%3D%22.5%22%20rx%3D%221%22%20ry%3D%221%22%20transform%3D%22matrix(-15.114%2052.0476%20-15.0519%20-4.3709%20101.5%2092)%22%2F%3E%3Cellipse%20fill%3D%22%23cc9003%22%20fill-opacity%3D%22.5%22%20rx%3D%221%22%20ry%3D%221%22%20transform%3D%22matrix(-5.64448%20-21.51547%2036.7855%20-9.6505%2011.3%20102.7)%22%2F%3E%3Cpath%20fill%3D%22%23b36852%22%20fill-opacity%3D%22.5%22%20d%3D%22M-18.2%20157.6L71%20133l35.2-80.9z%22%2F%3E%3Cellipse%20fill%3D%22%23707277%22%20fill-opacity%3D%22.5%22%20rx%3D%221%22%20ry%3D%221%22%20transform%3D%22matrix(79.69625%20107.3111%20-26.5819%2019.74146%20219.9%20181)%22%2F%3E%3Cellipse%20fill%3D%22%23353534%22%20fill-opacity%3D%22.5%22%20rx%3D%221%22%20ry%3D%221%22%20transform%3D%22matrix(1.39533%2039.9571%20-30.50922%201.0654%20127%20150)%22%2F%3E%3Cpath%20fill%3D%22%236c6c6c%22%20fill-opacity%3D%22.5%22%20d%3D%22M108.4%20185.7H167v39.9h-58.6z%22%2F%3E%3C%2Fg%3E%3C%2Fsvg%3E) Gebäude und Zelte
Gebäude und ZelteFantasy-Wikingerhaus mit abnehmbarem Dach 28mm Maßstab
Dieses Wikingerhaus im 28-mm-Maßstab ist perfekt für die Verwendung mit RPG-Miniaturen. Wird unbemalt in mehreren Teilen geliefert. “Die Wände waren aus Flechtwerk (geflochtene Stöcke, die mit Lehm bedeckt waren, um Wind und Regen abzuhalten). Die Häuser der Wikinger waren oft Einraumhäuser mit einer Feuerstelle in der Mitte. Das Haus hat ein rustikales und gemütliches Aussehen, was ihm viel Charakter und Charme verleiht.
(0 reviews) -
%22%20transform%3D%22translate(.6%20.6)%20scale(1.17188)%22%20fill-opacity%3D%22.5%22%3E%3Cellipse%20fill%3D%22%23262626%22%20rx%3D%221%22%20ry%3D%221%22%20transform%3D%22matrix(72.63542%2019.9115%20-16.6636%2060.7874%20126.2%2081.8)%22%2F%3E%3Cellipse%20fill%3D%22%23fff%22%20rx%3D%221%22%20ry%3D%221%22%20transform%3D%22rotate(-48.3%20211.5%2083.2)%20scale(59.34511%20118.08057)%22%2F%3E%3Cellipse%20fill%3D%22%23d9d9d9%22%20rx%3D%221%22%20ry%3D%221%22%20transform%3D%22rotate(58.7%20-53.6%20293.2)%20scale(48.22497%20122.11111)%22%2F%3E%3Cellipse%20fill%3D%22%233e3e3e%22%20cx%3D%22176%22%20cy%3D%2278%22%20rx%3D%22100%22%20ry%3D%2224%22%2F%3E%3Cellipse%20fill%3D%22%23c4c4c4%22%20rx%3D%221%22%20ry%3D%221%22%20transform%3D%22matrix(68.34164%2014.02852%20-4.78011%2023.28688%20224%2010.8)%22%2F%3E%3Cellipse%20fill%3D%22%23b1b1b1%22%20rx%3D%221%22%20ry%3D%221%22%20transform%3D%22matrix(-10.64211%2012.5653%20-145.58568%20-123.30304%2093.3%20178.3)%22%2F%3E%3Cellipse%20fill%3D%22%23fdfdfd%22%20cy%3D%22196%22%20rx%3D%2241%22%20ry%3D%2241%22%2F%3E%3Cellipse%20fill%3D%22%23353535%22%20cx%3D%22126%22%20cy%3D%2281%22%20rx%3D%2241%22%20ry%3D%2241%22%2F%3E%3Cellipse%20fill%3D%22%23d0d0d0%22%20cx%3D%22232%22%20cy%3D%22203%22%20rx%3D%2248%22%20ry%3D%2248%22%2F%3E%3Cellipse%20fill%3D%22%23676767%22%20rx%3D%221%22%20ry%3D%221%22%20transform%3D%22rotate(-41.4%2090.7%20-111.7)%20scale(71.02273%2018.56887)%22%2F%3E%3Cellipse%20fill%3D%22%23828282%22%20rx%3D%221%22%20ry%3D%221%22%20transform%3D%22matrix(-16.61658%20-3.2358%2023.89178%20-122.69018%20169.4%20180.5)%22%2F%3E%3Cellipse%20fill%3D%22%23b6b6b6%22%20rx%3D%221%22%20ry%3D%221%22%20transform%3D%22matrix(30.30748%20-12.47707%206.91382%2016.79405%2021.3%200)%22%2F%3E%3Cellipse%20fill%3D%22%236e6e6e%22%20rx%3D%221%22%20ry%3D%221%22%20transform%3D%22matrix(.96288%20-20.42556%2061.94464%202.92014%20117.6%20135.8)%22%2F%3E%3Cellipse%20fill%3D%22%239b9b9b%22%20rx%3D%221%22%20ry%3D%221%22%20transform%3D%22matrix(3.87062%2016.26345%20-49.1467%2011.69666%20227.3%20139.9)%22%2F%3E%3Cpath%20fill%3D%22%23707070%22%20d%3D%22M245%2059l-67%2010L70-16z%22%2F%3E%3C%2Fg%3E%3C%2Fsvg%3E) Gebäude und Zelte
Gebäude und ZelteZweistöckige Steinbau-Ruinen, geeignet für Fantasy-Szenarien
Zweistöckige Steinbau-Ruinen – ein realistisches und vielseitiges Geländestück, das Ihre Wargame-Szenarien bereichern wird.
(0 reviews) -
%22%20transform%3D%22translate(.6%20.6)%20scale(1.17188)%22%20fill-opacity%3D%22.5%22%3E%3Cellipse%20fill%3D%22%231d1b25%22%20rx%3D%221%22%20ry%3D%221%22%20transform%3D%22rotate(169.4%2069.4%2054.8)%20scale(86.8859%2058.04914)%22%2F%3E%3Cellipse%20fill%3D%22%23e9e7f1%22%20rx%3D%221%22%20ry%3D%221%22%20transform%3D%22matrix(253.34618%20-1.8763%20.14494%2019.57055%20134%208.8)%22%2F%3E%3Cellipse%20fill%3D%22%23dce2b9%22%20rx%3D%221%22%20ry%3D%221%22%20transform%3D%22matrix(2.81977%2030.96511%20-253.94924%2023.12535%20108.3%20198.4)%22%2F%3E%3Cellipse%20fill%3D%22%23c3ce88%22%20cx%3D%2214%22%20cy%3D%22170%22%20rx%3D%2233%22%20ry%3D%2262%22%2F%3E%3Cellipse%20fill%3D%22%23859729%22%20rx%3D%221%22%20ry%3D%221%22%20transform%3D%22matrix(.55274%20-39.58473%2026.65544%20.3722%2015.8%2096.6)%22%2F%3E%3Cellipse%20fill%3D%22%2373717b%22%20rx%3D%221%22%20ry%3D%221%22%20transform%3D%22matrix(-85.9193%2029.08208%20-5.94155%20-17.55354%20158.8%20150.8)%22%2F%3E%3Cpath%20fill%3D%22%23c5c4c9%22%20d%3D%22M268.4%2061.6l-69-29.3%2020.2-47.9%2069%2029.3z%22%2F%3E%3Cellipse%20fill%3D%22%23313131%22%20rx%3D%221%22%20ry%3D%221%22%20transform%3D%22matrix(52.73081%20-10.8424%208.44166%2041.0551%20143%2096)%22%2F%3E%3Cellipse%20fill%3D%22%23c7d290%22%20rx%3D%221%22%20ry%3D%221%22%20transform%3D%22matrix(24.8174%2019.88495%20-33.50655%2041.81784%20235.8%20176.5)%22%2F%3E%3Cellipse%20fill%3D%22%23c2c2c5%22%20cx%3D%2221%22%20cy%3D%2219%22%20rx%3D%2249%22%20ry%3D%2229%22%2F%3E%3Cpath%20fill%3D%22%23747379%22%20d%3D%22M41%20102l10-82%20144-6z%22%2F%3E%3Cellipse%20fill%3D%22%23737277%22%20rx%3D%221%22%20ry%3D%221%22%20transform%3D%22matrix(-14.32128%2012.40549%20-42.59032%20-49.16761%20224.2%2070.8)%22%2F%3E%3Cellipse%20fill%3D%22%23525252%22%20rx%3D%221%22%20ry%3D%221%22%20transform%3D%22matrix(24.08259%20-19.17274%2011.51252%2014.4607%2075.4%2071.2)%22%2F%3E%3Cellipse%20fill%3D%22%236c6c6e%22%20rx%3D%221%22%20ry%3D%221%22%20transform%3D%22matrix(10.02948%20-7.13148%2033.87821%2047.64522%2082.4%20128.6)%22%2F%3E%3Cellipse%20fill%3D%22%239d99b5%22%20rx%3D%221%22%20ry%3D%221%22%20transform%3D%22matrix(27.07321%2015.63072%20-8.97373%2015.54296%2038.5%20163)%22%2F%3E%3C%2Fg%3E%3C%2Fsvg%3E) Gebäude und Zelte
Gebäude und ZelteFantasy Ruinen Gelände im 28-mm Maßstab
Perfektes Set für Tabletop-Rollenspiele, Forestgrave, Skyless Realms und Dungeon Terrain.
(0 reviews) -
%22%20transform%3D%22translate(.6%20.6)%20scale(1.17188)%22%20fill-opacity%3D%22.5%22%3E%3Cellipse%20cx%3D%22211%22%20cy%3D%22187%22%20rx%3D%2289%22%20ry%3D%2289%22%2F%3E%3Cellipse%20fill%3D%22%23a0a4ae%22%20rx%3D%221%22%20ry%3D%221%22%20transform%3D%22rotate(-104.3%2093.1%20-49.3)%20scale(64.19524%20107.62946)%22%2F%3E%3Cellipse%20fill%3D%22%230c101a%22%20rx%3D%221%22%20ry%3D%221%22%20transform%3D%22matrix(-29.70867%2030.97991%20-26.05795%20-24.98868%2023%2093.8)%22%2F%3E%3Cellipse%20fill%3D%22%23e17451%22%20rx%3D%221%22%20ry%3D%221%22%20transform%3D%22rotate(170%2014%2089.1)%20scale(60.40734%2038.17524)%22%2F%3E%3Cellipse%20fill%3D%22%23858c1e%22%20cx%3D%22101%22%20cy%3D%22145%22%20rx%3D%2244%22%20ry%3D%2244%22%2F%3E%3Cellipse%20fill%3D%22%239498a1%22%20rx%3D%221%22%20ry%3D%221%22%20transform%3D%22rotate(-107%2013.4%20-9.7)%20scale(27.91564%2081.72386)%22%2F%3E%3Cellipse%20fill%3D%22%2316181d%22%20rx%3D%221%22%20ry%3D%221%22%20transform%3D%22rotate(-36.7%20310.2%20-284.2)%20scale(98.53773%2031.96687)%22%2F%3E%3Cellipse%20fill%3D%22%23b1b1b1%22%20rx%3D%221%22%20ry%3D%221%22%20transform%3D%22matrix(-27.64416%2018.8686%20-9.67043%20-14.16803%20192.8%2049.8)%22%2F%3E%3Cellipse%20fill%3D%22%23929490%22%20cx%3D%22116%22%20cy%3D%2281%22%20rx%3D%2236%22%20ry%3D%2233%22%2F%3E%3Cellipse%20fill%3D%22%2342540a%22%20rx%3D%221%22%20ry%3D%221%22%20transform%3D%22matrix(16.56144%20-49.14037%2018.20088%206.13412%20125.7%20169)%22%2F%3E%3Cellipse%20fill%3D%22%23b465a7%22%20cx%3D%2211%22%20cy%3D%22183%22%20rx%3D%2230%22%20ry%3D%2230%22%2F%3E%3Cpath%20fill%3D%22%23505258%22%20d%3D%22M278.3%2089.6l-129.7%2055.1-13-30.3%20129.8-55.1z%22%2F%3E%3Cpath%20fill%3D%22%234f4b52%22%20d%3D%22M83%2083L62%2022%2018%20158z%22%2F%3E%3Cellipse%20fill%3D%22%230d0d0d%22%20rx%3D%221%22%20ry%3D%221%22%20transform%3D%22matrix(-3.15545%20-13.24519%2022.98285%20-5.47529%2015.4%2094.2)%22%2F%3E%3Cpath%20fill%3D%22%233e3e3e%22%20d%3D%22M138.7%2013.7l-.4-27%2025-.4.4%2027z%22%2F%3E%3C%2Fg%3E%3C%2Fsvg%3E) Terrain & Szenerie
Terrain & SzenerieDnD Elfen Baumhaus Kollektion 28mm Maßstab
Dies ist eine modulare Elfen Baumhäuser geeignet für 28mm Wargames. Sie ist so konzipiert, dass man weitere Brücken zwischen den Baumhäusern einbauen und so eine ganze, miteinander verbundene Stadt schaffen kann.
(0 reviews) -
%22%20transform%3D%22translate(.6%20.6)%20scale(1.17188)%22%20fill-opacity%3D%22.5%22%3E%3Cellipse%20fill%3D%22%23e4e3de%22%20rx%3D%221%22%20ry%3D%221%22%20transform%3D%22matrix(1.03543%20-46.40303%2062.79943%201.4013%20120.4%2086.3)%22%2F%3E%3Cpath%20d%3D%22M156.9%202.3l59.4-59.4L313%2039.7l-59.4%2059.4z%22%2F%3E%3Cellipse%20fill%3D%22%23000100%22%20rx%3D%221%22%20ry%3D%221%22%20transform%3D%22matrix(-32.30843%20-23.81983%20151.32181%20-205.24791%200%2054)%22%2F%3E%3Cellipse%20fill%3D%22%23670e2e%22%20cx%3D%22229%22%20cy%3D%22133%22%20rx%3D%2240%22%20ry%3D%2259%22%2F%3E%3Cellipse%20fill%3D%22%23d7dcde%22%20cx%3D%22118%22%20cy%3D%2287%22%20rx%3D%2236%22%20ry%3D%2222%22%2F%3E%3Cellipse%20fill%3D%22%23d56e56%22%20rx%3D%221%22%20ry%3D%221%22%20transform%3D%22matrix(-13.48789%2013.67754%20-27.50557%20-27.12418%20180.6%2069.4)%22%2F%3E%3Cellipse%20fill%3D%22%23262f2e%22%20rx%3D%221%22%20ry%3D%221%22%20transform%3D%22matrix(74.28093%205.20714%20-3.34867%2047.7694%2036.2%20176.2)%22%2F%3E%3Cpath%20fill%3D%22%23898a8c%22%20d%3D%22M104%20134.8L164.8%2074l31.2%2031.2-60.8%2060.8z%22%2F%3E%3Cellipse%20fill%3D%22%23727979%22%20rx%3D%221%22%20ry%3D%221%22%20transform%3D%22matrix(14.0368%20-.8971%203.29876%2051.61528%2060.9%2076.4)%22%2F%3E%3Cellipse%20fill%3D%22%231d2323%22%20cx%3D%22132%22%20cy%3D%229%22%20rx%3D%22254%22%20ry%3D%2218%22%2F%3E%3Cellipse%20fill%3D%22%2325433a%22%20rx%3D%221%22%20ry%3D%221%22%20transform%3D%22matrix(15.07934%20-18.41823%2050.5612%2041.39536%20228.5%20191)%22%2F%3E%3Cellipse%20fill%3D%22%23636769%22%20rx%3D%221%22%20ry%3D%221%22%20transform%3D%22matrix(1.28458%2013.10112%20-85.35144%208.36878%20117.3%2040.7)%22%2F%3E%3Cellipse%20fill%3D%22%233b3f3f%22%20rx%3D%221%22%20ry%3D%221%22%20transform%3D%22rotate(-153.7%2021.4%2054.6)%20scale(13.54651%20116.54484)%22%2F%3E%3Cpath%20fill%3D%22%236c7373%22%20d%3D%22M180%20146L54%2097l95%20110z%22%2F%3E%3Cellipse%20fill%3D%22%23484a4a%22%20rx%3D%221%22%20ry%3D%221%22%20transform%3D%22rotate(-55.4%20124%20-160.7)%20scale(11.68717%2047.36277)%22%2F%3E%3C%2Fg%3E%3C%2Fsvg%3E) Sci-Fi
Sci-FiHub Alpha Drachenruhe Sci-Fi Streugelände 28mm – 32mm Maßstab
Als Teil der modularen Outpost: Origins-Reihe ist der Hub Alpha ein mehrteiliger Druck, mit dem Sie Ihre Operationsbasis aufbauen können. Die Türen lassen sich leicht ein- und ausschieben oder können mit Schotts verschlossen werden, um verschiedene Eingangsvarianten zu ermöglichen. Die Türen können auch durch eine Rampe ersetzt werden.
Mehrere Hub Alphas können mit Hilfe der eingebauten Positionsführungen gestapelt werden. Im Inneren befindet sich ein herausnehmbares Bodengitter, das Ihren Kolonisten den Zugang zu anderen Ebenen über die interne Leiter ermöglicht. Das abnehmbare Dach beherbergt die lebensnotwendige Ausrüstung für die Besiedlung.
(0 reviews) -
%22%20transform%3D%22translate(.6%20.6)%20scale(1.17188)%22%20fill-opacity%3D%22.5%22%3E%3Cellipse%20fill%3D%22%231e1d27%22%20rx%3D%221%22%20ry%3D%221%22%20transform%3D%22matrix(62.53238%207.40995%20-6.6863%2056.42544%20128%2079.6)%22%2F%3E%3Cellipse%20fill%3D%22%23aab18c%22%20rx%3D%221%22%20ry%3D%221%22%20transform%3D%22matrix(-37.26214%2046.21418%20-98.0406%20-79.04938%2044%20187.2)%22%2F%3E%3Cellipse%20fill%3D%22%23a3b067%22%20rx%3D%221%22%20ry%3D%221%22%20transform%3D%22matrix(-46.6652%2044.28362%20-53.17809%20-56.03801%20234.3%20192.3)%22%2F%3E%3Cellipse%20fill%3D%22%2392919b%22%20cx%3D%22221%22%20cy%3D%227%22%20rx%3D%2277%22%20ry%3D%2220%22%2F%3E%3Cellipse%20fill%3D%22%23b3c45e%22%20rx%3D%221%22%20ry%3D%221%22%20transform%3D%22rotate(160%20-3.8%20102.5)%20scale(33.99898%2051.91848)%22%2F%3E%3Cellipse%20fill%3D%22%2335353c%22%20rx%3D%221%22%20ry%3D%221%22%20transform%3D%22matrix(101.72688%207.99415%20-1.07108%2013.62964%20255%2069)%22%2F%3E%3Cpath%20fill%3D%22%23b8c769%22%20d%3D%22M206%20178h50v31h-50z%22%2F%3E%3Cellipse%20fill%3D%22%23757284%22%20rx%3D%221%22%20ry%3D%221%22%20transform%3D%22matrix(-18.41488%2018.93643%20-63.72793%20-61.9727%2071.1%20154.2)%22%2F%3E%3Cellipse%20fill%3D%22%2394939d%22%20rx%3D%221%22%20ry%3D%221%22%20transform%3D%22matrix(-4.02166%20-18.14864%2046.27274%20-10.25383%2031%200)%22%2F%3E%3Cellipse%20fill%3D%22%23736f87%22%20rx%3D%221%22%20ry%3D%221%22%20transform%3D%22rotate(2.7%20-3645%203898.9)%20scale(13.41251%2088.72753)%22%2F%3E%3Cpath%20fill%3D%22%237a892c%22%20d%3D%22M258%20147.7l-4.8%2030.6-63.2-10%204.8-30.6z%22%2F%3E%3Cpath%20fill%3D%22%237b8c22%22%20d%3D%22M-8%20138.5l42.8-3%201.3%2018-43%203z%22%2F%3E%3Cpath%20fill%3D%22%23080808%22%20d%3D%22M131%2096l16-17-44%205z%22%2F%3E%3Cellipse%20fill%3D%22%235d5d62%22%20rx%3D%221%22%20ry%3D%221%22%20transform%3D%22matrix(-33.95258%20-60.01098%2011.62303%20-6.576%2070.6%20106.4)%22%2F%3E%3Cellipse%20fill%3D%22%23595860%22%20rx%3D%221%22%20ry%3D%221%22%20transform%3D%22rotate(-77%20106.4%20-94.2)%20scale(12.02638%20112.70417)%22%2F%3E%3C%2Fg%3E%3C%2Fsvg%3E) Sci-Fi
Sci-FiModulares Teil eines massiven Gothic-Raumschiffwrack Geschützturms: 28mm Maßstab
Dies ist ein kompletter Satz von Stücken, die die gunport von gotischen Raumschiff Wrack Serie macht. Das Gunport ist mit Schienen versehen, die zu den Waffenschlitten passen. Außerdem hat er geschlossene und halbgeöffnete Luken.
(0 reviews) -
%22%20transform%3D%22translate(.6%20.6)%20scale(1.17188)%22%20fill-opacity%3D%22.5%22%3E%3Cellipse%20fill%3D%22%23919191%22%20cx%3D%22143%22%20cy%3D%22112%22%20rx%3D%2261%22%20ry%3D%2268%22%2F%3E%3Cellipse%20fill%3D%22%23fff%22%20rx%3D%221%22%20ry%3D%221%22%20transform%3D%22rotate(119.7%20-.9%2044.8)%20scale(187.6263%2043.72496)%22%2F%3E%3Cellipse%20fill%3D%22%23fff%22%20rx%3D%221%22%20ry%3D%221%22%20transform%3D%22rotate(33.5%20-92.8%2081.8)%20scale(34.35687%20209.03984)%22%2F%3E%3Cellipse%20fill%3D%22%238d8d8d%22%20rx%3D%221%22%20ry%3D%221%22%20transform%3D%22matrix(-27.0264%20-12.0895%2018.4094%20-41.15473%20139.5%2099.8)%22%2F%3E%3Cpath%20fill%3D%22%23c8c8c8%22%20d%3D%22M215%20126l-66%2078-64-56z%22%2F%3E%3Cellipse%20fill%3D%22%23b6b6b6%22%20cx%3D%22150%22%20cy%3D%2251%22%20rx%3D%2233%22%20ry%3D%2218%22%2F%3E%3Cellipse%20fill%3D%22%23d9d9d9%22%20rx%3D%221%22%20ry%3D%221%22%20transform%3D%22rotate(-56.7%20118.6%20-31)%20scale(59.82941%2024.35942)%22%2F%3E%3Cellipse%20fill%3D%22%23fff%22%20rx%3D%221%22%20ry%3D%221%22%20transform%3D%22rotate(123.6%20-29.3%2054.5)%20scale(149.44243%2037.08384)%22%2F%3E%3Cellipse%20fill%3D%22%23e6e6e6%22%20rx%3D%221%22%20ry%3D%221%22%20transform%3D%22rotate(166%20113.3%2062)%20scale(40.92095%20255.00002)%22%2F%3E%3Cellipse%20fill%3D%22%23c7c7c7%22%20rx%3D%221%22%20ry%3D%221%22%20transform%3D%22rotate(84.6%2037%20155.4)%20scale(41.48181%2017.63118)%22%2F%3E%3Cellipse%20fill%3D%22%23bdbdbd%22%20cx%3D%2288%22%20cy%3D%22122%22%20rx%3D%2214%22%20ry%3D%2230%22%2F%3E%3Cellipse%20fill%3D%22%23e6e6e6%22%20rx%3D%221%22%20ry%3D%221%22%20transform%3D%22matrix(-1.14412%2020.50092%20-74.3172%20-4.1475%2054.6%20176.2)%22%2F%3E%3Cpath%20fill%3D%22%23fff%22%20d%3D%22M-16%20147l49%2019L59-16z%22%2F%3E%3Cpath%20fill%3D%22%23b3b3b3%22%20d%3D%22M129%20177h35v15h-35z%22%2F%3E%3Cpath%20fill%3D%22%23e6e6e6%22%20d%3D%22M132-16l81%2033L83%2042z%22%2F%3E%3C%2Fg%3E%3C%2Fsvg%3E) Terrain & Szenerie
Terrain & SzenerieGoblin Hut Typ 3 für Tabletop-Spiele
Miniatur-Goblin-Hütte für deine Goblin- oder Barbaren-Szenerie. Es ist für 28mm-32mm (oder “Heroic” Maßstab”) Gaming skaliert und sind ideal für Wargaming oder für scenics in Ihrem RPG Begegnungen. Dieses Stück ist so konzipiert, dass es in 1″-Rasterzellen passt, wenn du eine Rasterkarte verwendest, und es kann als Streugelände in “Free Range”-Spielen abgeworfen werden.
(0 reviews) -
%22%20transform%3D%22translate(.6%20.6)%20scale(1.17188)%22%20fill-opacity%3D%22.5%22%3E%3Cellipse%20fill%3D%22%232a2f90%22%20cx%3D%22255%22%20cy%3D%2256%22%20rx%3D%22132%22%20ry%3D%22132%22%2F%3E%3Cellipse%20fill%3D%22%23737356%22%20rx%3D%221%22%20ry%3D%221%22%20transform%3D%22matrix(-40.07596%2013.09884%20-33.33516%20-101.98906%2091%20128.5)%22%2F%3E%3Cellipse%20fill%3D%22%2338381c%22%20rx%3D%221%22%20ry%3D%221%22%20transform%3D%22matrix(18.87978%20222.58576%20-27.20342%202.3074%2021.4%20118)%22%2F%3E%3Cellipse%20fill%3D%22%23005b86%22%20rx%3D%221%22%20ry%3D%221%22%20transform%3D%22matrix(44.5218%2048.60308%20-25.91174%2023.7359%20227%2022.2)%22%2F%3E%3Cellipse%20fill%3D%22%232a271f%22%20rx%3D%221%22%20ry%3D%221%22%20transform%3D%22rotate(-3.1%20234.7%20-147.9)%20scale(160.74136%2018.95168)%22%2F%3E%3Cellipse%20fill%3D%22%2338362d%22%20rx%3D%221%22%20ry%3D%221%22%20transform%3D%22rotate(-133.9%2094%2036.6)%20scale(39.00284%2018.86175)%22%2F%3E%3Cellipse%20fill%3D%22%23686865%22%20cx%3D%2273%22%20cy%3D%2269%22%20rx%3D%2243%22%20ry%3D%2243%22%2F%3E%3Cellipse%20fill%3D%22%2348317a%22%20cx%3D%22223%22%20cy%3D%22146%22%20rx%3D%2269%22%20ry%3D%2269%22%2F%3E%3Cpath%20fill%3D%22%23101113%22%20d%3D%22M64-12.2L19.3%2027.2.7%2061.6l-8.3-74.8z%22%2F%3E%3Cpath%20fill%3D%22%230c39e1%22%20d%3D%22M231.6%2020l.8-21%2032%201-.8%2021z%22%2F%3E%3Cellipse%20fill%3D%22%233b3b32%22%20rx%3D%221%22%20ry%3D%221%22%20transform%3D%22rotate(170.7%2020.8%2083)%20scale(13.47916%2036.17522)%22%2F%3E%3Cpath%20fill%3D%22%23464639%22%20d%3D%22M130.7%2020.5l-13.6%2025.6-53.8-28.6L76.9-8.1z%22%2F%3E%3Cpath%20fill%3D%22%23483278%22%20d%3D%22M122%2014h69v95h-69z%22%2F%3E%3Cellipse%20fill%3D%22%23130065%22%20cx%3D%22150%22%20rx%3D%2221%22%20ry%3D%2214%22%2F%3E%3Cellipse%20fill%3D%22%23464742%22%20rx%3D%221%22%20ry%3D%221%22%20transform%3D%22rotate(67.6%202.5%2044)%20scale(15.04271%2029.16388)%22%2F%3E%3C%2Fg%3E%3C%2Fsvg%3E) Gebäude und Zelte
Gebäude und ZelteKaufmannshaus und Gefängnis im Maßstab 28mm für mittelalterliche und Fantasy-Dörfer. Stadt Tarok
Sie können die Türen dieses Miniaturgebäudes öffnen und schließen, um Ihre Tischplatte lebendiger zu gestalten. Alle Risse und jedes Detail werden individuell modelliert. Bei diesem Modell gibt es einige sich wiederholende Muster.
(0 reviews) -
%22%20transform%3D%22translate(.6%20.6)%20scale(1.17188)%22%20fill-opacity%3D%22.5%22%3E%3Cellipse%20fill%3D%22%23768fb3%22%20rx%3D%221%22%20ry%3D%221%22%20transform%3D%22matrix(87.80616%20.11925%20-.07182%2052.88668%20121.3%208)%22%2F%3E%3Cellipse%20fill%3D%22%23d48350%22%20rx%3D%221%22%20ry%3D%221%22%20transform%3D%22matrix(2.8537%20-42.36457%2085.88685%205.7854%20135%2099)%22%2F%3E%3Cellipse%20fill%3D%22%233a5e04%22%20rx%3D%221%22%20ry%3D%221%22%20transform%3D%22matrix(-33.34087%208.06741%20-24.37044%20-100.7178%2026.8%20158.3)%22%2F%3E%3Cellipse%20fill%3D%22%23506210%22%20cx%3D%22251%22%20cy%3D%22184%22%20rx%3D%2239%22%20ry%3D%22217%22%2F%3E%3Cellipse%20fill%3D%22%23914210%22%20rx%3D%221%22%20ry%3D%221%22%20transform%3D%22rotate(-7.2%201396.6%20-974.7)%20scale(81.52962%2030.79877)%22%2F%3E%3Cellipse%20fill%3D%22%23e9ac81%22%20cx%3D%22128%22%20cy%3D%2284%22%20rx%3D%2230%22%20ry%3D%2212%22%2F%3E%3Cellipse%20fill%3D%22%238e4a18%22%20rx%3D%221%22%20ry%3D%221%22%20transform%3D%22matrix(86.95168%20186.13656%20-12.9267%206.03857%2044%2090.3)%22%2F%3E%3Cellipse%20fill%3D%22%2346576b%22%20rx%3D%221%22%20ry%3D%221%22%20transform%3D%22matrix(-22.09368%2024.62381%20-10.6109%20-9.5206%20209.4%2021.5)%22%2F%3E%3Cellipse%20fill%3D%22%23273700%22%20rx%3D%221%22%20ry%3D%221%22%20transform%3D%22matrix(-7.8383%20-28.18614%2018.40922%20-5.11943%201.2%2095.6)%22%2F%3E%3Cellipse%20fill%3D%22%23779845%22%20cx%3D%22128%22%20cy%3D%2260%22%20rx%3D%2272%22%20ry%3D%228%22%2F%3E%3Cpath%20fill%3D%22%23465c37%22%20d%3D%22M74%2033L21%2011l25%2054z%22%2F%3E%3Cellipse%20fill%3D%22%23aa5931%22%20rx%3D%221%22%20ry%3D%221%22%20transform%3D%22matrix(-1.90994%2041.53715%20-22.46242%20-1.03286%20210.5%20106.6)%22%2F%3E%3Cpath%20fill%3D%22%23566c21%22%20d%3D%22M244%2014l-54%2036%2081%2061z%22%2F%3E%3Cellipse%20fill%3D%22%23527124%22%20rx%3D%221%22%20ry%3D%221%22%20transform%3D%22matrix(-5.22868%20-19.10228%2030.99912%20-8.48509%20227.6%20169.6)%22%2F%3E%3Cpath%20fill%3D%22%2362712c%22%20d%3D%22M32%2073l43%20122-86-13z%22%2F%3E%3C%2Fg%3E%3C%2Fsvg%3E) Terrain & Szenerie
Terrain & SzenerieSteampunk-Tor für modulare Spielhügel im Maßstab 28mm
Dies ist ein Einstieg mit Steampunk-Feeling für die Modular Hills-Serie. Kommt in einem Stück und Clips zu den Gaming-Serie Hügeln zu befestigen, aber es gibt Löcher für Magnete zu, wenn Sie nicht wollen, um Clips zu verwenden. Die Größe ist 3 mm, verwenden Sie einen Bohrer, wenn Ihre Magnete größer sind.
(0 reviews) -
%22%20transform%3D%22translate(.6%20.6)%20scale(1.17188)%22%20fill-opacity%3D%22.5%22%3E%3Cellipse%20fill%3D%22%23938f94%22%20rx%3D%221%22%20ry%3D%221%22%20transform%3D%22matrix(50.89494%2016.04711%20-25.46025%2080.7496%20104.5%2054.1)%22%2F%3E%3Cellipse%20fill%3D%22%2300173b%22%20rx%3D%221%22%20ry%3D%221%22%20transform%3D%22matrix(37.6434%20-8.01933%2035.6453%20167.322%20240.3%2048.7)%22%2F%3E%3Cellipse%20fill%3D%22%23110f07%22%20rx%3D%221%22%20ry%3D%221%22%20transform%3D%22rotate(-171.2%201.1%2014.3)%20scale(33.18353%2078.05533)%22%2F%3E%3Cellipse%20fill%3D%22%236a54cc%22%20rx%3D%221%22%20ry%3D%221%22%20transform%3D%22matrix(1.2224%2051.16385%20-21.58609%20.51573%20170.4%2036)%22%2F%3E%3Cellipse%20fill%3D%22%23002774%22%20rx%3D%221%22%20ry%3D%221%22%20transform%3D%22matrix(19.72052%2041.90514%20-45.60098%2021.45978%20240.2%2014)%22%2F%3E%3Cellipse%20fill%3D%22%232e2d20%22%20rx%3D%221%22%20ry%3D%221%22%20transform%3D%22matrix(20.00791%20-13.34362%2031.71002%2047.54717%2015.6%20161.4)%22%2F%3E%3Cellipse%20fill%3D%22%23554d38%22%20rx%3D%221%22%20ry%3D%221%22%20transform%3D%22matrix(23.35314%2057.59273%20-37.56138%2015.23067%20235.2%20126)%22%2F%3E%3Cellipse%20fill%3D%22%233d2a99%22%20rx%3D%221%22%20ry%3D%221%22%20transform%3D%22rotate(-97.9%2041.2%20-35.9)%20scale(19.91497%2055.48506)%22%2F%3E%3Cpath%20fill%3D%22%235b5b54%22%20d%3D%22M176.1%20107.4l-37.6%2020.8-28.6-51.6%2037.6-20.8z%22%2F%3E%3Cellipse%20fill%3D%22%23696960%22%20cx%3D%22177%22%20cy%3D%22138%22%20rx%3D%2248%22%20ry%3D%2248%22%2F%3E%3Cpath%20fill%3D%22%23313e89%22%20d%3D%22M189%200h27v75h-27z%22%2F%3E%3Cellipse%20fill%3D%22%23001e46%22%20rx%3D%221%22%20ry%3D%221%22%20transform%3D%22matrix(9.6172%2044.16251%20-23.82114%205.1875%20237.2%2031)%22%2F%3E%3Cellipse%20fill%3D%22%23898b82%22%20cx%3D%2283%22%20cy%3D%2277%22%20rx%3D%2229%22%20ry%3D%2253%22%2F%3E%3Cellipse%20fill%3D%22%23100f11%22%20rx%3D%221%22%20ry%3D%221%22%20transform%3D%22matrix(-52.51732%2091.11513%20-18.35965%20-10.58221%202.6%2013.5)%22%2F%3E%3Cellipse%20fill%3D%22%23616056%22%20rx%3D%221%22%20ry%3D%221%22%20transform%3D%22matrix(25.07546%201.27253%20-2.9646%2058.4181%2032.6%2082.4)%22%2F%3E%3C%2Fg%3E%3C%2Fsvg%3E) Gebäude und Zelte
Gebäude und ZelteWaschhaus und Holzfäller 28mm Maßstab Gebäude für mittelalterliche und Fantasy-Dorf. Stadt Tarok
Dies ist ein einzelnes Waschhaus und Holzfällerhaus mit Waschhaus- und Holzfällerartikeln. Alle Risse und jedes Detail werden individuell modelliert. Bei diesem Modell gibt es einige sich wiederholende Muster.
(0 reviews) -
%22%20transform%3D%22translate(.6%20.6)%20scale(1.17188)%22%20fill-opacity%3D%22.5%22%3E%3Cellipse%20fill%3D%22%23c2c2c3%22%20rx%3D%221%22%20ry%3D%221%22%20transform%3D%22matrix(163.33684%20-.3261%20.09475%2047.45869%20117.9%205.4)%22%2F%3E%3Cellipse%20fill%3D%22%23262627%22%20rx%3D%221%22%20ry%3D%221%22%20transform%3D%22matrix(-234.56834%20-44.32215%207.8333%20-41.45652%20202%20128.1)%22%2F%3E%3Cellipse%20fill%3D%22%23292929%22%20rx%3D%221%22%20ry%3D%221%22%20transform%3D%22rotate(-32.8%20265.7%20-372.8)%20scale(95.56424%2029.03857)%22%2F%3E%3Cellipse%20fill%3D%22%239da37f%22%20cx%3D%2244%22%20cy%3D%22168%22%20rx%3D%2260%22%20ry%3D%2219%22%2F%3E%3Cellipse%20fill%3D%22%237b7b7b%22%20rx%3D%221%22%20ry%3D%221%22%20transform%3D%22matrix(-35.85516%20.50067%20-.61309%20-43.90639%20254.2%20173)%22%2F%3E%3Cellipse%20fill%3D%22%236b6b6c%22%20rx%3D%221%22%20ry%3D%221%22%20transform%3D%22rotate(-82.4%2081.6%20-30.7)%20scale(23.60569%20115.12703)%22%2F%3E%3Cellipse%20fill%3D%22%23717171%22%20cx%3D%22227%22%20cy%3D%2237%22%20rx%3D%2280%22%20ry%3D%2217%22%2F%3E%3Cellipse%20fill%3D%22%23272727%22%20rx%3D%221%22%20ry%3D%221%22%20transform%3D%22matrix(-23.14395%2044.83285%20-21.46328%20-11.07994%20174.2%20154.6)%22%2F%3E%3Cellipse%20fill%3D%22%23adadad%22%20cx%3D%2289%22%20cy%3D%225%22%20rx%3D%22183%22%20ry%3D%2223%22%2F%3E%3Cellipse%20fill%3D%22%23717171%22%20rx%3D%221%22%20ry%3D%221%22%20transform%3D%22matrix(-1.3712%206.09604%20-35.65178%20-8.01923%20110.1%20145.4)%22%2F%3E%3Cpath%20fill%3D%22%2381941f%22%20d%3D%22M0%20157h33v17H0z%22%2F%3E%3Cellipse%20fill%3D%22%233c3c3c%22%20cx%3D%2224%22%20cy%3D%2292%22%20rx%3D%2258%22%20ry%3D%2232%22%2F%3E%3Cellipse%20fill%3D%22%23444%22%20rx%3D%221%22%20ry%3D%221%22%20transform%3D%22matrix(34.87638%2017.7704%20-13.23848%2025.98197%20228.5%2098.2)%22%2F%3E%3Cellipse%20fill%3D%22%23434343%22%20rx%3D%221%22%20ry%3D%221%22%20transform%3D%22rotate(126%2046.5%20131.8)%20scale(28.59613%2043.6943)%22%2F%3E%3Cellipse%20fill%3D%22%23838289%22%20rx%3D%221%22%20ry%3D%221%22%20transform%3D%22matrix(103.30469%2021.39337%20-1.2427%206.00073%201.1%20148)%22%2F%3E%3C%2Fg%3E%3C%2Fsvg%3E) Sci-Fi
Sci-FiEin Satz von 3 Grimdark-Block-Strukturen – Industriegelände
Es handelt sich dabei um modulare Teile eines Industriegeländes, mit denen du erstaunliche Szenen von dystopischen Fabriken, Ödland und Schlachtfeldern gestalten kannst. Das Set enthält drei unterschiedlich große Blöcke mit realistischen Details wie Rohren, Lüftungsöffnungen und Metallplatten.
(0 reviews) -
%22%20transform%3D%22translate(.6%20.6)%20scale(1.17188)%22%20fill-opacity%3D%22.5%22%3E%3Cellipse%20fill%3D%22%23000002%22%20rx%3D%221%22%20ry%3D%221%22%20transform%3D%22rotate(23.5%20-76.4%2067.5)%20scale(40.59493%20117.93679)%22%2F%3E%3Cellipse%20fill%3D%22%237e7b8c%22%20rx%3D%221%22%20ry%3D%221%22%20transform%3D%22rotate(-140%2090.1%2027.2)%20scale(63.37655%2093.00588)%22%2F%3E%3Cellipse%20fill%3D%22%236d715c%22%20cx%3D%2285%22%20cy%3D%22222%22%20rx%3D%22113%22%20ry%3D%22113%22%2F%3E%3Cellipse%20fill%3D%22%232e321c%22%20rx%3D%221%22%20ry%3D%221%22%20transform%3D%22matrix(-39.2083%20-5.2315%208.3809%20-62.81186%20238.3%20215.8)%22%2F%3E%3Cpath%20fill%3D%22%2335248f%22%20d%3D%22M169.2-45.7l102.1-19.8%2039.5%20203.2-102.1%2019.8z%22%2F%3E%3Cpath%20fill%3D%22%232d1b8a%22%20d%3D%22M142-46.4l36.6%2068.8L62%2084.4%2025.4%2015.6z%22%2F%3E%3Cellipse%20fill%3D%22%238d8f83%22%20rx%3D%221%22%20ry%3D%221%22%20transform%3D%22rotate(-33%20232%20-188.5)%20scale(81.52605%2019.13841)%22%2F%3E%3Cellipse%20fill%3D%22%235e4eb4%22%20cx%3D%22190%22%20cy%3D%22135%22%20rx%3D%2220%22%20ry%3D%2245%22%2F%3E%3Cellipse%20fill%3D%22%23353828%22%20rx%3D%221%22%20ry%3D%221%22%20transform%3D%22matrix(-33.52116%2029.86627%20-9.63009%20-10.80857%2033.8%20104.5)%22%2F%3E%3Cpath%20fill%3D%22%239a9a99%22%20d%3D%22M55.1%20164.8l21%2015.3-15.2%2021-21-15.2z%22%2F%3E%3Cellipse%20fill%3D%22%23181a0c%22%20cx%3D%227%22%20cy%3D%2225%22%20rx%3D%2227%22%20ry%3D%2290%22%2F%3E%3Cellipse%20fill%3D%22%2303003c%22%20rx%3D%221%22%20ry%3D%221%22%20transform%3D%22matrix(-9.83375%2016.04723%20-24.18173%20-14.81858%20247.7%20.1)%22%2F%3E%3Cellipse%20fill%3D%22%236053a5%22%20rx%3D%221%22%20ry%3D%221%22%20transform%3D%22matrix(8.5478%207.44872%20-31.14894%2035.74505%20114%2059)%22%2F%3E%3Cellipse%20fill%3D%22%23575757%22%20rx%3D%221%22%20ry%3D%221%22%20transform%3D%22matrix(-12.65906%20-27.42237%2042.02473%20-19.39998%20129.3%20154.9)%22%2F%3E%3Cellipse%20fill%3D%22%236a5ea7%22%20rx%3D%221%22%20ry%3D%221%22%20transform%3D%22rotate(-175.1%20105.4%2032)%20scale(11.69288%2040.65582)%22%2F%3E%3C%2Fg%3E%3C%2Fsvg%3E) Gebäude und Zelte
Gebäude und ZelteKleines Haus im 28mm Maßstab für mittelalterliche und Fantasy-Dörfer. Stadt Tarok
Sie können die Türen dieses kleinen Hauses öffnen und schließen, um Ihre Tischplatte lebendiger zu gestalten. Alle Risse und jedes Detail werden individuell modelliert. Bei diesem Modell gibt es einige sich wiederholende Muster.
(0 reviews) -
%22%20transform%3D%22translate(.7%20.7)%20scale(1.3086)%22%20fill-opacity%3D%22.5%22%3E%3Cellipse%20fill%3D%22%237d6147%22%20rx%3D%221%22%20ry%3D%221%22%20transform%3D%22matrix(-25.45008%2077.79387%20-54.19894%20-17.73105%20114.1%20126.4)%22%2F%3E%3Cellipse%20fill%3D%22%230029b8%22%20rx%3D%221%22%20ry%3D%221%22%20transform%3D%22matrix(-39.49219%20-224.5537%2026.69123%20-4.69418%20208.8%2060.7)%22%2F%3E%3Cellipse%20rx%3D%221%22%20ry%3D%221%22%20transform%3D%22matrix(26.67994%208.30988%20-24.19163%2077.6704%207.2%2047.4)%22%2F%3E%3Cellipse%20fill%3D%22%2304183b%22%20rx%3D%221%22%20ry%3D%221%22%20transform%3D%22rotate(135.8%2047.9%20143.8)%20scale(30.68091%2077.87113)%22%2F%3E%3Cellipse%20fill%3D%22%23000744%22%20cx%3D%2219%22%20cy%3D%22183%22%20rx%3D%2218%22%20ry%3D%22192%22%2F%3E%3Cellipse%20fill%3D%22%236f344a%22%20rx%3D%221%22%20ry%3D%221%22%20transform%3D%22matrix(-2.25592%20-32.81318%2058.1524%20-3.998%20158.2%20131.3)%22%2F%3E%3Cellipse%20fill%3D%22%23484c8a%22%20rx%3D%221%22%20ry%3D%221%22%20transform%3D%22matrix(-29.75211%2015.38008%20-21.74352%20-42.06192%2072.7%20200.3)%22%2F%3E%3Cpath%20fill%3D%22%231850cb%22%20d%3D%22M238%2058l-72-18%2068%20102z%22%2F%3E%3Cellipse%20fill%3D%22%2369695c%22%20rx%3D%221%22%20ry%3D%221%22%20transform%3D%22rotate(-85.1%20110.4%204)%20scale(88.75927%2024.09781)%22%2F%3E%3Cellipse%20fill%3D%22%23020f45%22%20cx%3D%22165%22%20rx%3D%22158%22%20ry%3D%2219%22%2F%3E%3Cellipse%20cx%3D%224%22%20cy%3D%2228%22%20rx%3D%2215%22%20ry%3D%2258%22%2F%3E%3Cellipse%20fill%3D%22%2330331c%22%20rx%3D%221%22%20ry%3D%221%22%20transform%3D%22matrix(7.73048%2029.89153%20-31.90922%208.25228%20144.8%20176.4)%22%2F%3E%3Cellipse%20fill%3D%22%23003d66%22%20rx%3D%221%22%20ry%3D%221%22%20transform%3D%22matrix(-16.37297%208.65782%20-29.14138%20-55.10983%2029.1%20197.7)%22%2F%3E%3Cellipse%20fill%3D%22%23473d89%22%20rx%3D%221%22%20ry%3D%221%22%20transform%3D%22matrix(13.97619%20-58.215%2016.25128%203.90159%2057.5%20124.5)%22%2F%3E%3Cpath%20fill%3D%22%2343387b%22%20d%3D%22M155%2020l67%20102-34%2081z%22%2F%3E%3C%2Fg%3E%3C%2Fsvg%3E) Gebäude und Zelte
Gebäude und ZelteMedieval Home 28mm Maßstab Gebäude für mittelalterliche und Fantasy-Dorf. Stadt Tarok
Sie können die Türen dieses mittelalterlichen Hauses öffnen und schließen, um Ihre Tischplatte lebendiger zu gestalten. Alle Risse und jedes Detail werden individuell modelliert. Bei diesem Modell gibt es einige sich wiederholende Muster.
(0 reviews) -
%22%20transform%3D%22translate(.6%20.6)%20scale(1.17188)%22%20fill-opacity%3D%22.5%22%3E%3Cellipse%20fill%3D%22%23fff%22%20rx%3D%221%22%20ry%3D%221%22%20transform%3D%22matrix(-1.01957%2040.76177%20-221.3775%20-5.5373%20122%2014.6)%22%2F%3E%3Cellipse%20fill%3D%22%23252910%22%20rx%3D%221%22%20ry%3D%221%22%20transform%3D%22matrix(-7.64914%20-68.66397%20208.95866%20-23.27791%20103.5%20165.5)%22%2F%3E%3Cpath%20fill%3D%22%239f9da5%22%20d%3D%22M50%2047h66v75H50z%22%2F%3E%3Cellipse%20fill%3D%22%23faf9fd%22%20rx%3D%221%22%20ry%3D%221%22%20transform%3D%22matrix(1.26779%2024.73835%20-140.7575%207.21352%20181.4%200)%22%2F%3E%3Cellipse%20fill%3D%22%235a6a08%22%20rx%3D%221%22%20ry%3D%221%22%20transform%3D%22matrix(38.7459%20-27.90523%2046.4761%2064.53122%2021%20148.9)%22%2F%3E%3Cellipse%20fill%3D%22%233d3a49%22%20cx%3D%22165%22%20cy%3D%22139%22%20rx%3D%2273%22%20ry%3D%2273%22%2F%3E%3Cellipse%20fill%3D%22%23717174%22%20rx%3D%221%22%20ry%3D%221%22%20transform%3D%22matrix(-12.92867%2015.38892%20-66.79998%20-56.12055%20218.8%2099)%22%2F%3E%3Cellipse%20fill%3D%22%239b9a9e%22%20cx%3D%22190%22%20cy%3D%2254%22%20rx%3D%22214%22%20ry%3D%2214%22%2F%3E%3Cellipse%20fill%3D%22%23737374%22%20rx%3D%221%22%20ry%3D%221%22%20transform%3D%22matrix(-19.4775%20-17.17172%2028.28306%20-32.08083%2096.6%20114.9)%22%2F%3E%3Cellipse%20fill%3D%22%23433e57%22%20rx%3D%221%22%20ry%3D%221%22%20transform%3D%22matrix(-7.66444%2022.44198%20-32.01754%20-10.93471%206.6%2086)%22%2F%3E%3Cellipse%20fill%3D%22%232d3800%22%20cx%3D%2265%22%20cy%3D%22192%22%20rx%3D%2218%22%20ry%3D%2242%22%2F%3E%3Cellipse%20fill%3D%22%23818083%22%20rx%3D%221%22%20ry%3D%221%22%20transform%3D%22rotate(-138.6%2029.3%2026)%20scale(80.21743%2011.84463)%22%2F%3E%3Cellipse%20fill%3D%22%23677427%22%20cx%3D%2234%22%20cy%3D%22136%22%20rx%3D%2234%22%20ry%3D%2234%22%2F%3E%3Cellipse%20fill%3D%22%2339393d%22%20cx%3D%22184%22%20cy%3D%22182%22%20rx%3D%22104%22%20ry%3D%2252%22%2F%3E%3Cellipse%20fill%3D%22%23b9b9b9%22%20rx%3D%221%22%20ry%3D%221%22%20transform%3D%22matrix(35.96467%20-2.99756%202.38185%2028.57741%2076.8%2048.2)%22%2F%3E%3C%2Fg%3E%3C%2Fsvg%3E) Terrain & Scenery
Terrain & SceneryWWII Bunker For Modular Gaming Hills Series 28mm Scale
This is an WWII bunker for modular hills series. Comes in 2 pieces (roof and base) and clips to attach to the gaming series hills, but there are holes for magnets too if you don’t want to use clips. The size is 3mm, use a drill if your magnets are larger.
(0 reviews) -
%22%20transform%3D%22translate(.6%20.6)%20scale(1.17188)%22%20fill-opacity%3D%22.5%22%3E%3Cellipse%20fill%3D%22%238d9192%22%20rx%3D%221%22%20ry%3D%221%22%20transform%3D%22rotate(-134%2076.5%2017.6)%20scale(59.02923%2077.41515)%22%2F%3E%3Cellipse%20rx%3D%221%22%20ry%3D%221%22%20transform%3D%22matrix(147.78228%20-118.39593%2020.83747%2026.00941%2027.7%2019.8)%22%2F%3E%3Cellipse%20rx%3D%221%22%20ry%3D%221%22%20transform%3D%22matrix(98.09057%2070.68595%20-18.05966%2025.06131%2031.5%20182.6)%22%2F%3E%3Cellipse%20fill%3D%22%23360002%22%20rx%3D%221%22%20ry%3D%221%22%20transform%3D%22matrix(16.29585%2020.4867%20-70.40153%2055.9999%20232%20183.5)%22%2F%3E%3Cellipse%20fill%3D%22%23030909%22%20cx%3D%22255%22%20cy%3D%2222%22%20rx%3D%2231%22%20ry%3D%2262%22%2F%3E%3Cellipse%20fill%3D%22%23972600%22%20rx%3D%221%22%20ry%3D%221%22%20transform%3D%22rotate(130.9%2087.4%2050.8)%20scale(18.16102%2035.82849)%22%2F%3E%3Cellipse%20fill%3D%22%238f9090%22%20rx%3D%221%22%20ry%3D%221%22%20transform%3D%22matrix(-45.06607%201.52454%20-1.21816%20-36.00942%20105%2095.9)%22%2F%3E%3Cellipse%20fill%3D%22%23646767%22%20cx%3D%22169%22%20cy%3D%22111%22%20rx%3D%2233%22%20ry%3D%2233%22%2F%3E%3Cpath%20fill%3D%22%2370042e%22%20d%3D%22M271%20125l-67-6%2036%2088z%22%2F%3E%3Cpath%20fill%3D%22%2360585b%22%20d%3D%22M27%2084L142-16l42%2050z%22%2F%3E%3Cellipse%20fill%3D%22%236b6f6f%22%20rx%3D%221%22%20ry%3D%221%22%20transform%3D%22matrix(-16.9026%203.6236%20-4.6662%20-21.76584%2044.5%20100.5)%22%2F%3E%3Cellipse%20fill%3D%22%233e383b%22%20cx%3D%22218%22%20cy%3D%2261%22%20rx%3D%2221%22%20ry%3D%2264%22%2F%3E%3Cellipse%20fill%3D%22%2361585c%22%20cx%3D%22164%22%20cy%3D%2278%22%20rx%3D%2222%22%20ry%3D%2265%22%2F%3E%3Cellipse%20fill%3D%22%232e3737%22%20cx%3D%22162%22%20cy%3D%22175%22%20rx%3D%2265%22%20ry%3D%2227%22%2F%3E%3Cpath%20fill%3D%22%235c5f5e%22%20d%3D%22M125%20159l90-42-159%2024z%22%2F%3E%3C%2Fg%3E%3C%2Fsvg%3E) Sci-Fi
Sci-FiOrbital Outpost Walkways Medium Starter Set 28mm
Walkways Medium Starter Set 28mm scale. All walkways are based on a 1 inch grid. Great as a quick start to your next sci-fi dungeon crawl.
(0 reviews) -
%22%20transform%3D%22translate(.6%20.6)%20scale(1.17188)%22%20fill-opacity%3D%22.5%22%3E%3Cellipse%20fill%3D%22%232c3700%22%20rx%3D%221%22%20ry%3D%221%22%20transform%3D%22matrix(-2.12315%2047.3459%20-117.64373%20-5.27554%2083.8%20196)%22%2F%3E%3Cellipse%20fill%3D%22%23a19db4%22%20rx%3D%221%22%20ry%3D%221%22%20transform%3D%22matrix(45.71132%20-31.79775%2018.5295%2026.63736%2019.6%2072.5)%22%2F%3E%3Cellipse%20fill%3D%22%23a19cb6%22%20rx%3D%221%22%20ry%3D%221%22%20transform%3D%22matrix(-27.0141%20-58.73287%2033.83685%20-15.56321%20254.9%20145.3)%22%2F%3E%3Cellipse%20fill%3D%22%239490aa%22%20rx%3D%221%22%20ry%3D%221%22%20transform%3D%22matrix(-37.1139%207.28146%20-8.59455%20-43.80679%20119.3%2083)%22%2F%3E%3Cellipse%20fill%3D%22%235c6d02%22%20rx%3D%221%22%20ry%3D%221%22%20transform%3D%22matrix(-23.62515%2046.91064%20-65.99505%20-33.23644%20196.7%2020.1)%22%2F%3E%3Cellipse%20fill%3D%22%232b2b27%22%20rx%3D%221%22%20ry%3D%221%22%20transform%3D%22matrix(16.14627%20-52.79467%2024.4912%207.49018%20169.5%20177)%22%2F%3E%3Cellipse%20fill%3D%22%23899935%22%20rx%3D%221%22%20ry%3D%221%22%20transform%3D%22matrix(-111.01389%20-25.27521%206.67902%20-29.33563%2034.7%203.9)%22%2F%3E%3Cellipse%20fill%3D%22%234a4560%22%20cx%3D%22103%22%20cy%3D%22141%22%20rx%3D%2274%22%20ry%3D%2220%22%2F%3E%3Cellipse%20fill%3D%22%233c4a00%22%20cx%3D%22118%22%20cy%3D%22196%22%20rx%3D%2268%22%20ry%3D%2228%22%2F%3E%3Cellipse%20fill%3D%22%23738223%22%20cx%3D%227%22%20cy%3D%22196%22%20rx%3D%2247%22%20ry%3D%2247%22%2F%3E%3Cellipse%20fill%3D%22%23b6b6b8%22%20rx%3D%221%22%20ry%3D%221%22%20transform%3D%22rotate(63.2%20-52.4%2034)%20scale(25.51883%2018.03701)%22%2F%3E%3Cellipse%20fill%3D%22%23343b0a%22%20rx%3D%221%22%20ry%3D%221%22%20transform%3D%22rotate(58.2%20-113.2%20129.8)%20scale(30.78205%2018.69326)%22%2F%3E%3Cellipse%20fill%3D%22%23b6b6b7%22%20cx%3D%22252%22%20cy%3D%22118%22%20rx%3D%2220%22%20ry%3D%2218%22%2F%3E%3Cellipse%20fill%3D%22%23605d70%22%20rx%3D%221%22%20ry%3D%221%22%20transform%3D%22matrix(-19.5629%20-15.39448%2040.95765%20-52.04788%2049.9%2094.5)%22%2F%3E%3Cellipse%20fill%3D%22%2357536a%22%20rx%3D%221%22%20ry%3D%221%22%20transform%3D%22rotate(-114.1%20145.4%204.6)%20scale(77.80579%2017.73809)%22%2F%3E%3C%2Fg%3E%3C%2Fsvg%3E) Terrain & Scenery
Terrain & ScenerySet Of 5 Linear Slope for Modular Gaming Hills Series 28mm Scale
A set of 5 linear slope pieces that goes between corner pieces for modular hills series. Printed with PLA all white, ready to become your next DIY project.
(0 reviews) -
%22%20transform%3D%22translate(.6%20.6)%20scale(1.17188)%22%20fill-opacity%3D%22.5%22%3E%3Cellipse%20fill%3D%22%23d2d7f5%22%20rx%3D%221%22%20ry%3D%221%22%20transform%3D%22matrix(156.217%201.99805%20-.85848%2067.12017%20153.6%200)%22%2F%3E%3Cpath%20fill%3D%22%23454a00%22%20d%3D%22M37.2%20110.4l218-3.8%201.6%2095-218%203.8z%22%2F%3E%3Cellipse%20fill%3D%22%23cd7b4c%22%20cx%3D%22161%22%20cy%3D%2286%22%20rx%3D%2287%22%20ry%3D%2233%22%2F%3E%3Cellipse%20fill%3D%22%23637d23%22%20rx%3D%221%22%20ry%3D%221%22%20transform%3D%22rotate(-31.4%20222.9%2025)%20scale(53.84018%2074.48423)%22%2F%3E%3Cellipse%20fill%3D%22%23dfdfe4%22%20rx%3D%221%22%20ry%3D%221%22%20transform%3D%22matrix(93.5321%20-6.42919%201.89624%2027.58655%20122.4%200)%22%2F%3E%3Cellipse%20fill%3D%22%23959c9f%22%20rx%3D%221%22%20ry%3D%221%22%20transform%3D%22matrix(7.18468%20-26.08382%2071.06272%2019.57393%2081.2%2051)%22%2F%3E%3Cellipse%20fill%3D%22%23959983%22%20cx%3D%22223%22%20cy%3D%2250%22%20rx%3D%22114%22%20ry%3D%2224%22%2F%3E%3Cellipse%20fill%3D%22%234c540e%22%20cy%3D%2288%22%20rx%3D%2228%22%20ry%3D%2235%22%2F%3E%3Cellipse%20fill%3D%22%239f4d24%22%20cx%3D%22158%22%20cy%3D%22114%22%20rx%3D%2244%22%20ry%3D%2223%22%2F%3E%3Cellipse%20fill%3D%22%23cba760%22%20rx%3D%221%22%20ry%3D%221%22%20transform%3D%22matrix(45.94907%20-13.08894%205.26894%2018.49677%20167.3%2069.2)%22%2F%3E%3Cellipse%20fill%3D%22%23a95c30%22%20rx%3D%221%22%20ry%3D%221%22%20transform%3D%22matrix(-47.98028%20-10.30174%203.75584%20-17.49277%20240.1%2096)%22%2F%3E%3Cellipse%20fill%3D%22%23d5d5da%22%20rx%3D%221%22%20ry%3D%221%22%20transform%3D%22matrix(-.494%2013.47203%20-46.82224%20-1.7169%20249.3%2011.7)%22%2F%3E%3Cellipse%20fill%3D%22%23998e4f%22%20rx%3D%221%22%20ry%3D%221%22%20transform%3D%22rotate(164.5%2021.2%2061)%20scale(39.96858%2013.16122)%22%2F%3E%3Cellipse%20fill%3D%22%23f5f5f5%22%20cx%3D%22105%22%20cy%3D%224%22%20rx%3D%2242%22%20ry%3D%2210%22%2F%3E%3Cellipse%20fill%3D%22%23a0a4a9%22%20rx%3D%221%22%20ry%3D%221%22%20transform%3D%22matrix(-4.1585%20-20.20847%2040.67657%20-8.37043%20107.5%2056.2)%22%2F%3E%3C%2Fg%3E%3C%2Fsvg%3E) Terrain & Scenery
Terrain & SceneryCave Entrance For Modular Gaming Hills Series 28mm Scale
Cave entrance for modular hills series. It comes in one piece and clips to attach to the gaming series hills.
(0 reviews) -
%22%20transform%3D%22translate(.6%20.6)%20scale(1.17188)%22%20fill-opacity%3D%22.5%22%3E%3Cellipse%20fill%3D%22%23eeeff0%22%20rx%3D%221%22%20ry%3D%221%22%20transform%3D%22matrix(-43.9748%20-45.9483%20130.11147%20-124.52312%20184.3%20190.3)%22%2F%3E%3Cellipse%20fill%3D%22%23626364%22%20rx%3D%221%22%20ry%3D%221%22%20transform%3D%22matrix(-42.16386%20-31.31365%20101.15889%20-136.21056%20153.8%2015.3)%22%2F%3E%3Cpath%20fill%3D%22%23646565%22%20d%3D%22M196.2%2058.3L191-15.5l68.8-4.8%205.2%2073.8z%22%2F%3E%3Cellipse%20fill%3D%22%23f8f8f8%22%20rx%3D%221%22%20ry%3D%221%22%20transform%3D%22matrix(-6.36825%20-18.3827%2073.48976%20-25.45876%20235.9%20176)%22%2F%3E%3Cellipse%20fill%3D%22%23d69634%22%20rx%3D%221%22%20ry%3D%221%22%20transform%3D%22matrix(-4.95855%20-21.02812%2050.7431%20-11.96552%200%205.6)%22%2F%3E%3Cellipse%20fill%3D%22%234a4a4a%22%20rx%3D%221%22%20ry%3D%221%22%20transform%3D%22matrix(-10.44551%2024.15169%20-13.8407%20-5.98605%20113.7%2058.7)%22%2F%3E%3Cellipse%20fill%3D%22%236e706d%22%20rx%3D%221%22%20ry%3D%221%22%20transform%3D%22matrix(8.25686%20-18.5452%2056.72812%2025.25699%2071.3%201)%22%2F%3E%3Cpath%20fill%3D%22%23a9aaab%22%20d%3D%22M40.3%20137.7l30-33.2L25%2034.2-4.5%20207z%22%2F%3E%3Cellipse%20fill%3D%22%23a5a6a7%22%20rx%3D%221%22%20ry%3D%221%22%20transform%3D%22matrix(41.78226%20-43.4286%2016.45718%2015.8333%20167.7%20105.1)%22%2F%3E%3Cpath%20fill%3D%22%23676768%22%20d%3D%22M14%2041v40H-4V41z%22%2F%3E%3Cellipse%20fill%3D%22%23bdbdbd%22%20cx%3D%22223%22%20cy%3D%22113%22%20rx%3D%2240%22%20ry%3D%2240%22%2F%3E%3Cpath%20fill%3D%22%23dedfdf%22%20d%3D%22M13.8%20177.3l.3%2017-28%20.4-.2-17z%22%2F%3E%3Cpath%20fill%3D%22%239d9d9e%22%20d%3D%22M228%2054h28v21h-28z%22%2F%3E%3Cellipse%20fill%3D%22%23808081%22%20cx%3D%22203%22%20cy%3D%2244%22%20rx%3D%2238%22%20ry%3D%2218%22%2F%3E%3Cellipse%20fill%3D%22%23b9baba%22%20rx%3D%221%22%20ry%3D%221%22%20transform%3D%22matrix(-61.32658%2045.54514%20-14.11252%20-19.00253%20134.8%20177.2)%22%2F%3E%3C%2Fg%3E%3C%2Fsvg%3E) Terrain & Scenery
Terrain & ScenerySamurai Stone Wall Gate From Old Japan 28mm Scale
Walls to surround residential houses of samurai and local wealthy landowners in Japan.
(1 review) -
%22%20transform%3D%22translate(.6%20.6)%20scale(1.17188)%22%20fill-opacity%3D%22.5%22%3E%3Cellipse%20fill%3D%22%23797979%22%20rx%3D%221%22%20ry%3D%221%22%20transform%3D%22rotate(82.3%2023.9%20115.1)%20scale(39.96497%20125.42801)%22%2F%3E%3Cellipse%20fill%3D%22%230a0a0a%22%20rx%3D%221%22%20ry%3D%221%22%20transform%3D%22matrix(-239.08225%2062.44476%20-12.09023%20-46.28988%20115%20187.6)%22%2F%3E%3Cellipse%20fill%3D%22%23050505%22%20cx%3D%2264%22%20rx%3D%22119%22%20ry%3D%2235%22%2F%3E%3Cellipse%20fill%3D%22%23424242%22%20rx%3D%221%22%20ry%3D%221%22%20transform%3D%22matrix(11.77189%2021.2262%20-59.89992%2033.22002%20116.6%20125.8)%22%2F%3E%3Cellipse%20fill%3D%22%236b6b6b%22%20cx%3D%2268%22%20cy%3D%2286%22%20rx%3D%2245%22%20ry%3D%2245%22%2F%3E%3Cellipse%20fill%3D%22%23353535%22%20cx%3D%22109%22%20cy%3D%2237%22%20rx%3D%2268%22%20ry%3D%2217%22%2F%3E%3Cellipse%20fill%3D%22%23969696%22%20cx%3D%22201%22%20cy%3D%2261%22%20rx%3D%2218%22%20ry%3D%2214%22%2F%3E%3Cellipse%20fill%3D%22%23050505%22%20rx%3D%221%22%20ry%3D%221%22%20transform%3D%22matrix(28.13022%20.21565%20-.3188%2041.58523%202.7%2013)%22%2F%3E%3Cellipse%20fill%3D%22%23101010%22%20rx%3D%221%22%20ry%3D%221%22%20transform%3D%22rotate(85%20-83%2086.5)%20scale(11.91928%2036.87814)%22%2F%3E%3Cellipse%20fill%3D%22%23323232%22%20cx%3D%22161%22%20cy%3D%22108%22%20rx%3D%2251%22%20ry%3D%2220%22%2F%3E%3Cpath%20fill%3D%22%23666%22%20d%3D%22M104%2068h152v21H104z%22%2F%3E%3Cellipse%20fill%3D%22%23070707%22%20cx%3D%22244%22%20rx%3D%2226%22%20ry%3D%2214%22%2F%3E%3Cpath%20fill%3D%22%23595959%22%20d%3D%22M110%2098L87%2026H36z%22%2F%3E%3Cpath%20fill%3D%22%239c9c9c%22%20d%3D%22M55%2068h13v21H55z%22%2F%3E%3Cellipse%20fill%3D%22%231c1c1c%22%20cx%3D%22184%22%20cy%3D%22143%22%20rx%3D%2254%22%20ry%3D%2228%22%2F%3E%3C%2Fg%3E%3C%2Fsvg%3E) Sci-Fi
Sci-FiOrbital Outpost Walkways Complete Set 28mm
Origins range and contains pieces for you to build huge structures for your base. All walkways are based on a 1 inch grid. Great for providing endless varieties of multi elevation cover or used as a quick and easy-to-print start to your next sci-fi dungeon crawl.
These walkway components are designed to allow for unlimited build combinations each time you set up your gaming table.
(0 reviews) -
%22%20transform%3D%22translate(.6%20.6)%20scale(1.17188)%22%20fill-opacity%3D%22.5%22%3E%3Cellipse%20fill%3D%22%23919191%22%20rx%3D%221%22%20ry%3D%221%22%20transform%3D%22matrix(94.42638%2042.42883%20-21.13877%2047.04484%20145%2097.3)%22%2F%3E%3Cellipse%20fill%3D%22%23010101%22%20rx%3D%221%22%20ry%3D%221%22%20transform%3D%22matrix(254.9944%201.6897%20-.1202%2018.13976%2074.9%209.5)%22%2F%3E%3Cellipse%20fill%3D%22%23050505%22%20rx%3D%221%22%20ry%3D%221%22%20transform%3D%22matrix(-27.548%202.7011%20-23.53826%20-240.06175%2015.4%20110.4)%22%2F%3E%3Cellipse%20rx%3D%221%22%20ry%3D%221%22%20transform%3D%22matrix(-33.2248%207.75159%20-11.33225%20-48.57224%20245.5%2026.3)%22%2F%3E%3Cellipse%20fill%3D%22%237b7b7b%22%20rx%3D%221%22%20ry%3D%221%22%20transform%3D%22matrix(-27.98561%20-.93229%204.02026%20-120.68135%20170.4%2054.7)%22%2F%3E%3Cellipse%20fill%3D%22%23929292%22%20rx%3D%221%22%20ry%3D%221%22%20transform%3D%22rotate(-163.1%2094.6%2043.4)%20scale(48.37132%2031.0115)%22%2F%3E%3Cellipse%20fill%3D%22%23515151%22%20cx%3D%2243%22%20cy%3D%2279%22%20rx%3D%2226%22%20ry%3D%2243%22%2F%3E%3Cellipse%20fill%3D%22%23515151%22%20rx%3D%221%22%20ry%3D%221%22%20transform%3D%22matrix(-6.82682%2020.05895%20-70.46254%20-23.98106%20147.2%2050.3)%22%2F%3E%3Cellipse%20fill%3D%22%233d3d3d%22%20cx%3D%2289%22%20cy%3D%22158%22%20rx%3D%2252%22%20ry%3D%2270%22%2F%3E%3Cellipse%20fill%3D%22%238e8e8e%22%20rx%3D%221%22%20ry%3D%221%22%20transform%3D%22matrix(21.90608%2010.68431%20-8.1135%2016.63512%2090.4%2069)%22%2F%3E%3Cpath%20fill%3D%22%23b5b5b5%22%20d%3D%22M170%20106h21v25h-21z%22%2F%3E%3Cellipse%20cx%3D%22250%22%20cy%3D%224%22%20rx%3D%2226%22%20ry%3D%2232%22%2F%3E%3Cpath%20fill%3D%22%232c2c2c%22%20d%3D%22M219.5%2018.1l-88.9%204.7-2.1-41%2088.9-4.6z%22%2F%3E%3Cpath%20d%3D%22M50.9%204.4L-2.6%2031.7-18.9-.4l53.5-27.3z%22%2F%3E%3Cellipse%20fill%3D%22%233f3f3f%22%20rx%3D%221%22%20ry%3D%221%22%20transform%3D%22matrix(-39.67681%2092.6624%20-24.22496%20-10.3728%20239%20153)%22%2F%3E%3C%2Fg%3E%3C%2Fsvg%3E) Sci-Fi
Sci-FiOrbital Outpost Hub Starter Set 28mm
Orbital Outpost Hub Starter Set. It can be stacked using the inbuilt location guides. There’s a removable floor grate inside to allow your colonists access to other levels via the internal ladder. The detachable roof houses the basic life support equipment needed for colonization.
(1 review) -
%22%20transform%3D%22translate(.6%20.6)%20scale(1.17188)%22%20fill-opacity%3D%22.5%22%3E%3Cellipse%20fill%3D%22%23c5d2d2%22%20rx%3D%221%22%20ry%3D%221%22%20transform%3D%22rotate(158.8%2087%20106.2)%20scale(113.51515%2038.40589)%22%2F%3E%3Cellipse%20fill%3D%22%233e4145%22%20rx%3D%221%22%20ry%3D%221%22%20transform%3D%22matrix(-10.3351%20-19.76923%2061.59309%20-32.20009%20216.3%2071.8)%22%2F%3E%3Cellipse%20fill%3D%22%23cf6451%22%20rx%3D%221%22%20ry%3D%221%22%20transform%3D%22matrix(.47876%20-29.93187%2095.01514%201.51975%2078%2083)%22%2F%3E%3Cellipse%20fill%3D%22%23c3d1cb%22%20cx%3D%22202%22%20cy%3D%221%22%20rx%3D%22103%22%20ry%3D%2226%22%2F%3E%3Cellipse%20fill%3D%22%235376db%22%20rx%3D%221%22%20ry%3D%221%22%20transform%3D%22matrix(.05598%20-15.89443%2044.17812%20.15558%2060.5%203.5)%22%2F%3E%3Cellipse%20fill%3D%22%23d2d2d2%22%20rx%3D%221%22%20ry%3D%221%22%20transform%3D%22matrix(-7.97896%20-24.46837%2056.76536%20-18.51076%20231%20180)%22%2F%3E%3Cellipse%20fill%3D%22%23abb8b8%22%20rx%3D%221%22%20ry%3D%221%22%20transform%3D%22rotate(-103%2072%2086.7)%20scale(50.94069%2029.00231)%22%2F%3E%3Cellipse%20fill%3D%22%23ae5a8b%22%20rx%3D%221%22%20ry%3D%221%22%20transform%3D%22matrix(-38.87486%20-21.93125%2014.28726%20-25.3253%20128.3%2073.1)%22%2F%3E%3Cellipse%20fill%3D%22%23ae782b%22%20cx%3D%2262%22%20cy%3D%2290%22%20rx%3D%2241%22%20ry%3D%2220%22%2F%3E%3Cellipse%20fill%3D%22%23dcb46a%22%20rx%3D%221%22%20ry%3D%221%22%20transform%3D%22matrix(-11.01573%20-20.37317%2027.2223%20-14.71905%2010.5%2078.3)%22%2F%3E%3Cellipse%20fill%3D%22%23727d7d%22%20rx%3D%221%22%20ry%3D%221%22%20transform%3D%22matrix(8.24131%2023.87183%20-122.4614%2042.27755%20155.6%20132.9)%22%2F%3E%3Cpath%20fill%3D%22%23989999%22%20d%3D%22M115.5%20203l-12.1-28.6L252.5%20111l12.1%2028.5z%22%2F%3E%3Cellipse%20fill%3D%22%23d2d6c3%22%20rx%3D%221%22%20ry%3D%221%22%20transform%3D%22rotate(2.7%2084.2%204353.3)%20scale(53.20224%2013.04908)%22%2F%3E%3Cellipse%20fill%3D%22%23767f83%22%20rx%3D%221%22%20ry%3D%221%22%20transform%3D%22rotate(97.7%203%2035.8)%20scale(23.89597%2034.93641)%22%2F%3E%3Cellipse%20fill%3D%22%23bc547c%22%20cx%3D%2286%22%20cy%3D%22118%22%20rx%3D%2224%22%20ry%3D%2211%22%2F%3E%3C%2Fg%3E%3C%2Fsvg%3E) Terrain & Scenery
Terrain & SceneryLarge Torii Gates From Old Japan 28mm Scale
Torii gate adorned with support posts and ropes. Can be fitted with one of two top beams; plain version or rooftile version. The items comes printed all white, unpainted.
(1 review) -
%22%20transform%3D%22translate(.6%20.6)%20scale(1.17188)%22%20fill-opacity%3D%22.5%22%3E%3Cellipse%20cx%3D%2261%22%20rx%3D%22255%22%20ry%3D%2241%22%2F%3E%3Cpath%20fill%3D%22%237a7778%22%20d%3D%22M-16%2087l237%2089%205-127z%22%2F%3E%3Cellipse%20fill%3D%22%23961843%22%20rx%3D%221%22%20ry%3D%221%22%20transform%3D%22rotate(145.3%20102%20106.6)%20scale(46.93053%2029.05803)%22%2F%3E%3Cpath%20d%3D%22M130-16L-16%2074v-90z%22%2F%3E%3Cellipse%20fill%3D%22%23050706%22%20rx%3D%221%22%20ry%3D%221%22%20transform%3D%22matrix(-61.11391%20-25.31421%2013.7418%20-33.17563%20252.4%2010.8)%22%2F%3E%3Cpath%20fill%3D%22%23545655%22%20d%3D%22M203.5%2027v12h-95V27z%22%2F%3E%3Cellipse%20fill%3D%22%23666a69%22%20cx%3D%2259%22%20cy%3D%2292%22%20rx%3D%2232%22%20ry%3D%2232%22%2F%3E%3Cellipse%20fill%3D%22%23333635%22%20rx%3D%221%22%20ry%3D%221%22%20transform%3D%22rotate(-70.4%2072.9%2040.1)%20scale(81.89914%2015.74837)%22%2F%3E%3Cellipse%20rx%3D%221%22%20ry%3D%221%22%20transform%3D%22matrix(-79.27483%2010.08524%20-2.58858%20-20.34748%2040.4%200)%22%2F%3E%3Cpath%20fill%3D%22%233c2a30%22%20d%3D%22M189%20156.5h32v21h-32z%22%2F%3E%3Cpath%20fill%3D%22%232f3030%22%20d%3D%22M196.4%2010.1l33.2%2089.7-2.2-64%2043.6-17z%22%2F%3E%3Cellipse%20fill%3D%22%23606363%22%20cx%3D%22151%22%20cy%3D%22102%22%20rx%3D%2275%22%20ry%3D%2248%22%2F%3E%3Cpath%20d%3D%22M189.3%204.4l3.4-21.8%2082%2013-3.4%2021.8z%22%2F%3E%3Cellipse%20fill%3D%22%23242525%22%20rx%3D%221%22%20ry%3D%221%22%20transform%3D%22rotate(-18.1%20115.9%20-107.1)%20scale(51.40499%207.5989)%22%2F%3E%3Cellipse%20fill%3D%22%2399566d%22%20rx%3D%221%22%20ry%3D%221%22%20transform%3D%22matrix(-6.38134%20-5.26037%208.06172%20-9.77965%20215.2%20139.9)%22%2F%3E%3C%2Fg%3E%3C%2Fsvg%3E) Sci-Fi
Sci-FiLab Speciment Container Sci-Fi Scatter Terrain 28mm – 32mm Scale
Listing for Lab Speciment Container. Perfect for Warhammer 40k terrain and Star wars legion scenery.
(1 review) -
%22%20transform%3D%22translate(.6%20.6)%20scale(1.17188)%22%20fill-opacity%3D%22.5%22%3E%3Cellipse%20fill%3D%22%23979797%22%20rx%3D%221%22%20ry%3D%221%22%20transform%3D%22matrix(11.20804%20-32.87928%2052.7565%2017.98388%20127.5%20101.4)%22%2F%3E%3Cellipse%20fill%3D%22%23fff%22%20rx%3D%221%22%20ry%3D%221%22%20transform%3D%22matrix(40.3567%20-10.36184%2061.99154%20241.4411%20242%2087.5)%22%2F%3E%3Cellipse%20fill%3D%22%23fff%22%20cx%3D%222%22%20cy%3D%22110%22%20rx%3D%2246%22%20ry%3D%22255%22%2F%3E%3Cellipse%20fill%3D%22%23cacaca%22%20cx%3D%22105%22%20cy%3D%2295%22%20rx%3D%2265%22%20ry%3D%2265%22%2F%3E%3Cellipse%20fill%3D%22%23fff%22%20cx%3D%22120%22%20cy%3D%2216%22%20rx%3D%22255%22%20ry%3D%2219%22%2F%3E%3Cellipse%20fill%3D%22%23fff%22%20cx%3D%22117%22%20cy%3D%22185%22%20rx%3D%22255%22%20ry%3D%2223%22%2F%3E%3Cellipse%20fill%3D%22%23cdcdcd%22%20rx%3D%221%22%20ry%3D%221%22%20transform%3D%22matrix(-27.32344%202.71992%20-5.22211%20-52.45957%20181.7%20105.2)%22%2F%3E%3Cellipse%20fill%3D%22%23fff%22%20rx%3D%221%22%20ry%3D%221%22%20transform%3D%22rotate(7.2%20-1030.3%201916.7)%20scale(26.20196%20249.68946)%22%2F%3E%3Cellipse%20fill%3D%22%23fff%22%20rx%3D%221%22%20ry%3D%221%22%20transform%3D%22rotate(20.1%20-439.8%20267.7)%20scale(107.3134%2019.80125)%22%2F%3E%3Cellipse%20fill%3D%22%23fff%22%20rx%3D%221%22%20ry%3D%221%22%20transform%3D%22matrix(155.7376%20-8.2766%201.7637%2033.18676%20145.6%200)%22%2F%3E%3Cellipse%20fill%3D%22%23b9b9b9%22%20rx%3D%221%22%20ry%3D%221%22%20transform%3D%22matrix(10.58276%20-26.72901%2044.51003%2017.62277%20131.8%20100)%22%2F%3E%3Cellipse%20fill%3D%22%23fff%22%20rx%3D%221%22%20ry%3D%221%22%20transform%3D%22rotate(-75.5%2050.2%2012.8)%20scale(185.94553%2025.06251)%22%2F%3E%3Cpath%20fill%3D%22%23d9d9d9%22%20d%3D%22M205%20119L91%20163h81z%22%2F%3E%3Cellipse%20fill%3D%22%23fff%22%20rx%3D%221%22%20ry%3D%221%22%20transform%3D%22matrix(-11.31793%20-21.1155%2090.12128%20-48.3051%20208%20170.5)%22%2F%3E%3Cellipse%20fill%3D%22%23fff%22%20rx%3D%221%22%20ry%3D%221%22%20transform%3D%22matrix(22.90198%20-23.84685%2055.19553%2053.00856%20226.2%2050)%22%2F%3E%3C%2Fg%3E%3C%2Fsvg%3E) Terrain & Scenery
Terrain & SceneryGoblin Hut For Tabletop Gaming
Miniature Goblin Hut for your goblin scenery. It’s scaled for 28mm-32mm (or “Heroic” scale”) gaming and are great for wargaming or for scenics in your RPG encounters. This piece is designed to fit within 1″ grid cells if you use a grid map, and can be thrown down as scatter terrain in “free range” games.
(1 review) -
%22%20transform%3D%22translate(.6%20.6)%20scale(1.17188)%22%20fill-opacity%3D%22.5%22%3E%3Cpath%20fill%3D%22%23263200%22%20d%3D%22M84.4%2016.3l-90%2081-42.8-47.6%2090-81z%22%2F%3E%3Cellipse%20fill%3D%22%23635e79%22%20rx%3D%221%22%20ry%3D%221%22%20transform%3D%22matrix(-3.17957%2059.65432%20-124.12371%20-6.61579%20132.5%2092)%22%2F%3E%3Cellipse%20fill%3D%22%2364740d%22%20rx%3D%221%22%20ry%3D%221%22%20transform%3D%22matrix(191.31238%2067.49846%20-10.4321%2029.56794%2017.7%20161)%22%2F%3E%3Cellipse%20fill%3D%22%2364740c%22%20cx%3D%22205%22%20cy%3D%2216%22%20rx%3D%2257%22%20ry%3D%2234%22%2F%3E%3Cpath%20fill%3D%22%2364740e%22%20d%3D%22M170%20247.4l-34.7-71L262%20114.6l34.7%2071z%22%2F%3E%3Cpath%20fill%3D%22%23485700%22%20d%3D%22M-16%201l191-14-191%2080z%22%2F%3E%3Cellipse%20fill%3D%22%2362616b%22%20rx%3D%221%22%20ry%3D%221%22%20transform%3D%22matrix(1.0262%2016.51976%20-38.45208%202.38864%20135%20156.6)%22%2F%3E%3Cpath%20fill%3D%22%236a7628%22%20d%3D%22M188%201L75-4l1%2034z%22%2F%3E%3Cellipse%20fill%3D%22%23373440%22%20rx%3D%221%22%20ry%3D%221%22%20transform%3D%22matrix(46.07075%20-45.51829%206.99517%207.08007%202.5%2086.5)%22%2F%3E%3Cellipse%20fill%3D%22%23616163%22%20cx%3D%22243%22%20cy%3D%2277%22%20rx%3D%22187%22%20ry%3D%2230%22%2F%3E%3Cellipse%20fill%3D%22%23625f71%22%20cx%3D%22120%22%20cy%3D%2230%22%20rx%3D%2237%22%20ry%3D%2210%22%2F%3E%3Cellipse%20fill%3D%22%233c4600%22%20rx%3D%221%22%20ry%3D%221%22%20transform%3D%22matrix(9.95717%2028.96165%20-50.12124%2017.23196%2024%2017.8)%22%2F%3E%3Cpath%20fill%3D%22%23616065%22%20d%3D%22M8%20114l-24%206%2093.2-87.4-33.6%20108z%22%2F%3E%3Cellipse%20fill%3D%22%23606d23%22%20rx%3D%221%22%20ry%3D%221%22%20transform%3D%22rotate(45.1%20-157.6%20168.4)%20scale(30.11513%2020.38907)%22%2F%3E%3Cpath%20fill%3D%22%235f6b23%22%20d%3D%22M130.5%206.5L161.7-16l38.7%2070.2-13.7%202.5z%22%2F%3E%3C%2Fg%3E%3C%2Fsvg%3E) Terrain & Scenery
Terrain & SceneryFantasy viking palisade 28mm terrain scale
This is a set of 8 walls with irregular stone work and holes for the pin in each end (7 pins included). This palisade is perfect to surround your fantasy village. The items will come unpainted.
(0 reviews) -
%22%20transform%3D%22translate(.6%20.6)%20scale(1.17188)%22%20fill-opacity%3D%22.5%22%3E%3Cpath%20fill%3D%22%2386819f%22%20d%3D%22M265%2056L154%20197l-93-60z%22%2F%3E%3Cellipse%20fill%3D%22%234e5c09%22%20rx%3D%221%22%20ry%3D%221%22%20transform%3D%22matrix(-46.45738%2010.34797%20-23.743%20-106.59463%2016.4%20106.4)%22%2F%3E%3Cellipse%20fill%3D%22%234d5819%22%20rx%3D%221%22%20ry%3D%221%22%20transform%3D%22matrix(12.90191%2025.58888%20-142.2381%2071.71646%20213.8%20167)%22%2F%3E%3Cellipse%20fill%3D%22%234d4967%22%20rx%3D%221%22%20ry%3D%221%22%20transform%3D%22rotate(-90.5%20146%2024.6)%20scale(14.99343%2057.17098)%22%2F%3E%3Cpath%20fill%3D%22%238b9945%22%20d%3D%22M134%20129l137-92L15-16z%22%2F%3E%3Cpath%20fill%3D%22%23acabb5%22%20d%3D%22M222%20106l-60%2018%2054-57z%22%2F%3E%3Cellipse%20fill%3D%22%234e5c0b%22%20rx%3D%221%22%20ry%3D%221%22%20transform%3D%22matrix(-24.03133%20-18.9788%2015.55782%20-19.69961%20247.5%2014.1)%22%2F%3E%3Cellipse%20fill%3D%22%23556215%22%20rx%3D%221%22%20ry%3D%221%22%20transform%3D%22matrix(-3.23691%20-22.74373%2024.75672%20-3.5234%2066.6%2069.8)%22%2F%3E%3Cellipse%20fill%3D%22%2387963c%22%20rx%3D%221%22%20ry%3D%221%22%20transform%3D%22matrix(-9.42596%20-33.33179%2016.80562%20-4.7525%20244.6%2078.8)%22%2F%3E%3Cellipse%20fill%3D%22%2383828b%22%20rx%3D%221%22%20ry%3D%221%22%20transform%3D%22matrix(4.35092%2021.38547%20-49.11508%209.99258%20168.2%20133.7)%22%2F%3E%3Cellipse%20fill%3D%22%238d9859%22%20rx%3D%221%22%20ry%3D%221%22%20transform%3D%22matrix(16.54252%20-19.24812%2013.1597%2011.30992%2081%20114)%22%2F%3E%3Cpath%20fill%3D%22%238c9a48%22%20d%3D%22M220-4.7l-3.6%2028.8-76.4-9.4%203.6-28.8z%22%2F%3E%3Cellipse%20fill%3D%22%2382818d%22%20cx%3D%22106%22%20cy%3D%22133%22%20rx%3D%2228%22%20ry%3D%2219%22%2F%3E%3Cpath%20fill%3D%22%2357546a%22%20d%3D%22M68%20150h27v32H68z%22%2F%3E%3Cpath%20fill%3D%22%23818d44%22%20d%3D%22M81%2080h95v36H81z%22%2F%3E%3C%2Fg%3E%3C%2Fsvg%3E) Sci-Fi
Sci-FiSet Of 4 Corner Pieces For Modular Gaming Hills Series 28mm Scale
A set of pieces to build hills for wargaming and roleplaying games.
(0 reviews) -
%22%20transform%3D%22translate(.6%20.6)%20scale(1.17188)%22%20fill-opacity%3D%22.5%22%3E%3Cellipse%20fill%3D%22%239aa19f%22%20rx%3D%221%22%20ry%3D%221%22%20transform%3D%22matrix(-8.38645%20-71.39043%2033.56452%20-3.94292%20123.7%20103)%22%2F%3E%3Cellipse%20fill%3D%22%23111514%22%20cx%3D%22226%22%20cy%3D%229%22%20rx%3D%2278%22%20ry%3D%2226%22%2F%3E%3Cellipse%20fill%3D%22%23232a28%22%20cx%3D%227%22%20cy%3D%22100%22%20rx%3D%2227%22%20ry%3D%22255%22%2F%3E%3Cellipse%20fill%3D%22%2333282c%22%20rx%3D%221%22%20ry%3D%221%22%20transform%3D%22matrix(-95.3928%20131.29693%20-25.92723%20-18.83724%20230%20168.8)%22%2F%3E%3Cellipse%20fill%3D%22%23a83059%22%20rx%3D%221%22%20ry%3D%221%22%20transform%3D%22matrix(-14.00938%2027.02684%20-35.61324%20-18.46015%20251.8%2065.5)%22%2F%3E%3Cpath%20fill%3D%22%23b34144%22%20d%3D%22M108.5%2027.3l32.8-7.7%2022-25.8L50.6-4.4z%22%2F%3E%3Cellipse%20fill%3D%22%230b0d0c%22%20rx%3D%221%22%20ry%3D%221%22%20transform%3D%22matrix(-59.09943%20-12.02391%203.5091%20-17.24782%20237.9%201)%22%2F%3E%3Cpath%20fill%3D%22%23666c6a%22%20d%3D%22M212%2021l8%20129-117%2057z%22%2F%3E%3Cellipse%20fill%3D%22%237f183b%22%20rx%3D%221%22%20ry%3D%221%22%20transform%3D%22rotate(74.3%2052.9%20215.6)%20scale(23.98729%2013.93491)%22%2F%3E%3Cellipse%20fill%3D%22%232e3130%22%20cx%3D%2226%22%20rx%3D%2228%22%20ry%3D%2236%22%2F%3E%3Cellipse%20fill%3D%22%23646867%22%20rx%3D%221%22%20ry%3D%221%22%20transform%3D%22matrix(-26.0003%201.93763%20-8.82872%20-118.46941%2073.2%20109)%22%2F%3E%3Cellipse%20fill%3D%22%23323635%22%20rx%3D%221%22%20ry%3D%221%22%20transform%3D%22rotate(175.4%2014.4%2096.2)%20scale(17.97789%2033.40256)%22%2F%3E%3Cpath%20fill%3D%22%23888787%22%20d%3D%22M96%20122h66v36H96z%22%2F%3E%3Cpath%20fill%3D%22%23686c6b%22%20d%3D%22M29.6%2049.2l11-5.8%2010%2056.2-31.7-42z%22%2F%3E%3Cpath%20fill%3D%22%23494144%22%20d%3D%22M158.7%203.8L262%2027.7l-4.7%2020.5L154%2024.3z%22%2F%3E%3C%2Fg%3E%3C%2Fsvg%3E) Sci-Fi
Sci-FiThe Dreaded Ambull Compatible Tokens & Markers Set
“An Ambull is a massively built, roughly humanoid xenos creature with an insect-
like armoured carapace and oversized arms tipped with iron-hard claws.” (0 reviews) -
%22%20transform%3D%22translate(.6%20.6)%20scale(1.17188)%22%20fill-opacity%3D%22.5%22%3E%3Cellipse%20fill%3D%22%23929292%22%20cx%3D%22135%22%20cy%3D%22113%22%20rx%3D%2281%22%20ry%3D%2257%22%2F%3E%3Cellipse%20fill%3D%22%23fff%22%20cx%3D%222%22%20cy%3D%2221%22%20rx%3D%22151%22%20ry%3D%2251%22%2F%3E%3Cellipse%20fill%3D%22%23f5f5f5%22%20rx%3D%221%22%20ry%3D%221%22%20transform%3D%22matrix(130.97429%20218.79382%20-36.6533%2021.94138%200%20109.8)%22%2F%3E%3Cellipse%20fill%3D%22%238f8f8f%22%20rx%3D%221%22%20ry%3D%221%22%20transform%3D%22matrix(54.5836%20-2.62593%201.55466%2032.31576%20129%20107)%22%2F%3E%3Cpath%20fill%3D%22%23fff%22%20d%3D%22M36-11L11%2045%20224-1z%22%2F%3E%3Cellipse%20fill%3D%22%23e5e5e5%22%20rx%3D%221%22%20ry%3D%221%22%20transform%3D%22matrix(-52.5655%203.6048%20-17.20906%20-250.94421%20237.3%2091.5)%22%2F%3E%3Cpath%20fill%3D%22%23ddd%22%20d%3D%22M271%20182l-281%2025%2029-86z%22%2F%3E%3Cpath%20fill%3D%22%23d1d1d1%22%20d%3D%22M20.5%2040.5h175v33h-175z%22%2F%3E%3Cellipse%20fill%3D%22%23fff%22%20cx%3D%224%22%20cy%3D%2297%22%20rx%3D%2210%22%20ry%3D%2257%22%2F%3E%3Cellipse%20fill%3D%22%23b4b4b4%22%20rx%3D%221%22%20ry%3D%221%22%20transform%3D%22matrix(19.031%2042.50909%20-17.5723%207.86698%20193%2095.3)%22%2F%3E%3Cellipse%20fill%3D%22%23e0e0e0%22%20rx%3D%221%22%20ry%3D%221%22%20transform%3D%22matrix(8.42953%2022.07476%20-57.0015%2021.76676%20161.4%2023.6)%22%2F%3E%3Cellipse%20fill%3D%22%23fff%22%20cx%3D%2275%22%20cy%3D%2212%22%20rx%3D%2249%22%20ry%3D%2223%22%2F%3E%3Cellipse%20fill%3D%22%23c2c2c2%22%20rx%3D%221%22%20ry%3D%221%22%20transform%3D%22matrix(45.97407%20-19.23137%207.777%2018.59152%20172%20147)%22%2F%3E%3Cellipse%20fill%3D%22%23c4c4c4%22%20cx%3D%2267%22%20cy%3D%22106%22%20rx%3D%2215%22%20ry%3D%2239%22%2F%3E%3Cellipse%20fill%3D%22%23fff%22%20cx%3D%222%22%20cy%3D%2298%22%20rx%3D%2212%22%20ry%3D%2252%22%2F%3E%3C%2Fg%3E%3C%2Fsvg%3E) Terrain & Scenery
Terrain & SceneryGoblin Hut Type 4 For Tabletop Gaming
“Goblin hut is intrinsically better than pump as if your opponent opts to rush (with hog, battle ram, etc) you instead of spelling the pump, the goblin hut actually helps out a ton on defense unlike pump. Pump helps out plenty if left unspelled or even spelled, the extra elixer can easily help defend.”
(0 reviews) -
Terrain & Scenery
Sci Fi Barracks Set 28mm Scale
A perfect set for dressing up your outpost rooms. The sleeping area contains 6 bunk beds, a single bed, 6 single lockers, a sink and 2 groups of 3 lockers.
(2 reviews) -
%22%20transform%3D%22translate(.6%20.6)%20scale(1.17188)%22%20fill-opacity%3D%22.5%22%3E%3Cellipse%20fill%3D%22%23ececec%22%20rx%3D%221%22%20ry%3D%221%22%20transform%3D%22rotate(-49.5%20283.7%20-198.8)%20scale(51.39384%2069.27572)%22%2F%3E%3Cpath%20fill%3D%22%234d4d4d%22%20d%3D%22M195.1%2070.4l-12.4-88.1L273-30.4l12.4%2088.1z%22%2F%3E%3Cellipse%20fill%3D%22%23646464%22%20rx%3D%221%22%20ry%3D%221%22%20transform%3D%22rotate(-108.8%2030.1%20-7.3)%20scale(32.28429%20112.35357)%22%2F%3E%3Cpath%20fill%3D%22%23f9f9f9%22%20d%3D%22M277.4%20140.1l-52.7-6.4%204-31.8%2052.6%206.4z%22%2F%3E%3Cellipse%20fill%3D%22%234e4e4e%22%20rx%3D%221%22%20ry%3D%221%22%20transform%3D%22matrix(37.81616%2010.4163%20-6.70643%2024.34755%20237%207.8)%22%2F%3E%3Cellipse%20fill%3D%22%236d6d6d%22%20rx%3D%221%22%20ry%3D%221%22%20transform%3D%22rotate(11.7%20-648.3%20763.8)%20scale(20.82495%2011.46503)%22%2F%3E%3Cellipse%20fill%3D%22%236a6a6a%22%20cx%3D%22142%22%20cy%3D%2281%22%20rx%3D%2222%22%20ry%3D%228%22%2F%3E%3Cpath%20fill%3D%22%23878787%22%20d%3D%22M214%2068l57-5-118-79z%22%2F%3E%3Cellipse%20fill%3D%22%234e4e4e%22%20rx%3D%221%22%20ry%3D%221%22%20transform%3D%22matrix(-17.14454%205.70323%20-4.79217%20-14.4058%2087.2%20-.1)%22%2F%3E%3Cellipse%20fill%3D%22%23b6b6b6%22%20rx%3D%221%22%20ry%3D%221%22%20transform%3D%22matrix(-15.32707%204.52366%20-16.26183%20-55.09838%20203.6%20144.4)%22%2F%3E%3Cellipse%20fill%3D%22%23a5a5a5%22%20cx%3D%2263%22%20cy%3D%22104%22%20rx%3D%2264%22%20ry%3D%2264%22%2F%3E%3Cpath%20fill%3D%22%23a2a2a2%22%20d%3D%22M196%20207L134%2093l73%2056z%22%2F%3E%3Cellipse%20fill%3D%22%23a5a5a5%22%20rx%3D%221%22%20ry%3D%221%22%20transform%3D%22matrix(24.97713%20-6.67943%2010.25715%2038.35571%20155.2%2036.4)%22%2F%3E%3Cpath%20fill%3D%22%23818181%22%20d%3D%22M191.7%2070l-.1-38-32.1-48%20110.8%2082.1z%22%2F%3E%3Cellipse%20fill%3D%22%23a4a4a4%22%20rx%3D%221%22%20ry%3D%221%22%20transform%3D%22matrix(1.72928%2024.6256%20-107.01328%207.5148%2082.4%20181.1)%22%2F%3E%3C%2Fg%3E%3C%2Fsvg%3E) Terrain & Scenery
Terrain & Scenery12 x Samurai Stone Walls From Old Japan 28mm Scale
Samurai Terrain set to build stone wall gateway.
(1 review) -
%22%20transform%3D%22translate(.6%20.6)%20scale(1.17188)%22%20fill-opacity%3D%22.5%22%3E%3Cellipse%20fill%3D%22%23d2cfe0%22%20cx%3D%2281%22%20cy%3D%22102%22%20rx%3D%22132%22%20ry%3D%2242%22%2F%3E%3Cellipse%20fill%3D%22%23303321%22%20rx%3D%221%22%20ry%3D%221%22%20transform%3D%22rotate(-85.6%2060.2%20-54.7)%20scale(35.2788%20255.00004)%22%2F%3E%3Cellipse%20fill%3D%22%239cae3f%22%20cx%3D%2298%22%20cy%3D%22176%22%20rx%3D%22255%22%20ry%3D%2226%22%2F%3E%3Cellipse%20fill%3D%22%239e9ca6%22%20rx%3D%221%22%20ry%3D%221%22%20transform%3D%22matrix(9.76235%20-35.74502%2071.7715%2019.60158%20138.2%2067.4)%22%2F%3E%3Cellipse%20fill%3D%22%23333331%22%20cx%3D%22247%22%20cy%3D%2211%22%20rx%3D%2257%22%20ry%3D%2257%22%2F%3E%3Cellipse%20fill%3D%22%23615f6c%22%20rx%3D%221%22%20ry%3D%221%22%20transform%3D%22rotate(-96.8%2034.1%206.2)%20scale(29.72528%2065.58127)%22%2F%3E%3Cellipse%20fill%3D%22%23c8c7cb%22%20rx%3D%221%22%20ry%3D%221%22%20transform%3D%22matrix(-21.90111%2032.45635%20-41.19585%20-27.79841%2066.6%20115.2)%22%2F%3E%3Cellipse%20fill%3D%22%236f7b30%22%20rx%3D%221%22%20ry%3D%221%22%20transform%3D%22matrix(10.33714%2024.57065%20-40.8164%2017.1719%20169.2%20172.7)%22%2F%3E%3Cellipse%20fill%3D%22%239c9ba0%22%20rx%3D%221%22%20ry%3D%221%22%20transform%3D%22matrix(-80.30823%2036.93766%20-8.19428%20-17.81565%20162.5%20120.8)%22%2F%3E%3Cellipse%20fill%3D%22%235c6e00%22%20cx%3D%22133%22%20rx%3D%2298%22%20ry%3D%2215%22%2F%3E%3Cpath%20fill%3D%22%23a8b372%22%20d%3D%22M-10.5%20119.7L135%20164l-18.4%2060.2L-29%20180z%22%2F%3E%3Cpath%20fill%3D%22%236c6b75%22%20d%3D%22M143.1%2021l117%2027-7.2%2031-117-27z%22%2F%3E%3Cellipse%20fill%3D%22%23d5d6d2%22%20cx%3D%22167%22%20cy%3D%2292%22%20rx%3D%2218%22%20ry%3D%2217%22%2F%3E%3Cellipse%20fill%3D%22%23717c37%22%20rx%3D%221%22%20ry%3D%221%22%20transform%3D%22matrix(28.67732%206.96233%20-2.88584%2011.88655%20229.5%20164.8)%22%2F%3E%3Cellipse%20fill%3D%22%23515154%22%20cx%3D%2221%22%20cy%3D%2242%22%20rx%3D%2238%22%20ry%3D%2212%22%2F%3E%3C%2Fg%3E%3C%2Fsvg%3E) Terrain & Scenery
Terrain & ScenerySamurai Zen Garden From Old Japan 28mm Scale
The Japanese rock garden also called as “dry landscape” and zen from old Japan. A zen garden is usually relatively small, surrounded by a wall.
(1 review) -
%22%20transform%3D%22translate(.6%20.6)%20scale(1.17188)%22%20fill-opacity%3D%22.5%22%3E%3Cellipse%20fill%3D%22%23c3a7dd%22%20rx%3D%221%22%20ry%3D%221%22%20transform%3D%22matrix(1.36693%2026.98369%20-152.04489%207.70226%2068.2%2013.5)%22%2F%3E%3Cellipse%20fill%3D%22%23864a13%22%20rx%3D%221%22%20ry%3D%221%22%20transform%3D%22matrix(112.34882%2029.59117%20-8.49877%2032.26729%2076%20124.7)%22%2F%3E%3Cellipse%20fill%3D%22%23a5d67a%22%20rx%3D%221%22%20ry%3D%221%22%20transform%3D%22rotate(-79.2%20135%2072.8)%20scale(20.64564%2071.77181)%22%2F%3E%3Cellipse%20fill%3D%22%236a3c00%22%20rx%3D%221%22%20ry%3D%221%22%20transform%3D%22matrix(26.32822%20-4.88919%205.20734%2028.04142%20244.8%2068.3)%22%2F%3E%3Cellipse%20fill%3D%22%23bbcb7a%22%20rx%3D%221%22%20ry%3D%221%22%20transform%3D%22matrix(-43.62702%2013.1734%20-9.29683%20-30.7888%20249.9%20189.7)%22%2F%3E%3Cellipse%20fill%3D%22%23407322%22%20cy%3D%22116%22%20rx%3D%2222%22%20ry%3D%2248%22%2F%3E%3Cellipse%20fill%3D%22%2372a843%22%20cx%3D%22239%22%20rx%3D%2242%22%20ry%3D%2242%22%2F%3E%3Cellipse%20fill%3D%22%2388a5ae%22%20rx%3D%221%22%20ry%3D%221%22%20transform%3D%22rotate(-43.1%2045.3%2017)%20scale(55.93171%2034.73108)%22%2F%3E%3Cellipse%20fill%3D%22%23ad597a%22%20rx%3D%221%22%20ry%3D%221%22%20transform%3D%22matrix(56.3852%20-6.04455%201.35502%2012.64%20128.5%2034)%22%2F%3E%3Cellipse%20fill%3D%22%23bd794e%22%20cx%3D%2251%22%20cy%3D%22111%22%20rx%3D%2218%22%20ry%3D%2273%22%2F%3E%3Cpath%20fill%3D%22%23b66e3c%22%20d%3D%22M223%2045L45%2049l180%20134z%22%2F%3E%3Cellipse%20fill%3D%22%2386481d%22%20cx%3D%22100%22%20cy%3D%22125%22%20rx%3D%2231%22%20ry%3D%2231%22%2F%3E%3Cellipse%20fill%3D%22%238cada5%22%20cx%3D%22121%22%20cy%3D%221%22%20rx%3D%2226%22%20ry%3D%2226%22%2F%3E%3Cellipse%20fill%3D%22%23bb7241%22%20rx%3D%221%22%20ry%3D%221%22%20transform%3D%22matrix(68.55013%2014.7407%20-4.58453%2021.3199%20156.4%20189.6)%22%2F%3E%3Cellipse%20fill%3D%22%23db81a5%22%20rx%3D%221%22%20ry%3D%221%22%20transform%3D%22matrix(-35.60592%2035.3582%20-9.2193%20-9.28389%2074%2011.7)%22%2F%3E%3C%2Fg%3E%3C%2Fsvg%3E) Sci-Fi
Sci-FiSci-Fi Star Wars Legion Compatible Tower 28mm Scale
Scenery piece for Sci-Fi, Legion, Empire Wargame Terrain and Infinity.
(0 reviews) -
%22%20transform%3D%22translate(.6%20.6)%20scale(1.17188)%22%20fill-opacity%3D%22.5%22%3E%3Cellipse%20fill%3D%22%23bfccca%22%20rx%3D%221%22%20ry%3D%221%22%20transform%3D%22rotate(101.5%2065.3%2067.6)%20scale(63.31172%20137.96402)%22%2F%3E%3Cellipse%20rx%3D%221%22%20ry%3D%221%22%20transform%3D%22matrix(-27.28804%20-68.46512%20236.8783%20-94.41223%20153%20204)%22%2F%3E%3Cellipse%20fill%3D%22%237b7678%22%20cx%3D%2294%22%20cy%3D%2280%22%20rx%3D%2257%22%20ry%3D%2257%22%2F%3E%3Cellipse%20fill%3D%22%23292628%22%20rx%3D%221%22%20ry%3D%221%22%20transform%3D%22matrix(-32.06706%2020.94743%20-23.21266%20-35.53475%200%2088.4)%22%2F%3E%3Cellipse%20fill%3D%22%2313140a%22%20rx%3D%221%22%20ry%3D%221%22%20transform%3D%22matrix(15.58142%2041.7842%20-168.70058%2062.9088%20198.2%20178.1)%22%2F%3E%3Cellipse%20fill%3D%22%23494648%22%20rx%3D%221%22%20ry%3D%221%22%20transform%3D%22rotate(-19.1%20500.8%20-197.4)%20scale(156.22168%2018.54255)%22%2F%3E%3Cellipse%20fill%3D%22%23acacab%22%20cx%3D%22189%22%20cy%3D%2231%22%20rx%3D%2268%22%20ry%3D%2234%22%2F%3E%3Cellipse%20fill%3D%22%237f7c7d%22%20rx%3D%221%22%20ry%3D%221%22%20transform%3D%22rotate(-101.9%20116.7%20-22.2)%20scale(15.40419%20119.83965)%22%2F%3E%3Cellipse%20fill%3D%22%235ad4aa%22%20cx%3D%22106%22%20cy%3D%224%22%20rx%3D%2264%22%20ry%3D%2210%22%2F%3E%3Cellipse%20fill%3D%22%237c797a%22%20rx%3D%221%22%20ry%3D%221%22%20transform%3D%22rotate(118.5%2011%2024.4)%20scale(15.1421%20157.82835)%22%2F%3E%3Cellipse%20fill%3D%22%23353535%22%20rx%3D%221%22%20ry%3D%221%22%20transform%3D%22matrix(28.70068%20-19.83181%2013.03422%2018.86317%2029.5%20176)%22%2F%3E%3Cellipse%20fill%3D%22%238b8c8c%22%20rx%3D%221%22%20ry%3D%221%22%20transform%3D%22matrix(9.88836%20-28.55587%2019.4269%206.72716%2081.8%20107.3)%22%2F%3E%3Cellipse%20fill%3D%22%23203100%22%20cx%3D%22161%22%20cy%3D%22179%22%20rx%3D%2217%22%20ry%3D%2230%22%2F%3E%3Cellipse%20fill%3D%22%23525353%22%20rx%3D%221%22%20ry%3D%221%22%20transform%3D%22matrix(-9.89112%208.27026%20-22.04957%20-26.37099%20122.3%20101.8)%22%2F%3E%3Cpath%20fill%3D%22%2358ccd0%22%20d%3D%22M232%200h24v14h-24z%22%2F%3E%3C%2Fg%3E%3C%2Fsvg%3E) Terrain & Scenery
Terrain & SceneryDnD Elven Tree House Collection 28mm scale
Build your own city with a modular elven treehouse suitable for 28mm wargames. It’s designed in a way that allows you to add more bridges between treehouses.
(0 reviews) -
%22%20transform%3D%22translate(.6%20.6)%20scale(1.17188)%22%20fill-opacity%3D%22.5%22%3E%3Cellipse%20rx%3D%221%22%20ry%3D%221%22%20transform%3D%22matrix(2.97668%20-30.05069%20253.75811%2025.13606%20122.6%207.6)%22%2F%3E%3Cellipse%20fill%3D%22%23857d7d%22%20rx%3D%221%22%20ry%3D%221%22%20transform%3D%22matrix(-6.58434%2040.5362%20-113.5903%20-18.45059%20137%2090.8)%22%2F%3E%3Cellipse%20fill%3D%22%23a62d38%22%20rx%3D%221%22%20ry%3D%221%22%20transform%3D%22matrix(-.3433%2044.22253%20-24.37126%20-.1892%20242.5%20105.5)%22%2F%3E%3Cpath%20d%3D%22M-5.7-18.8L42.7%202.8l-33%2074-48.4-21.6z%22%2F%3E%3Cellipse%20rx%3D%221%22%20ry%3D%221%22%20transform%3D%22rotate(8%2059.7%201641.8)%20scale(61.28017%2017.38393)%22%2F%3E%3Cellipse%20fill%3D%22%236f7474%22%20rx%3D%221%22%20ry%3D%221%22%20transform%3D%22rotate(-20.7%20230.5%20-334.7)%20scale(37.32327%2038.70238)%22%2F%3E%3Cellipse%20fill%3D%22%23656b6b%22%20rx%3D%221%22%20ry%3D%221%22%20transform%3D%22matrix(-28.94131%20-14.29215%2010.26206%20-20.78046%2059.8%20105.7)%22%2F%3E%3Cpath%20fill%3D%22%238f8f8f%22%20d%3D%22M158.6%2076l-28.2-24.5-28.7%2029.1%2036%2016.2z%22%2F%3E%3Cpath%20fill%3D%22%23101313%22%20d%3D%22M198.3%2047.8l2.5-12.7%2057%2011-2.6%2012.8z%22%2F%3E%3Cellipse%20fill%3D%22%239a660d%22%20cx%3D%22248%22%20cy%3D%2299%22%20rx%3D%2217%22%20ry%3D%2218%22%2F%3E%3Cellipse%20fill%3D%22%23393d3d%22%20cx%3D%22139%22%20cy%3D%22153%22%20rx%3D%22107%22%20ry%3D%2225%22%2F%3E%3Cpath%20fill%3D%22%23404141%22%20d%3D%22M44.5%2026.5h131v15h-131z%22%2F%3E%3Cellipse%20rx%3D%221%22%20ry%3D%221%22%20transform%3D%22matrix(89.90876%2026.12091%20-5.75648%2019.81392%20221.4%200)%22%2F%3E%3Cpath%20fill%3D%22%232c2f2f%22%20d%3D%22M50.5%2013.8L25.2%2083.4%205.5%2076.2%2030.8%206.6z%22%2F%3E%3Cellipse%20fill%3D%22%238b4d6a%22%20rx%3D%221%22%20ry%3D%221%22%20transform%3D%22matrix(2.35229%20-35.40276%209.66325%20.64206%20223.4%20102.6)%22%2F%3E%3C%2Fg%3E%3C%2Fsvg%3E) Sci-Fi
Sci-FiSci-Fi Wash Room Set 28mm Scale
Scenery set for 28mm Scale. Warhammer 40k, Blackstone Fortress.
(0 reviews) -
%27%20fill-opacity%3D%27.5%27%3E%3Cellipse%20fill%3D%22%23dad5fe%22%20fill-opacity%3D%22.5%22%20rx%3D%221%22%20ry%3D%221%22%20transform%3D%22matrix(89.92026%20-17.07852%208.48895%2044.69526%2074.8%2017.2)%22%2F%3E%3Cellipse%20fill%3D%22%233a440d%22%20fill-opacity%3D%22.5%22%20rx%3D%221%22%20ry%3D%221%22%20transform%3D%22matrix(133.65367%2048.32166%20-22.13094%2061.21232%20241.7%20143.7)%22%2F%3E%3Cellipse%20fill%3D%22%23dcd8fe%22%20fill-opacity%3D%22.5%22%20rx%3D%221%22%20ry%3D%221%22%20transform%3D%22matrix(75.5264%2021.14826%20-10.80615%2038.59179%20272.8%2012.8)%22%2F%3E%3Cellipse%20fill%3D%22%23b0bf6b%22%20fill-opacity%3D%22.5%22%20rx%3D%221%22%20ry%3D%221%22%20transform%3D%22matrix(-28.59199%20108.98617%20-29.03103%20-7.61615%20.6%20151.4)%22%2F%3E%3Cellipse%20fill%3D%22%23241f41%22%20fill-opacity%3D%22.5%22%20rx%3D%221%22%20ry%3D%221%22%20transform%3D%22rotate(102.2%2076.8%20180.1)%20scale(21.35279%2045.07233)%22%2F%3E%3Cellipse%20fill%3D%22%23625b86%22%20fill-opacity%3D%22.5%22%20rx%3D%221%22%20ry%3D%221%22%20transform%3D%22matrix(29.78946%2014.64855%20-9.7173%2019.7612%20170.7%20105.4)%22%2F%3E%3Cellipse%20fill%3D%22%23a7b17b%22%20fill-opacity%3D%22.5%22%20rx%3D%221%22%20ry%3D%221%22%20transform%3D%22rotate(-65.5%20127%20-154.3)%20scale(13.41783%2067.638)%22%2F%3E%3Cellipse%20fill%3D%22%237d8d35%22%20fill-opacity%3D%22.5%22%20rx%3D%221%22%20ry%3D%221%22%20transform%3D%22matrix(30.77231%20-45.40883%2087.60972%2059.37068%20117%20188.3)%22%2F%3E%3Cellipse%20fill%3D%22%23d1d0d3%22%20fill-opacity%3D%22.5%22%20rx%3D%221%22%20ry%3D%221%22%20transform%3D%22matrix(3.51827%2030.04497%20-98.95276%2011.58737%2067.2%20.6)%22%2F%3E%3Cellipse%20fill%3D%22%238c8b40%22%20fill-opacity%3D%22.5%22%20rx%3D%221%22%20ry%3D%221%22%20transform%3D%22matrix(-10.61884%20-19.36108%2081.47834%20-44.68788%20110.6%2073.6)%22%2F%3E%3Cpath%20fill%3D%22%23999d8d%22%20fill-opacity%3D%22.5%22%20d%3D%22M197.5%2017L39.3%2086l-47-48z%22%2F%3E%3Cellipse%20fill%3D%22%23cfcdd2%22%20fill-opacity%3D%22.5%22%20rx%3D%221%22%20ry%3D%221%22%20transform%3D%22matrix(.2271%20-16.32546%2072.45572%201.00789%20286.4%2010.3)%22%2F%3E%3Cellipse%20fill%3D%22%237b8b34%22%20fill-opacity%3D%22.5%22%20rx%3D%221%22%20ry%3D%221%22%20transform%3D%22matrix(100.93844%2027.70853%20-4.076%2014.8483%20251.3%2071.2)%22%2F%3E%3Cpath%20fill%3D%22%23b8673b%22%20fill-opacity%3D%22.5%22%20d%3D%22M114.3%2085.5L109%2069.2l-39%2032.6%2035.3%2016.4z%22%2F%3E%3Cellipse%20fill%3D%22%23a9b962%22%20fill-opacity%3D%22.5%22%20rx%3D%221%22%20ry%3D%221%22%20transform%3D%22rotate(26.4%2084.4%20389.1)%20scale(18.51737%2034.92163)%22%2F%3E%3C%2Fg%3E%3C%2Fsvg%3E) Terrain & Scenery
Terrain & SceneryHobbit Entrance For Modular Gaming Hills Series 28mm Scale
Perfect for Warhammer 40k terrain, Star wars legion scenery and Imperial Assault.
(0 reviews) -
%22%20transform%3D%22translate(.6%20.6)%20scale(1.17188)%22%20fill-opacity%3D%22.5%22%3E%3Cellipse%20fill%3D%22%238d9393%22%20rx%3D%221%22%20ry%3D%221%22%20transform%3D%22matrix(76.19255%20.29038%20-.22053%2057.8637%20113.4%2096.3)%22%2F%3E%3Cellipse%20rx%3D%221%22%20ry%3D%221%22%20transform%3D%22matrix(145.01846%20-110.87306%2028.78797%2037.65376%205.3%2019.5)%22%2F%3E%3Cellipse%20rx%3D%221%22%20ry%3D%221%22%20transform%3D%22matrix(-24.41664%2034.84613%20-128.41585%20-89.98083%2017.7%20188)%22%2F%3E%3Cellipse%20fill%3D%22%23370003%22%20rx%3D%221%22%20ry%3D%221%22%20transform%3D%22rotate(-47.9%20327.7%20-158.4)%20scale(60.06992%2029.36046)%22%2F%3E%3Cellipse%20fill%3D%22%23010707%22%20rx%3D%221%22%20ry%3D%221%22%20transform%3D%22matrix(36.42297%20102.32568%20-23.97815%208.53506%20253.3%2030.5)%22%2F%3E%3Cellipse%20fill%3D%22%23962503%22%20rx%3D%221%22%20ry%3D%221%22%20transform%3D%22matrix(-11.56704%2014.38781%20-29.16567%20-23.44765%20184%2018.2)%22%2F%3E%3Cellipse%20fill%3D%22%23767275%22%20cx%3D%22138%22%20cy%3D%2255%22%20rx%3D%2249%22%20ry%3D%2249%22%2F%3E%3Cellipse%20fill%3D%22%238f908f%22%20cx%3D%22104%22%20cy%3D%2296%22%20rx%3D%2245%22%20ry%3D%2234%22%2F%3E%3Cellipse%20fill%3D%22%23780a34%22%20rx%3D%221%22%20ry%3D%221%22%20transform%3D%22rotate(113.9%2072.9%20150.2)%20scale(23.39816%2031.51917)%22%2F%3E%3Cellipse%20fill%3D%22%23545656%22%20rx%3D%221%22%20ry%3D%221%22%20transform%3D%22matrix(-8.6448%20-52.6215%2028.6884%20-4.713%20172.7%2097.3)%22%2F%3E%3Cellipse%20fill%3D%22%23353437%22%20cx%3D%22222%22%20cy%3D%2269%22%20rx%3D%2239%22%20ry%3D%2239%22%2F%3E%3Cellipse%20fill%3D%22%232c3636%22%20cx%3D%22185%22%20cy%3D%22176%22%20rx%3D%2239%22%20ry%3D%2239%22%2F%3E%3Cellipse%20fill%3D%22%233d4141%22%20rx%3D%221%22%20ry%3D%221%22%20transform%3D%22matrix(92.89495%2062.65843%20-13.0555%2019.35557%2070.5%20147.9)%22%2F%3E%3Cellipse%20fill%3D%22%23474a4a%22%20rx%3D%221%22%20ry%3D%221%22%20transform%3D%22matrix(-42.11819%209.7383%20-3.89912%20-16.86373%2069.2%2052.2)%22%2F%3E%3Cellipse%20fill%3D%22%234b001a%22%20rx%3D%221%22%20ry%3D%221%22%20transform%3D%22rotate(-165.2%20133.5%2071.7)%20scale(19.06966%2032.81871)%22%2F%3E%3C%2Fg%3E%3C%2Fsvg%3E) Sci-Fi
Sci-FiOrbital Outpost Walkways Extended Starter Set 28mm
Perfect for Warhammer 40k, Star Wars Legion and Infinity.
(0 reviews) -
%22%20transform%3D%22translate(.6%20.6)%20scale(1.17188)%22%20fill-opacity%3D%22.5%22%3E%3Cellipse%20fill%3D%22%23999%22%20rx%3D%221%22%20ry%3D%221%22%20transform%3D%22matrix(-21.67213%2040.08176%20-36.34637%20-19.6524%2076.6%20129)%22%2F%3E%3Cpath%20d%3D%22M248.8-39.3l65.9%20129.2-69.5%2035.4L179.3-3.9z%22%2F%3E%3Cellipse%20fill%3D%22%23737373%22%20rx%3D%221%22%20ry%3D%221%22%20transform%3D%22matrix(76.03538%2013.54396%20-6.19294%2034.76697%20120.2%2058.7)%22%2F%3E%3Cellipse%20fill%3D%22%23030303%22%20rx%3D%221%22%20ry%3D%221%22%20transform%3D%22rotate(-174.8%202.6%2058.5)%20scale(18.2313%20255.00006)%22%2F%3E%3Cellipse%20rx%3D%221%22%20ry%3D%221%22%20transform%3D%22matrix(25.09929%2016.39347%20-36.55746%2055.97143%20255%20181)%22%2F%3E%3Cellipse%20fill%3D%22%23747474%22%20rx%3D%221%22%20ry%3D%221%22%20transform%3D%22matrix(-23.2795%20-24.06997%2021.20547%20-20.50907%20183%20132.4)%22%2F%3E%3Cellipse%20fill%3D%22%23989898%22%20cx%3D%2275%22%20cy%3D%22133%22%20rx%3D%2225%22%20ry%3D%2231%22%2F%3E%3Cpath%20fill%3D%22%23444%22%20d%3D%22M151%20122l-28-59-71%2030z%22%2F%3E%3Cpath%20fill%3D%22%23828282%22%20d%3D%22M183.4%2036.3L161.8%2077l-21.2-11.2L162.2%2025z%22%2F%3E%3Cellipse%20fill%3D%22%23414141%22%20rx%3D%221%22%20ry%3D%221%22%20transform%3D%22matrix(-15.63723%2051.14706%20-18.38672%20-5.62138%2030.6%20117.8)%22%2F%3E%3Cellipse%20fill%3D%22%233f3f3f%22%20cx%3D%22202%22%20cy%3D%2265%22%20rx%3D%2217%22%20ry%3D%2246%22%2F%3E%3Cellipse%20fill%3D%22%23343434%22%20cx%3D%22153%22%20cy%3D%22185%22%20rx%3D%2270%22%20ry%3D%2225%22%2F%3E%3Cellipse%20fill%3D%22%23191919%22%20rx%3D%221%22%20ry%3D%221%22%20transform%3D%22rotate(-54.8%2024.3%20-9.3)%20scale(88.62395%2012.88909)%22%2F%3E%3Cpath%20fill%3D%22%23686868%22%20d%3D%22M118%2096l13%2043-86%2068z%22%2F%3E%3Cpath%20fill%3D%22%23666%22%20d%3D%22M51%2021h39v86H51z%22%2F%3E%3C%2Fg%3E%3C%2Fsvg%3E) Sci-Fi
Sci-FiSci-Fi Scatter Terrain Barracks Items
Pack of 28mm scale for Warhammer 40k terrain, Star wars legion scenery and Wargaming.
(0 reviews) -
%22%20transform%3D%22translate(.6%20.6)%20scale(1.17188)%22%20fill-opacity%3D%22.5%22%3E%3Cellipse%20fill%3D%22%23d0d0d0%22%20cx%3D%22136%22%20cy%3D%2210%22%20rx%3D%2276%22%20ry%3D%2276%22%2F%3E%3Cellipse%20fill%3D%22%23393939%22%20rx%3D%221%22%20ry%3D%221%22%20transform%3D%22rotate(81.2%20-31.8%20170.7)%20scale(34.74818%20255.00002)%22%2F%3E%3Cellipse%20fill%3D%22%23a7a7a7%22%20cx%3D%22123%22%20cy%3D%22109%22%20rx%3D%2231%22%20ry%3D%2262%22%2F%3E%3Cellipse%20fill%3D%22%23b4b4b4%22%20rx%3D%221%22%20ry%3D%221%22%20transform%3D%22matrix(120.45462%20-52.77583%209.62833%2021.97554%2069.3%2019.6)%22%2F%3E%3Cellipse%20fill%3D%22%23d3d3d3%22%20rx%3D%221%22%20ry%3D%221%22%20transform%3D%22rotate(58.2%2066%20133.6)%20scale(38.6284%2045.46837)%22%2F%3E%3Cellipse%20fill%3D%22%233f3f3f%22%20cx%3D%22241%22%20cy%3D%22165%22%20rx%3D%2223%22%20ry%3D%2266%22%2F%3E%3Cellipse%20fill%3D%22%23313131%22%20rx%3D%221%22%20ry%3D%221%22%20transform%3D%22matrix(-40.52156%20-8.69724%207.10122%20-33.0855%2013.9%20190.9)%22%2F%3E%3Cellipse%20fill%3D%22%23414141%22%20cx%3D%22247%22%20cy%3D%2234%22%20rx%3D%2216%22%20ry%3D%2215%22%2F%3E%3Cellipse%20fill%3D%22%236f6f6f%22%20rx%3D%221%22%20ry%3D%221%22%20transform%3D%22matrix(5.1588%2022.78597%20-124.50222%2028.18761%20181.8%20142.3)%22%2F%3E%3Cellipse%20fill%3D%22%23999%22%20rx%3D%221%22%20ry%3D%221%22%20transform%3D%22matrix(15.07592%20-16.3844%2067.15495%2061.79183%2089.5%2040.4)%22%2F%3E%3Cpath%20fill%3D%22%23b9b9b9%22%20d%3D%22M0%20116h43v20H0z%22%2F%3E%3Cellipse%20fill%3D%22%23909090%22%20rx%3D%221%22%20ry%3D%221%22%20transform%3D%22matrix(-5.8193%20-15.84105%2029.14428%20-10.7063%20110.2%20152.4)%22%2F%3E%3Cpath%20fill%3D%22%23585858%22%20d%3D%22M224.2%20158.6l-37.5-53-29.6%2034.5%201.2%2025.7z%22%2F%3E%3Cellipse%20fill%3D%22%23a9a9a9%22%20rx%3D%221%22%20ry%3D%221%22%20transform%3D%22matrix(-8.1902%2028.75191%20-26.17654%20-7.45658%20122.6%20113.4)%22%2F%3E%3Cellipse%20fill%3D%22%239a9a9a%22%20rx%3D%221%22%20ry%3D%221%22%20transform%3D%22matrix(-34.74018%2011.71206%20-6.94714%20-20.60653%20173%2060)%22%2F%3E%3C%2Fg%3E%3C%2Fsvg%3E) Sci-Fi
Sci-FiBlackstone Fortress Upgrade
Blackstone Fortress Terrain upgrade for Warhammer 40k and other wargaming. Token Edition 28mm Scale.
(1 review)